It was love at first sight when we found our 1964 Chevy pickup. We knew there was going to be some sheetmetal repairs that would have to be done—the hood, floors, and bed all needed work, but as they say, love is blind.
One of the areas that required repair was the left taillight panel. Several severe creases and other damage that couldn't be reached from the backside were going to make getting it straight a real challenge. Then there was another issue. Evidently Chevrolet was not real concerned with quality control in those days, and as long as the taillight panels were on right side up, that was close enough. Neither taillight panel aligned very well with the bed's side and to top it off one was lower than the other was. Given the circumstances we decided to have Jake Brazille, of Jake's Place in Florence, Oregon, install a complete replacement panel from LMC and make both sides the same.
Apparently when these pickup beds were built the end panels were spot welded to the sides, then the stake pocket boxes were installed. That meant there was no way to attach the new taillight panel without tearing the box further apart, which we were not anxious to do—the solution to our dilemma came in the form of Eastwood's Panel Adhesive.
For years the OEMs have been using adhesives to attach various patch panels, including the bedsides on pickups. We didn't have any experience with the stuff, but several body shop owners we spoke to use adhesives regularly and stand behind repairs made with it, so we decided to give it a try.
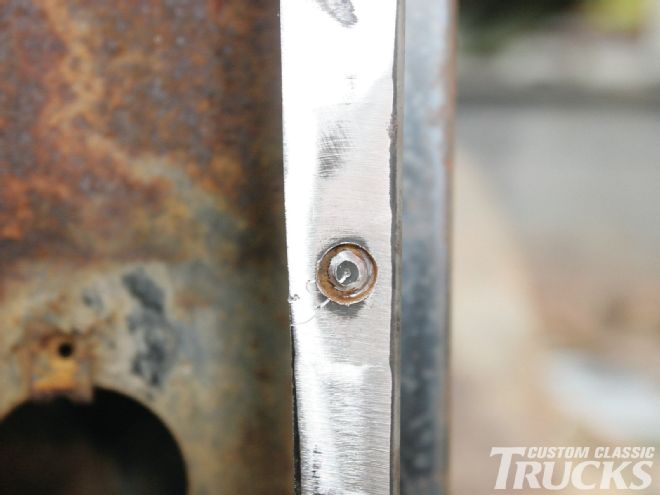
To begin the repair we cut away the outer portion of the end panel leaving the flanges that were spot welded to the body. Eastwood's spot-weld cutter made quick work of removing the leftover flange.
With the panel removed the remaining flanges on the box were straightened with a hammer and dolly then roughed up with a 36-grit sanding disc to give the adhesive a surface to bite into. A couple of test fits were required to get the alignment we were after—the flanges on the bed had to be ground off slightly to allow the new panel to align with the bedside.
Satisfied with the fit, the next challenge was to hold the new panel in place while the adhesive set. A variety of clamps could be used in the tailgate opening, but for the flanges on the inner surface of the bedside and rear panel we had to get creative. To get into the cramped confines we modified locking pliers by welding 1⁄8x1-inch extensions to the jaws. They're not pretty, but they work.
Happy with the panel's fit, and confident in our ability to clamp it in place, we applied a ¼-inch bead of adhesive to the flange on the bed and put the two together. The adhesive does allow for last-minute adjustments, there is around a 20-minute window before it starts to set.
Temperature is critical when using adhesive, so once we had the taillight panel clamped in place we cranked up the shop heater and walked out the door. The next day the adhesive was set, damage was history, and the panel fit was what is should be—not bad for our first stickup.
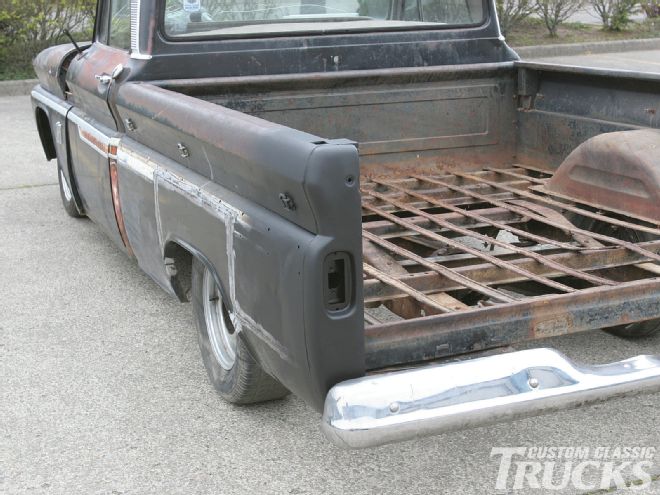
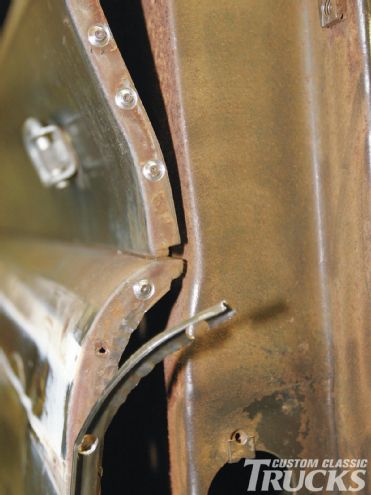
 1. Although it doesn’t look bad in this photo, the taillight panel on the left side did not fit the same as the one on the right. We decided to fix the damage and make both sides the same while we’re at it.
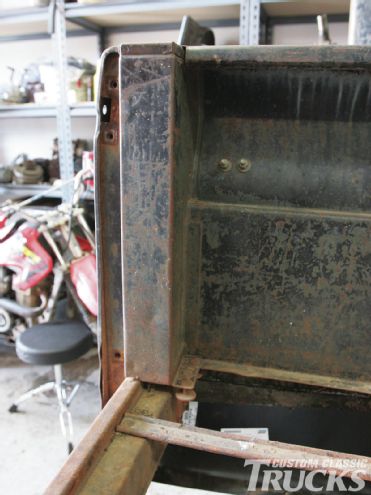 2. The stake pocket makes access to the factory spot welds between the side and taillight panels impossible.
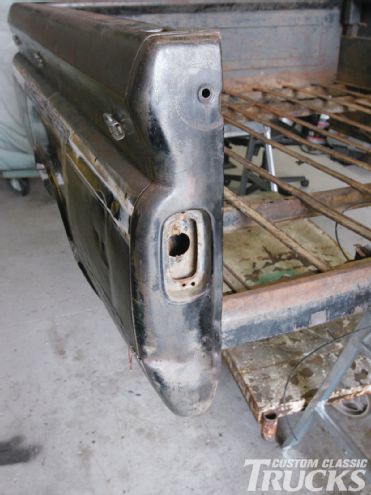
 3. This new replacement panel is from LMC Truck.
 4. Paul Wilson learned a valuable lesson, stop by the shop and we’ll put you to work. Here a hole was cut in the panel so we could see inside and figure out how it all went together.
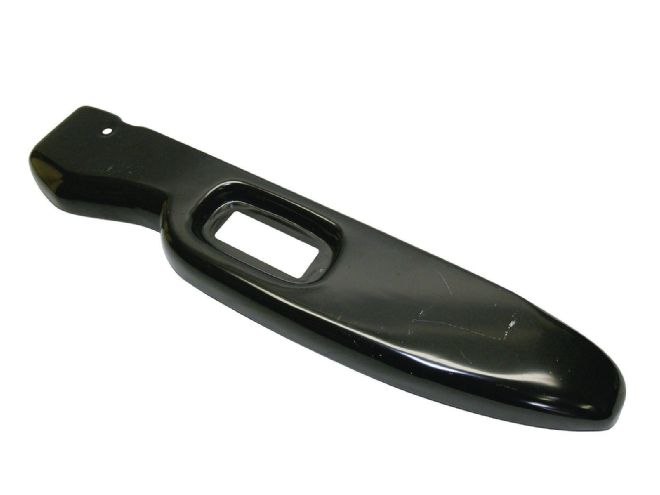
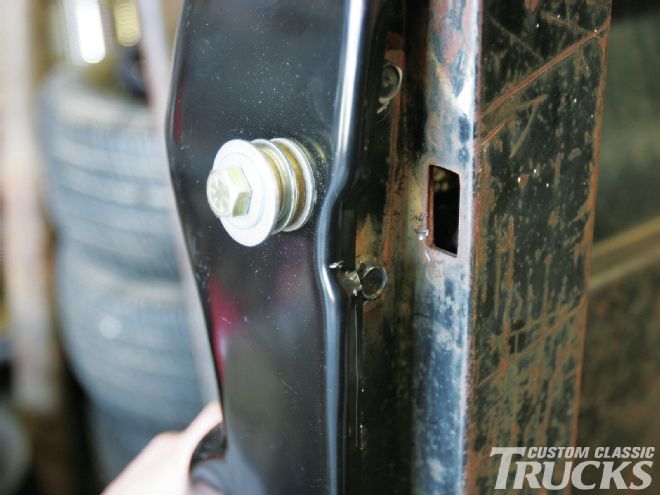
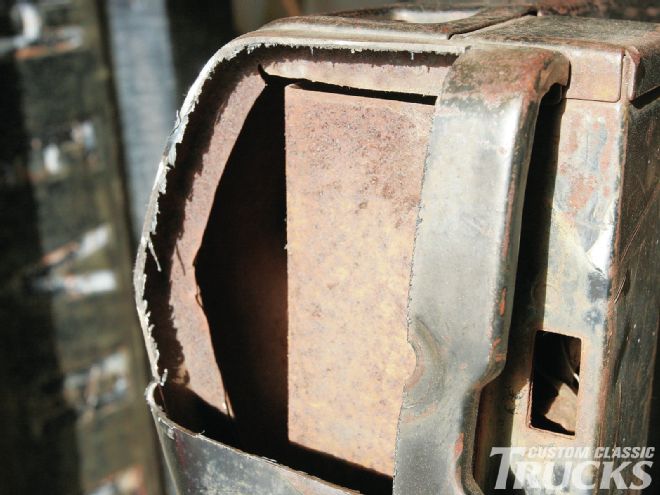 5. The taillight panel has a flange that was spot-welded to the bedside and the stake pocket.
 6. Most of the panel was cut away leaving only the flange that was attached to the bed.
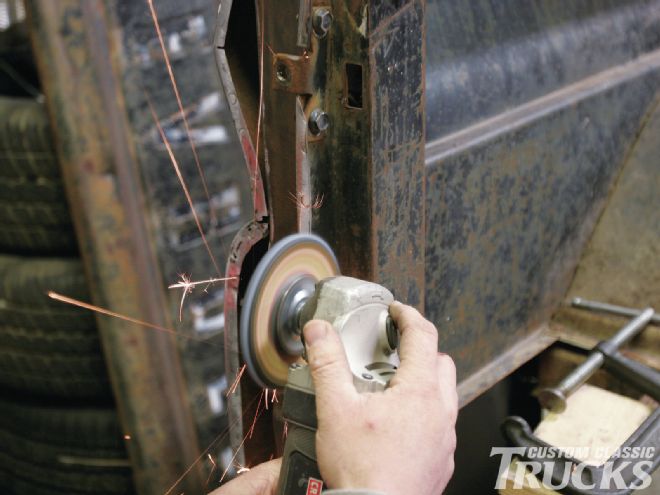
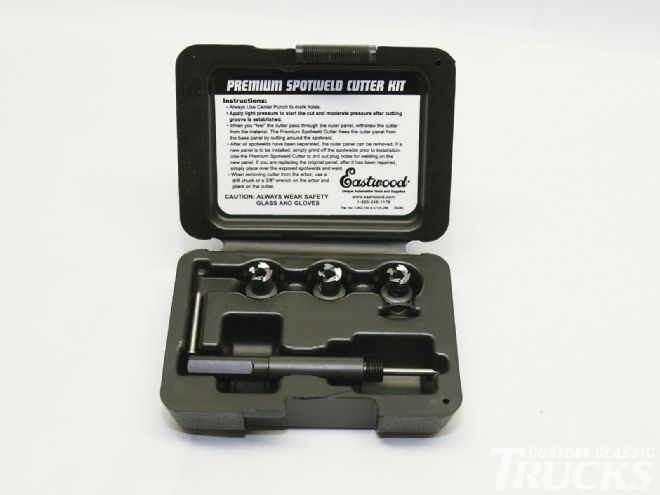 7. We ordered these spot-weld cutters from Eastwood not realizing just how good they are.
 8. The Eastwood spot-weld cutter has a spring-loaded guide that registers in a center punch mark made in the spot-weld.
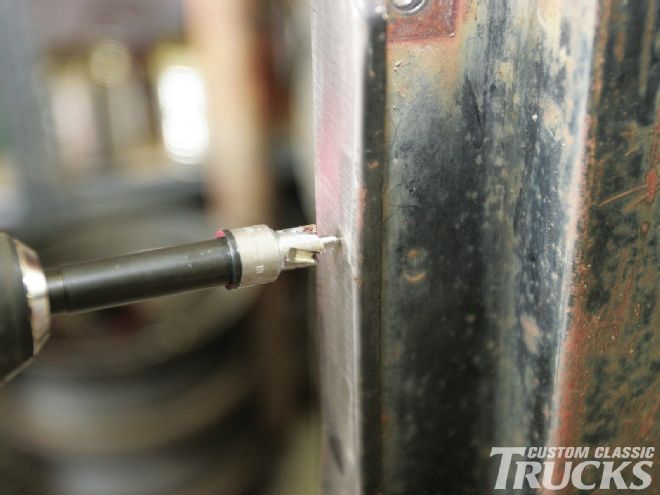
 9. While turning slowly, pressure is applied and the tool begins to cut.
 10. The circumference of the weld is cut leaving the center intact without a hole from a drill.
 11. With what was left of the flange removed we found the real problem with the fit of the taillight panel—it was the way the bedsides were put together.
 12. Jake Brazille did some hammer and bodywork on the bed flange, then did a test fit of the new panel.
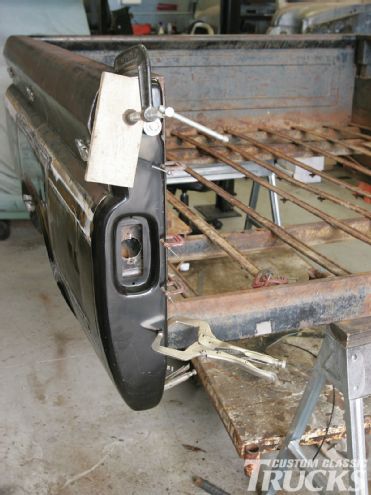
 13. A bolt in the tailgate chain bracket helped hold it in position.
 14. Jake found the edge of the stake pocket also kept the taillight panel from fitting like it should. By grinding down the flange the panel could be straightened rather than cocked as it was from the factory.
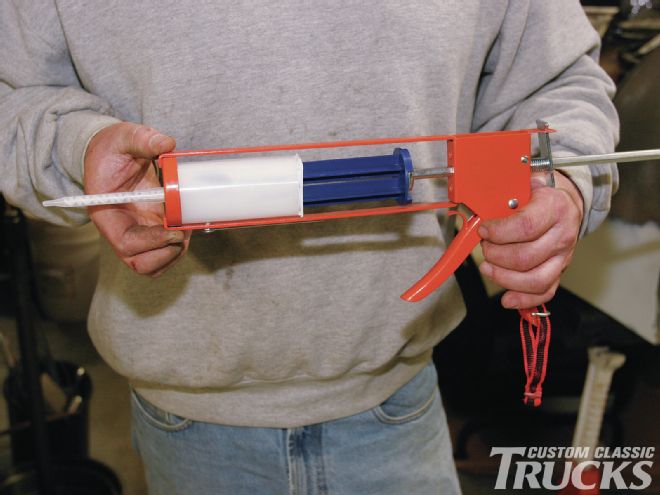
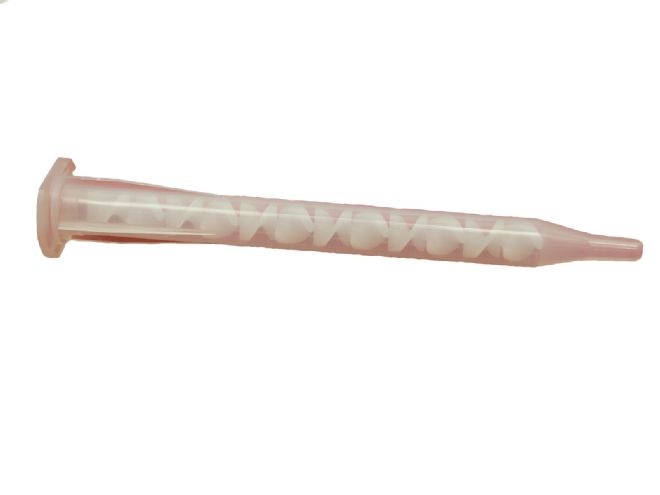 15. The Eastwood adhesive comes in a dual cartridge; this tip mixes the two components together.
16. Included in the kit is an adapter that allows the adhesive to be dispensed from an ordinary caulking gun.
15. The Eastwood adhesive comes in a dual cartridge; this tip mixes the two components together.
16. Included in the kit is an adapter that allows the adhesive to be dispensed from an ordinary caulking gun.
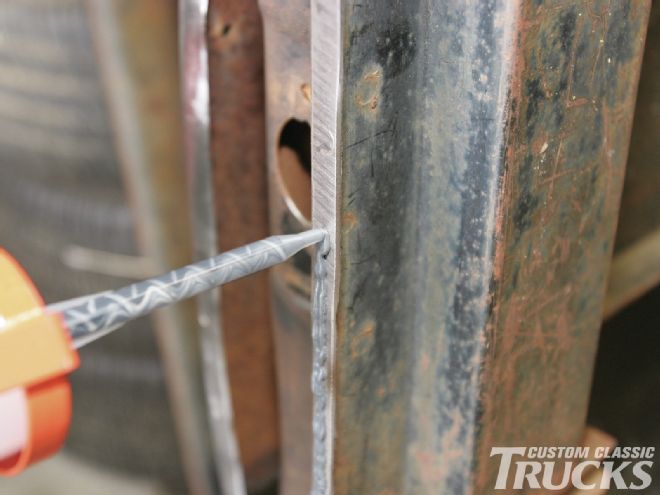 17. A bead of adhesive was applied to the flanges on the stake pocket and bedside. Note how the two components are combined.
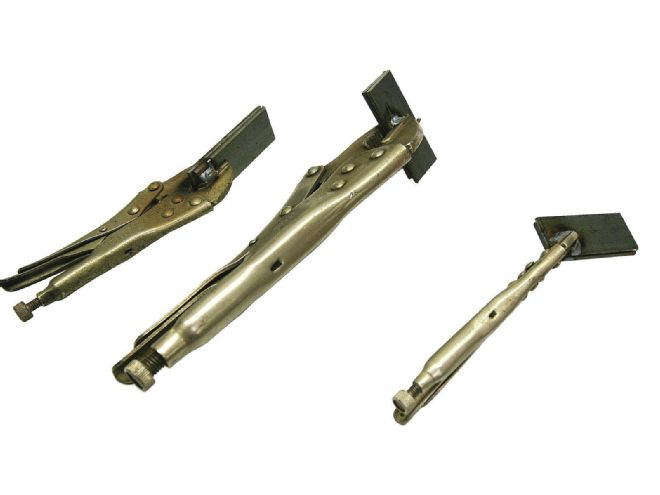 18. We made these crude but effective clamps to hold the panels together in areas that we couldn’t reach otherwise.
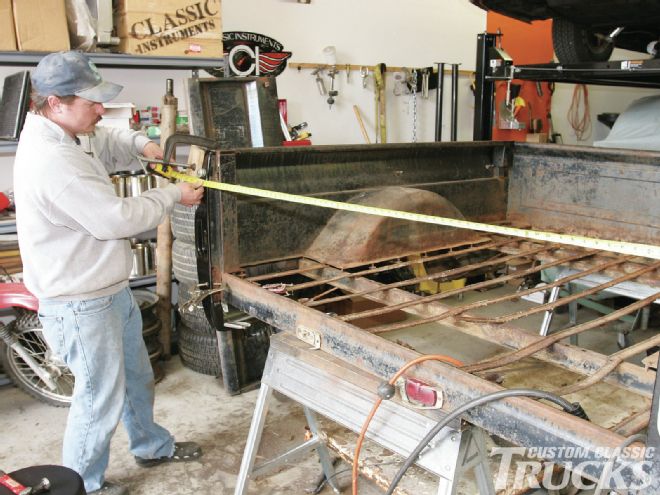 19. Jake double-checked the fit and made sure the tailgate opening was now even top to bottom.
 20. Along with our homemade clamps on the backside we used everything we could find to hold the panel in place while the adhesive cured.