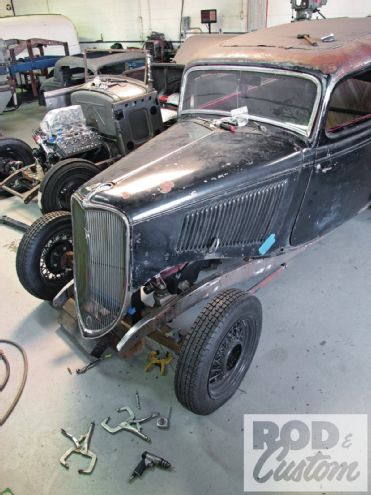
Progress on the Tudor is rather haphazard lately—but progress is progress nonetheless, right? Right. Initially we'd figured on wrapping up the remainder of the steering, that being mounting and connecting of the steering column, among other things. Not having the body completely attached to the frame as of yet, we opted to postpone that portion for the time being. As it turned out, one of the main issues preventing us from properly/fully mounting the body was, of all things, the radiator.
Like most mid-1930s and earlier vehicles, radiators are integral to the grilles, which in turn are integral to the hood. However, unlike Henry's previous offerings prior to the Model 40s, where the radiators themselves are fairly straightforward in their relationship with the crossmembers they directly attach to, 1933-34s place their cooling apparatus forward of the front crossmember via sheetmetal "legs" (as opposed to directly on top of the crossmember). Had we used a factory FoMoCo frame with its stock, integrated radiator mount, there really would be no need for any discussion here. But we're not.
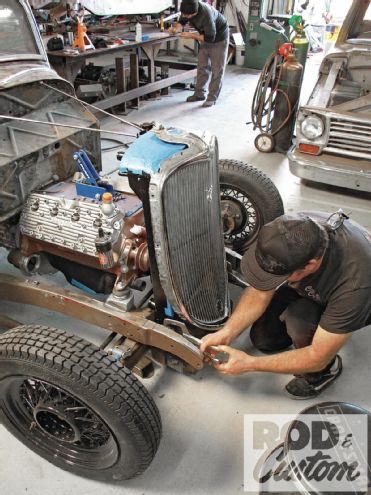
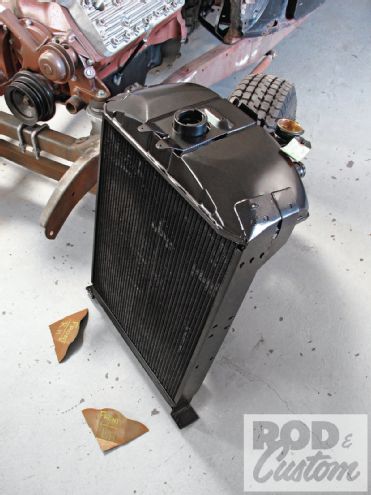
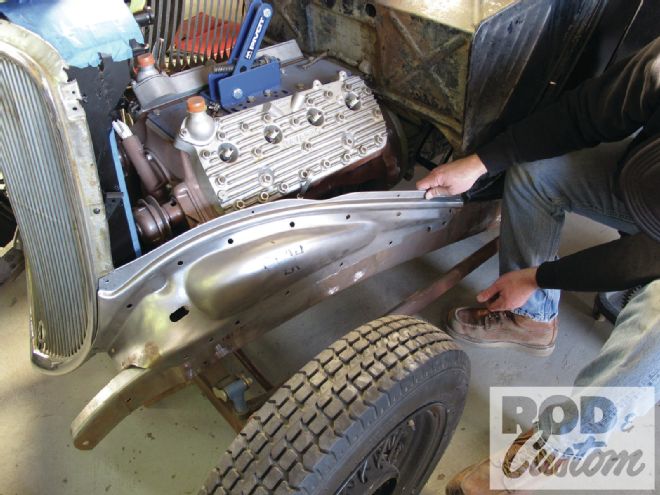
With its welded 1933-34 front crossmember, Speedway Motors provided sheetmetal "ears" for which to attach to our American Stamping–'railed frame and subsequently mount a reproduction-ish 1933 radiator we obtained from U.S. Radiator. (The addition of "ish" added to repro is simply due to the fact that the stock filler neck, though present—for mounting of the grille—is non-functional; the actual filler resides on the back side of the top tank. Further, the high-efficiency four-row copper-core unit is anything but stock, not only able to cool drastically better than original units, but aluminum-cored ones as well.) Rather than simply plopping the aftermarket radiator onto a crossmember, attaching a grille shell, and calling it a day, since the car will run a full hood, we had quite a bit of logistics to figure out.
First there was determining both the placement and angle of the mounts themselves. In order to accomplish this, the radiator itself had to be mocked in place—and in order to locate the radiator, both the hood and the grille had to be mocked in their respective places as well. This job started out necessitating more than one set of hands, to say the least, not to mention a variety of clamps. Furthermore, we had to procure a few specific attachment devices unique to 1933-34 Fords, such as the grille-to-radiator brackets and hood hinge mounts. Fortunately, CW Moss is but a few minutes down the street from Circle City Hot Rods, and a quick trip provided the necessary Vintique items to facilitate completing our erector set puzzle!
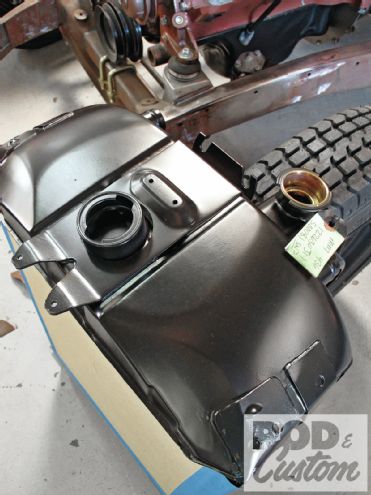
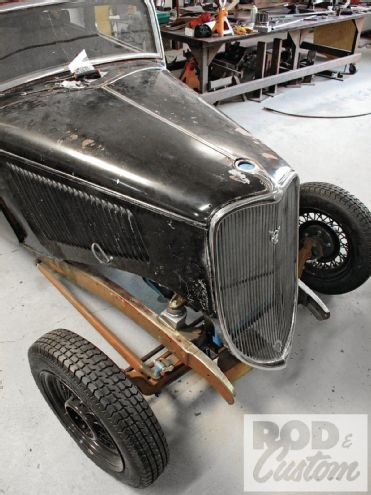
As you may (or may not, depending on the clarity of the images) notice, the Tudor's stock four-piece hood is not what you'd call pristine—far from it, to be quite honest. That said, the hood made the cut and will get used, as-is. What didn't make the cut, nor the trip from Texas with the rest of the body and related parts, were the inner fender panels, which were beyond repair. Again, with Model Bs/As, parts of this nature wouldn't matter for a highboy—with a 1933-34, the inner fenders are required in order to unite the hood sides with the frame. Locating a set of usable originals (for a reasonable price) proved unsuccessful, so a call was made to Steve's Auto Restorations for a pair of repops.
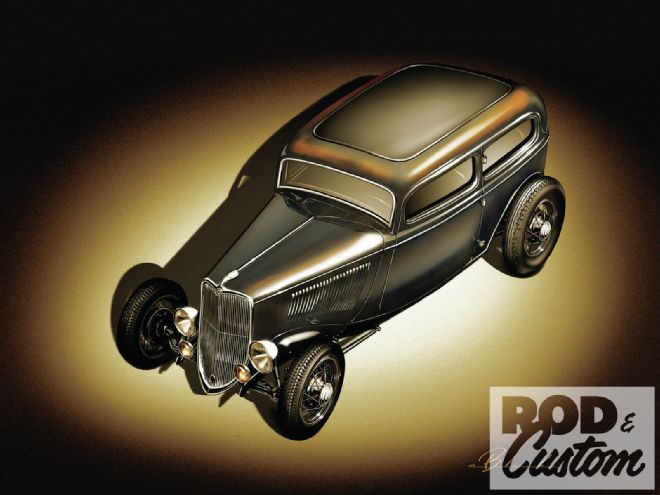
All said, by no means did we set out to achieve, nor attempt for that matter, perfect gaps on either side of the hood. Ultimately, the paint you see on the body now is the paint you'll see when the sedan's on the road in the not-so distant future. Jimmy White and I could have spent days fitting the hood and grille, but we didn't. Good enough is more than good enough for me.
 1. For this month’s overview on fitting and aligning the Tudor’s front sheetmetal group, our focal point is what lies beneath the stamped metal sheeting: the radiator. Thanks to good ol’ Henry’s new chassis design for the Model 40, there’s a bit more to the task at hand than with a ’32. We’ll start things off with U.S. Radiator’s high-efficiency repro ’33 radiator.
 2. Our four-row copper/brass core radiator came complete with all the factory hood and grille mounting provisions, including a dummy filler neck atop the tank and firewall support rod tabs.
 3. As noted in the story, our little adventure would nary be worth mention had we used a stock ’33-34 frame. Instead, our aftermarket situation presented a nice little challenge: mounting the radiator via individual lower mounts rather than the stamped-steel unit Ford rivets forward the front crossmember. No problem.
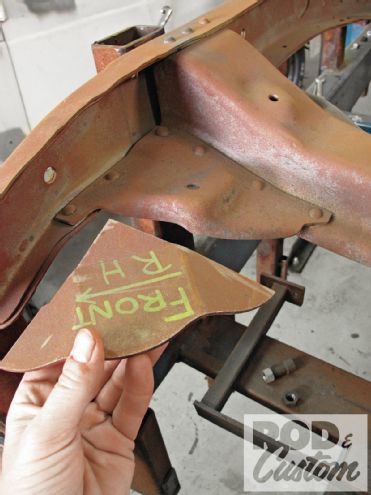
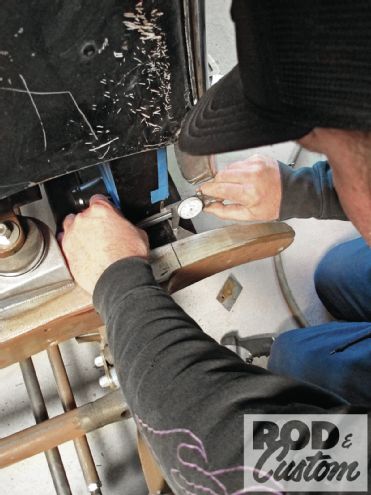
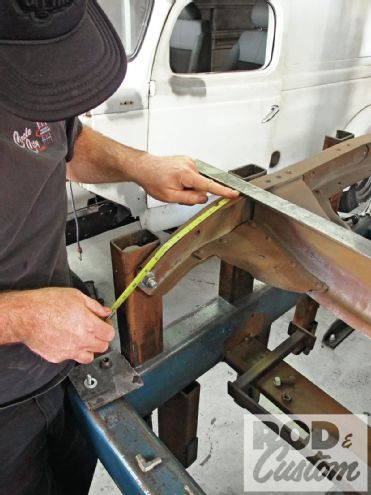 4. Fortunately, we had an original frame from which to “borrow” reference points and measurements.
 5. While the specs weren’t directly transferred from old to new, they did provide a very good starting point and took quite a bit of guessing out of the equation, so to speak.
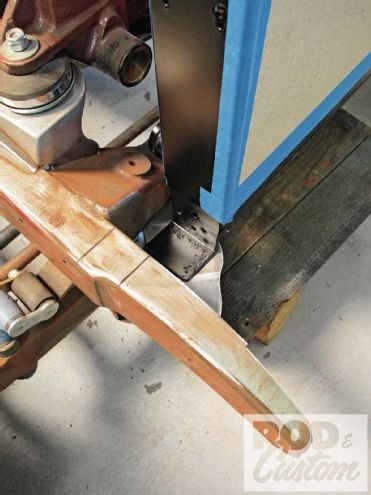
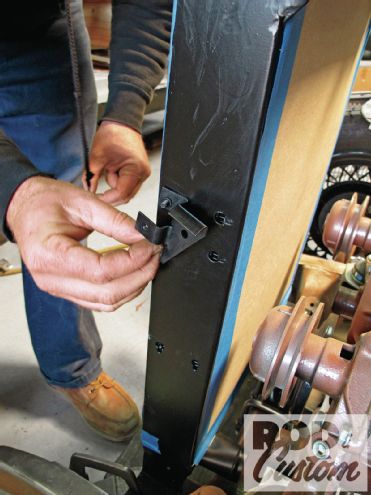
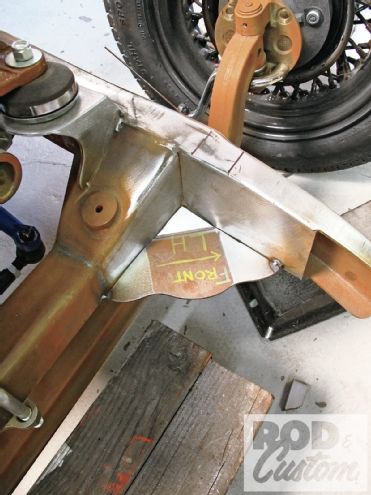 6. Speedway’s mounts are assumingly designed to fit un-boxed framerails best; obviously, our ’rails have a fourth plane. No big deal—Jimmy White fine-tuned the mounts to ensure they mated between the crossmember and boxing plates rather nicely.
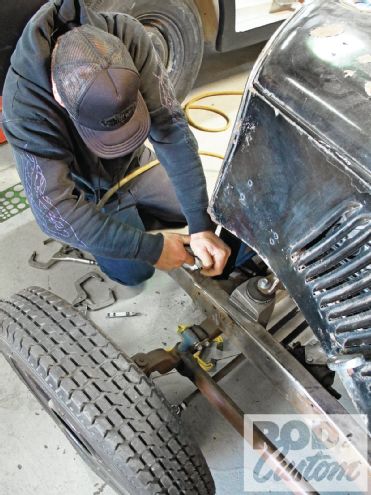
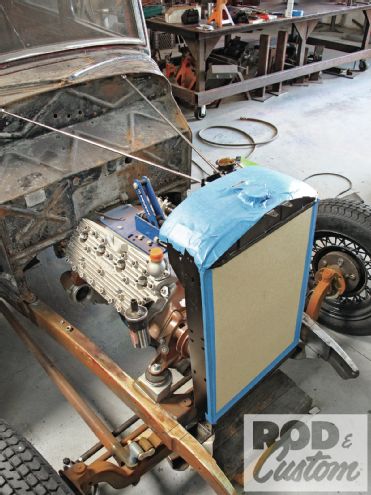 7. With the plate mounts tack-welded in (so as to allow any tweaking if deemed necessary), the radiator was set in place and semi-secured by attaching the firewall support rods. Note too the cardboard and masking tape protection on the radiator—while paint scratches aren’t a big concern, we’re not a fan of bent core fins!
 8. Neither the mounts nor the radiator feet are pre-drilled. We’ll first have to fit the grille and hood before making any holes.
 9. Looking back, the decision to run a full hood not only cost quite a bit of extra time, but a lot more financial investment too. I love the look of a fenderless ’33-34 with stock hood sides—especially the blistered inner fender panels. Since the Tudor’s originals were no good, a set of repops from Steve’s Auto Restorations had to be ordered.
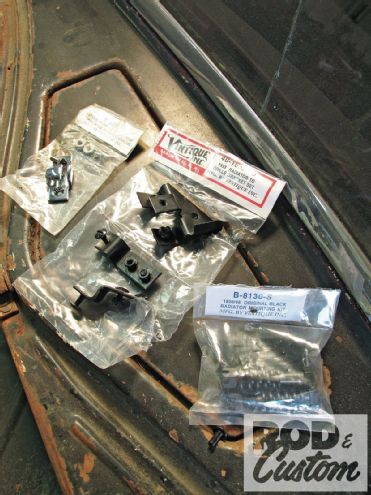 10. A trip to CW Moss in Orange, CA, provided the hardware in which to facilitate grille shell attachment (and hood latch points).
 11. As noted, the radiator features all the necessary mounting points for stock frontal sheetmetal.
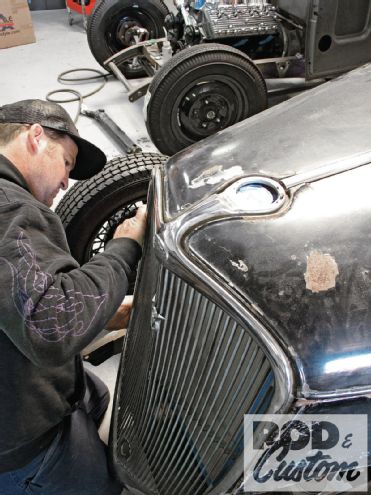
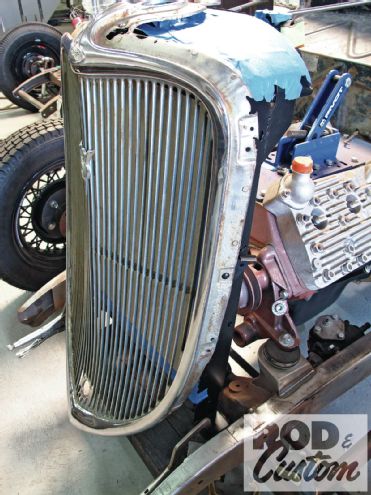 12. The sedan’s grille has definitely seen better days (maybe not quite as many as the hood though), but nonetheless will be retained for appropriate aesthetics, not to mention sentimental reasons.
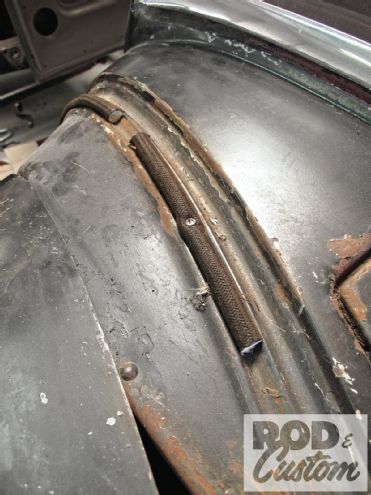 13. We took a spare strip of hood welting and, using sheetmetal screws (through the existing rivet holes), attached in increments along the cowl. This will keep the hood spaced up adequately for fitting purposes.
 14. With the grille shell hung and the hood draped over, we went to fit and attach our inner fender panels. Once again, our boxed framerails posed a minor obstacle—this time, slightly complicating the mounting of the panels (we’ll need to actually weld nuts into the exterior surface of the ’rails, which we’ll get to later). Fortunately, this did not affect fitting the hood sides or grille.
15. At this point, with the hood simply lying over the cowl/grille and the radiator feet clamped to their mounts, the alignment process was finally underway. Our main point of reference throughout was the cowl, as this is the only constant; everything else is adjustable.
14. With the grille shell hung and the hood draped over, we went to fit and attach our inner fender panels. Once again, our boxed framerails posed a minor obstacle—this time, slightly complicating the mounting of the panels (we’ll need to actually weld nuts into the exterior surface of the ’rails, which we’ll get to later). Fortunately, this did not affect fitting the hood sides or grille.
15. At this point, with the hood simply lying over the cowl/grille and the radiator feet clamped to their mounts, the alignment process was finally underway. Our main point of reference throughout was the cowl, as this is the only constant; everything else is adjustable.
 16. If it were solely up to me, eyeballing would’ve been more than sufficient—not for Mr. White. Despite my desire “not” to achieve perfect/consistent gaps, he did what it took getting things to fit as nice as he could in a reasonable amount of time.
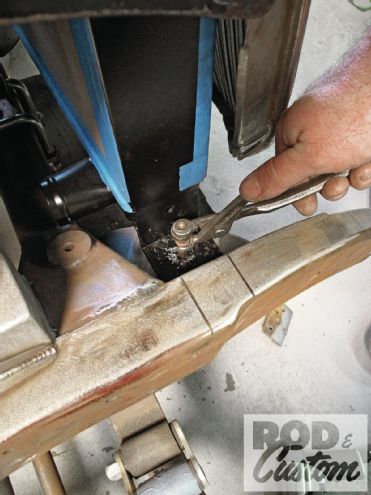 17. Once I convinced Jimmy we were good enough with sheetmetal fitment, the passenger side of the radiator was drilled and temporarily secured with a Cleco first.
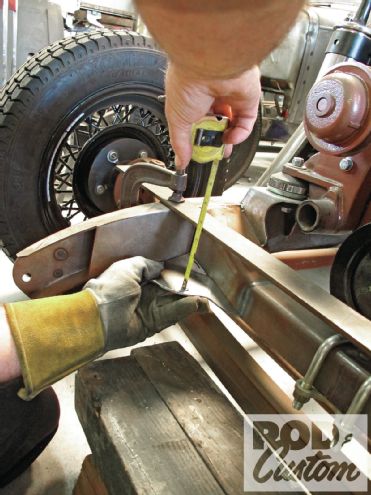
 18. Next, the driver side was measured and gaps rechecked before the remaining foot/mount were drilled. The holes were drilled slightly oversize to allow for future adjustment and fine-tuning.
 19. Next, the driver side was measured and gaps rechecked before the remaining foot/mount were drilled. The holes were drilled slightly oversize to allow for future adjustment and fine-tuning.
 20. Our CW Moss run also supplied us with the proper radiator mounting kit—resplendent in black rather than fancy polished stainless, of course.
21. Obviously we’ve still got plenty ahead of us in the way of, well, pretty much everything! Speaking entirely for myself only, I’m looking ahead to each and every step. For now, I’m very pleased with the progress we’ve achieved.
20. Our CW Moss run also supplied us with the proper radiator mounting kit—resplendent in black rather than fancy polished stainless, of course.
21. Obviously we’ve still got plenty ahead of us in the way of, well, pretty much everything! Speaking entirely for myself only, I’m looking ahead to each and every step. For now, I’m very pleased with the progress we’ve achieved.