In our last issue we began chopping the top on the '51 Ford sedan that will soon crisscross this expansive country of ours, leading the 2013 AMSOIL/STREET RODDER Road Tours with the ever effervescent Jerry Dixey at the wheel. (That sound in the background is Dixey running for the dictionary.) A quick review may be in order before we move forward.
We began with a top that was bare metal and had been media blasted clean on the inside by Flintstone Media. Clean metal on both sides of the top is imperative to prevent dirt from migrating into your welds. It also makes marking and cutting the top much easier and more precise and cuts down on the amount of smoke generated while welding. With this clean top we measured out a top chop that would provide us with a profile matching the rendering supplied for the project by Eric Black.
The team at Honest Charley Garage decided to take it moderate, and to that end the shoebox was chopped 2 inches up front and 3-1/2 inches out back. This angular chop would help accent the slight tail dragger look found in the rendering.
In the first installment we marked the top, cut the top free from the car, chopped the A- and B-pillars 2 inches, and reattached the roof to the car by moving the B-pillar forward. That left us with a very cool looking front half of the roof, while the original rear window is towering over the now-lowered roof skin. For more details refer to the story and photos in the July issue of STREET RODDER.
So the task at hand is to mate that original size rear window with the lower roof skin. As it turns out this is not an insurmountable task if you simply make the right cuts and the right moves.
We cut the original window free from the car by making a long cut through the panel between the rear window and the decklid. Next, we cut through the heavy braces that form the rear package shelf inside the car. These brackets were marked and straight cuts were made so they could be used for as a measuring reference while sliding the rear window section forward.
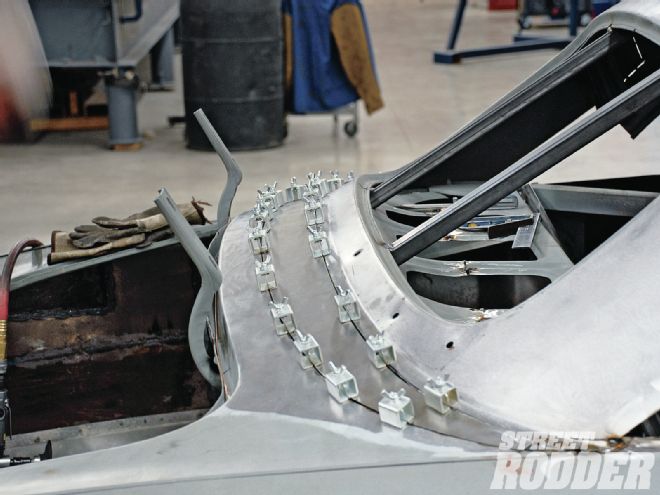
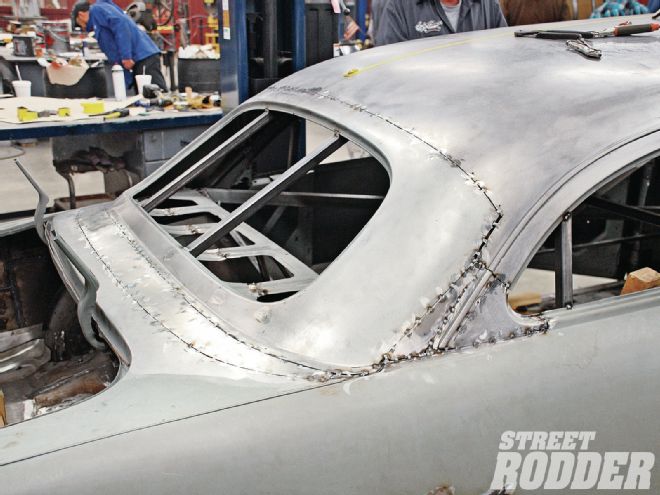
And that is exactly what we did, we slid the entire rear window panel forward approximately 3 inches, and the rotated the panel downward about 3 inches and just like that the gap between the roof skin and the rear window was closed. Oh sure, there was some hammer and dolly work, lots of Eastwood panel clamps, and some Millermatic welding to be done, but the basic fitment was accomplished by sliding the panel forward and rotating down.
Small filler pieces were fabricated, the rear corners of the side windows were reconfigured, slightly rotated, and fit to each side window and in the end we had a top chop that, while conservative, added up to a radical change in the overall profile of the car. The minimal number of cuts and great fitting by the guys at Honest Charley Garage means minimal filler will be required to make this top perfect.
Finally we cut the inside window moldings to fit the newly lowered roof and door tops and the top chop was complete. Now that you have a feel for the process, follow along with the photos for more details in the step-by-step process of lowering the lid on the 2013 AMSOIL/STREET RODDER Road Tour '51 Ford.
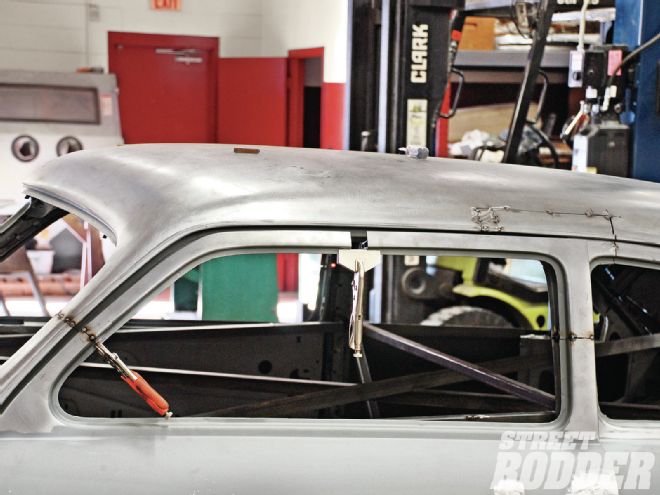
This is where we left off in the July issue of STREET RODDER. We had effectively lowered the main roof, including the A- and B-pillars and were left with a considerable gap to close at the rear window area.
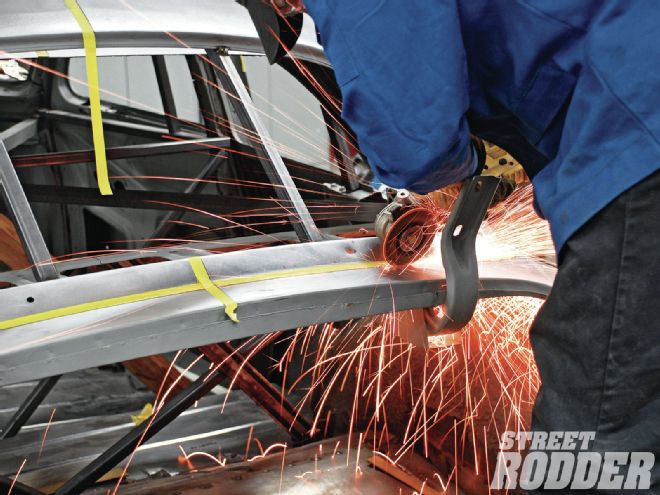
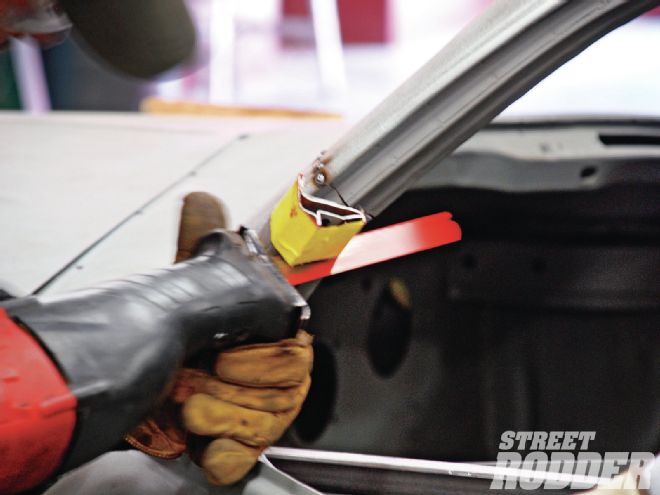
Leaning the rear window forward requires that we cut it free from the panel between the window and the decklid. A cut-off wheel handles the job and once again stays true to the line.
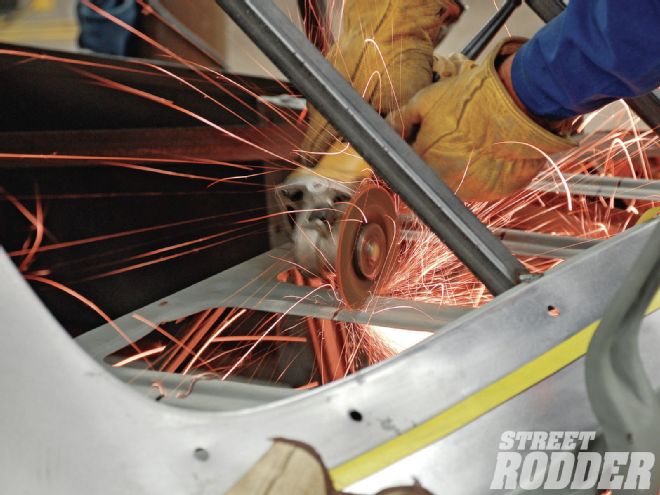
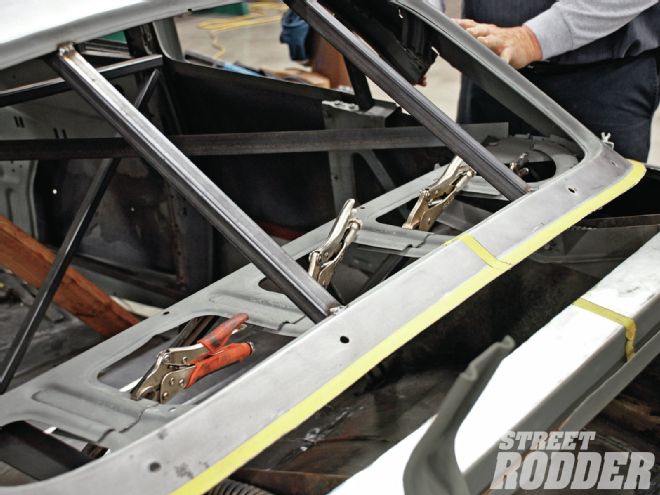
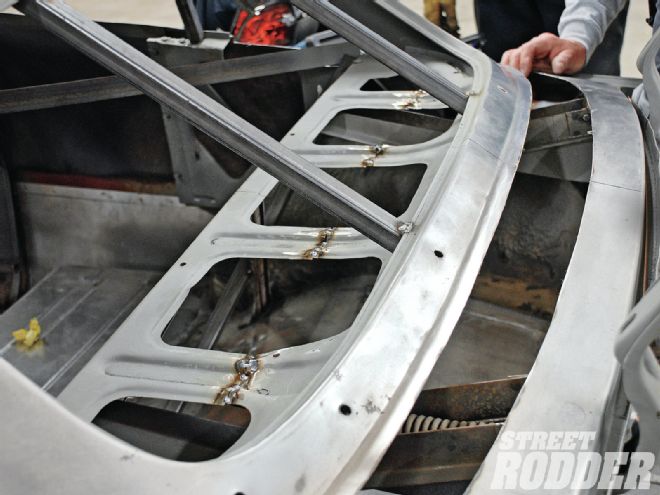
The final cuts are inside the window through the package shelf braces. Measure and mark the cuts square so you can use them as references when aligning the roof.
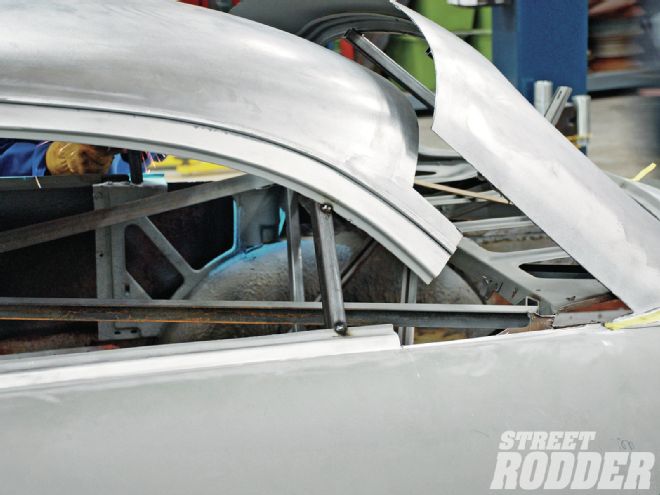
Those package shelf braces serve as a telescoping set of brackets to clamp the roof in place for alignment. The roof is moved forward 3 inches and leaned downward.
And just like that the huge gap has closed up. This lowered the roof 3-1/2 inches in the rear, on a more radical chop the roof skins would need to be reshaped.
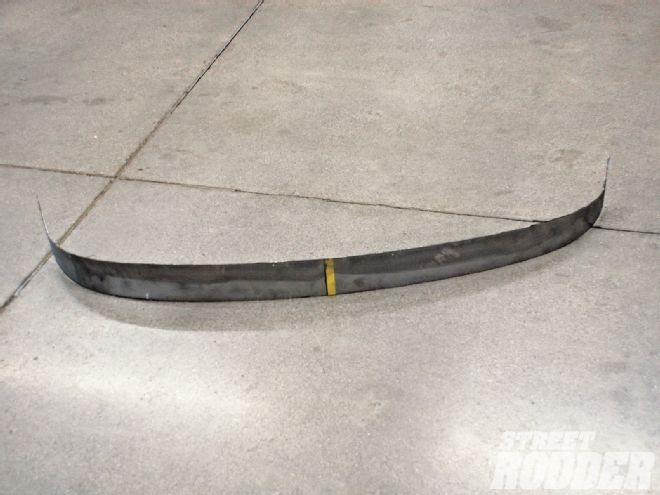
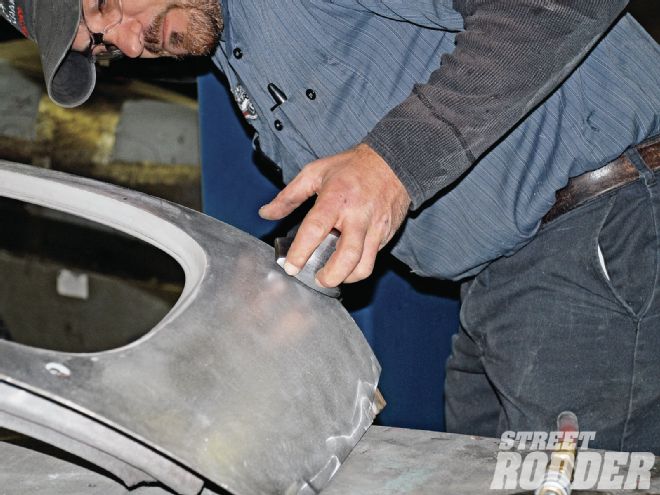
Looking from the rear we can see the misalignment on the rear sides of the window panel. Since the roof pieces are overlapped by 3 inches we marked the rear roof area and carefully cut the excess off.
Here is the piece we removed; it was attached to rear window panel. With this piece removed the two roof skins will butt up to each other.
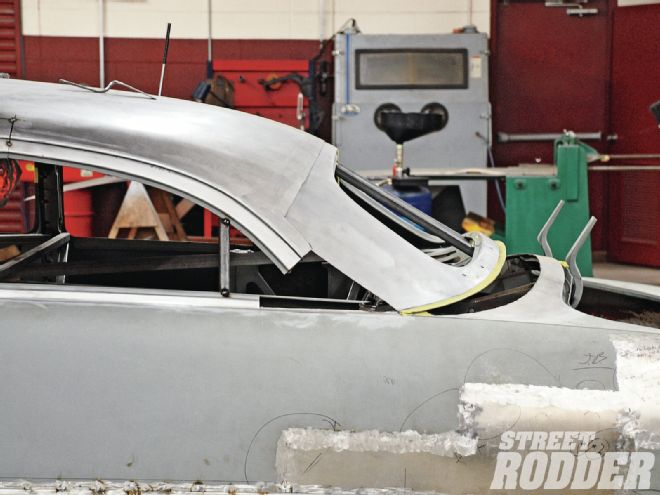
Before we aligned the two pieces of roof skin we broke out the Eastwood hammer and dolly to gently lift the ends of the main roof skin.
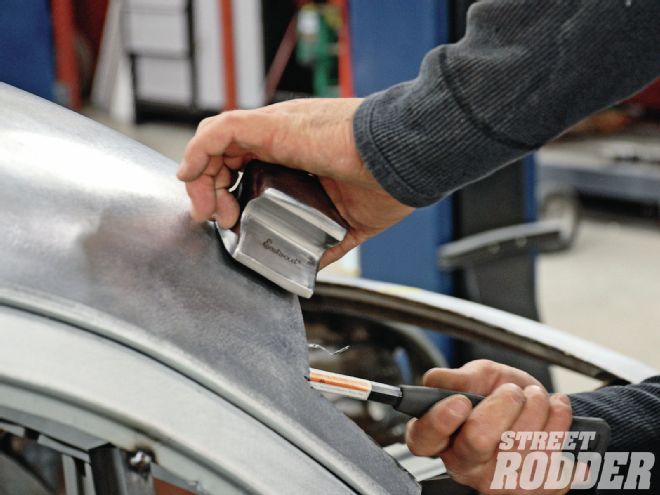
We used our Eastwood hammer and dolly to gently lower the end of the roof skin above the rear window. By moving the main skin up and the rear skin down we achieved perfect alignment.
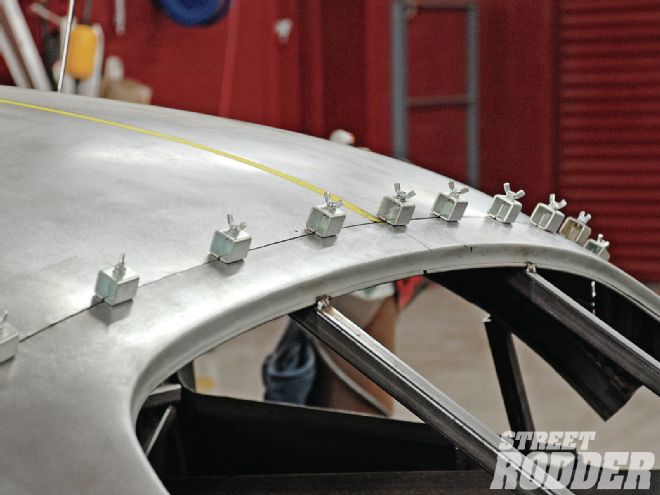
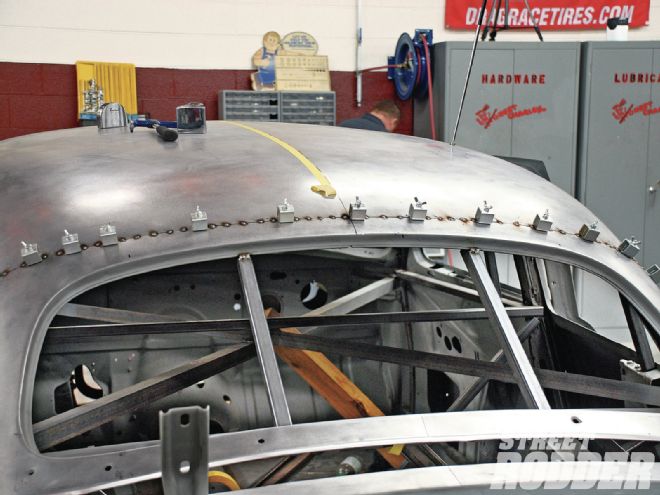
As we worked from the center out the Eastwood panel clamps pulled the two skins into perfect alignment. Note that the center lines are also perfectly matched on the roof panels.
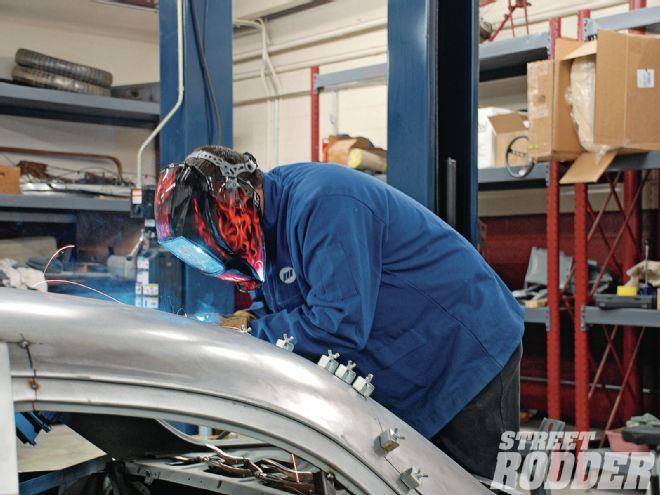
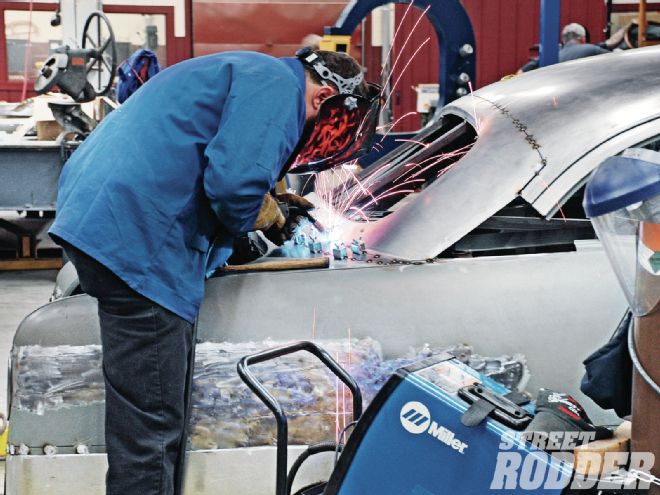
Next Richard Marter fired up the Millermatic and put a tack weld between each Eastwood panel clamp, moving from side to side to minimize any heat distortion.
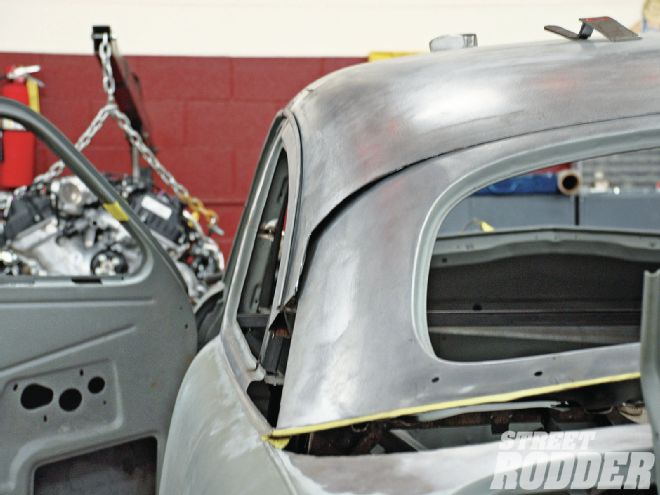
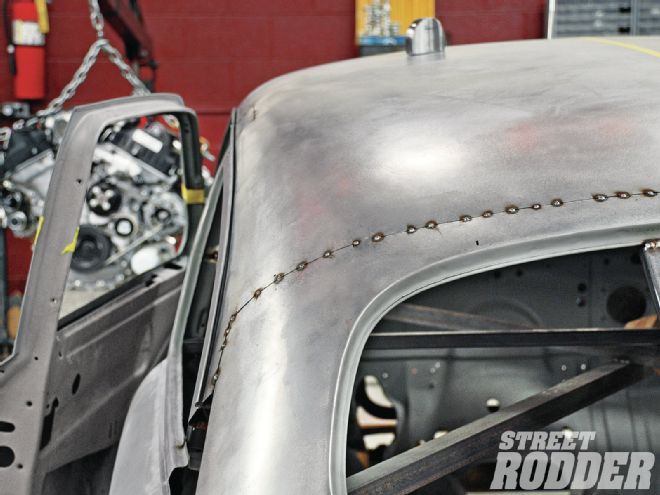
With the roof skin tack-welded between the clamps our '51 Ford was looking like a car once more. A bit more hammer and dolly work will perfect the roof skin contour.
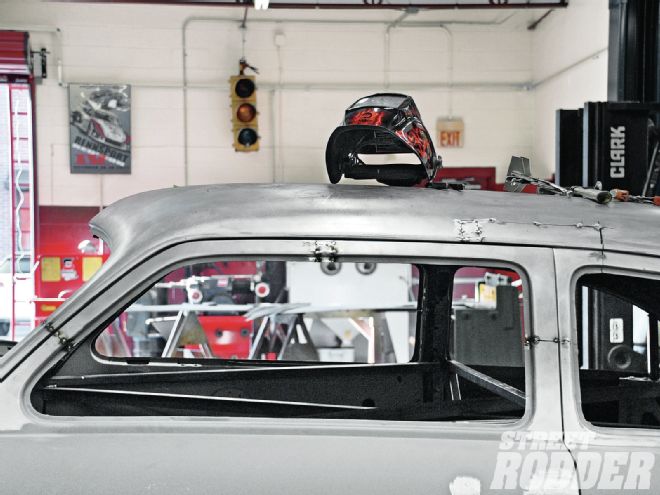
We took the time to "eyeball" all the angles and curves on the roof to be certain we had a nice flowing top line. One look from this angle tells you it just doesn't get any better than this.
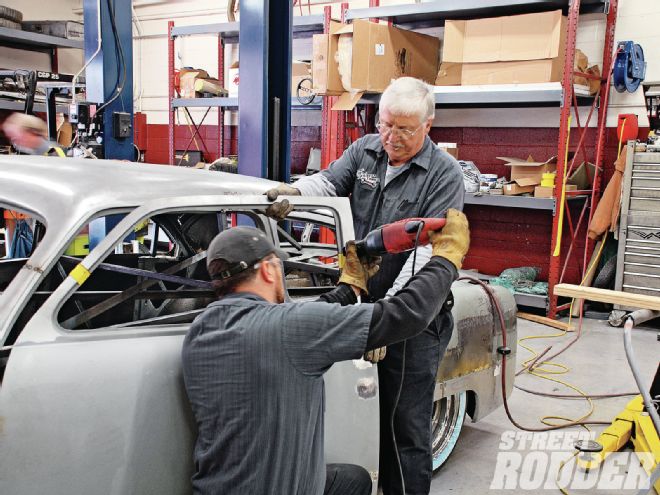
We used a cut-off wheel to cut through the overlapped package tray brackets and then welded them solid with our Millermatic MIG welder.
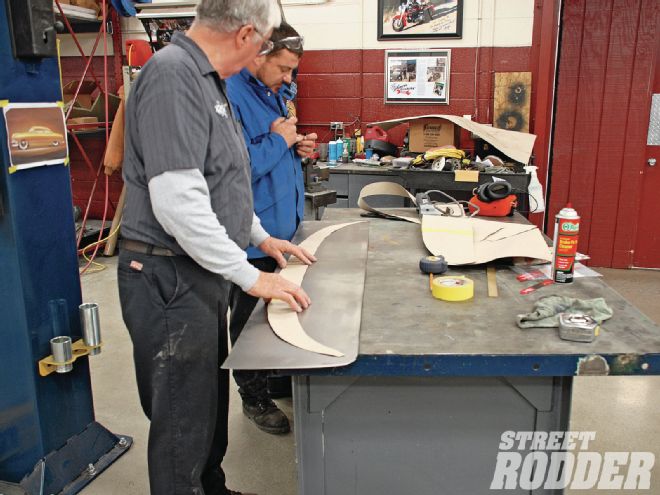
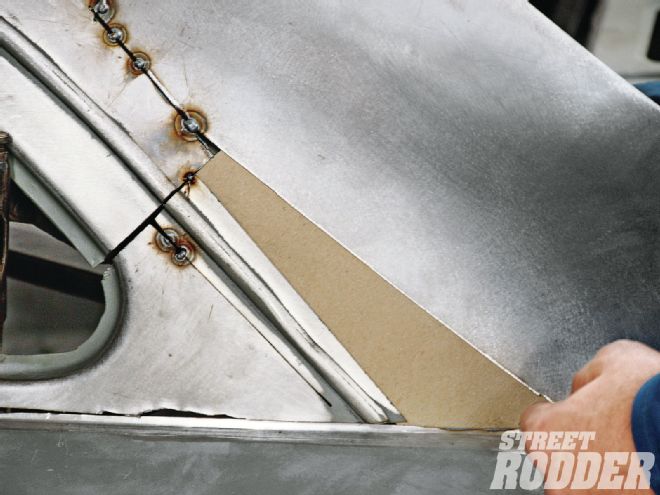
After making a cardboard template for the required filler panel the shape was transferred to some 18-gauge sheet steel.
After carefully fitting the filler panel it was clamped into place with Eastwood panel clamps. This filler piece visually lengthens the trunk area, which takes that "grandma's sedan" look out of the car.
Once again a series of tack welds connect the filler panel to the rear window and to the decklid area. At this point the roof is one with the body again.
After carefully calculating and marking the lower rear corners of the window, Delton Scott cuts the top and bottom ends off the window radius piece that we removed earlier.
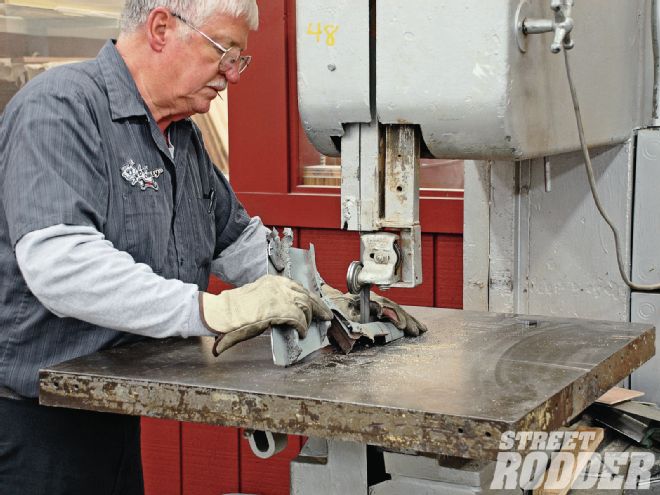
Often this rear radius will have to be closed up by pie-cutting the piece and folding it closed, but in this case we managed to slightly rotate the stock radius in the rear window corner for a real factory look.
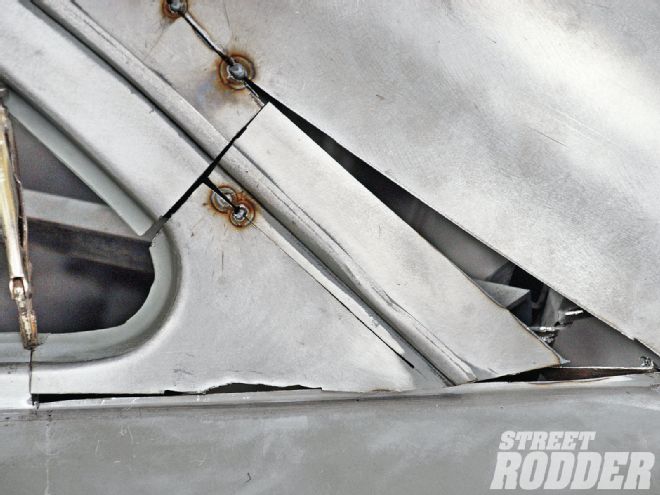
After tack-welding the window corner in place it was time to make a filler piece for the sail panel behind the window. First the opening was trimmed to a uniform shape that eliminated the sharp point at the top of the panel.
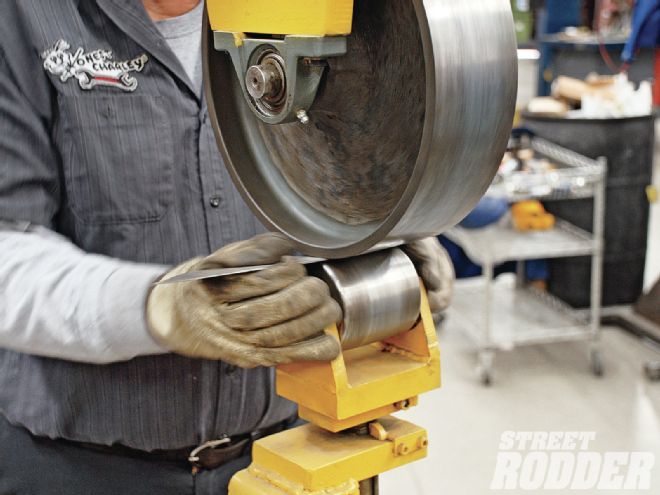
While the filler panel is small it does carry a compound curve. Scott uses the English wheel to form that curve, this same curve could be formed with a shot bag and mallet by the homebuilder.
After some careful fitting the final filler piece was tack-welded into the roof. Notice how well the panels fit and more importantly notice how few cuts were made to the roof.
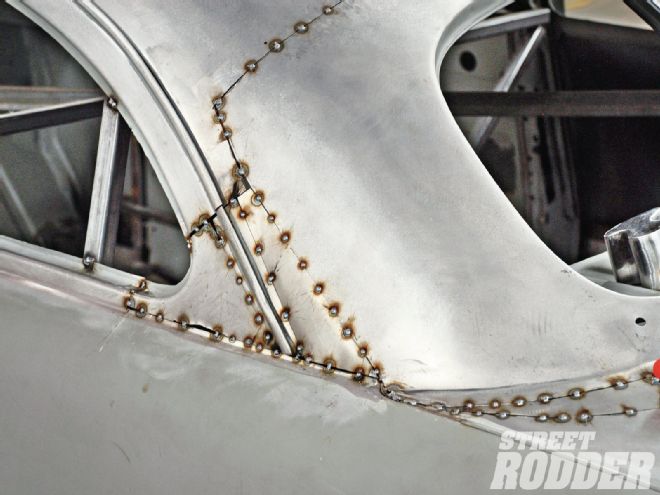
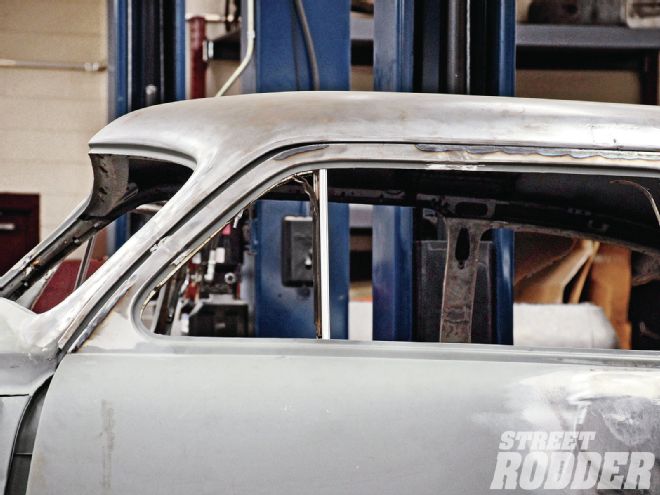
We were pleased with the smooth flowing lines of the rear window area and after some final welding and sanding of the welds there will be nearly no filler required on the seams.

We couldn't be happier with the shape of the rear window. It is now shorter so it has a bit more of a coupe appearance and that rear corner radius is perfect. The small brace showing in the window is temporary.
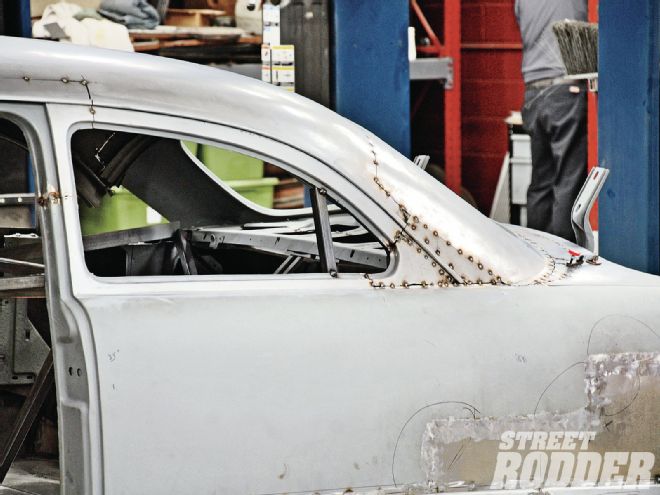
The extended area between the decklid and the rear window visually lengthens our '51 Ford and while the rear window is still original size, it appears smaller on this angle.
With the top lowered, the team at Honest Charley Garage turned their attention to lowering the doorframes.
The basic cuts were made in the same places as the main roof cuts, this helps ensure symmetry between the upper door and the now lowered roof.
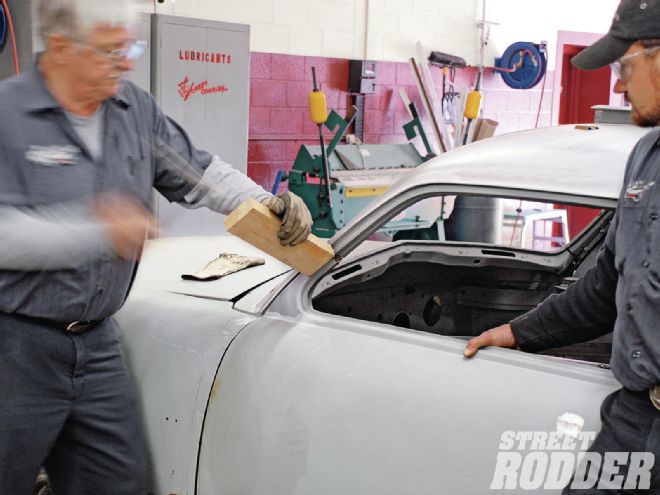
For the most part this top chop was a gentle operation with minimal force exerted, but sometimes there is just on substitute for a 2x4 and a hammer to move a post in 1/8 inch.
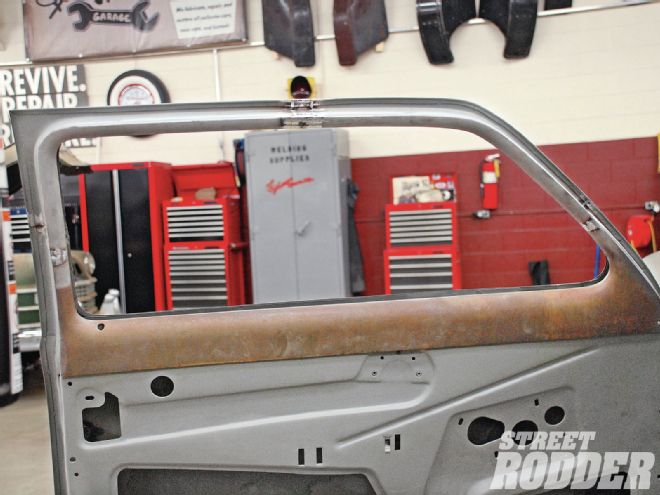
The window frame portion of the door was cut in the center to allow the front and rear pieces to align properly. Since we moved the B-pillar to the rear we will need to add a filler piece to the top of the door.
Remember those pieces you cut out of the B-pillar to lower the roof? Simply trim one of those to fit the void in the middle of the upper door.
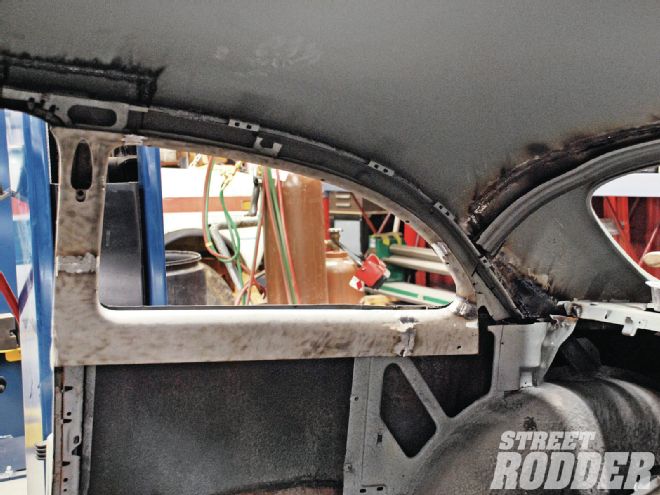
The inside window molding were also cut to fit the new window opening, which means they too were lowered and extended to fit the opening.
The vent window will remain and be fully functional with the same foldout feature that was there in 1951.
The quarter window moldings were cut and the rear corner was massaged to match the new, reshaped window.
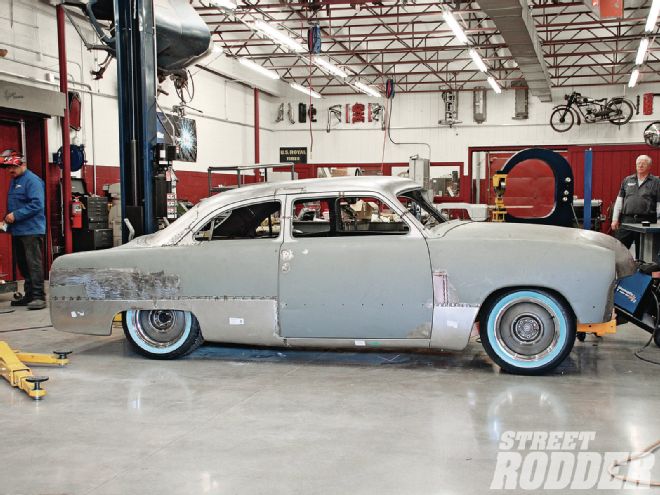
And here it is, a dramatically lower profile without employing a radical top chop. With just 2 inches removed from the front and 3-1/2 inches from the rear, the car takes on a smooth custom profile. This may cause a lot of folks to rethink the radical 5-inch chops.

Watch the guys over at Honest Charley Garage chop the roof here.
To see more videos covering the build of the 2013 AMSOIL/STREET RODDER Road Tour car, click here.