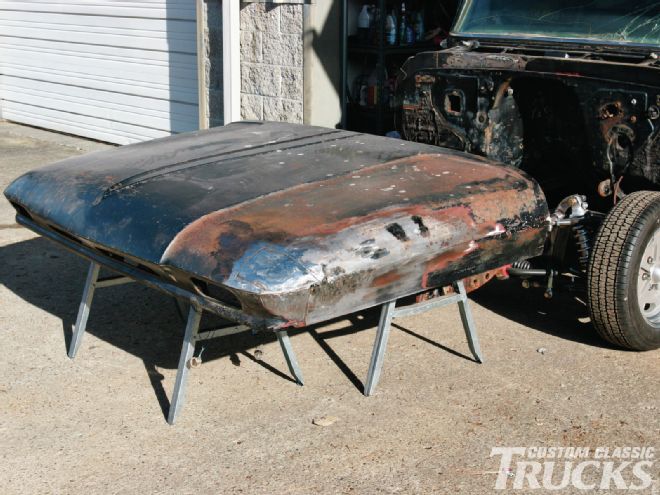
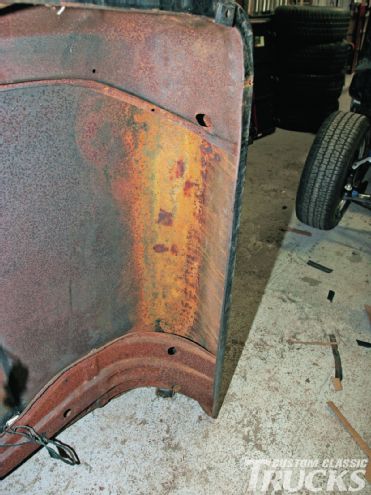
After getting our ’64 Chevy home and checking it out from end to end we were convinced it was a solid truck. Sure, the floors need some work, and it has the usual assortment of small dings and dents old trucks collect. And then there was an odd little rust hole in the front of the hood, but it didn’t appear to be too serious. Since fixing the hood appeared to be the easiest repair to make we started on it first, little did we know what was in store.
The problems started with a faulty assumption—we figured that moisture had gotten under the blob of plastic filler that been applied to the corner of the hood—we were sort of right. Somewhere in the truck’s past the hood had been damaged and the old technique of drilling holes then using a sheetmetal screw in a slide hammer was used to sort of pull out the dent. In reality lots of filler took care of the majority of the dent and plugged the screw holes as well.
While the repair work was less than stellar, it was made worse by the hood spending a considerable amount of time upside-down in the bed. Rainwater collected in the front corner, worked its way through the filled holes and got under the plastic on the outside and ate the metal away. All this was discovered after the filler was ground—we now had a great big hole instead of the small one we expected to deal with. And the worst part was the patch would have to be in the shape of a compound curve, which was certainly more difficult than anything we’ve ever done.
To make the necessary repair we enlisted the help of Jake Brazille of Jake’s Place in Florence, Oregon. And while no one involved had tried it before, with a pair of plastic mallets, shot bag, and planishing hammer from Harbor Freight we summoned all our courage, threw caution to the wind, and beat a patch panel into shape. Here’s how we did it.
1. We thought that fixing the hood on our ’64 Chevy was going to be simple, but it turned out to be more challenging than we thought. The worst part is over, but there’s still more work to do.

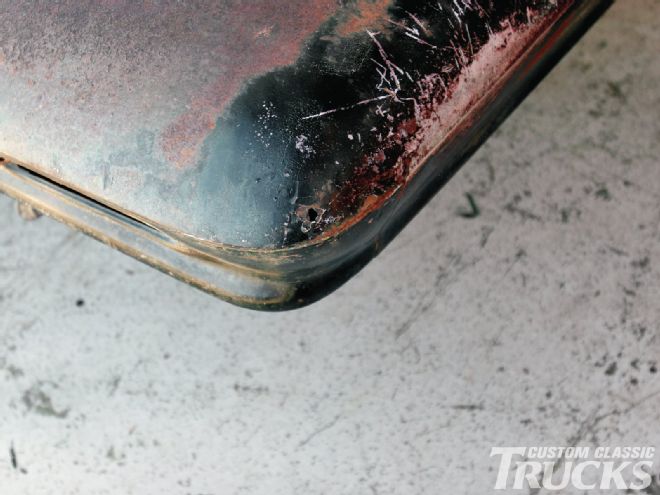
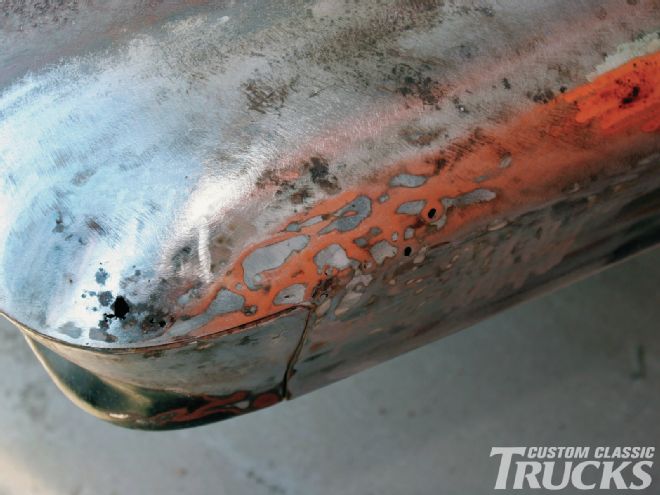
2. Initially the small hole in the corner of the hood didn’t appear to be a real challenge to repair—that was before the old filler was ground off.
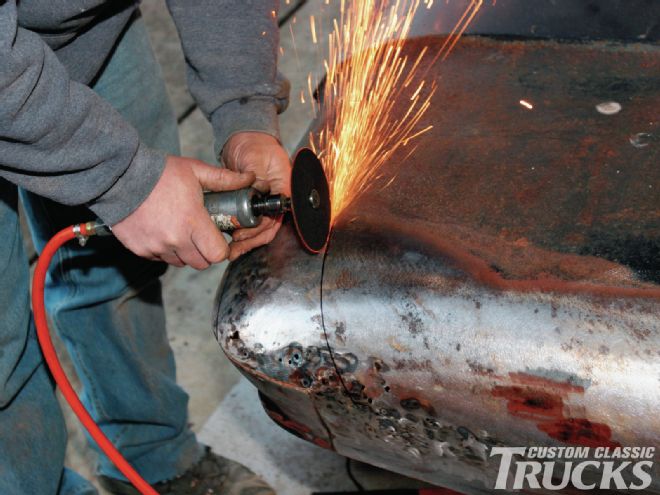
3. Jake Brazille began removing the old paint and filler and it soon became obvious there was going to be more to making things right than we anticipated.

4. As the paint was removed we discovered more and more plastic filler and things were turning ugly.
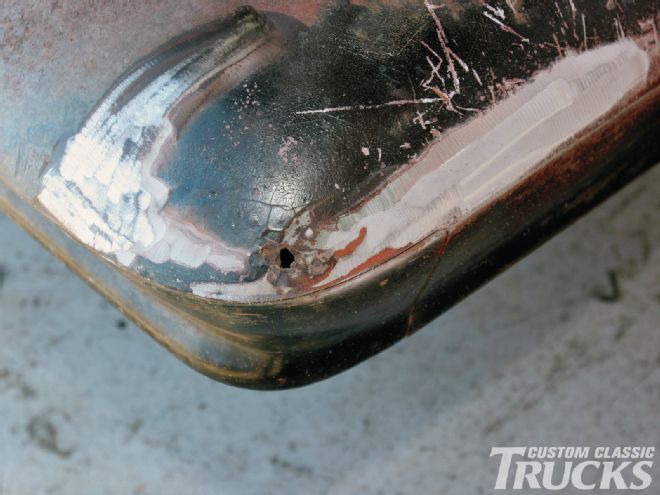
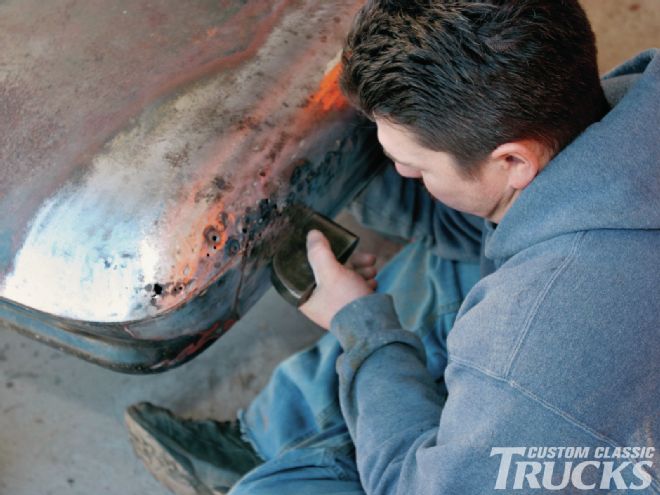
5. When the filler was ground away, we found much more rust damage than we expected, plus a number of screw holes that would have to be welded shut.

6. We hadn’t seen the rust stain inside the hood, but it was obvious that water collecting there had caused the rust problem.
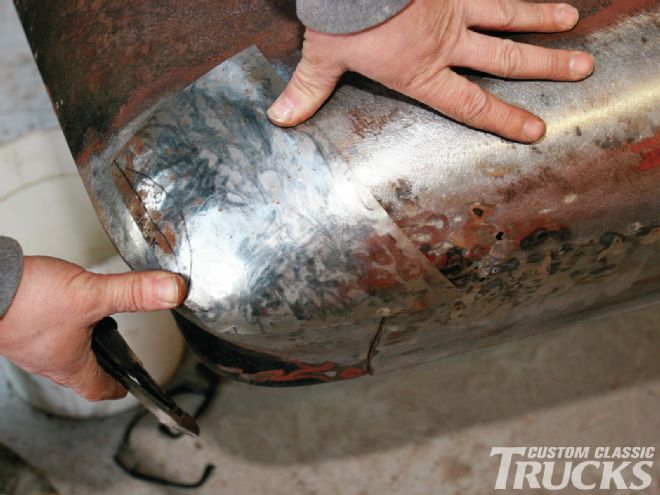
7. Although attempts had been made to pull the dents out of the hood nothing much was accomplished other than leaving holes behind to fill.
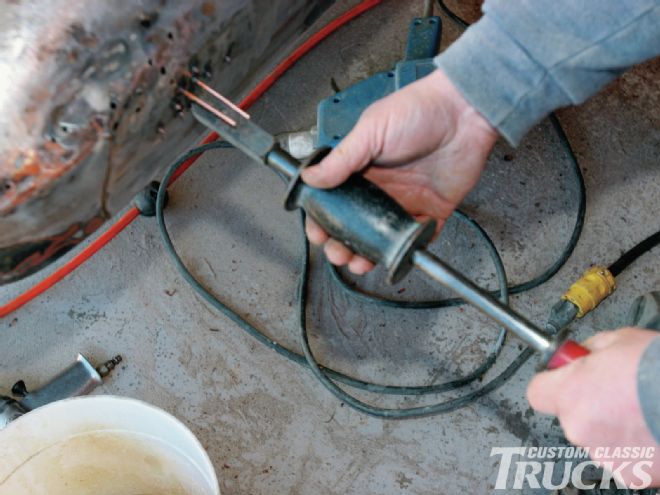
8. Unfortunately there’s a large brace inside the hood that prevents using a hammer and dolly. As an alternative repair method Jake uses a gun that attaches copper “nails” to the surface.
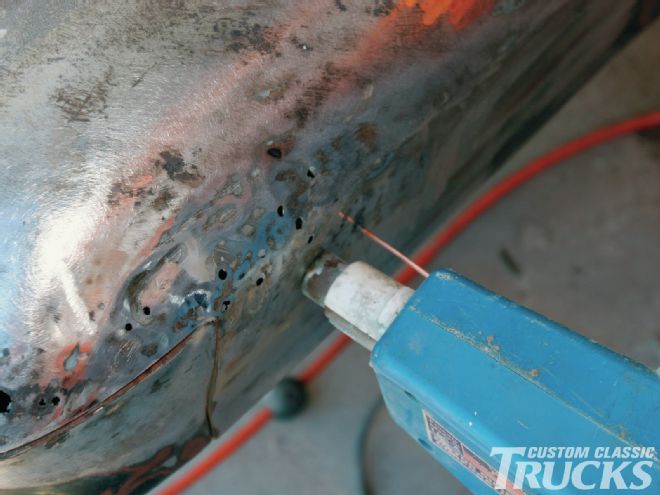
9. A special slide hammer grips the nails and the low spots can be pulled up.
10. In areas not covered by the brace, conventional hammer and dolly procedures could be used.
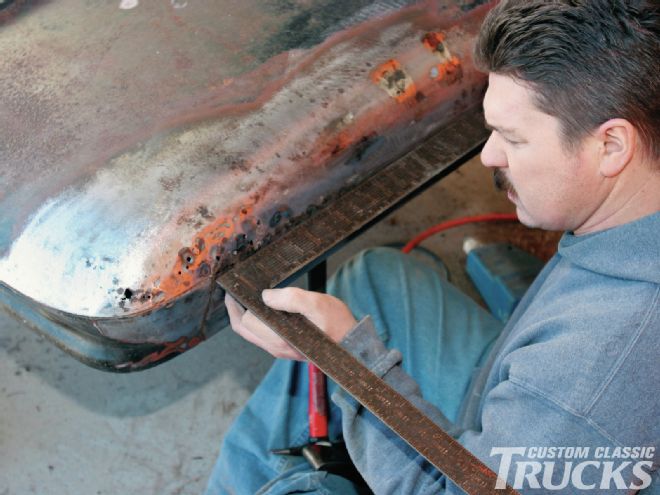
11. Jake used a square to check progress. Once the hood was reasonably straight, the rusty area would be cut out.
12. We began fabricating the patch panel by beating a piece of sheetmetal the same gauge as the hood into rough shape.
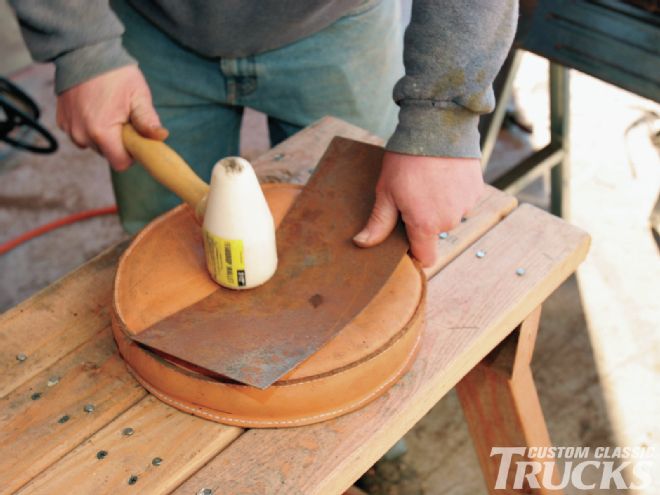
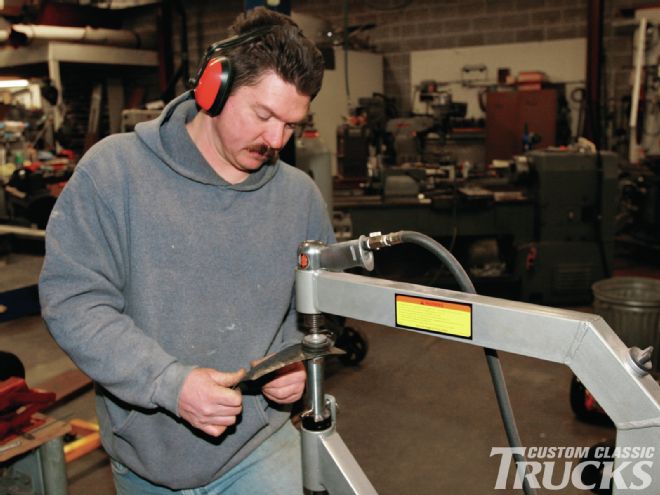
13. Next a planishing hammer was used to smooth all the irregularities left by the mallets. We then laid the patch over the hood to check the fit.
14. A test fit on the hood corner showed we were on the right track.
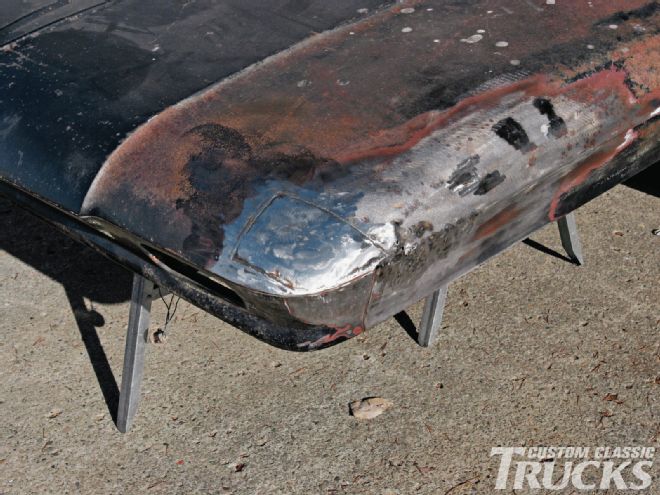
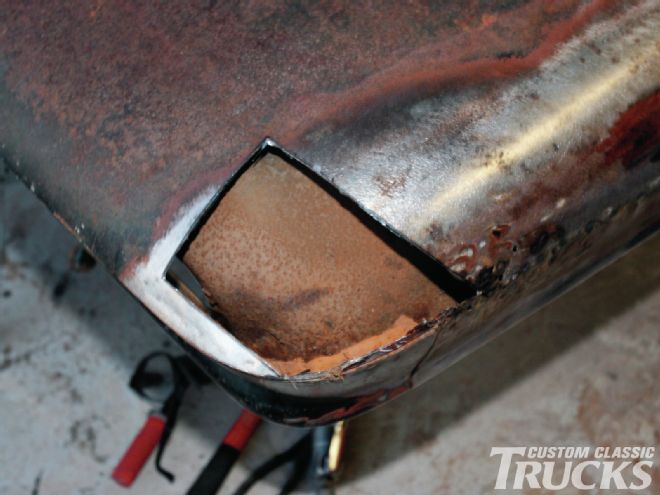
15. Confident that our patch was the right shape, we used it for a template and cut away the damaged part of the hood.
16. What stared out as a small hole ended up looking like this. Before the patch was installed we treated what we could with Eastwood’s Rust Encapsulator.
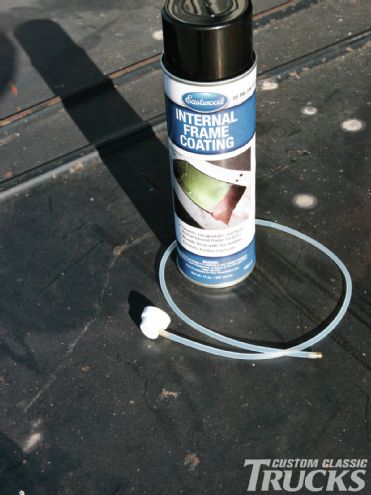
17. For those areas that couldn’t be reached easily, we used Eastwood’s frame coating that can be applied via a nozzle on the end of a length of flexible tubing.
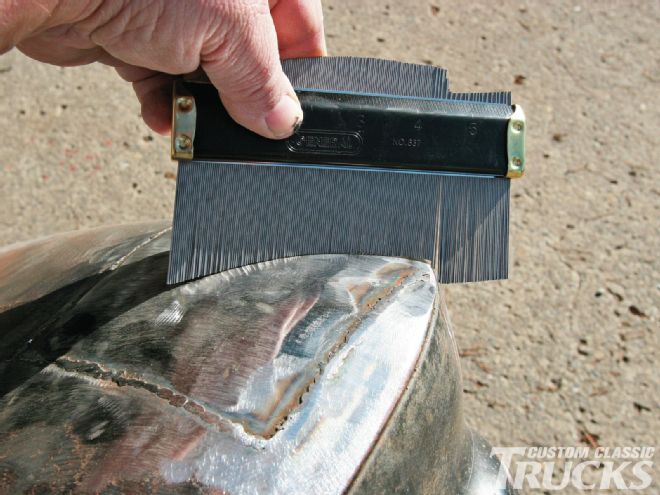
18. To compare the shape of the repaired area to the opposite side we used a contour gauge from Eastwood. Our repair was close enough that only a skim coat of filler will be required.
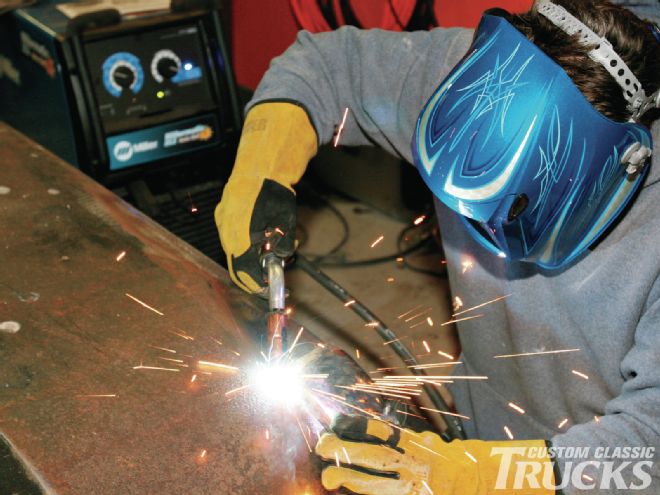
19. Satisfied with the shape of our hand-formed patch panel, we fired up our Miller welder and made the repair permanent.
20. While the hood still needs more work, the hard part is done, and it wasn’t as tough to do as we feared.