
Anyone reading this magazine knows full well building a street rod is a tricky deal. Until you have that body down to bare metal you are never certain exactly what you are working on. In our last installment Flintstone Media Blasting removed all the paint, dirt, grime, and rust from our AMSOIL/STREET RODDER Road Tour ’51 Ford and what was uncovered was daunting. Not only did this old Ford have a lot of rust, it even had rusted-out patch panels that had been installed many years ago.
When rust is this extensive you may consider finding a better body, but happily the team at Honest Charley Garage felt this was a good opportunity to show that rough and rusty can be converted into solid steel with time, tools, and talent along with repair panels from Dennis Carpenter Ford Restoration Parts (DC). The Honest Charley Garage team of Greg Cunningham, Delton Scott, Richard Marter, and Jonathan Myren would be performing the salvage operation on our ’51 Ford.
The car had been crossbraced with angle iron and box tubing prior to being sent to the media blaster so no structural twisting or bending would occur. Now it was time to restore structural integrity to the body. The rust was extensive enough that the crossbracing was the only thing maintaining the body shape.
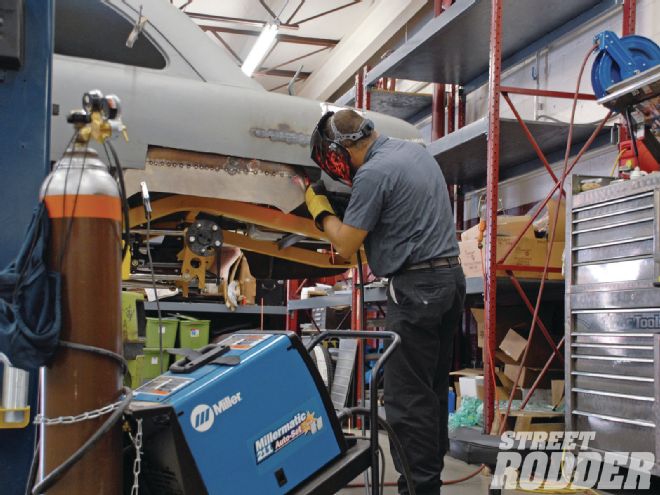
The first step was to cut out the rusted main floor section to expose the body mounts that attach to the bottom of the floor. Cut-off wheels and the occasional Sawzall removed the rusted metal with ease, exposing the channel body mounts, or at least what was left of them. With the body mounts exposed it became apparent that the first order of business would be repairing the rusty lower cowl area. This repair was a matter of fabricating box panels to replace the lower rusted pieces and connecting it to the toeboard portion of the floorboard. These repair panels were formed by Honest Charley Garage and welded in place using a combination of MIG welding with a Millermatic 211 and TIG welding with a Miller Dynasty 200 machine. Once the lower corner of the cowl was repaired the lower portion of the doorjamb was repaired in preparation for the installation of the new DC inner and outer rocker panels.
The inner rocker panel was tack-welded in place on the inside of the rocker panel prior to fitting it to the body. Happily our door opening was the exact same size as the replacement rocker panel so we felt certain the door opening had not been compromised. A little tweaking on the repaired corners and the DC rocker panel was tack-welded in place. The door was then installed to be certain the opening was correct and the gaps were all uniform between the new rocker panel and the door. The gaps were nearly perfect and after a bit of adjustment the gaps were better than any new ’51 Ford. The door was removed and the rocker panels were welded in place. We now had the cowl connected to the rest of the body and the inner rocker panels provide the mounting surface for the body mounts.
The body mounts were test-fit alongside the original mounts before cutting out the old rusted units. Delton Scott cut the new DC body mount and formed a 3/8-inch flange that fit flush with the new inner rocker panels. The new mounts were bolted to the Fatman Fabrications chassis and then tack-welded in place to the inner rocker. During rust repair it is best to tack-weld all your panels prior to finish welding. Most of these panels connect to one another so it may be necessary to go back and move one repair panel to line up with the next panel and tack welding makes such adjustment easy.
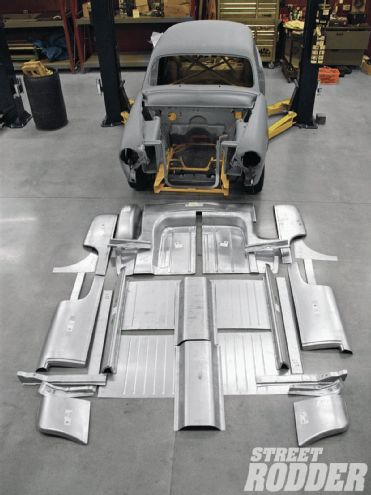
When the shipment of Dennis Carpenter Ford Restoration Parts replacement panels arrived at the Honest Charley Garage we spread them out in front of our ’51 Ford project car. We used every piece repairing the car.
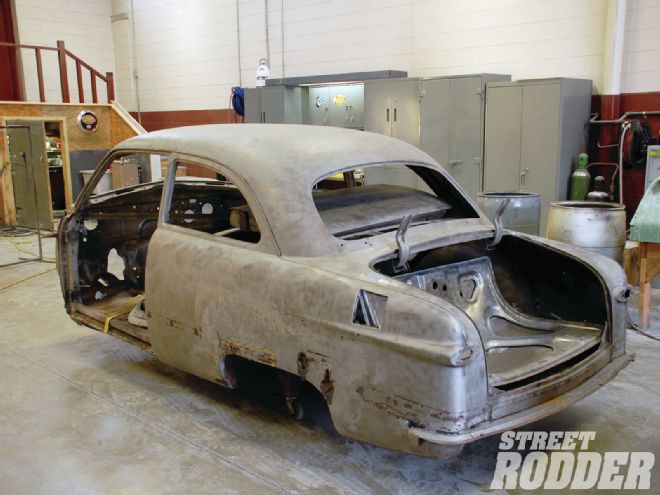
We knew it wasn’t exactly “rust free” but when Flintstone Media finished with the body we could see through most panels.
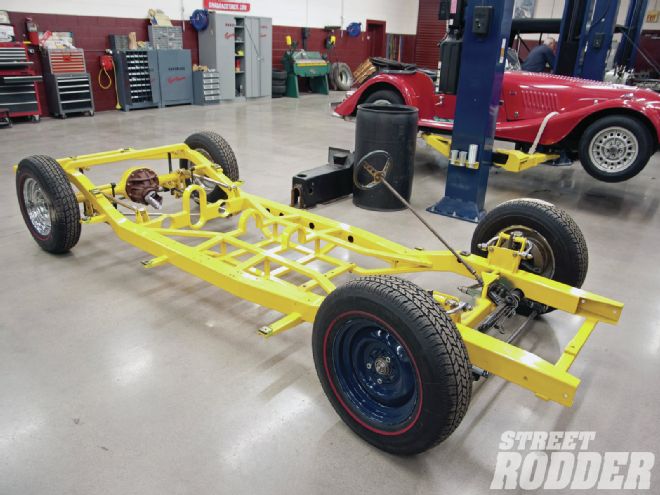
The good news is the Ford rides on a brand-new Fatman Fabrications chassis, so there will be no rust repair on the frame, and no, it will not be painted yellow when finished.
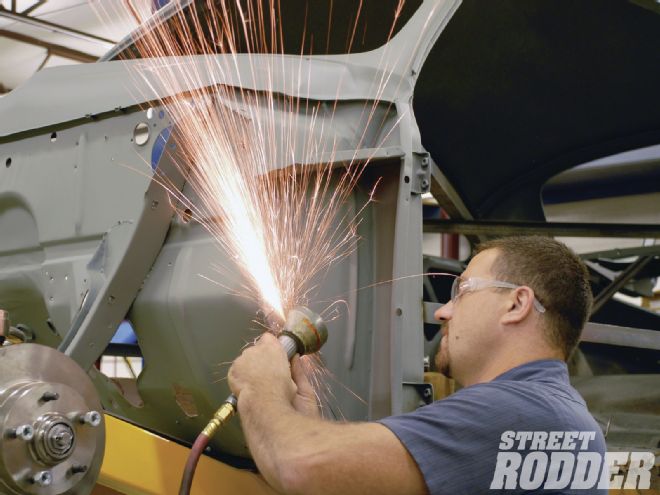
Delton Scott spent many hours going over the body with a DA sander cleaning up bare metal and removing any small areas not cleaned with the media blasting.
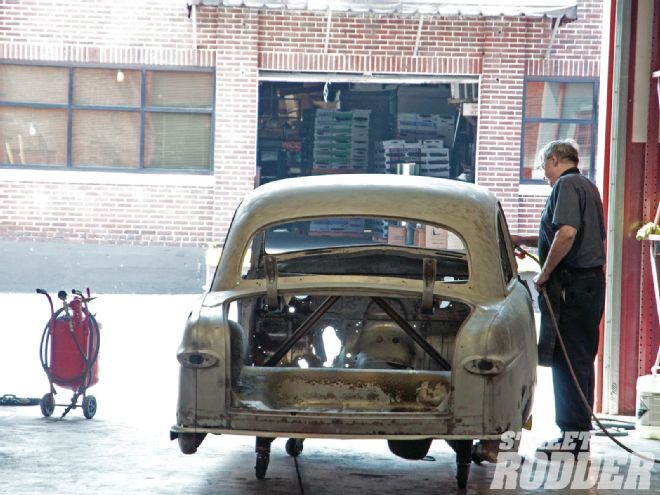
Resting in the Honest Charley Garage spray booth the body already looks a lot better, but don’t let this picture deceive you; this is one rusty old car.

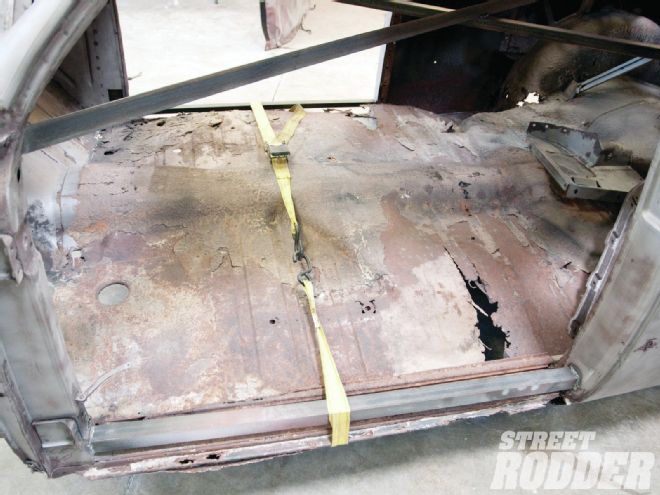
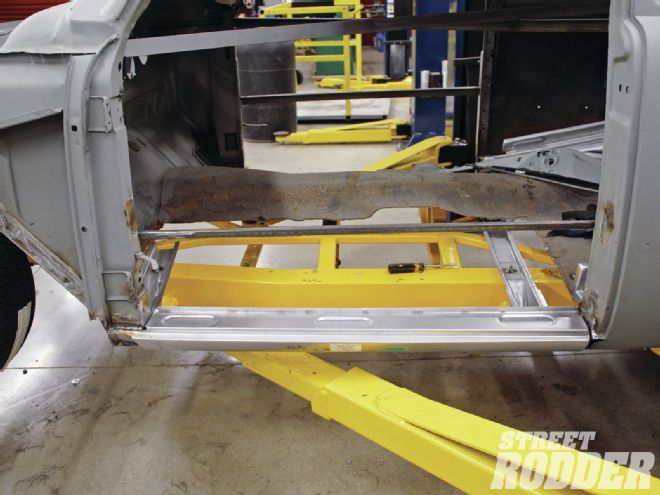
The entire floor was wafer-thin or rusted completely through. We’ll remove all of the main floor section and replace it with DC panels.
This is the lower cowl area. It is very important to restore this properly as it is a main structural point on the body; the rocker panels connect here.
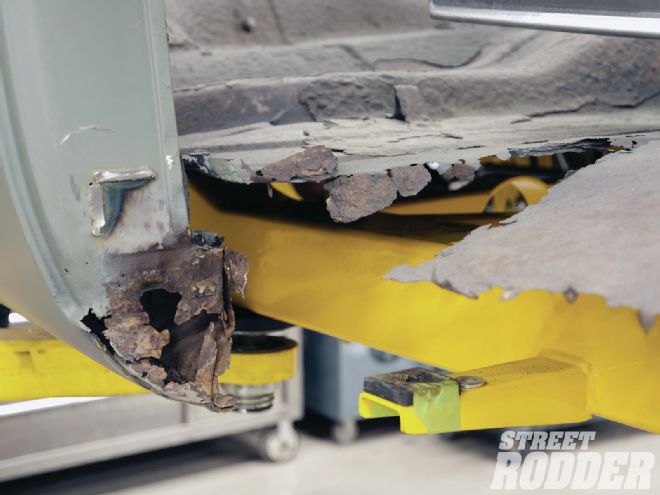
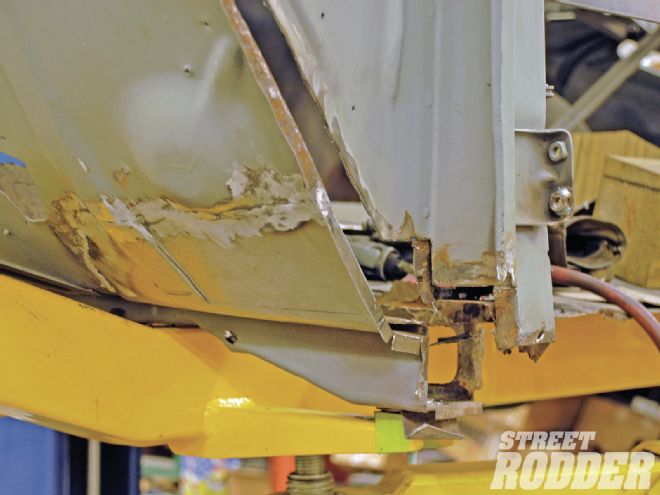
From the side it was apparent the rust had traveled well up the cowl and also on the interior toeboard of the floor.
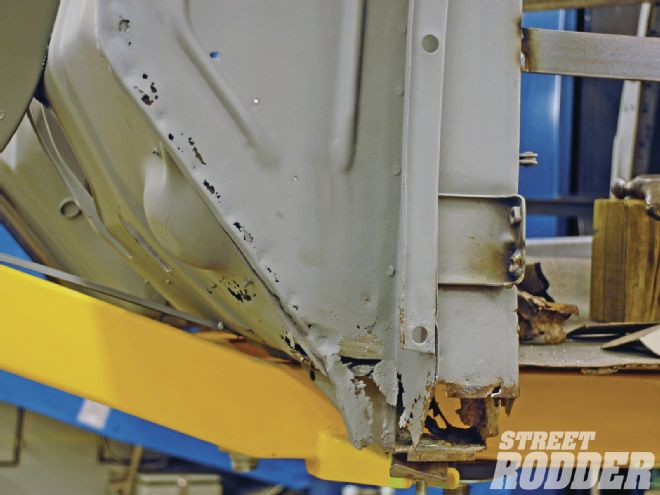
More surgery was required to remove the rusted area from the cowl, providing solid metal for attaching the patch panel.
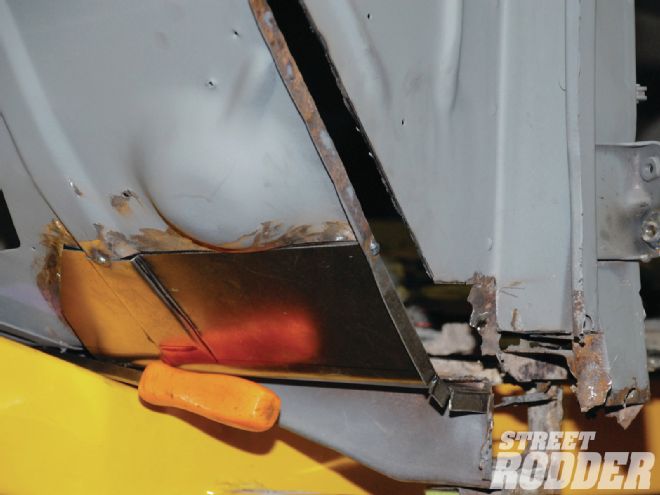
The toeboard panel is tack-welded in place. Note the flanged outer edge that matches the factory flange on the cowl.
The toeboard is fully welded and now it is time to construct the lower cowl box and repair the upper cowl.
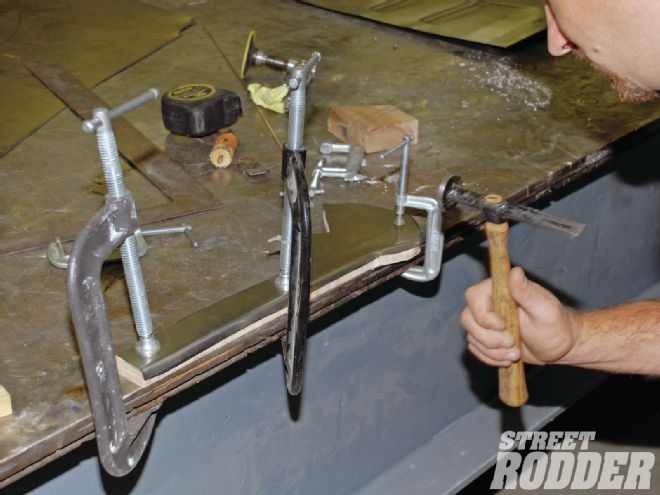
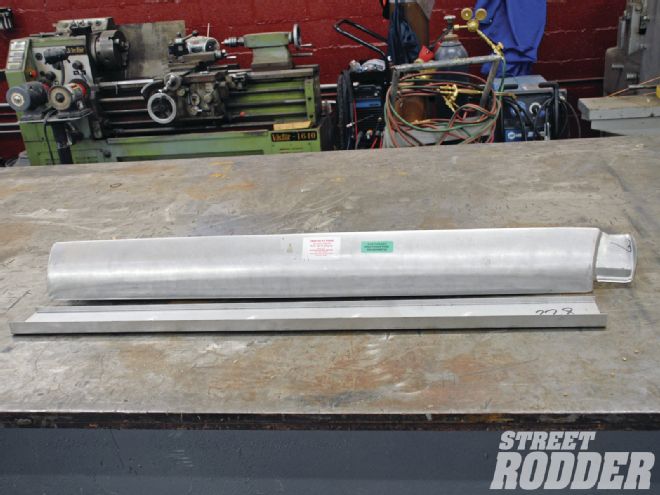
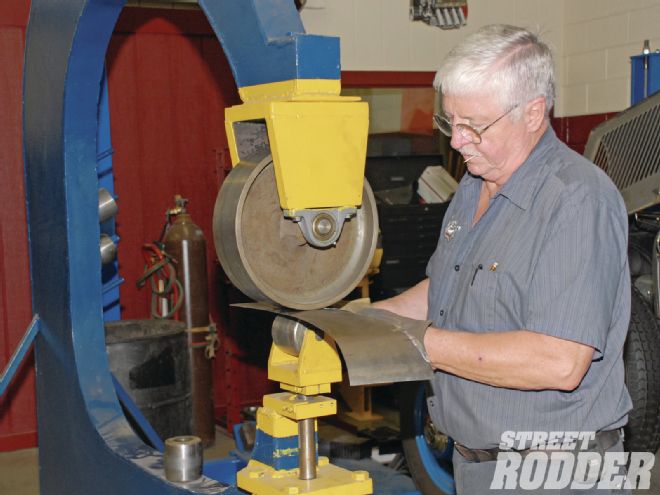
A 3/4-inch plywood buck was cut out to match the shape of the cowl repair, and then the 18-gauge steel was hammer-formed around the buck.
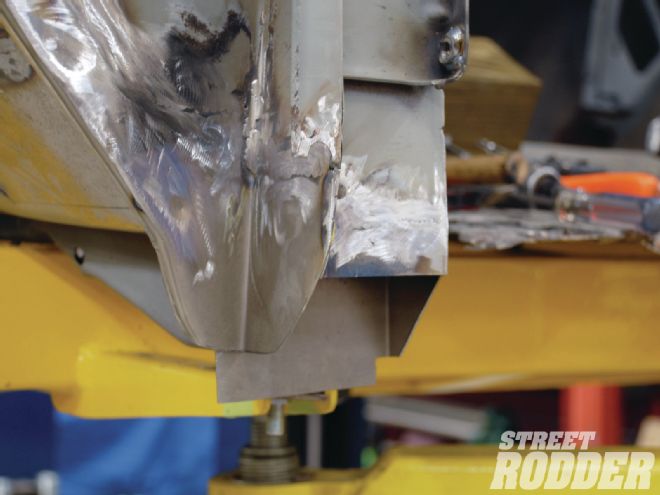
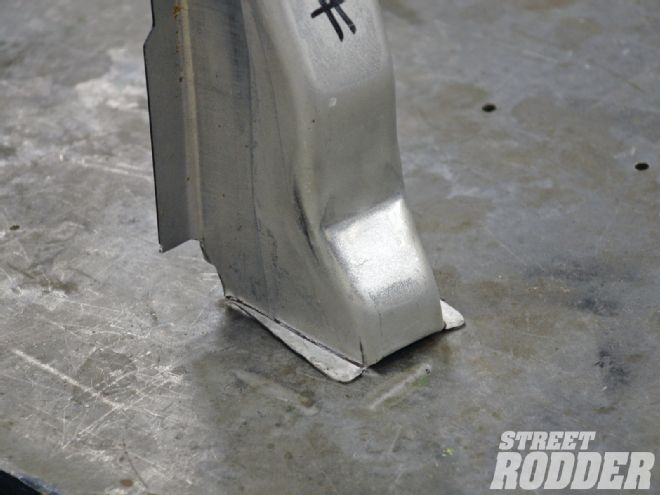
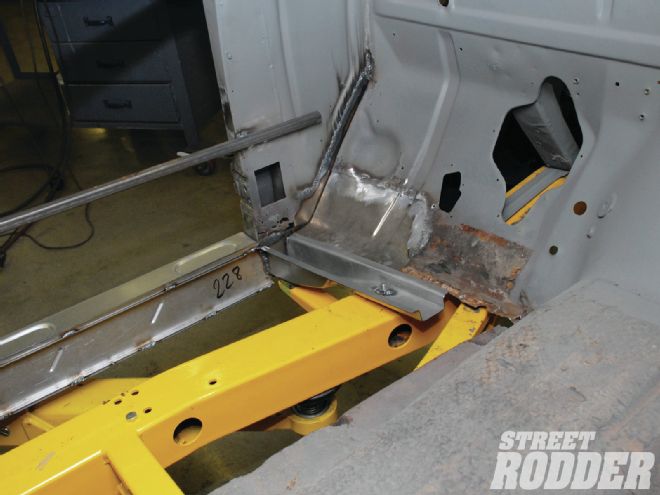
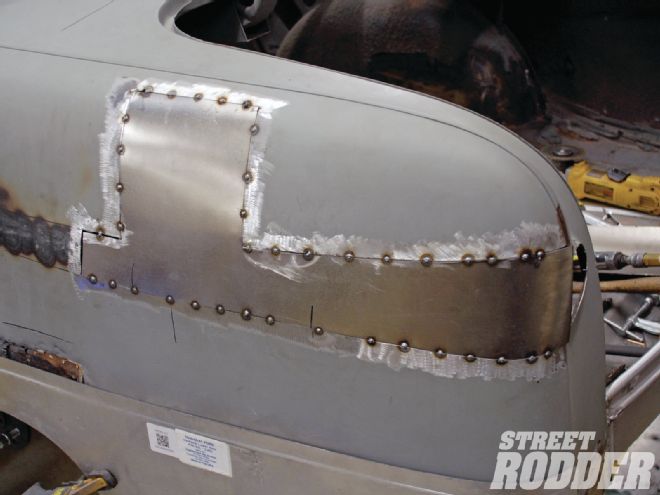
The hammer-formed patch panel sandwiches the toeboard flange and extends down into the lower doorjamb to form the basis for the rocker panel mounting point.
Next, a small box was formed in a metal brake to construct the lower doorjamb box. This box connects to the doorjamb and to the floorboard.
Certain the box is in the proper size it is finish-welded using the Millermatic 211. The box was built to conform to the new DC outer rocker panel.
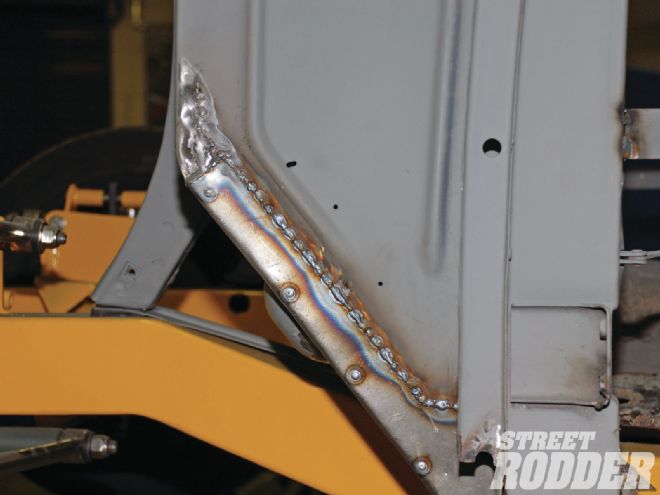
The final welding and grinding make the lower doorjamb as good as new and ready for the DC connection.
The new rocker panels are two pieces; the inner rocker panel is basically a flat filler piece and then the formed outer rocker panel.
The Honest Charley Garage–built lower doorjamb and the DC rocker panel fit together perfectly.
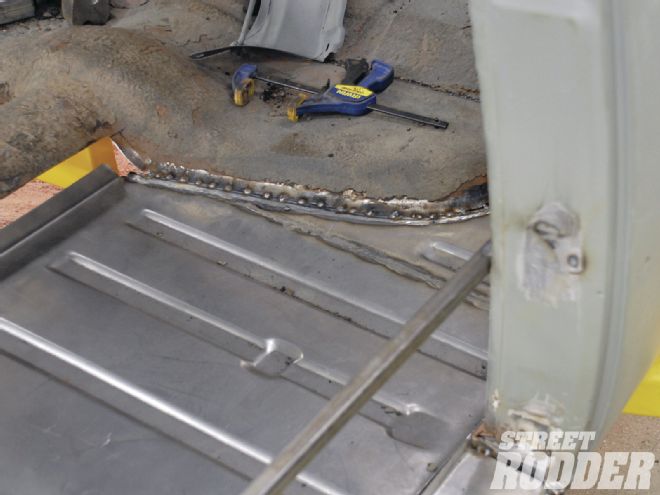
Moving to the rear a similar process secured the second body mount from the rocker panel to the body mount on the frame. Certain that everything was properly located, the mounts, rocker panels, and inner rocker panels received the finished welding in preparation for floor installation.
On our extensively rusted ’51 the entire front floor was replaced, once again DC repair panels saved the team at Honest Charley Garage a lot of time. The floors were fitted inside the car and tack-welded in place. The floors and transmission tunnel are not exact replicas of the original, rather they are designed to be cut and fit to each application. For that reason we used portions of the front flooring, leaving any good original metal in place. In the area over the rear suspension Scott and Marter fabricated their own floor panel, providing some extra suspension clearance in the process.
The trunk floor was also repaired using DC trunk panels. Since the spare tirewell was eliminated on our car, that area was filled with a flat panel while the remainder of the trunk was repaired using DC panels trimmed to fit our rusted areas.
The new rockers and floors made the car structurally sound again, while much of this work will not show on the finished product, it is very important that it be done correctly. The final portion of the rust repair lies in the outer skin.
As it turns out we used every single piece that DC offers for the ’49-51 Ford, and that includes the two-piece lower quarter-panels. These repair panels proved to be a lifesaver for our shoebox, and while the team at Honest Charley garage could have fabricated these panels by hand, the labor saving from just the quarter-panels alone was immense.
Of course if you see external rust you can bet there is internal rust behind the panel. Sure enough behind those rusted quarter-panels we found rusted wheelhouses. Panels were fabricated and welded in place on the wheelhouses before the lower quarter-panels were fitted and welded in place. One of the biggest challenges in serious rust repair is actually locating the panels when many of the mounting points have been eaten away. Much time was spent carefully measuring to be sure the panels were in the proper location.
After the rust was repaired Marter and Scott teamed up and removed the accent spear from the quarter-panel. Finally they were out of the rust and into the fun part of modifying the car. It was a lot of work, but in the end we have the satisfaction of saving another vintage car and the team at Honest Charley Garage has the pleasure of looking at a job well done.
The door was mounted and all gaps were checked prior to welding the rocker panel in place. This is important, as once the rocker is welded in place, changing the door opening is impossible.
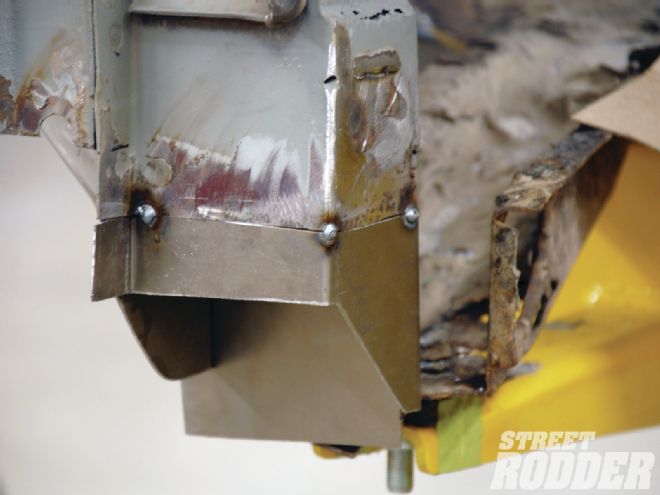
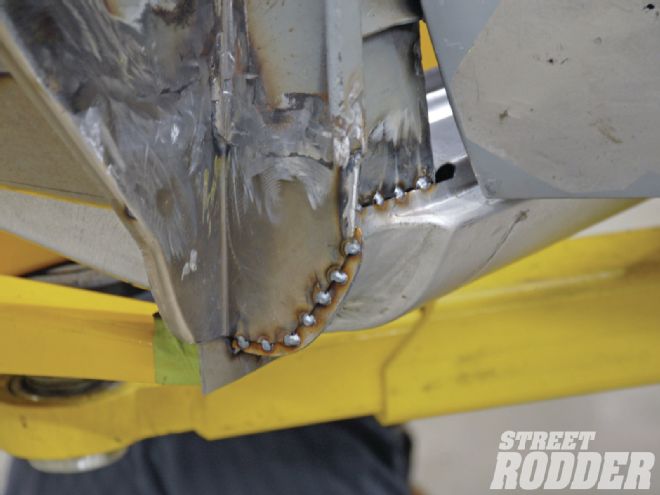
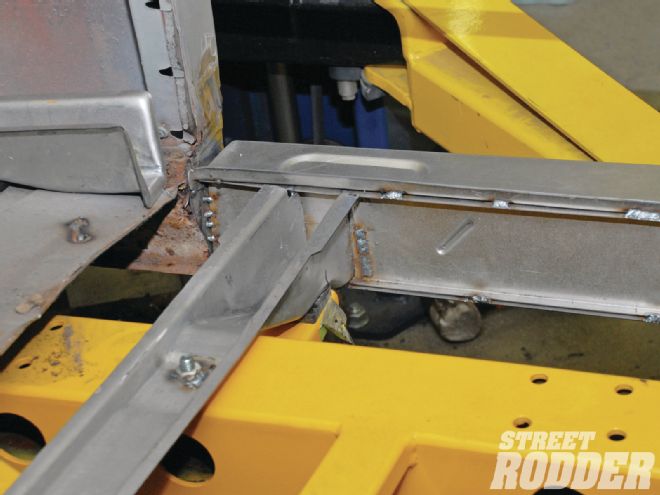
Next up is installing the new DC body mounts. These channel-shaped “outriggers” attach to the inner rocker panel. A small flange was hammered onto the end for a mounting surface.
After lining the body mount up with the body mount holes in the Fatman Fabrications chassis, it was welded to the inner rocker panel.
Moving to the rear, the same process was used to mount the second body mount at the base of the B-pillar. A nut was welded inside the body mount to make bolting the body in place a bit easier.
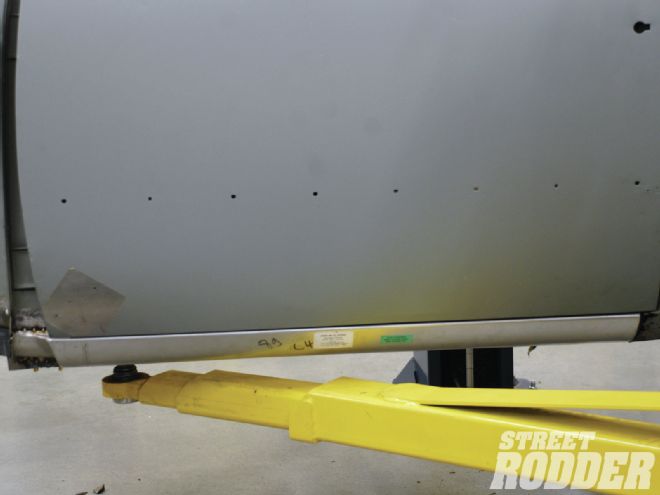
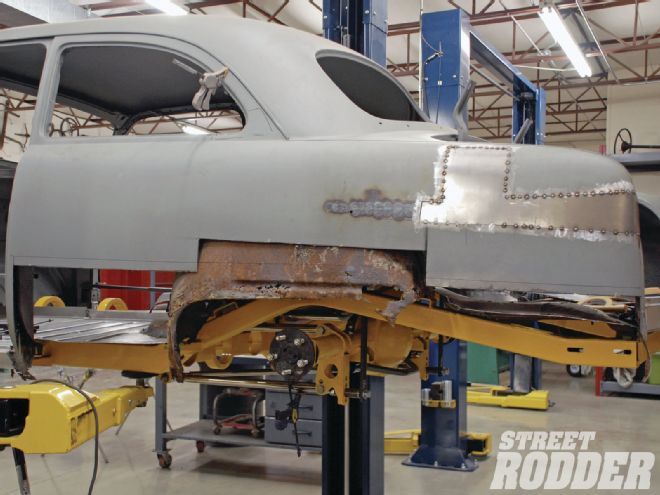
With the inner and outer rocker panels in place, along with the two new body mounts and reconstructed cowl, our ’51 Ford is becoming structurally sound once more.
After the rockers are in place, the new floors go in quickly. The large flange on the inboard side mates to the transmission tunnel.
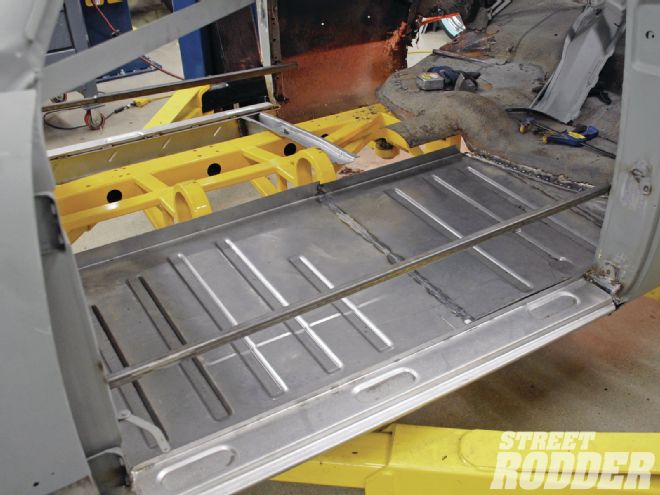
The rear portion of the floorboard was solid, so the rusted floor was trimmed to meet the raised portion of the rear floor. The car is being built as a “business sedan” so no rear seat is planned.
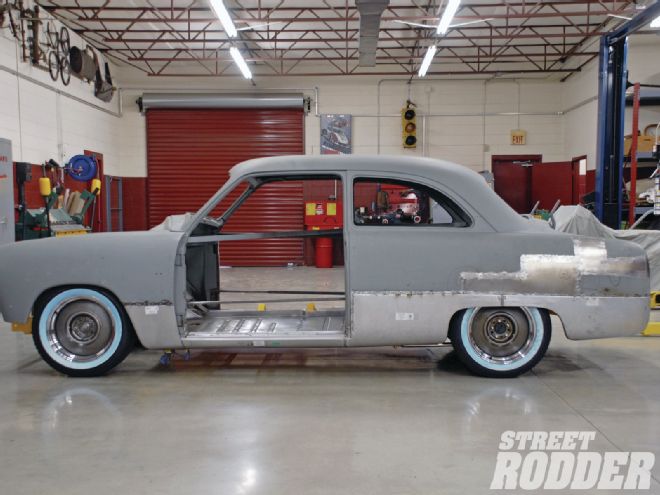
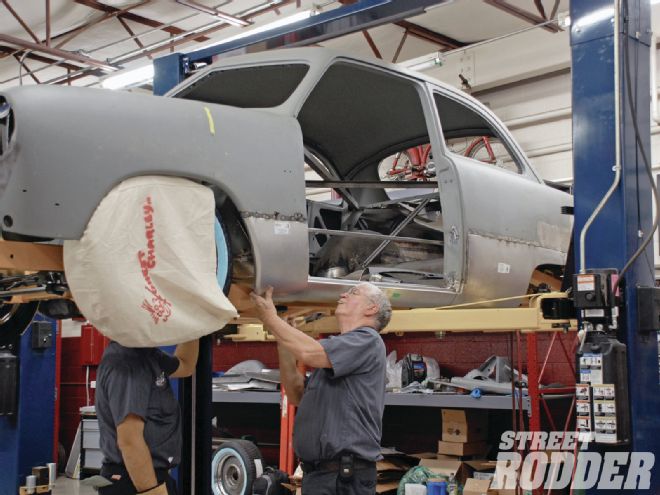
A quick test-fit of the DC lower quarter-panels show they will fill the void left by rust. But first we decided to eliminate the gas filler door and the accent spear on the quarter-panel.
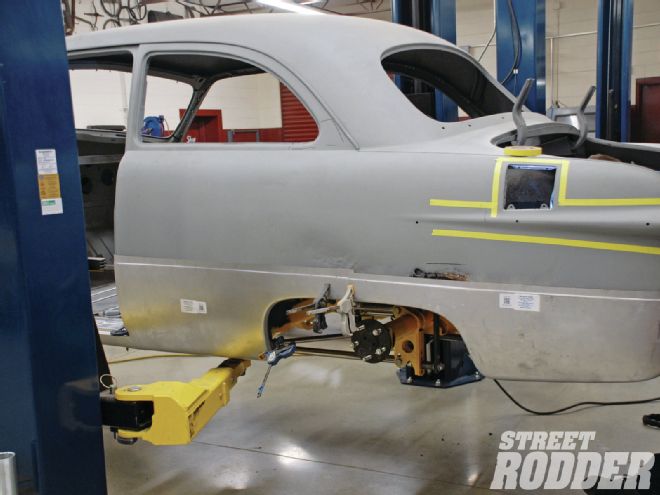
A cutoff wheel follows the taped line to remove the unwanted metal; this modification will change the look of the quarter-panel dramatically.
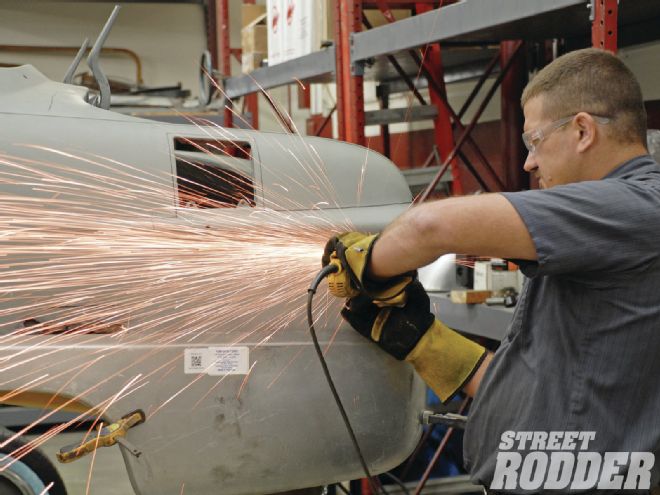
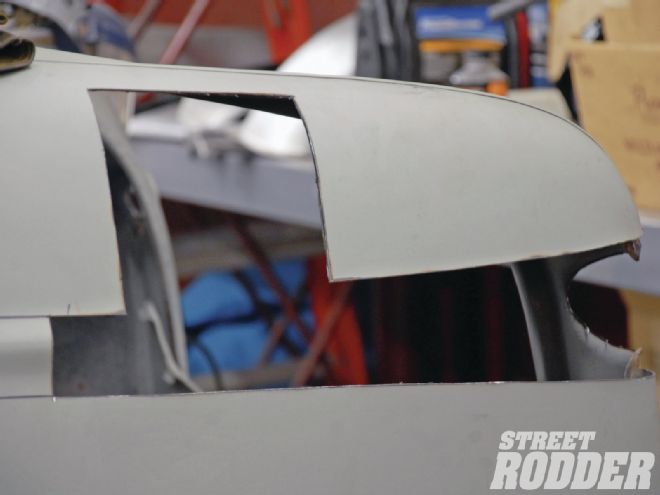
The irregular shape of the opening will make the panel-forming process a little tricky, but Honest Charley Garage is up to the task.
After the panel has been mildly rolled, Scott takes the panel on the English wheel to form the compound bends required to match the quarter-panel.
After several rounds of test-fit, roll a bit more, test-fit again, the panel is trimmed and tack-welded in place.
When we cut all of the rust off the lower quarter-panels there was no lower quarter-panel left. And yes, the wheelhouses had rusted through too.
The rear of the wheel tub was repaired and a portion of the DC rear floor was cut to fit the rusty corner on our ’51 Ford. Once again, all of these pieces interconnect for strength.
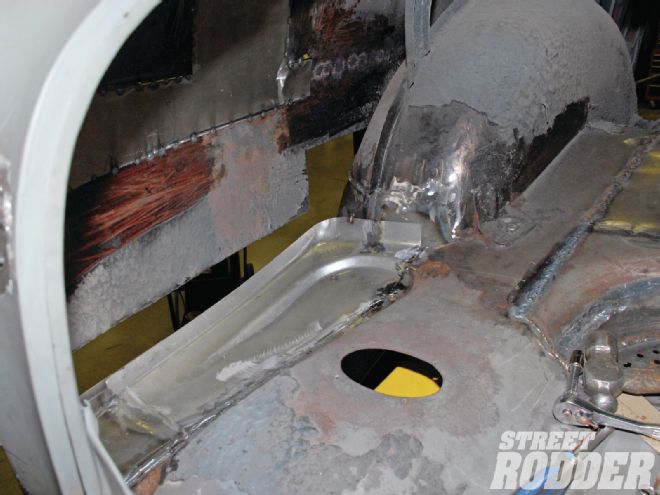
A new panel was formed and welded in place to restore the rusted wheelhouse. This panel is tied into the floor too.
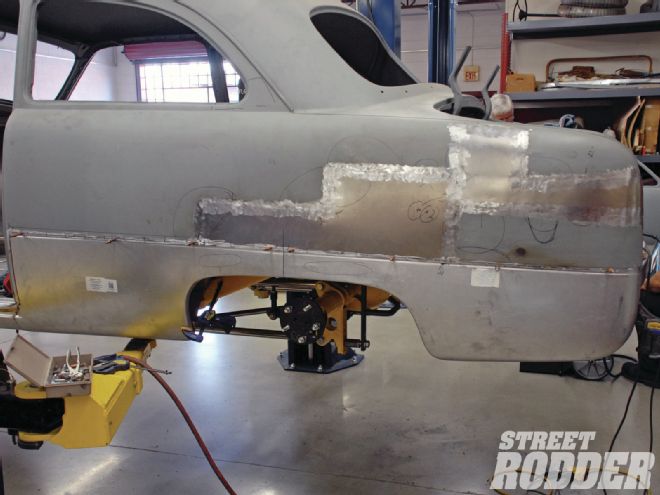
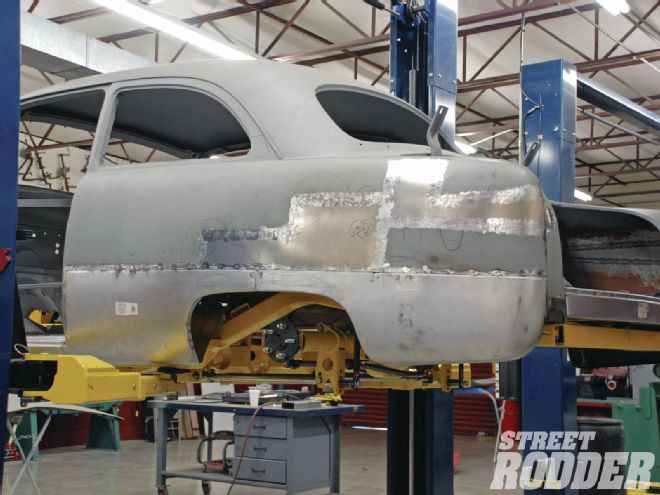
Our rust had crept up well above the lower quarter-panels so a larger patch panel was formed to fill the bad area.
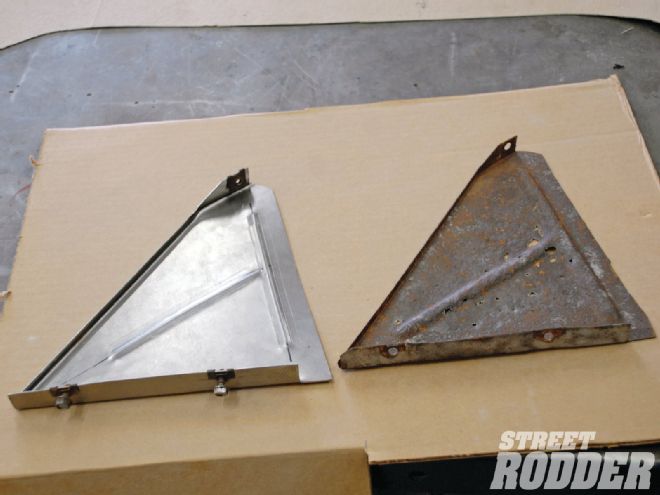
The braces behind the rear wheel had rusted through so Honest Charley Garage formed a new brace. This completes the quarter-panel repair.
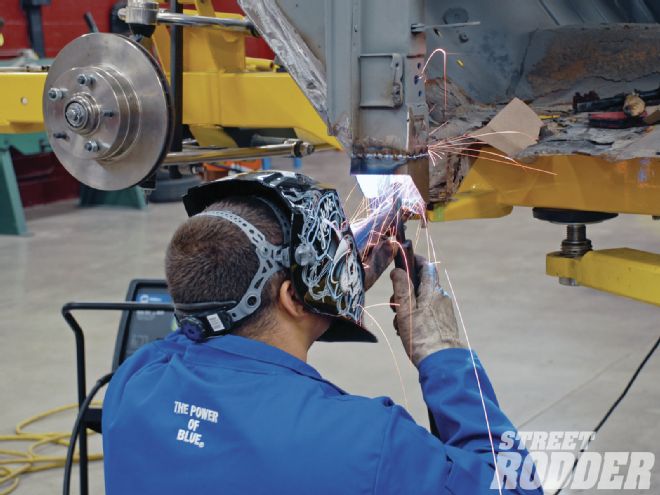
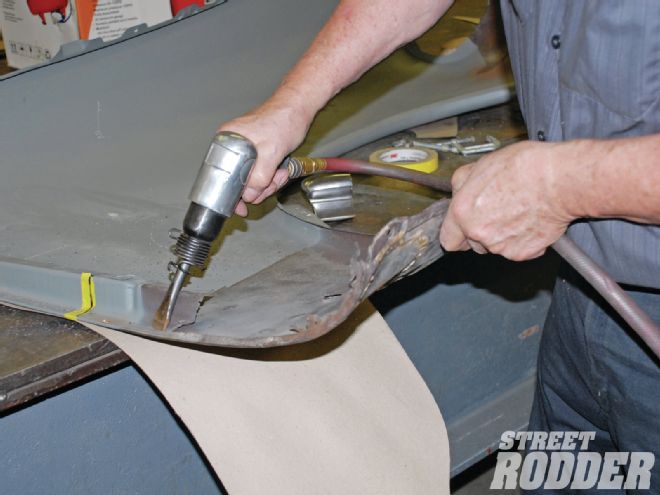
Our Eastwood air chisel made quick work of opening up the fender flange to allow removal of the rusted inner brace.
The new DC inner fender brace is trimmed to the point where we found good metal on our existing fender.

A test-fit of the fender with the patch panel tack-welded in place allows Scott to check the lower contour with the new rocker panels. The fit was excellent.
The DC quarter-panels are now firmly tacked in place and the accent lines are off the quarter-panels. Now all that is left is a couple of hours with our Miller TIG welder.
And here it is, a rust-free ’51 Ford, thanks to Honest Charley Garage and Dennis Carpenter Ford Restoration Parts. Now we can begin the modification process.
Watch the guys over at Honest Charley Garage work their magic on the rusty floorboards of the 2013 AMSOIL/STREET RODDER Road Tour Car.
Watch the Miller Dynasty 200 MIG welder in action as the Honest Charley Garage team creates new rear quarter-panels for the '51 Ford.
See more videos detailing the build of our 2013 AMSOIL/STREET RODDER Road Tour Car here.