 1.
1.
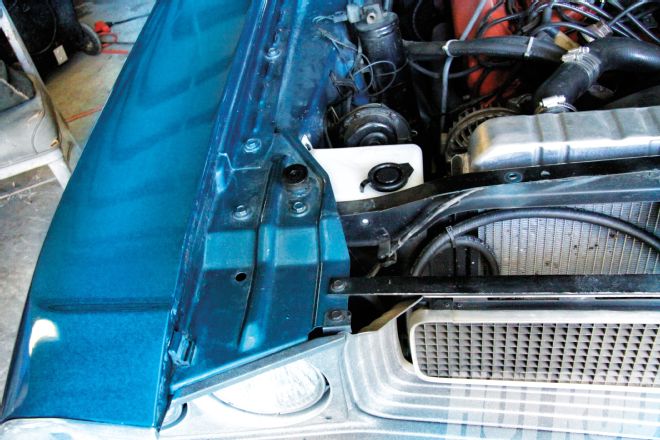
01] Our '70 Challenger never had pins from the factory, but the holes were already in the inner fenders. Most muscle cars that were offered with a factory pin option either have the holes or divots, so there’s no need to guess at location. The following techniques are good practice not just for hoodpins but also for any drilling of painted or finished surfaces.
02] First, loosely install the pin at slightly below the final height and dab a small spot of grease at the tip.
03] Gently lower the hood to leave a witness mark on the inner surface, marking the starting point for your pilot hole.
04] Blue painters tape applied to the painted surface before drilling helps prevent chips and scratches. Start each hole by making a divot with a spring-loaded center punch, and then follow it by drilling a small hole with an 1⁄8-inch bit. Use that to center a larger drill or stepped bit to enlarge the hole to just slightly bigger than the diameter of your hoodpin.
05] Clean away the chips with a chamfer tool or an oversized drill bit turned by hand. Reapply blue tape and mark the area around the pin for the cover bolts.
06] Remove the tape and do a final check for burrs and high spots on both the top and bottom surfaces of the hood. Install the cover and locking pins.
07] Set the pins to a final installed height. Use a small screwdriver through the pinhole to hold the shaft while tightening the nut at the base.
 8.
8.
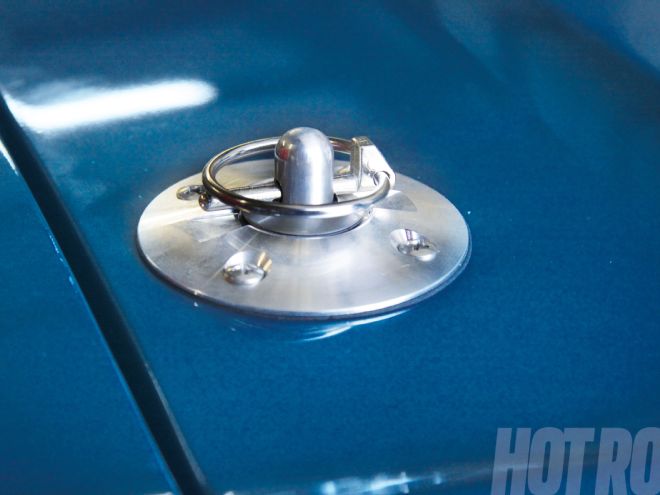
08] If you've ever had a hood come up at speed, you’ll appreciate the added insurance a set of hoodpins can bring to a drag run or freeway drive. Plus, they look cool. These are the basic-style billet aluminum pins from Metrom Performance. They are available natural, brushed, polished, or black, starting at $99.