Many facets of hot rodding are surrounded by style and creativity. Just because something isn’t usually found on a car doesn’t mean it might not look bitchin’ if it can be worked into the mix. It’s this type of inventiveness that adds excitement and many times a newfound classic look if worked into the design phase of your project.
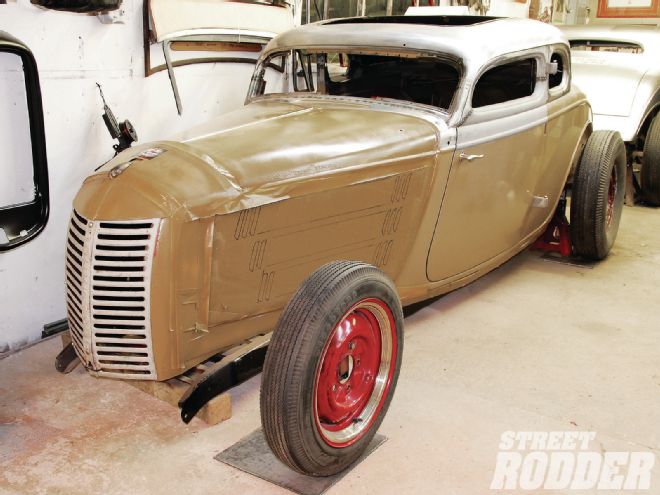
On a recent visit to the Rolling Bones Hot Rod Shop in Greenfield Center, New York, we came across Dick DeLuna’s ’34 Ford coupe in mock-up form, sporting a truly unique front nose to see if the formula might work. To give the car a signature style all its own the team came up with a rarely seen vintage Cockshutt tractor nose and were preparing to adapt it to the frontend of the coupe. With all of the different models of tractors produced over countless decades there are plenty of unique designs available for adaptation into hot rod projects. Let’s see just what it takes to bring this distinctiveness into the rodding world.
Once the decision was made to incorporate the nose into the project, the team prepared the coupe for mock-up to see what types of revisions would be required to make it all fit together. Incorporating the stock hood, cardboard hood sides were added and the nose was set in place. A number of measurements were taken and close attention was paid to placement and how it would be mounted to the frame. It was determined that 13-1/2 inches would need to be removed from the rear section of the nose. While wearing safety glasses, a cutoff wheel was used to separate the nose and a flat file was then used to deburr the surface areas. The nose was then media blasted to remove any old paint as well as expose any potential issues in need of attention (there were none).
 The vintage Cockshutt tractor nose was mocked into place on the ’34 Ford coupe to see if its proportions would complement the lines of the car.
Team member Ken Schmidt then created a cardboard template of the front of the hood and sides of the coupe to assist in identifying the adjustments needed to flawlessly incorporate the nose section. Seeing the nose sides were extremely flat in their original design, this would require both sides be re-contoured to make the proportions work.
 To fit the car, it was determined 13-1/2 inches would need to be removed from the rear of the nose. The front section was then media blasted.
Schmidt proceeded by first disassembling the nose by removing the grille sections and grille center nameplate. He followed by removing the nose side panels where they met the crown by using a cutoff wheel. With the nose completely disassembled the first step was to rework the grille sections and center nameplate seeing as they had suffered some abuse over the years in the agricultural world.
To straighten out the grille bars, a sandbag was used as a base while a number of homespun dollies were worked through a body hammer to remove any minor dents and smooth out the individual bars. It’s a good idea to take your time on this and gradually rework the metal. Schmidt continued to use the sandbag with the nameplate section, only this time he worked with a pick hammer on the inside of the letters to make them crisp once again. To regain the original exterior contours a small dolly was anchored in a bench vise and a body hammer was carefully used to rework the original shape to perfection. So the grille sections could be easily mounted to the nameplate centersection, two strips of 1/8-inch steel plate were first mildly contoured to mirror the centersection. The plates were then clamped together and marked for five holes drilled with a 1/4-inch bit using a drill press. Threaded studs were then MIG welded to one plate using a Miller Electric Mfg. Co. Millermatic 35 and final welded to the rear of the center nameplate. A small disc grinder topped with a 40-grit disc was used to smooth everything out.
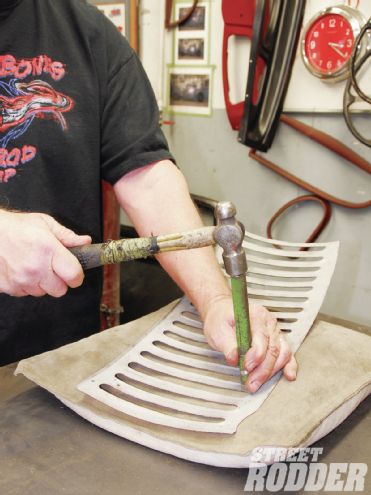 The grille sections were beaten up from years of abuse, requiring a sandbag with a number of dollies and a body hammer to restore them bar by bar.
To reestablish the proportions of the nose sides for a smooth transition to the hood sides Schmidt began the process by adding a graceful contour to each panel using a Mittler Bros. planishing hammer. It’s a good idea to wear ear protection during this step as the process is quite loud. Moving the panel slowly from left to right and up and down, the section was gradually worked into its new shape.
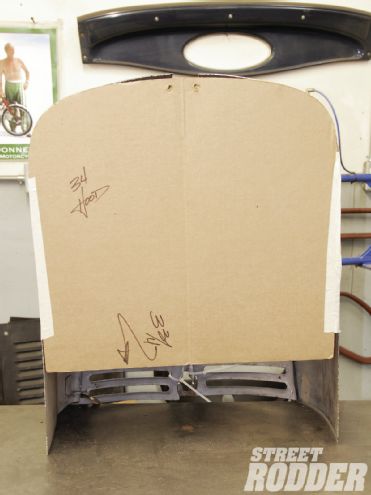 Once the nose was trimmed, a cardboard template of the ’34 Ford hood line was taped on the back to evaluate the proportion adjustments needed.
Schmidt followed by using a sandbag and body hammer for some minor adjustments to each panel. He then proceeded with a dolly and body hammer to reset the contour of the nose crown and prepare it for the newly contoured sides. Satisfied with the lines, the sides were clamped to the crown and TIG-welded using a Lincoln Electric Precision TIG 225 unit. Be sure to cool your welds as you proceed with an air gun to dissipate the heat and avoid panel warping. To stabilize the nose from flexing a temporary section of steel strapping was MIG-tacked to the bottom rear of the side panels. Schmidt then ground the TIG welds smooth using a disc grinder and 40-grit disc, followed by a combination flat and half-round file for final deburring.
He then returned to the planishing hammer to make a few small contour adjustments. The grille sides were then mocked in place to illustrate the progress made on the nose. To add some devilish good looks to the upper and lower grille corners small sections of flat steel stock were TIG-welded in each area to act as a base. Schmidt used standard welding rod to establish a neat bead line and carefully formed the upper and lower curves using a section of bar stock anchored in a bench vise. Once satisfied with the curves, the rod was clamped and TIG-welded in place, remember to cool your welds as you go. The welds were then ground smooth using a small grinder capped with a 40-grit disc and hand finished with a combination file. For added strength to the inside of the nose, 1/2-inch solid steel rod and 1/2-inch square steel tube was TIG-welded in place, making the unit rock solid.
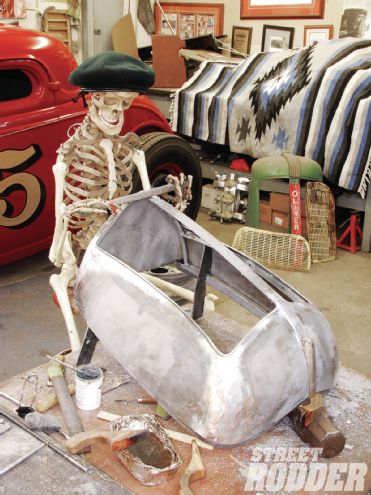
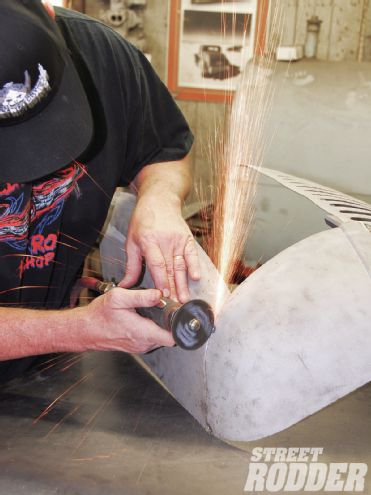 Since the nose would require reshaping, it was cut apart in sections with a cutoff wheel to allow it to be reworked. Wear safety glasses.
In order to add the final allure to the nose it was necessary to fabricate a bottom section to tie everything together. Starting with cardboard a simple template was fashioned from which team member John Cintula cut a piece of fir wood to form a buck. Using a combination of grinders and sanding blocks topped with 40-grit paper he was able to create a final shape with perfect contours to accent the nose. A second cardboard template was created approximately 2 inches larger in diameter than the buck. It was then traced onto 18-gauge sheet steel and cut out with a plasma cutter. Schmidt then screwed the buck to the steel and fastened the unit to a workbench where he made the first of four pie cuts per side in order to wrap the steel across the buck’s edges. With a body hammer and dolly he then worked the shape to perfection. Note this step takes time to finesse and once completed the section was TIG-welded and ground smooth using a grinder topped with a 40-grit disc followed by a combination file. The completed section was then mocked in place and TIG welded to the bottom of the nose.
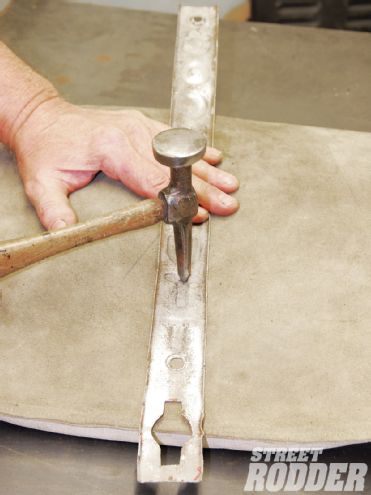 A number of dents to the grille center nameplate required attention artfully using a pick on the inner panel and sandbag to even out the letters.
Finally bodywork was completed in lead and massaged to perfection. The finished nose looked downright wicked and added a unique signature to the coupe, echoing its post-war styling cues.
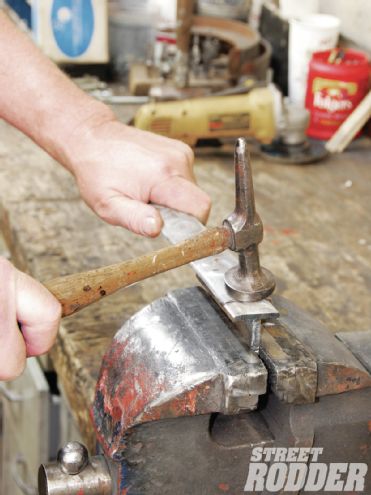 With a dolly secured in a vise, a body hammer was used to gradually remove any imperfections from the outer nameplate surface.
Rolling Bones Hot Rod Shop
(518) 893-2646
www.rollingboneshotrodshop.com