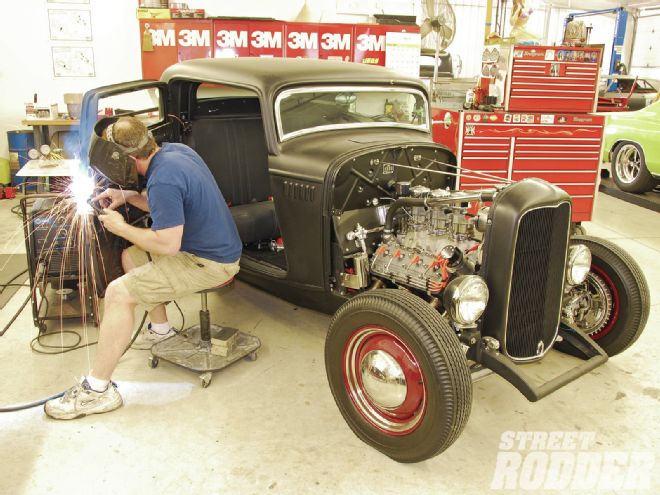

Automotive designers throughout the decades have always infused top-notch engineering into their offerings, focusing on everything from performance to safety. While many of their elements age timelessly as the years roll by, others could benefit from a bit of refreshment. When planning mechanical or structural enhancements to your hot rod one of the many logical updates should focus on replacing tired old door latches with fresh-designed units for added protection.
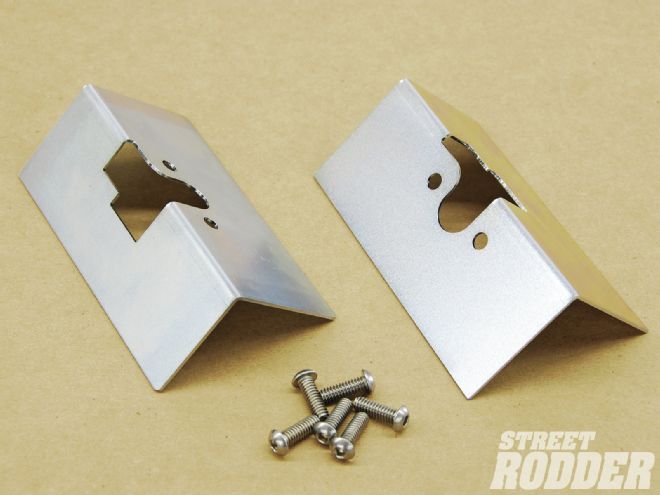
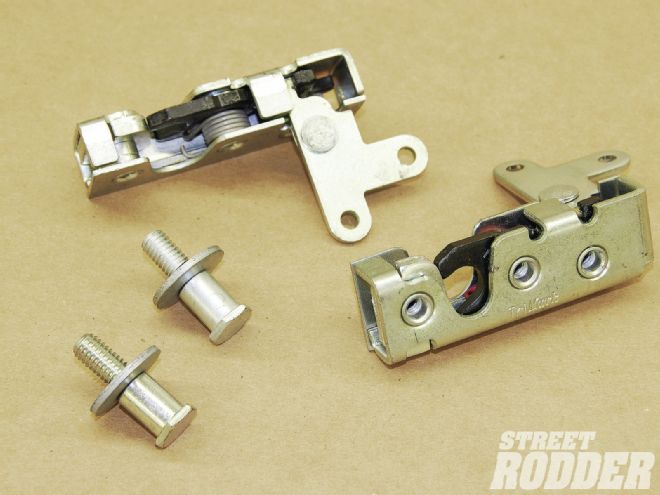 Watson’s StreetWorks offers an upgrade for the original latches in your hot rod with their medium-sized Gator-Jaw latch kit (PN L24) and heavy gauge steel weld-in mounting plates (PN L24M).
On a recent visit to The Hot Rod Garage in Denton, Maryland, we came across John Wright’s original steel Ford Deuce coupe, which was in for door latch updates. Team leader Dean Alexander has handled plenty of these updates over the years and he wasted no time in contacting Watson’s StreetWorks in Bozrah, Connecticut, for a pair of their medium-sized Gator-Jaw latches and heavy gauge steel weld-in mounting plates to get the job started. The new single rotor “trip” latches meet all Federal Vehicle Safety Standards and are rated for 750 pounds of holding force. They also offer an “L”-shaped release lever for quick release action from either the down or horizontal position. Additionally, Alexander contacted Carolina Custom Hot Rod Parts in Clinton, North Carolina, for their E-Z inside and E-Z outside door handle install kits (available for many applications).
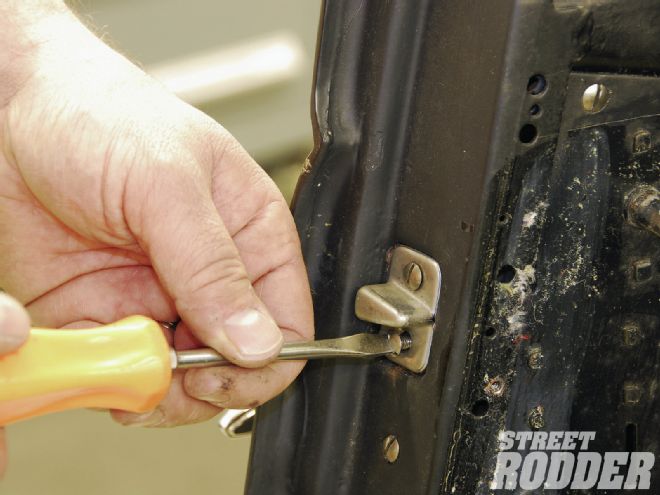
Before getting started, Alexander emphasized it’s imperative that the doors and hinges are rock-solid and properly hung prior to disassembly to ensure that reassembly will go smoothly. To prepare the door for the pending work, the first order of business was to remove the inside window garnish molding, door handles, and door panel using standard tools. This fully exposed the inner skin, door, and latch mechanisms. Next, using a slotted screwdriver, the upper and lower dovetails were removed and retained for reinstallation. A slick tip from Alexander was to create an inside door template from clear sheet plastic to locate the alignment holes for the interior door handle mechanism to ensure it’s retained in its original location and avoid any modification upon reassembly. The final unit removed was the door latch mechanism using a slotted screwdriver.
 Watson’s StreetWorks offers an upgrade for the original latches in your hot rod with their medium-sized Gator-Jaw latch kit (PN L24) and heavy gauge steel weld-in mounting plates (PN L24M).
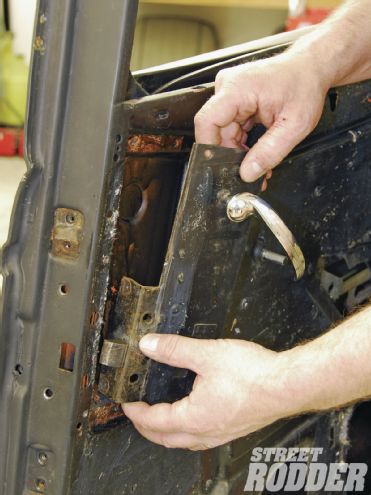
To begin the installation of the new steel latch mounting plates, measurements were taken to keep the alignment of the new latch consistent with the original striker. Using a silver marker (for visibility), the center point of the original door latch opening was marked. The new mounting plate was then held in place and marked at the latch center to mirror that of the original on the door.
With that completed there was an additional 7/8-inch toward the door’s outer edge to be trimmed. Alexander used a metal shear to complete the cut and then test-fitted the unit in place to confirm a proper fit. Using a needle-nose Vise-Grip to hold the mounting plate in place, a scribe was used to outline the trimming needed to the door to create a flush-fit. A small air-driven reciprocating saw was then used to complete the incision followed by a small circular grinder capped with an 80-grit disc to deburr the area. It’s always a good idea to wear eye protection during these steps.
 With the window garnish molding and inner door panel removed, Hot Rod Garage team leader Dean Alexander followed with the removal of upper and lower dovetails (which will be reinstalled upon completion).
Once the fitment of the latch mounting plate was dialed in, it was time to secure the new Gator-Jaw latch mechanism to the latch mounting plate with button-head socket screws. The unit was then clamped in place using a needle-nose Vise-Grip to determine the trimming needed to the inner doorskin for a flush fit. With a scribe, Alexander outlined the initial cuts required to properly fit the unit to the inner door. This step required a bit of time since once the initial opening was completed it needed be finessed to allow smooth operation of the mechanism.
To work in conjunction with the door latch unit, a new outer door handle mechanism was mocked into place to fit behind the door latch unit. A black marker was used to illustrate the trimming required to the inner window support channel bracing. Note that there was no need to remove the door glass for this procedure. Alexander carefully used a small air-driven reciprocating saw to remove the marked area while noting the close proximity to the outer doorskin so as not to damage it. He then proceeded with a flat file to deburr the steel. The outer door handle was then installed and taped (from outside the door) in place determining that 1-1/2 inches needed to be trimmed from the inner shaft, which was completed using a band saw.
 A slotted screwdriver was then used to remove the entire door latch mechanism.
The final mounting of the outer door handle mechanism required the fabrication of a small mounting plate fashioned from 16-gauge steel with a gradual step to allow for its mounting to the inner window support channel bracing. Alexander used a cardboard template to determine the size of the brace and cut the unit out using a bandsaw. Once deburred, it was fitted and secured in place. For the Gator-Jaw latch to be actuated by the external door handle mechanism he fabricated a small arm from 10-gauge steel and TIG welded it to the latch base creating a rock-solid unit able to take plenty of abuse.
With the fabrication completed, it was time to focus on final trimming the door latch mounting plate and making any minor last-minute adjustments to the inner doorskin area to ensure smooth operation of the new mechanisms. To install the new spring-loaded inner door handle mechanism, the sheet plastic template was taped back into place, locating the exact location for the new unit to be secured with Phillips head screws. Making everything operational, a universal cut-to-fit door handle linkage rod was trimmed to 4-1/2 inches and given a matching jog to fit the latch actuator mechanism. With each of the units in place (and door latch mounting plate secured by magnets) Alexander used his MIG welder to tack the latch-mounting place to the doorframe followed by the final MIG welding. The area was then ground smooth using a 3-inch grinder topped with a 50-grit disc for a seamless presentation. Nearing completion, the stock striker unit in the doorjamb was removed using a slotted screwdriver. To mount the new stainless steel striker in place, a filler piece created from a simple cardboard template and transferred to 16-gauge steel along with a 3/8-inch square nut capture also fashioned from 16-gauge steel. The striker filler panel was then taped in place and a 5/8-inch hole was marked in the exact spot for the striker to be located. Once drilled, the nut capture was MIG-welded in place from the rear and the filler piece was then MIG welded to the doorjamb. It was then ground smooth using a 3-inch grinder crowned with a 50-grit disc, for a factory-fresh look. To ensure your new latches will work smoothly and properly, it’s important to apply a good coating of spray lithium grease to the trigger mechanism-to-rotor contact surface using a Q-tip. The completed installation should perform flawlessly and give your hot rod years of added protection.
 Using clear sheet plastic, a template was created to locate the exact location of the interior door handle mechanism to ensure its exact placement to match the door panel upon reassembly with a new unit.