
Here's a secret: It only takes a few well-thought-out custom mods, tricks, and techniques to set your hot rod apart from the crowd. The factories have different priorities than you do when they build a car, leaving you with some panels that aren't as smooth as they could be and generally a lot more trim and badges than you want. If you own a welder and aren't afraid to use it, it's easier than you might think to turn your hot rod into a real smoothie. We recently had a '66 Chevelle straightened and painted by Tony and T.J. Grzelakowski at Advanced Body & Color in Imlay City, Michigan. In addition to top-level body restoration, the guys showed us four mini projects that will help the car stand out for the right reasons. We also turned to the pros at Jeff Lilly Restorations in San Antonio, Texas, for some tried-and-true techniques to make the bodywork and painting experience a better one.
 Among the techniques shown in this story is how to properly remove a dent.
Dent Removal
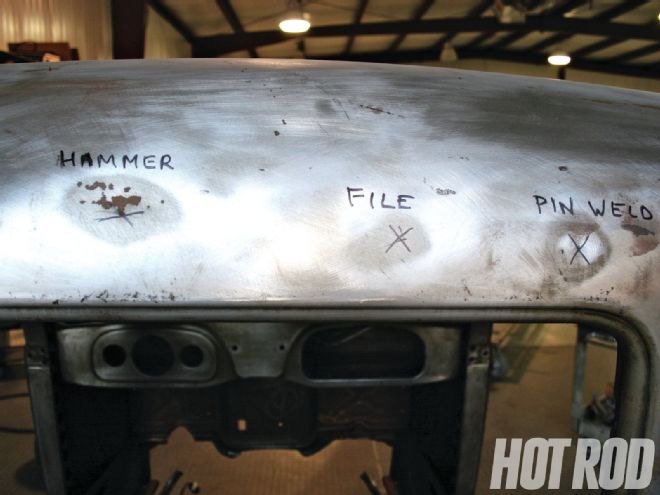 Here are three dents of different depths on this ’36 Ford Truck cab. We will show the top three methods to repair each one.
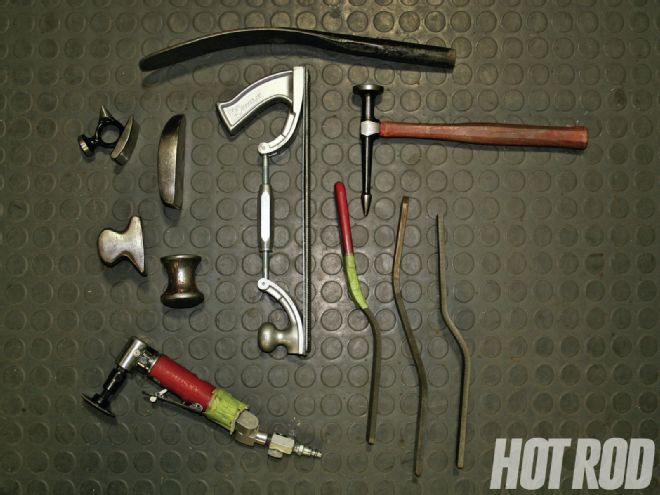 The basic tools for dent removal are hammers, dollies, slap files, an angle grinder, and a metal file. All can be had from the likes of Harbor Freight Tools or Eastwood for reasonable prices.
 A spiral pattern is the key to removing dents event when they are not perfectly round. Start on the outside and work the dolly (on the concave side) and hammer (on the convex side) in a circular motion until you meet in the center, thus gathering up the metal bit by bit.
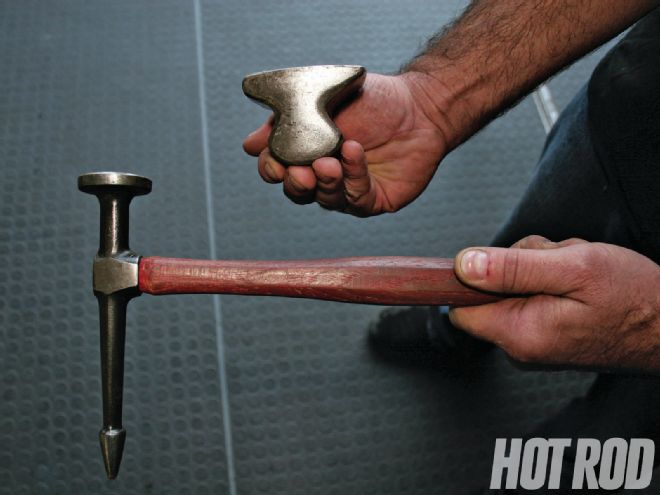 We’ll start with the deepest dent, the one marked “hammer” in the previous photo. In general, any dent that is 1⁄8 inch deep or more should be worked out to around 80 percent using a hammer with the correct face and a matching dolly. This particular hammer has a slight crown that keeps it from making contact on the outside edge of the dent, thus providing a smoother finish. As seen, the dolly has the same slight crown.
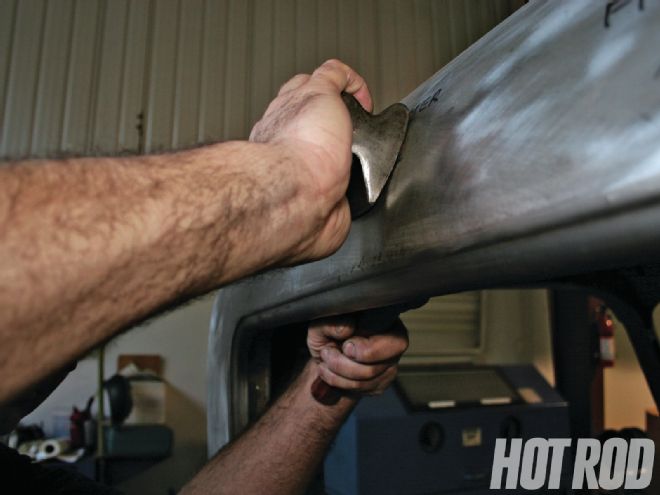 Make a nice swing with the hammer and make even contact with the panel. How you hold the dolly is important. Just 1⁄8 to 1⁄4 inch inside the dent, away from where the hammer strikes on the outside of the dent is best. This will allow easy dent removal without having to strike the panel so hard. In fact, a gentle, bouncing hammer swing is better. When the dent is about 80 percent removed, move to the slap-file method.
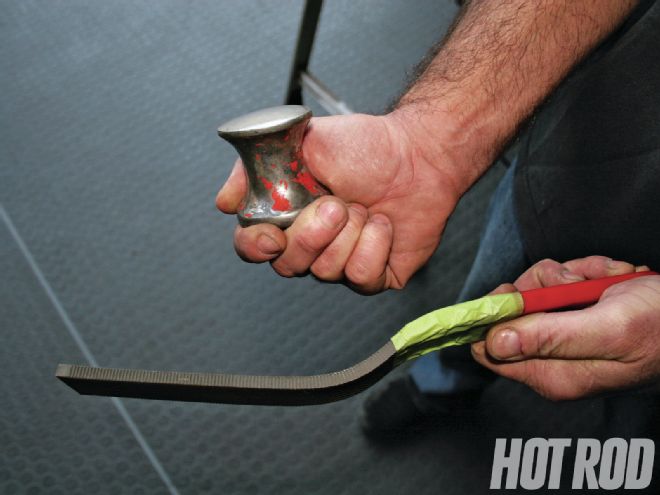 This dolly is smaller than what we previously used. It has an hourglass configuration that allows you to hold it with your fingers and get closer to the panel. This also shows a slap file, which could have finished the first dent to completion.
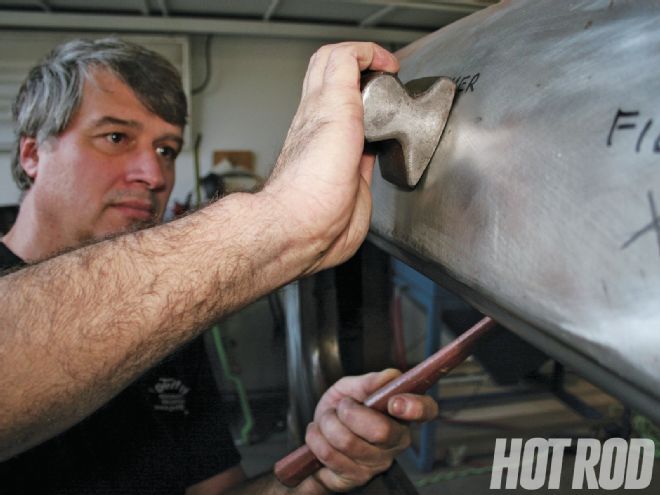
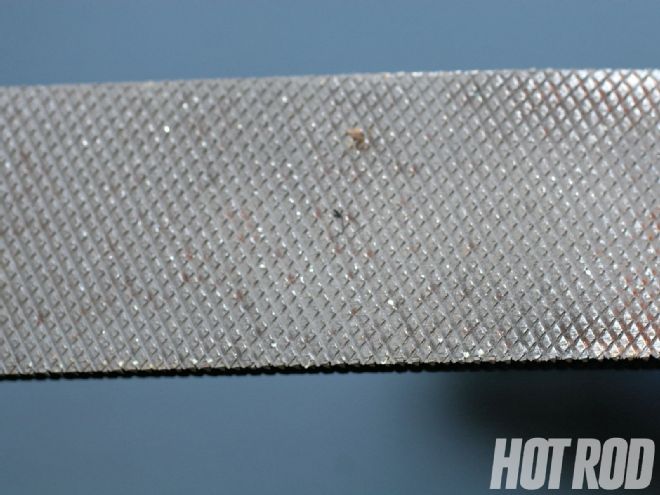 These are a slap file’s serrated teeth. Using a slap file for dent repair is the reverse of the hammer-and-dolly method. You still use the spiral technique, but instead of pounding out the dent the opposite way it was put in, you slap the panel the same way the dent was put into the panel. The dolly is placed on the backside with just a little force on the outer edge of the dent, and the slap file is used to hit the panel directly on the other side of the dolly. The file teeth allow the metal being pushed from the dolly to work itself into the teeth, allowing the dent to come back to the surface.
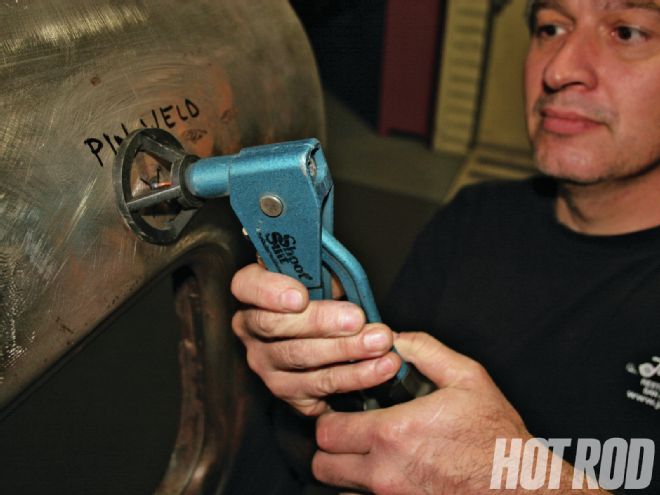
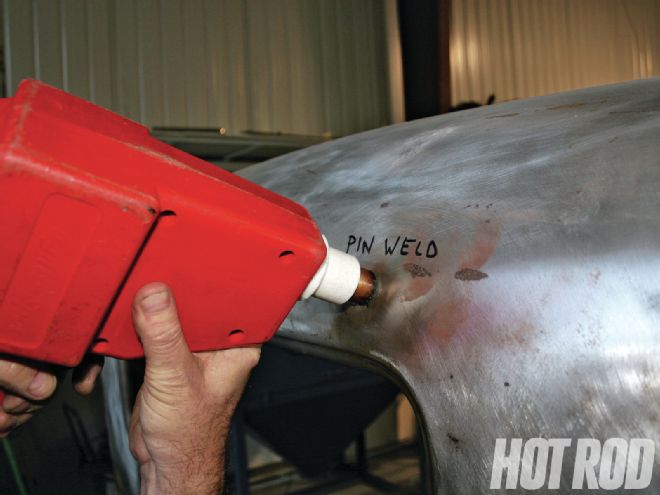 A pin-spot welder is also effective at removing dents. The pins come in different sizes, and most of the tools are calibrated to weld the pin to the metal without burning. Stick the pin in the center of the dent and pull the trigger.
 A Ding Near Perfect tool is very similar to a rivet gun with a circular basket on the end. It grabs the pin and pulls the dent right out.
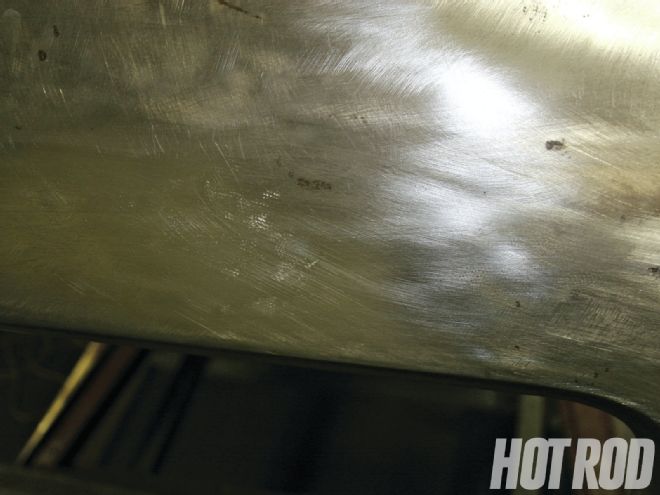
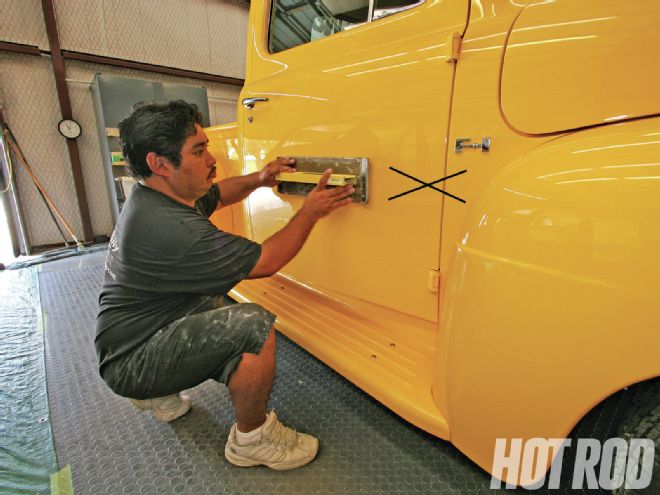
 When the dent is out, grind the pin-weld flat and then run a metal file over it. This file has eight teeth per inch. It works well and cuts metal nicely. Slide the file in an X pattern across the panel and it will shave a thin layer of metal off the top. This shows the highs and lows and gives you a gauge to where you are with the straightening process. If you need to slap some more, now is the time. When you think it’s good, hit it with 80-grit paper on a block and check for high and low spots.
 Here is the finished product. A few coats of high-build primer and it’s ready to paint.
Fill Trim Holes
 One of the easiest custom body mods is the removal of unwanted holes left when removing trim or components. If the hole is 3⁄8 inch or smaller, you can use the method shown here to fill it. Prep the hole by straightening the area with a hammer and dolly and remove the paint and primer. You’d use a copper plug as shown here, available from Eastwood or your local welding store, to weld against.
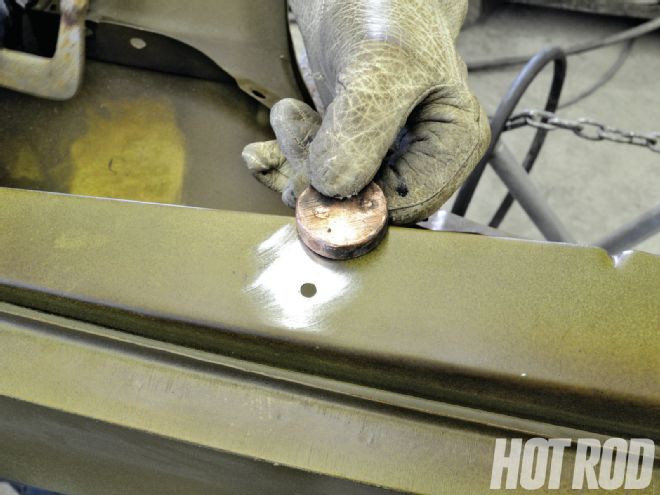
 Using a clamp or a welding glove, hold the copper plug against the backside of the panel. Set your MIG welder for the thickness of the metal you’re working on and weld in a circular motion from the outside of the hole to the middle. The MIG process won’t affect the copper.
 Use an abrasive disc to grind the excess metal away from the weld. Most of the time, you won’t need any body filler if the weld was clean; a couple of coats of high-build primer will fill in the minor imperfections and no one will ever know there was a hole there.
Flush Bumper Bolts
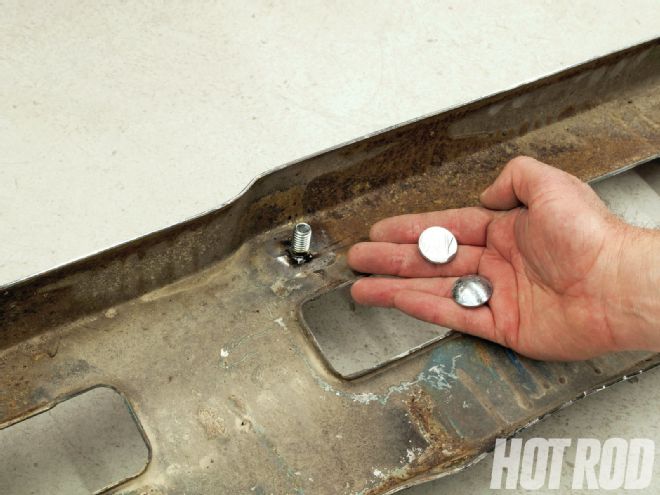 A very popular custom mod is to smooth the heads of bumper bolts so they don’t appear on the face of the bumper. Tony Grzelakowski at Advanced Body & Color walked us through the steps. Start with the correct bumper bolts and cut off the heads, leaving the square locating shoulder intact.
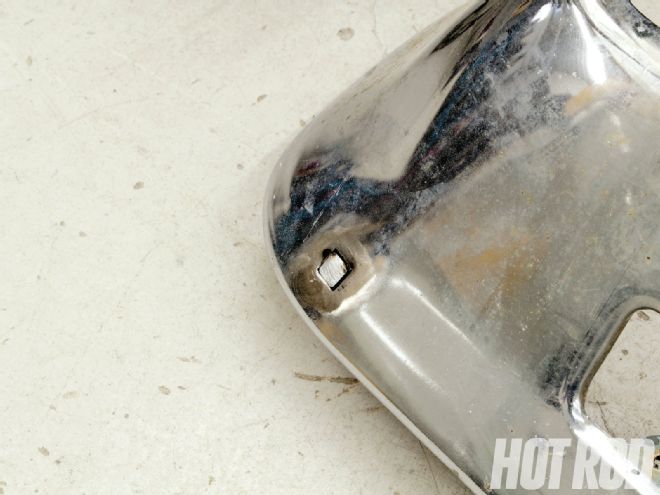 If the bumper is chromed, grind away the chrome finish near the hole. Tack-weld the bolt in place from the backside. Try to get the bolt as flush as possible with the outside of the bumper. Use the welder to fill the areas around the bolt. We used a TIG welder in this case for a cleaner weld, but a MIG will work.
With an abrasive disc, grind the welds and the end of the bolt down flush with the bumper surface. This one is smooth enough that it shouldn’t need much if any copper work before plating.
If the bumper is chromed, grind away the chrome finish near the hole. Tack-weld the bolt in place from the backside. Try to get the bolt as flush as possible with the outside of the bumper. Use the welder to fill the areas around the bolt. We used a TIG welder in this case for a cleaner weld, but a MIG will work.
With an abrasive disc, grind the welds and the end of the bolt down flush with the bumper surface. This one is smooth enough that it shouldn’t need much if any copper work before plating.
Smoothie Firewall
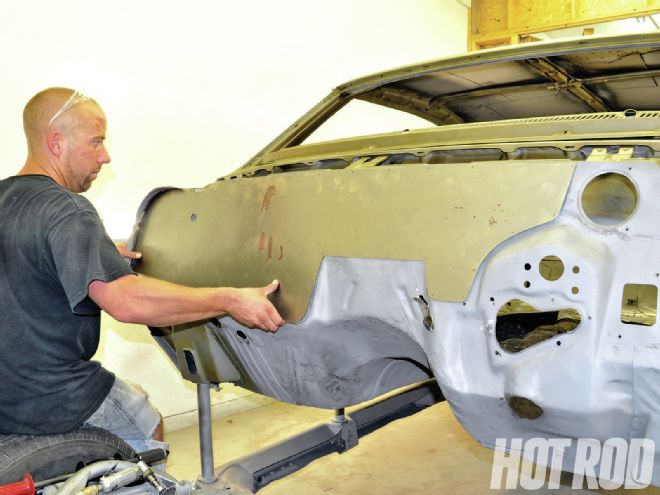 Smoothie Firewall Advanced Body & Color used an ABC Performance Firewall Smoothie panel for ’64 to ’72 GM A-bodies such as our Chevelle. These are U.S.-made, laser-cut panels that install over the factory firewall. Starting with the Firewall Smoothie panel makes the process that much easier; for other cars, you can make your own panel.
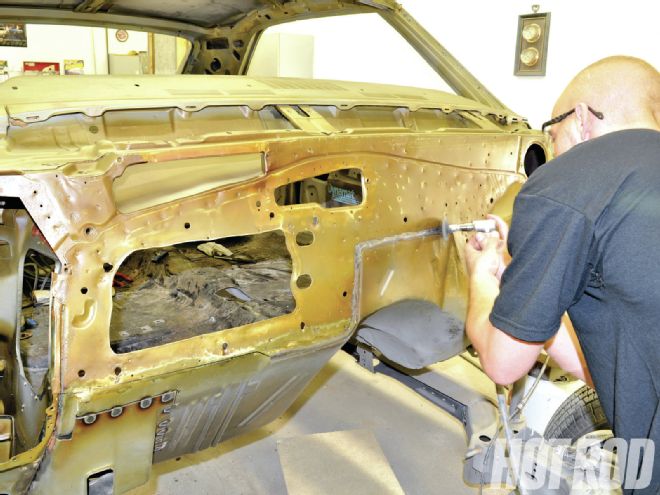
Grzelakowski traced the outline of the panel on the firewall. The raised lip around the heater box on the Chevelle needs to be trimmed or ground flat, and any high spots on the firewall need to be knocked down. You may have to do some hammer-and-dolly work to get the firewall to meet the new panel all the way around. An additional filler piece is available from ABC for ’64 to ’67 cars like this one that originally had air conditioning.
Smoothie Firewall Advanced Body & Color used an ABC Performance Firewall Smoothie panel for ’64 to ’72 GM A-bodies such as our Chevelle. These are U.S.-made, laser-cut panels that install over the factory firewall. Starting with the Firewall Smoothie panel makes the process that much easier; for other cars, you can make your own panel.
Grzelakowski traced the outline of the panel on the firewall. The raised lip around the heater box on the Chevelle needs to be trimmed or ground flat, and any high spots on the firewall need to be knocked down. You may have to do some hammer-and-dolly work to get the firewall to meet the new panel all the way around. An additional filler piece is available from ABC for ’64 to ’67 cars like this one that originally had air conditioning.
 We also used a Cleco kit from ABC Performance. The panel comes drilled around the circumference so it can be held in place with Clecos. This makes it easier to pull the new panel tight against the old one when you weld. Position the panel where you want it and use clamps to hold it in place. Drill a couple of the holes through the factory firewall and use the included tool to install the Cleco. Then drill the rest of the holes and install all of the Clecos.
 A fresh coat of PPG Self Etching Wash Primer was applied over the original firewall to protect it from corrosion. The Smoothie Firewall Panel was held in place with Clecos and traced yet again. With the panel removed, Grzelakowski sanded the primer around the panel edges to expose bare metal for welding. You’ll also need to prime the backside of the new panel and then clean several areas where you’ll tack-weld from the backside.
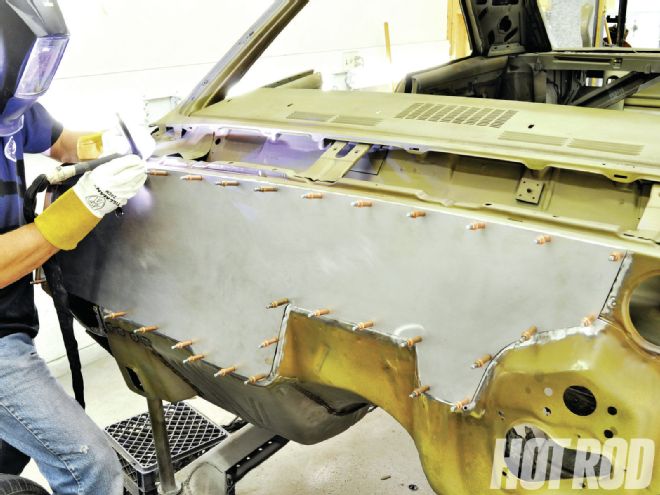 You can MIG-weld the new panel in place, but Tony used a TIG for a smaller bead and to put less heat in the panel. Whichever type of welder you use, weld a small section at a time to avoid warping the metal with too much heat. Start by placing a tack weld by each of the Clecos.
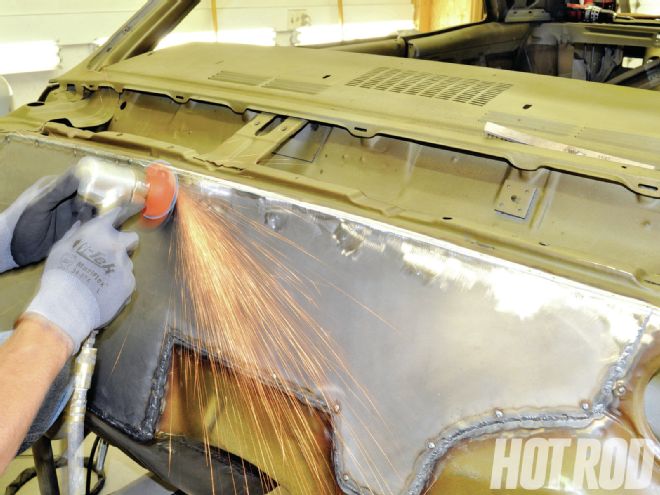 Once the edges of the panel are welded, you can remove the Clecos and fill the small holes with a MIG welder. The final bit of metalwork is grinding the welds smooth. You’ll probably need a thin layer of body filler in some spots.
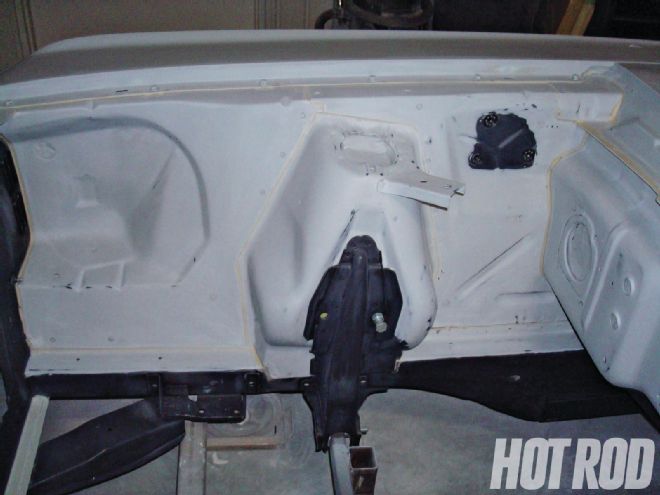
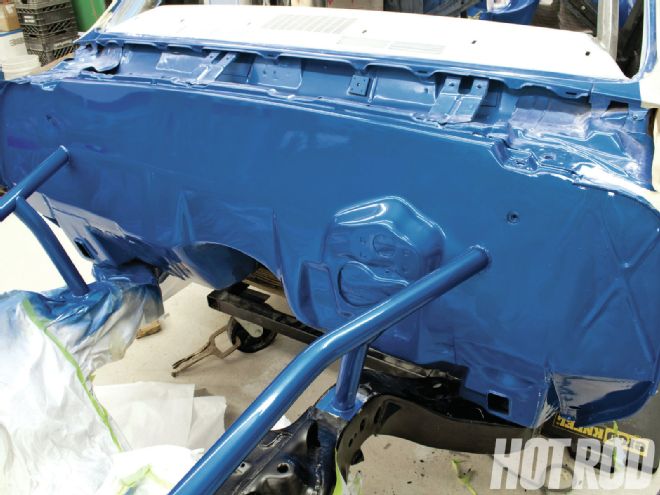 Here’s the finished product. Tony and T.J. installed the Ultimate version of the ABC Performance Smoothie Panel in this Chevelle, deleting the windshield wiper motor and extending it all the way to the driver side of the car. You can see how flat and smooth the finished firewall looks. After color-sanding and buffing, this will look every bit as good as the hood.
Seal The Seams
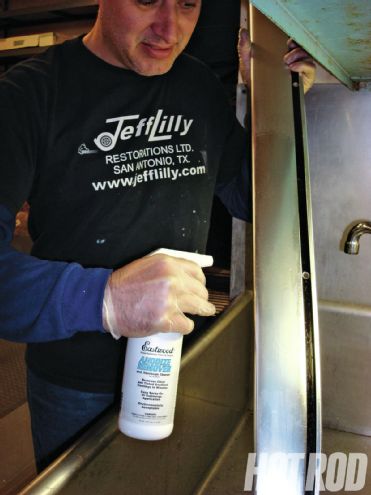
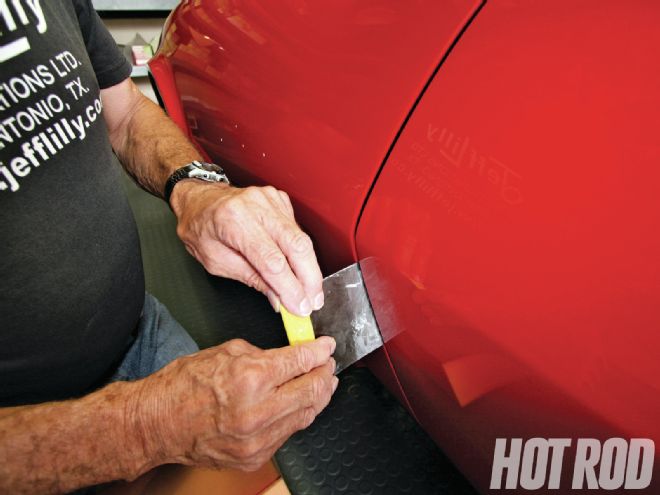
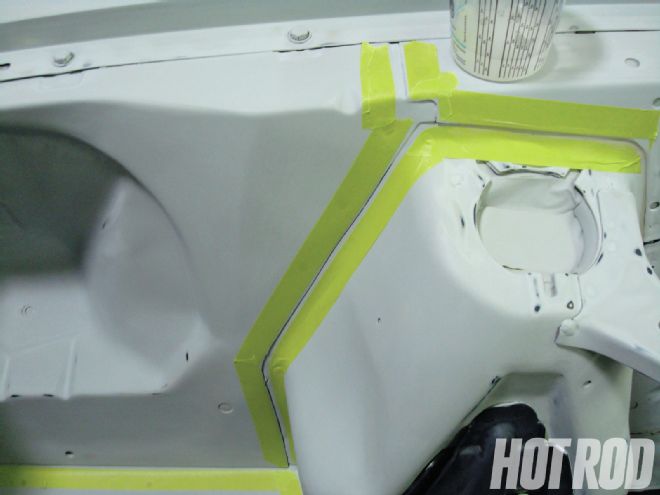 Just before you spray paint on a car, you should caulk any visible body seams to give a smoother appearance and keep water and rust stains from appearing, especially if you intend to drive in the rain. Apply 3⁄4-inch masking tape on the higher edge about 1⁄16 inch from the seam, and on the overlapped portion or the lower side, move the tape back 1⁄8 to 3⁄16 inch. Using 3M 8300 sealer, cut the tip to allow a 1⁄8-inch bead. This product flows smoothly and can be finger-stroked with lacquer thinner to make it extra slick. Peel the tape away after sealing a foot at a time. After one hour you can prime/paint over it.
 Shown here, the seams are all sealed, providing a very smooth transition from each panel. Once everything is sprayed and assembled it will look great.
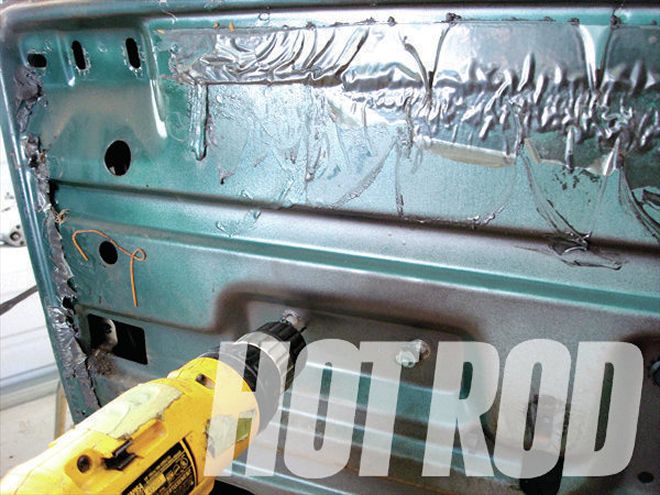
Stripping Foil
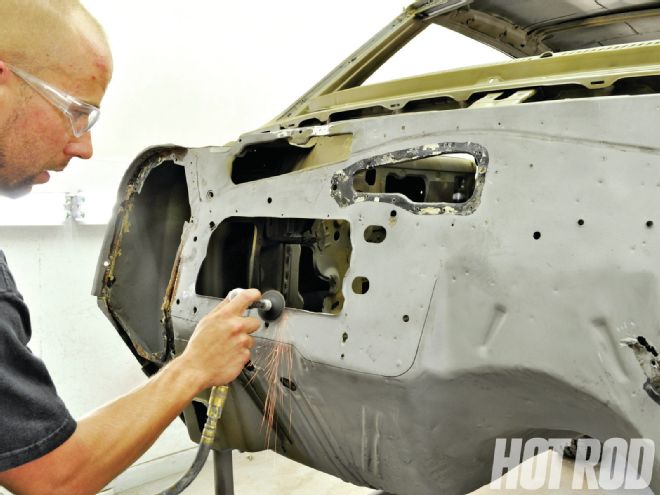
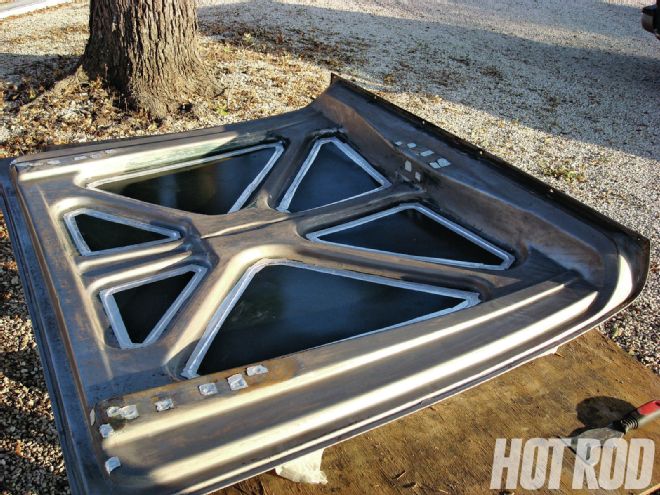 Stripping Foil When chemically stripping paint from a panel (such as the underside of this hood), use aluminum foil tape to seal off the inner panel from the outer. This will keep the old paint and stripper from dripping into the inner structure and becoming trapped, causing a big problem later on during refinishing. Use the foil tape over any holes, too. After stripping, use a Scotch-Brite disc on an angle grinder to clean all the paint off the edges (down to bare metal) where the tape covered it to finish the process.
Mask The Opening
 Mask The Opening As a visual aid to see how perfect a wheel opening is (especially on street rod fenders), tape some masking paper on the inside of the opening and look at it from 5 to 10 feet away. The paper prevents your eyes from trying to focus on too many areas at once for the ultimate inspection. This trick also lessens the chance of dirt and junk being blown off the inner side and ending up in the paint or primer.
Screw It
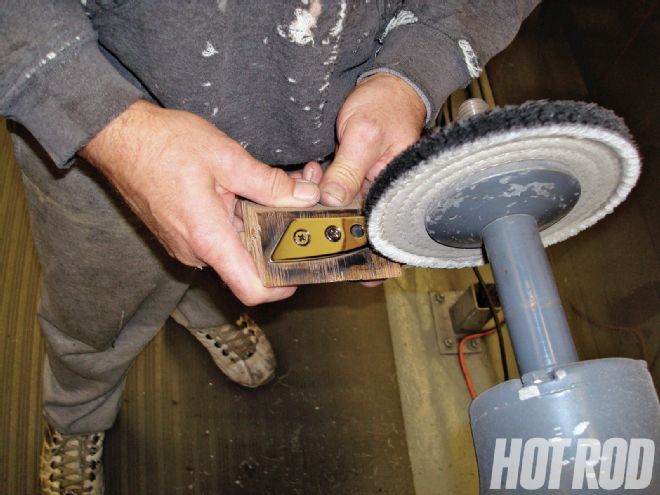 Screw It When buffing stainless trim parts, use various sizes of wood to bolt or screw them down to eliminate holding the actual part and tweaking it during the natural heat build that occurs.
Trim Fitting
 Trim Fitting It’s best to fit all the metal trim in its copper-plated state before final nickel and chrome is done. This is the last time you will be able to correct any fit problems. Most chrome shops overgrind and tend to tweak the parts a bit during preparation, and since they don’t have the car in front of them to check the fit, you can correct any areas you are not happy with before the final plating.
Cool Tool
 Cool Tool Fein built the first known power tool in the late 1800s, and the company is still at it today. This oscillating tool with a scraper attachment easily removes old undercoat. Save your wrists from carpal tunnel syndrome.
Fill The Grille
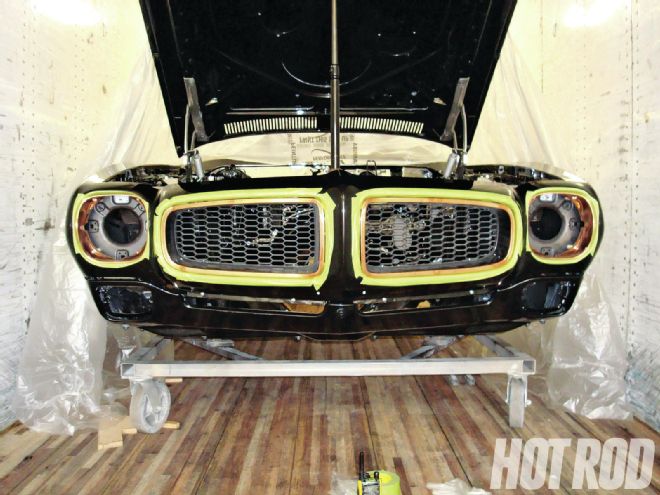
 This project is difficult because of the material: aluminum that is only 0.036 inch thick. On this Chevelle, we wanted to remove all the nameplate trim from the grille, but it has mounting bosses for either a Malibu or an SS badge. The solution was to get two reproduction grilles from C.A.R.S. Inc. and splice sections together so we had a smooth, badgeless grille.
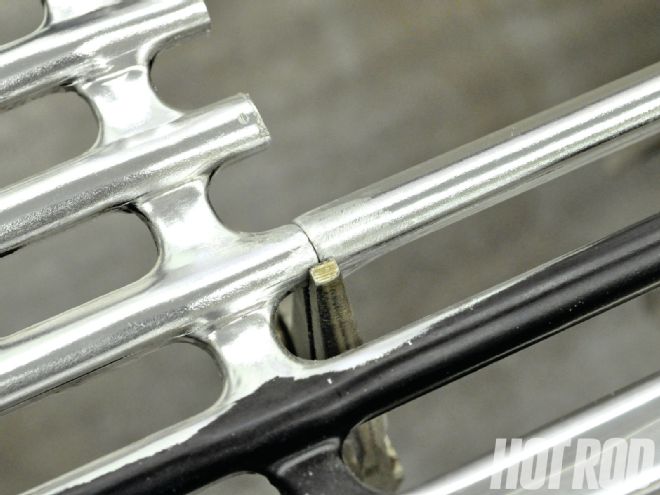
 There were three bars on either side of the center that needed to be replaced. Tony used a straightedge to mark exactly where to cut, making sure the cut will not be where the bars start to flatten out to meet a vertical support. He used a thin cutoff wheel to slowly cut through the grille.
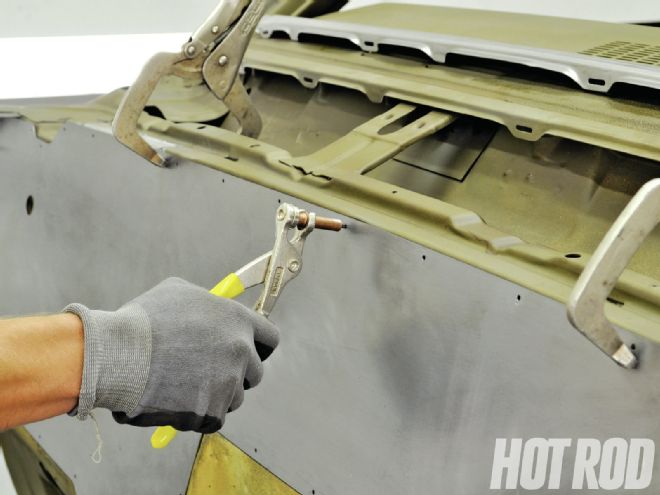
 Next, he cut out the section to be replaced, as well as bars from the donor grille that will be grafted in. Paint was removed from the grille with acetone and a hand file was used to perfectly fit the donor bars. Tony used a pair of locking needle-nose pliers to hold the transplanted bars in place so that they could be tack-welded in place.
 Because it is thin aluminum, a TIG welder was required, though the filler rod was 0.035-inch, 4043 aluminum wire for a MIG welder. Tony says whatever you’re welding, you want the tungsten and the filler rod to be about the same diameter as the thickness of the material.
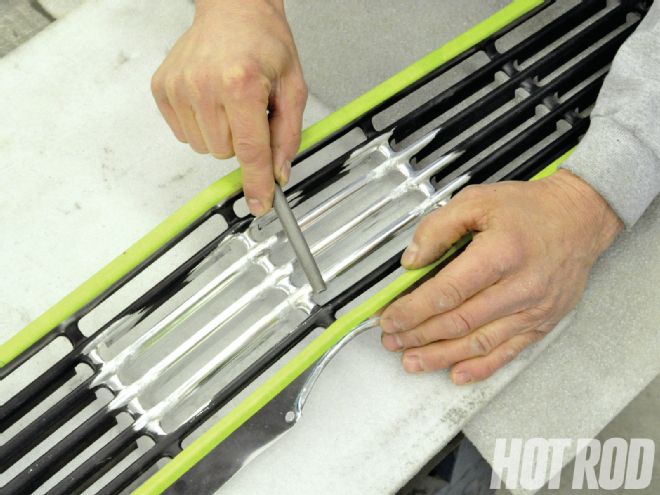 After all six bars were grafted in, Tony hand-filed the welds. Although the backside isn’t visible on the car, it was also welded and filed.
Pot Metal
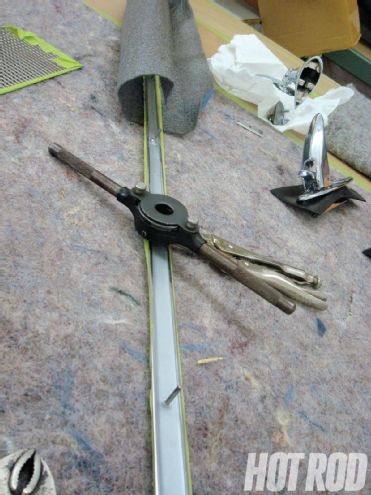 Pot Metal Some trim, such as this stainless steel molding, comes with pot-metal studs that accept thread-cutting nuts, which often slip when tightened. Using the proper thread-cutting die, you can change them to accept regular-threaded nuts to avoid snapping off the studs during assembly if they were too tight, and also to avoid a loose molding when the thread- cutting nuts have already cut too many grooves on the stud.
Anodizing Remover
 Anodizing Remover Eastwood has an anodizing remover for aluminum parts and fittings, so there’s no need to send them out anymore. It works well when you keep the part soaked. Cheap anodizing can also be removed with oven cleaner or Castrol Super Clean.
Pilot Holes
 Pilot Holes Once the side window glass is fitted and adjusted during mockup, pilot-drill the inside of the doors and quarter-panels to the window tracks with an 1⁄8-inch bit for easy alignment during final assembly.
Drill Finish
Drill Finish Give stainless or plated bolts a nice satin finish by chucking them in a drill and running them over a fine (gray) scuff pad.
Bolt Holders
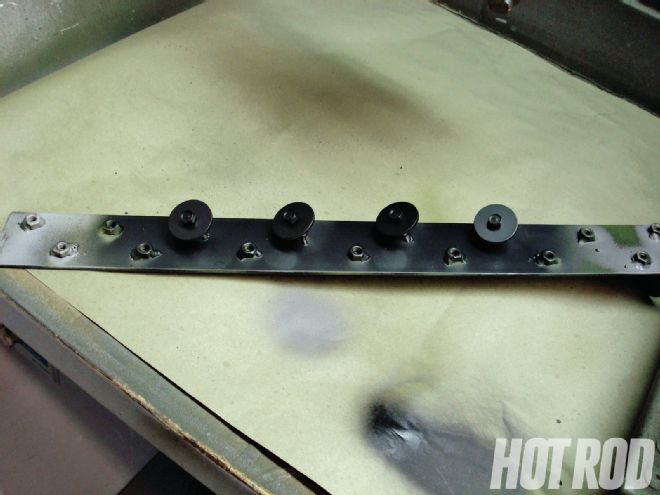 Bolt Holders To blast or paint bolts, fabricate these holders with some 2-inch-wide, 1⁄8-inch-thick strap material and weld different sized nuts in a row. This makes an excellent holder and is easy to do.
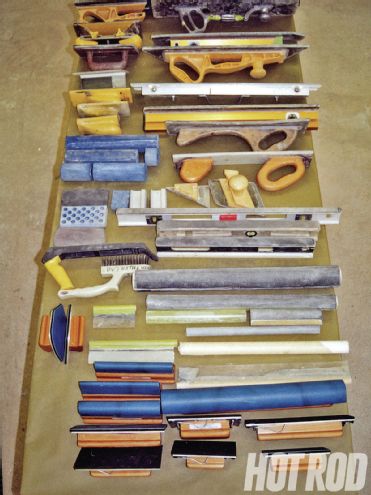
Color-Sanding Tips
Color-Sanding Tips Color sanding is done after paint but before final buffing to eliminate orange peel and other tiny imperfections. The buffing process then makes it shine like glass. Quickie paint shops often cut corners on the sanding step, leaving a lot of shine quality on the table. Every conceivable shape and size of sanding block you can imagine is needed to obtain optimum results on all the different body shapes and contours of a high-end car. Shown here are 53 of the blocks used at Jeff Lilly Restoration for color-sanding paint— and there are 27 more not shown here. Single- and double-wide, short, medium, long, extra long, round, convex, concave, small-, medium-, and large-diameter foams, hard rubber, vinyl backed, levels for straightedges—they’re all required. You can purchase some blocks from 3M, Motor Guard, Hutchins, or Eastwood, but others you can fabricate yourself.
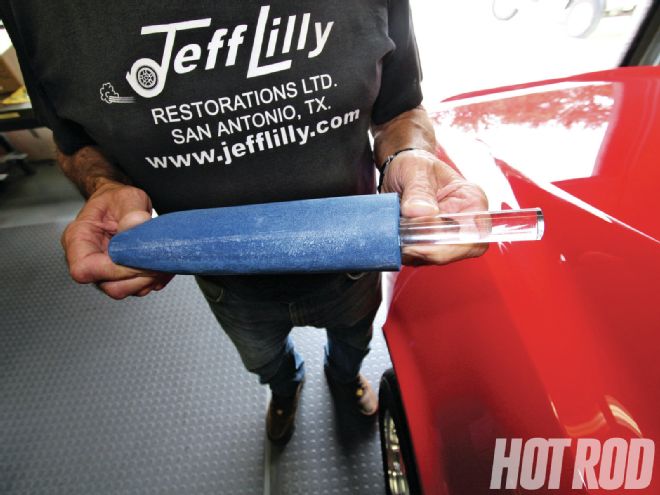 Lilly made this block with a round piece of foam backed by an acrylic rod. You can buy the foam from body-shop supply stores or you can make your own from quality pipe-insulation from your local big-box home improvement store.
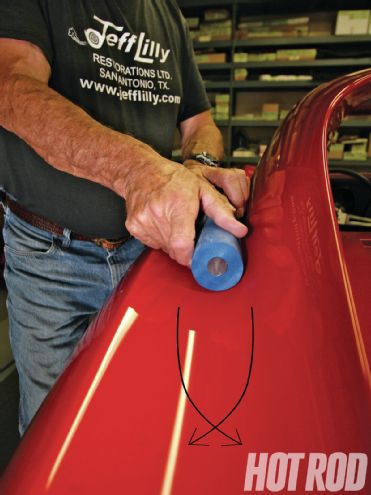 The concave section where the roof meets the quarter-panel on a lot of bodies, such as this Corvette, is where this foam block shines. The arrows also show the rotation needed to achieve the best results. Twist your fingers in this direction while moving your arms back and forth on the panels in 18- to 24-inch-long strokes. Everything is done in crisscross patterns; the difference is how long the stroke is and how tight the crisscross.
 This flex block can be used on roofs or sloping areas where you want as much contact with the surface as you can get. The thin Lexan is also ideal for block-sanding primer with 180- to 400-grit papers.
 These Dura-Block sanding tools are a made from open-cell foam that gives a little bit and moves with the panel. They work well for all grits from 40 to 2,500. Lilly cuts them to different lengths depending on the shape of the panels and also rounds the edges to keep them from digging in.
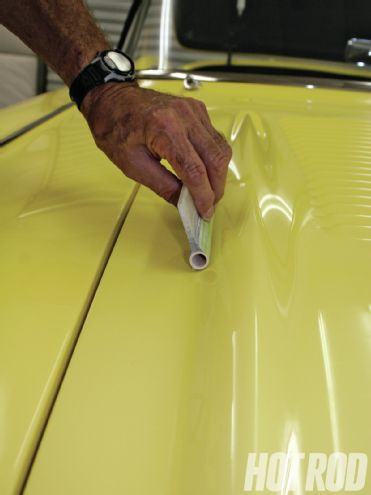 Half-inch PVC pipe with a glued-on handle makes a great block for tight areas such as where the spear drops into the flat area of this Tri-Five Chevy hood.
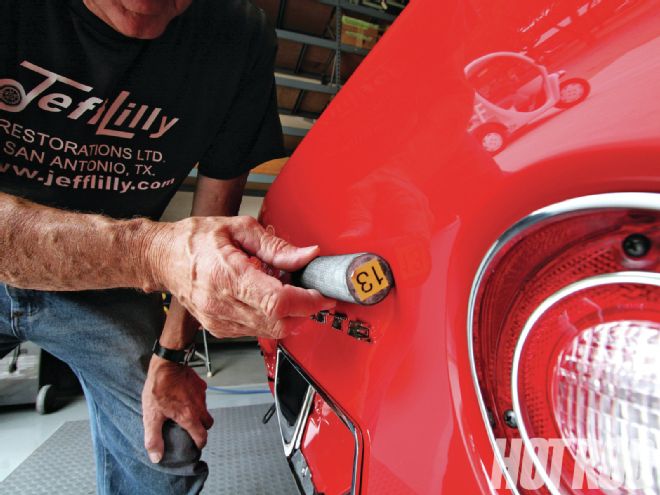
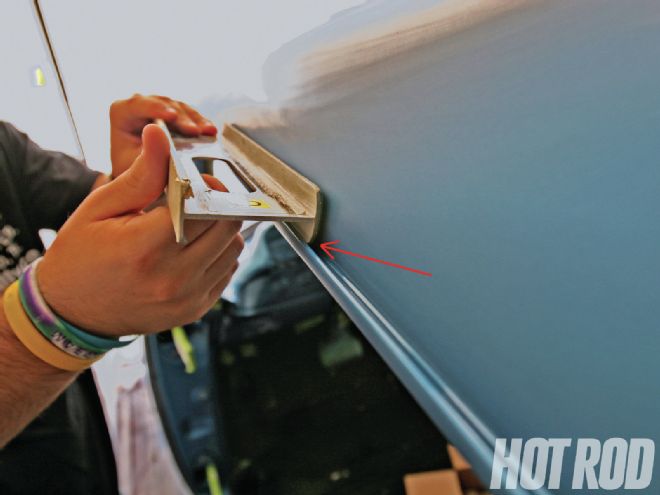
 When perfecting panel gaps, use small metal spreaders 1 to 2 inches wide. Too wide and they tend to dig on the ends as you are working a gap; too narrow and they won’t keep a straight line. Simply wrap the stick-it sandpaper around it as needed. Always work panel to panel; never work a body panel off a car or the quality will suffer.
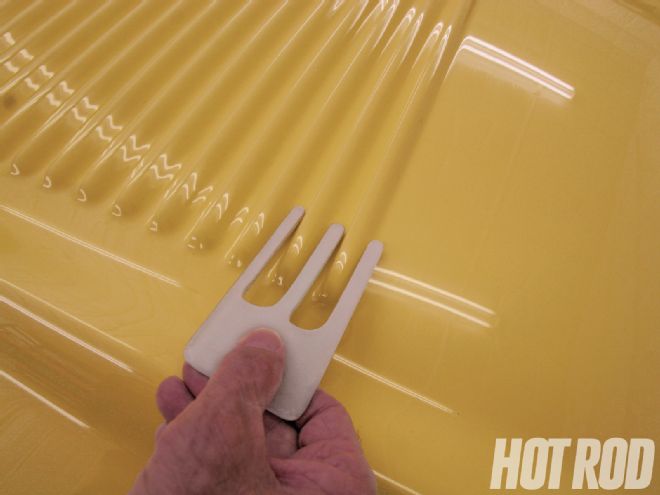 Strange shapes like louvers require many techniques. Lilly fabricates grooved blocks cut from 1⁄8-, 3⁄16-, and 1⁄4-inch Lexan. Notice that the grooves are cut somewhat larger than the louvers to gradually taper the panel into the louver for a sweet, no-dip look.
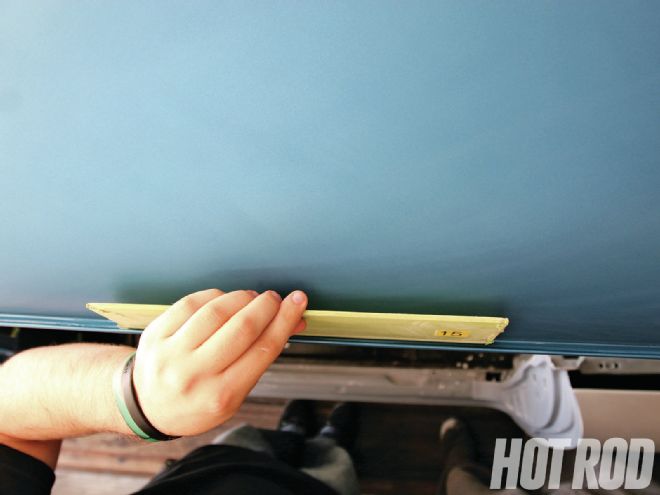
 This skinny, open level with 1⁄8-inch-thick rubber does a great job on the inside edges of a driprail.
 Finish the driprail off with 1⁄8-inch-thick Lexan with masking tape as a mini cushion under the stick-on sandpaper. If you’re working clearcoat, it’s likely very thin in areas like this—be careful not to blow through it.
 How you hold a block is just as important as using a crisscross pattern (arrows) to achieve the best results. Gentle, even pressure is applied across the entire sanding tool to prevent it from skating or digging in. Nat Ramirez is in the bodyman’s crouch, balanced and ready. When possible, Lilly uses rolling office chairs while working some panels. HRM