
Chopping the top on a vintage vehicle is the big one. It's a modification that requires skill, work, and thinking, but also provides the biggest return in visual change. There are varying degrees of difficulty in top chopping. Take a Model A and most folks can manage a good chop as the roof essentially comes straight down, however, cars became evermore curvaceous, making them both attractive and difficult to chop. Since later cars are filled with compound curves, it takes real skill and serious planning to complete a good top chop.
 Like most cars from the late '30s, David Wrenn's Chevrolet sedan seemed to have too much window area, so it was time to lower the lid on this Bow Tie.
The subject of our story happens to be a '36 Chevrolet sedan owned by David Wrenn, but the top chopping principles are similar for most cars of that era, as they share similar shapes. The Chevy is being chopped at Rodcrafters in Welcome, North Carolina, with head metalman Larry Shoaf performing the surgery. Preparing the body prior to cutting is very important. If those doors don't fit properly before the top is chopped, they will fit even worse after the chop. Take the time to fit all door gaps and repair any structural damage to the body before making any cuts. Stripping the body of all paint and filler is a big help that minimizes surprises later. Next remove all the glass from the car along with the garnish moldings. The entire interior should be removed and sound damping material should be scraped off the interior of the body.
With the body gutted it's time to brace the body. Cross bracing with box tubing ensures the body will hold its shape when the roof is removed. Brace carefully across door openings to hold the proper gaps, and remember to allow room for entry as you will be working from the inside of the body as well.
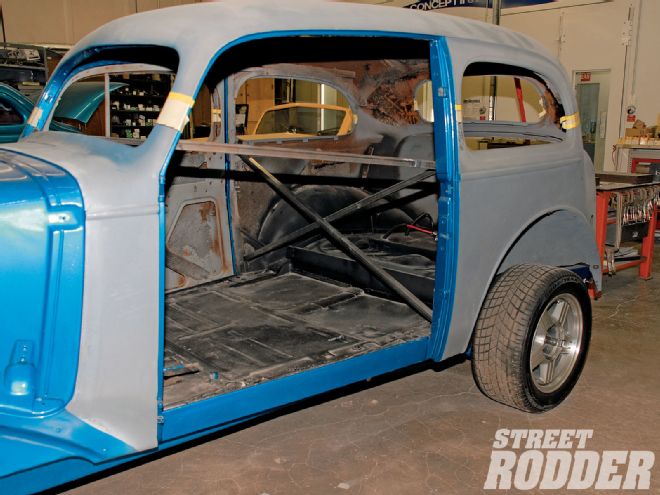 After being certain the doors fit perfectly, they were removed and cross bracing was installed inside the body prior to any cutting.
Now it's time to contemplate the cut lines on the car. The first big question is how much do you want to lower the lid? One simple rule is this: cut less, work less. If your chop is moderate, 2 inches or less, the body panels, bodylines, and reveals will line up much easier than a 4-inch chop. Before picking a number, do some math; measure the windows and subtract 4 inches to see how much glass area remains. Windshields smaller than 9 inches can be difficult to see out of, and don't forget to allow the proper amount for gasket intrusion into the field of vision. Some states also have a minimum windshield height law, something to consider before cutting.
If you simply aren't sure how much is enough, take a good photograph of the side, front, and rear of your car and cut the photo to scale to illustrate how dramatic the changes will be. This also illustrates misalignments caused by cutting. In the end Wrenn decided on a fairly radical 4-inch chop.
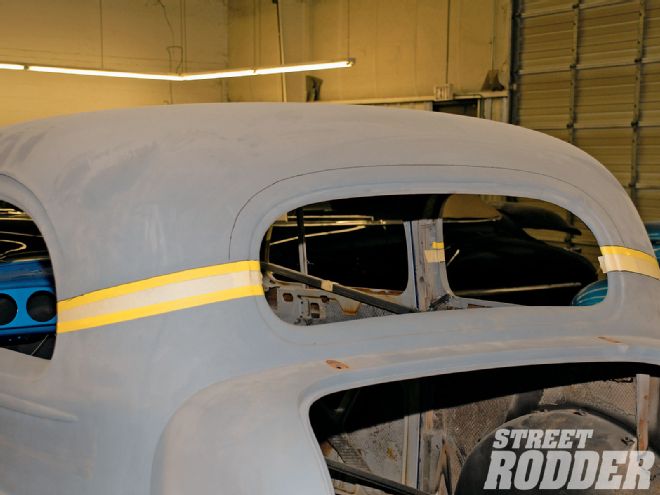 While the cut up front is 3-3/4, in the rear a piece of 2-inch tape serves as the cut line. Only the upper cut will be made allowing the remaining metal to bridge the gap at the rear of the roof.
Seldom does a 4-inch chop actually measure 4 inches front to rear. In this case Larry Shoaf laid out his cut lines with 3-3/4 being removed from the A- and B-pillars, and only 2 inches being removed from the rear portion of the roof and through the back window. This is done for several reasons. First, the extra metal in the rear will be used to fill the void left by the removed metal, and secondly a roof with a forward angle is more pleasing to the eye, and finally and most important, since the rear of the roof is angled, removing 2 inches of metal from the roof will result in almost a 3-inch vertical drop. The rear of the roof will be lowered and the lower portion of the roof/body will be leaned forward to meet the roof, resulting in an overall drop of about 3-1/4 inches. The B-pillar is the only vertical line in the cut, so removing 3-3/4 there dictates the actual vertical drop in the roof. By cutting the roof in this manner the rear of the roof is allowed to find its own correct location.
Now we must locate the all-important cut lines. Look at the body lines, the window reveals, and any special features of the inside window moldings when laying out your cuts. Shoaf looks for the location where the window reveals are tapering the least, and where the B-pillar and body panels are most vertical. Remember, these round sedans are all built with compound curves so look for the least amount of inward taper too.
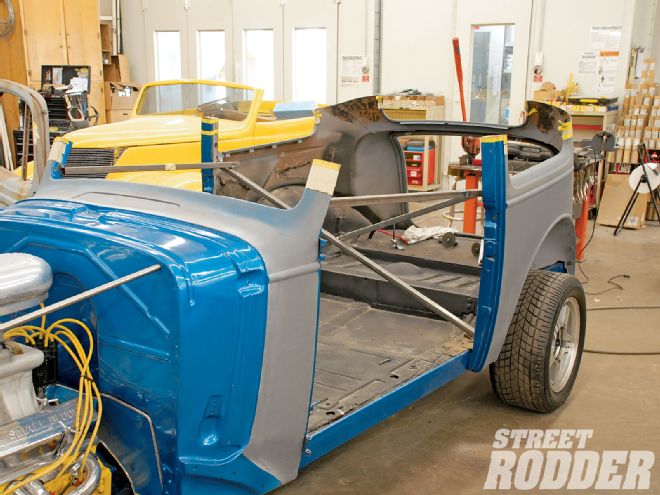 Well, there's no turning back now, you either have a very odd phaeton or you're on the way to a more sinister sedan.
After finding the best location for the cut lines, mark the top cut and carefully wrap a piece of tape around the pillars and across the rear roof panel. You could just measure down and make a second mark, but measuring opens up the possibilities for errors, whereas a roll of tape never changes. It may take several different sizes of tape to make up the proper cut lines, in this case Shoaf used two pieces of 1-1/2-inch tape and a piece of 3/4-inch tape to mark the pillars, with a piece of 2-inch tape marking the cut lines on the rear roof area. Another advantage of tape is it follows curved panels and the top and bottom lines remain perfectly parallel.
With the top taped out to be cut, stand back and do some serious thinking, consider the cuts and how they will affect the alignment later. Consider small things like interior window moldings and the rear package shelf. Do any of the cuts eliminate a garnish molding screw? If so, it may pay to move the cut line a bit to make installing the moldings easier. Now is the time to make changes.
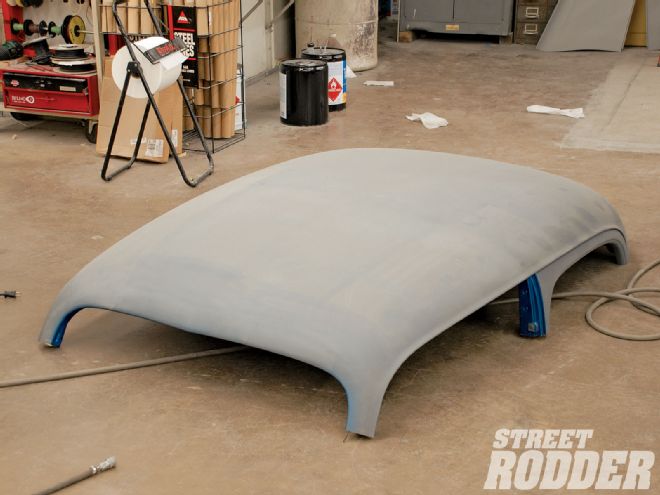 The roof section is set aside while the lower cuts are made to the A- and B-pillars.
Once you are certain the cut lines are properly located, it's time to cut off the roof. Always make the upper cut first that way the second cut is attached to the body, making it much easier to cut. You'll need a good selection of cutting tools, a Sawzall seems to work best on the A- and B-pillars while 0.035-thick cutting wheels work well on the larger sheetmetal areas. Cut carefully keeping your blade level through the cuts. After removing the roof, repeat the process on the stubs on the body paying special attention to make the cuts level.
After the desired amount of metal has been removed, save every removed piece as you will need them to rejoin the roof. With the help of a couple friends, lift the roof back into position to check the alignment gaps. Try locating the roof on the A-pillars first, then try aligning the roof with the B-pillar and check for gaps. Every top chop is different and sometimes lining up the A-pillars works well, while other times lining up the B-pillar works better.
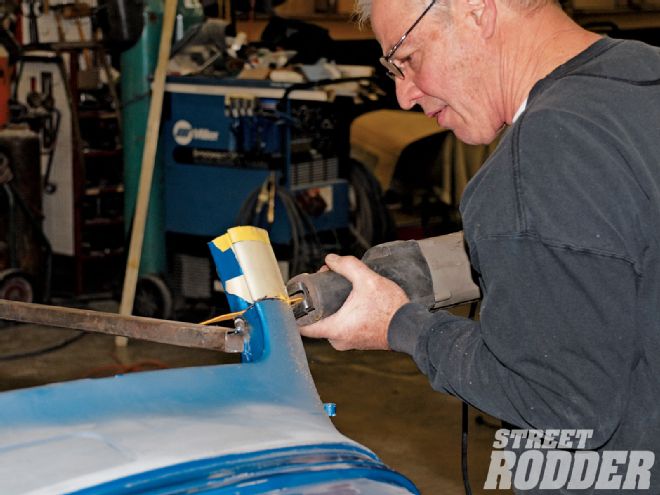 First the windshield post, aka A-pillar, is trimmed taking care to cut the post on the same angle as the first cut. The posts remain on the original rearward angle.
Our '36 Chevrolet had virtually no taper at the A-pillar so we opted to join the top back to the A-pillar. This would require moving the section of the B-pillar on the roof back some 2 inches, followed by leaning the rear roof section forward on an angle. We were very pleased, actually amazed at how well the A-pillars lined up, so after fitting the two posts we tack-welded the A-pillar posts in place. The B-pillars were resting on each other, albeit some 2 inches forward. Once again it is time to stand back, walk around the car and take measurements, and check for uniformity in fit and alignment. Both B-pillars should be misaligned in equal amounts; the rear portions should look symmetrical too.
Certain that the top was square and the windshield opening was perfectly symmetrical, we measured, marked, and cut the B-pillar free from the top and moved it rearward 2 inches to perfectly align the two posts. The post was moved rearward to compensate for the forward movement of the top when it met the now lower windshield posts. In effect the roof was now too short to meet both pillars. We measured and cut both sides in exactly the same location. This ensures things will be symmetrical in the end.
The rear of the roof was standing almost 3 inches forward of the lower portion of the roof. At first this appeared to be an insurmountable gap and talk turned to adding a 2-inch strip through the roof, just forward of the rear window. That's a big roof to cut and a large two-piece turret can be challenging to work with, so we considered adding a 1-inch strip of metal just in front on the decklid. Adding metal on this flat plane would move the roof forward 1 inch and leaning the lower piece forward would close the remainder of the gap.
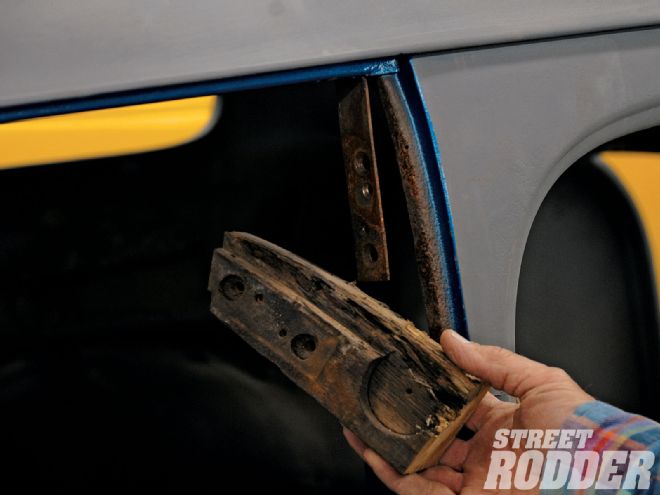 First the wood was removed from the B-pillar to facilitate welding. Screws were removed to free the wood.
After much thought, Larry decided to "just see how close we can come" without major surgery. Some gentle pushing on the lower portion of the roof leaned the window forward just a bit, but remember a 1/4 inch on the bottom of a 10-inch piece is a nice gain. Gentle pulling on the roof seemed to indicate these panels might align with relief cuts in the roof and the lower panels. The key to a successful top chop is careful measuring, precise alignment of posts and panels, and the ability to move metal slowly in small distances. It is amazing how far metal can be moved to bridge a gap if you do it with care.
Long relief cuts were made down the sides of the body and the roof area was gently pushed forward. These cuts were long, so gaining that 1/4 inch on the bottom of a 12-inch cut closed almost half the gap. Next Shoaf made a series of relief cuts in the corner of the roof. The cuts were made in a radial fashion rather than straight to allow the roof corner to conform to the new shape. With relief cuts approximately every 3 inches, it became easy to lift the tabs of metal to meet the lower portion of the roof. It became apparent this transition could be completed without adding metal to the roof, and more important, the resulting forward-leaning window was very pleasing to the eye. We had in effect shortened the turret on the car, visually making the sedan appear dramatically smaller.
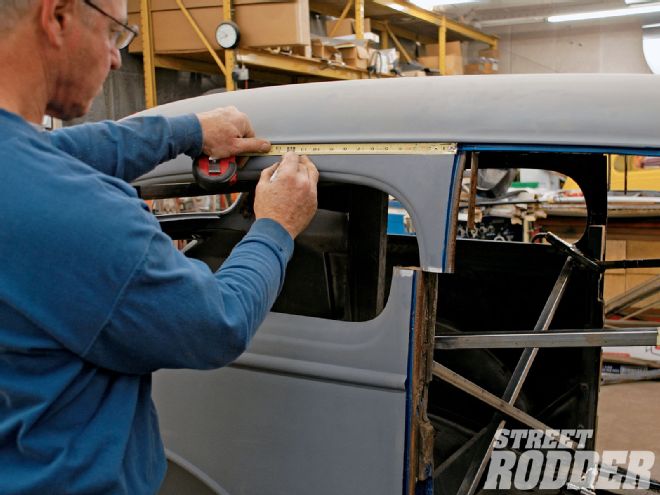 Larry Shoaf carefully measures back to a good cut point, a place where the window reveals are almost straight.
Once it was obvious the contour could be reshaped, Shoaf used a piece of sheetmetal as a temporary inside form. The upper and lower tabs were allowed to fold over themselves to form the basic shape. Cleco fasteners held the upper and lower tabs in place and finally one entire corner was lapped and shaped. A cut-off wheel eliminated overlapping metal and tack welds replaced the Cleco fasteners. In the end the roof had a great contour.
With the roof attached to the body again it was time for hours of welding and panel finishing. In the next issue of STREET RODDER we'll cut the doors, fit the interior moldings, and touch on the small details that make a successful top chop. Stay tuned.