Repairing the ravages of decades of abuse to an original steel body is something that takes planning and patience to complete. Maintaining a strong focus while enjoying the journey will no doubt ensure you're proud of the end result. Over the last few months, we've followed along as the team at Rolling Bones Hot Rod Shop in Greenfield Center, New York, undertook a major rebuild of a Deuce five-window body, including lowering its lid and replacing numerous body panels. With all of the completed updates in place, it was time to dial in the body and get it closer to the paint booth.
At Rolling Bones, the team specifically uses body solder, which is lead, as opposed to polyester fillers to take on their bodywork tasks. This old-school method of doing bodywork has been around for more than 80 years, and working with it is an art form in itself. Not often seen performed in shops today, we were fortunate enough to be able to follow along with team member Matt Schmidt as he prepared to take on the bodywork of the cowl and A-pillar area on the coupe.
Locating the materials to use was as easy as making one phone call to the Eastwood Company, since it stocks everything needed to undertake the project, including an instructional DVD for newcomers, entitled "The Lost Art of Body Leadwork." Surface preparation is critical when preparing to undertake any type of bodywork, especially when working with lead. Areas where this is particularly vital are those where welding has been completed, and Matt said special care must be taken to sections that may have accumulated any welding spatter or bluing of the steel. Depending on where the areas are on the body, different tools, such as a die grinder, may be required to access tight areas, or a combination of wire wheels and brushes along with varying grits of sandpaper. Matt said he often uses 80-grit to remove welding spatter, followed by 180-grit across the entire area to be worked on to give the surface plenty of bite for adhesion as the process gets underway.
Once the initial surface prep has been completed, the next step involves the application of solder and tinning flux, which is very caustic and must be applied with great care. Matt recommends masking off the area to be treated with 2-inch tape prior to getting started. He commonly uses a wire brush for hard-to-access areas and #1 steel wool for larger areas followed by a clean, dry cloth to wipe off any remaining excess. This process removes any and all surface contaminants and prepares the surface for tinning.
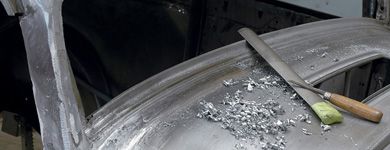
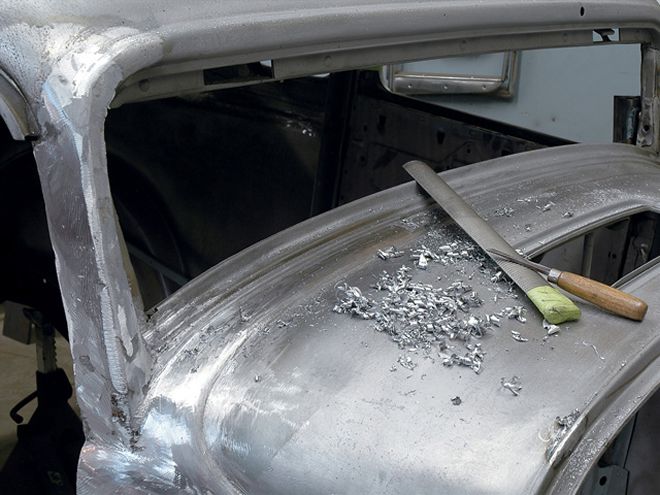
 With the chop and final welding completed on the Deuce, there was still plenty of attention needed to get the A-pillar and cowl area back to perfection before it was ready for paint.
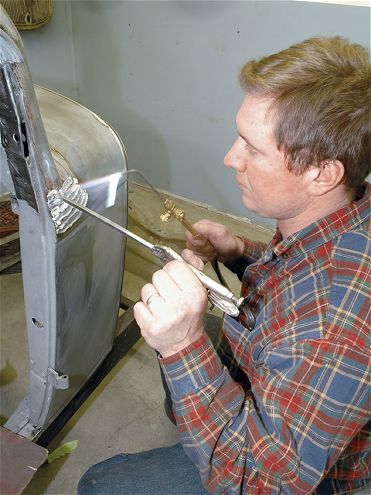
The final step prior to any lead being applied involves using tinning butter, which is typically a thick compound composed of tin powder and a zinc chloride. Matt prefers to warm the compound with low heat from a short flame and then completely mix the contents prior to application. From there, he uses an oxyacetylene torch with a low flame to heat the surface of the area where the tinning butter will be applied. Using a disposable brush, he then applies the compound to the surface to be treated, ensuring a small bit of overlap from where the lead will be applied. Matt returns with the torch once the area is covered, again warming the surface compounds until it turns to a brownish foamy residue, which he then immediately wipes off-from bottom to top-with either #1 steel wool or a clean, white cotton cloth. This then leaves a silvery surface, illustrating that the surface has been properly tinned and is ready for the lead application.
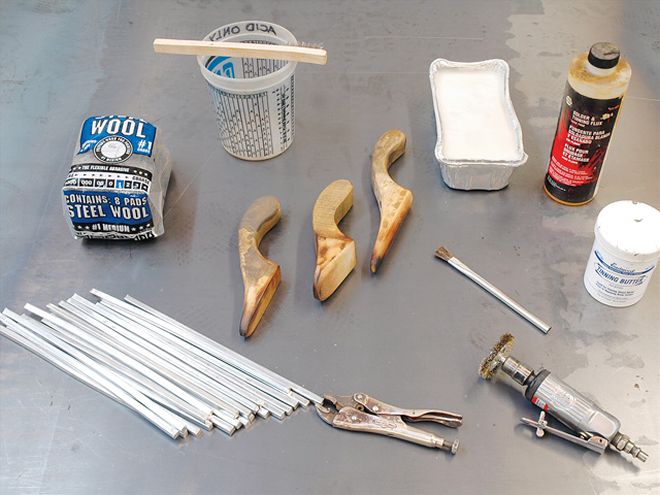
The main products to take on the job include quarter-pound sticks of body solder/lead, steel wool, tallow/paddle lube, solder and tinning flux, and tinning butter, all available from the Eastwood Company. Additional tools include wooden solder paddles, disposable brushes, and both manual and air-powered wire brushes.
The lead sticks used here are comprised of 30 percent tin and 70 percent lead. This formulation is easily applied and can be worked in both vertical and horizontal applications within a heat range of 361 to 489 degrees using a soft flame. Matt prefers to use an oxyacetylene torch, but a propane or a MAPP torch would work just as well. First, Matt heats the steel of the body; he then brings in a stick of lead that he holds steady using a small Vise-Grip and begins to heat both it and the body as he starts to apply the lead from bottom to top in the work area. It's always a good idea to apply a bit more than you think you will need, as it can easily be removed later on. Maintaining proper heat at this point is critical, since you don't want to overheat the lead and have a puddle at your feet.
Once you have completed the application of the lead, it's time to get the various paddles out and prepare to spread it. In order to properly spread the lead, you will need to warm a block of tallow with the torch to lubricate the base of the paddle so it will not stick to the lead. With paddle in hand, Matt warms the leaded surface to a point just before it starts to become liquefied to allow the paddle to work its magic and spread and compress the lead into place. Once everything is properly settled, it's time to start filing and getting the area of the body formed into the proper proportions.
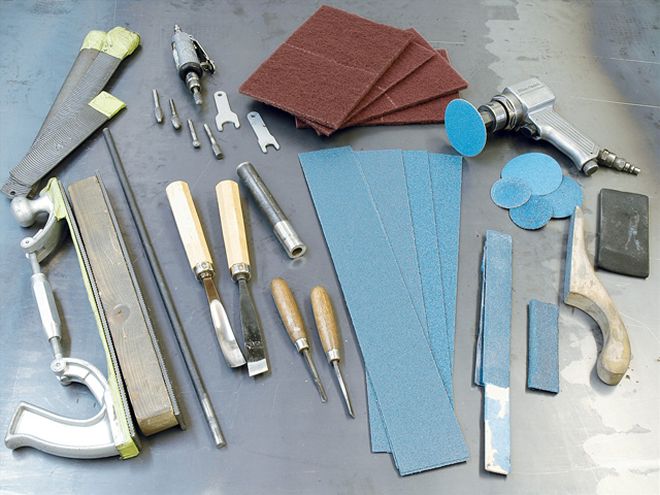 You'll also need many of the following products and tools throughout the application process to help in surface preparation and product removal, including an assortment of files, carving tools, a die grinder with assorted tips, an air-powered grinder, and various sandpaper strips and discs.
Completing this portion of the application takes a good amount of time as the body is sculpted back to perfection. Matt said there are a fair amount of tools he will use during this final stage, including numerous files-some of which have been custom bent for special applications-assorted small wood chisels, and a varying amount of homemade tools that work well with differing contours and shapes. It's also imperative at this point to wear safety glasses and a quality respirator, since you don't want to inhale any of the toxic dust that can be generated. Always remember that you want to avoid over-cutting of the lead, because then it's right back to the application process again. To access small areas, Matt will also use die grinders with varying heads, and occasional disc grinders to work the areas. A final sanding with 80-grit followed by 180-grit will smooth out everything to perfection before a final pass with a red scuff pad.
It is necessary to neutralize any residual remaining acid on the work surface to complete the process. Using a mixture of water and baking soda with a bristle brush will do the trick, followed with a clear-water wash and wipe. The final product is a surface with a load of durability down the road. In closing, Matt told us there are other variations of the application methods, but this is the process that's brought him the most success.