Unless your project car has been hammered out of virgin sheetmetal, the first thing to do when considering new paint is figure out how to handle the paint that's already there.
In some cases, the decision is pretty straightforward. Many painters consider a car's original finish to be one of the best foundations you can have for fresh paint, provided what's still on the car isn't cracking, lifting, or showing other signs of wear or damage. As John Sloane of Eastwood put it, a car's original finish "was applied with perfect prep and under ideal conditions, so it's tough to beat." If that's the case with your project car, you can feel pretty secure about scuffing the original finish, then priming and shooting right over it.
Then again, how many potential project cars have you run into lately that still sport unblemished, original paint? More likely, the cars you're looking to buy and build are covered with Lord-knows-how-many resprays over the top of Lord-knows-how-much body filler, questionable patch panels, bad welds, rust, or some combination of them all. And that is definitely not the kind of foundation you want under your spanking-new paint.
If you're not completely familiar with a car's history, how can you tell what may be lurking underneath that top layer of pigment? Well, there's a decidedly low-tech method: Grab a piece of sandpaper, pick a spot on the car -- preferably a location likely to have seen some damage over the years, like a rocker or rear quarter-panel -- and start rubbing. (A pocketknife will work, too, if you can find a corner to pick at.) It won't take long before you start revealing layers beneath the topcoat. Read them like tree rings: The more layers you find, the greater the certainty that a scuff job won't cut it and a strip to bare metal is in order.
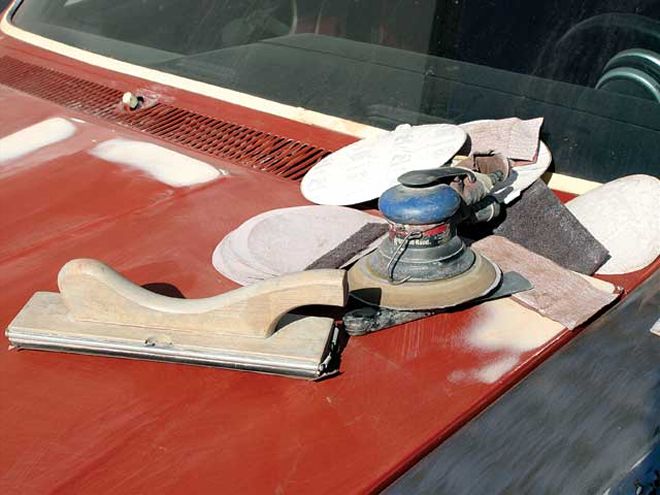 Tools of the sanding trade, found at Paint n Place in Placentia, California: Sanding board, dual-action sander, various grades of sandpaper, even a putty knife for scraping off the big chunks. <br><br><br>
If you're looking for a less intrusive way to judge the integrity of a car's finish, Eastwood sells a couple of different types of paint-thickness gauges you can use without leaving a mark. Paint-thickness gauges -- a magnetic version retails for about $50 and an ultrasonic one with a digital readout will set you back about $350 -- are actually not 100 percent accurate, Sloane said. What these gauges do is measure the distance between the paint's surface and the sheetmetal below (both gauges work only on steel bodies). OE paint will measure between 0.003 inch and 0.005 inch thick. If the measurement you get is more than 0.005 inch, chances are good "there's something other than paint under there," Sloane said. That rule of thumb doesn't apply to custom paint jobs, however, which can measure .012-inch to .015-inch thick or more. But even so, if you're running into paint that thick, it becomes "less and less desirable to put paint over what you have," Sloane said. "At that thickness, you can't assume you won't develop cracks in the new paint as the different substrates beneath it expand and contract at different rates."
There is another way to look at the strip versus scuff-and-shoot question. Most of the restoration specialists and high-end rod builders we spoke to prefer to start a paint job with a completely clean slate: bare metal. That way they know exactly what they're building on as they put together a show-winning finish. So if you don't own a car with well-preserved, original paint or you're clearing a place on your mantel for a boatload of car-show trophies, read on to figure out the best plan of attack to get the starting point you need for eye-popping paint.
Sand 'n' Scrape
Paint-stripping techniques generally fall into two broad categories -- mechanical and chemical. Mechanical stripping methods utilize some form of abrasive to remove paint from the metal. Abrasives range from good old-fashioned sandpaper to a variety of blasting media.
Do-it-yourselfers will usually default to sanding. Logistically, it's the easiest method, as the disassembly process is simpler than for blasting or dipping the metal, and you don't have to transport the car anywhere to get it done. It's also far less expensive. The thousand or more dollars you'd pay for blasting or dipping can buy a lot of sandpaper, not to mention a new air-powered sander, sanding boards, maybe even a new compressor if you shop smart. (See the "Compressor Tips" sidebar for more info on powering your air tools.)
Yet sanding an entire car, even if you're doing just the outside, is one of those jobs that's measured in days, not hours. If there's a ton of paint on the car, or if the paint is relatively new -- and therefore strong -- you're going to be working it awhile, even if you're using power sanders. And either way, your arms will ache for days afterward. But if you have more time and muscle than money, get out the paper and start rubbing.
One of sanding's advantages is that you can easily tailor its aggressiveness to the job at hand. If all you need to do is scuff original paint, a light touch with 320- to 400-grit paper should do the trick. If you're stripping down to metal, the consensus from our paint experts is that 80-grit is a good starting point. If your car's finish is particularly stubborn or thick, stepping down to 40- or even 24-grit paper will help cut the tough stuff. Take care, though, as it's very easy to gouge the metal when using paper that rough.
A power sander, whether a rotary or a dual-action (DA) sander, will cut your sanding time and effort considerably. A rotary sander generally spins faster than a DA, so it does offer more paint-cutting power, but there's a risk of burning rather than removing the paint if you're spinning the abrasive too fast. Burning the paint will, at best, clog your paper and waste material, and at worst, generate enough heat to warp the sheetmetal.
In some cases, you can remove paint more quickly by peeling it up with a razor blade than by rubbing it off with a sander. Jerry Sievers of Paint n Place told us he's seen entire race trailers stripped not with abrasives but with razors. This can be especially effective if the paint you're removing wasn't applied well in the first place. If you catch an edge of poorly prepped paint with a razor, it'll come off in sheets.
It's a Blast
Media blasting is an amazing thing to watch. Layers of paint that would take days to sand off simply vaporize at the end of a high-pressure nozzle. Depending on the medium used and the nozzle's line pressure, blasting can be gentle enough to strip wood and fiberglass or aggressive enough to cut through body filler and even rust.
If done improperly, however, media blasting can do more harm than good. Blast sheetmetal too hard, for too long, or with the wrong medium, and you'll warp panels, either because the impact of the medium is stretching the metal or because excessive heat caused by the medium hitting the metal is making it expand. Straight, flat panels are particularly prone to warping. One of the blasters we visited, Ron Hambright of Hambro Industries, won't blast Chevelle or El Camino hoods because the metal's too thin. Given the potential for damage, do some research and get referrals regarding the blasting operators in your area before bringing them your project car.
The best medium for your stripping job depends on what you expect to find beneath the top layer of paint. If you're stripping only a couple of coats of paint and you don't anticipate encountering much body filler or rust, or if you're stripping a nonmetal material such as fiberglass, a soft medium such as baking soda will work fine. The trade-off: Soda won't cut into rust. For cancerous panels or sheetmetal that's thickly coated with filler, a more aggressive medium such as aluminum oxide or DuPont's StarBlast will work better. Even with the more abrasive media, though, the operator has the option of removing filler entirely or just roughing it up for paint.
No matter which medium you choose, some disassembly will be required before you take your car to the blaster. If you're painting just the exterior, the prep job is easier, as all you need to remove are the car's trim pieces, bumpers, lights, and so on. For an "outside only" job like this, blasters can mask over glass to protect it from overspray and ricocheting media. But if you're planning a full-on, jambs-included, inside-and-out color change, you'll need to take off the doors, hood, and trunk lid, plus strip the interior of all upholstery, glass, carpet, and the instrument panel. Better access for the blasting nozzle gives you a more complete strip job.
It makes a difference regarding the job's price, too. The blasters we visited didn't have set prices for their work; the cost of the stripping depended on how much prep they had to do, how much car there was to strip, how long it took to get the metal clean, and whether the job was outside-only or inside-and-out. The more disassembly work you can do to make the blaster's job easier, the less the job will cost.
Given all the variables listed above, the blasters we interviewed were hesitant to give exact price quotes. But here are some ballpark figures: Hambright, who uses StarBlast for most automotive sheetmetal, said an outside-only job for a typical muscle-era car would run about $500. An "inside, outside, underneath" job on a unibody car like a Mustang runs closer to $1,400, he said, "and that's every part of the car, including suspension." A stripped '57 Chevy we photographed at Hambro was a $700 job, but that was because "there were no inner fenders to do, no frame or suspension pieces," Hambright said.
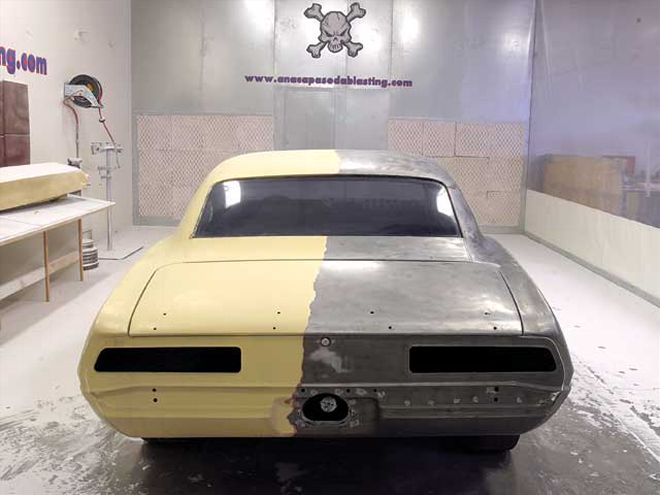
Manny Vega, whose Anacapa Soda Blasting stripped Editor Rob Kinnan's '69 Camaro with baking soda, estimated the job at between $1,400 and $1,600. That encompassed the body's exterior (including the fenders, cowl, and other miscellaneous parts, which were off the car) and the inside of one door, but not the rest of the interior, the firewall, or front subframe.
Both blasting shops perform a thorough cleaning of the car after blasting.
Hambro blows the StarBlast media out with compressed air and is able to reuse it. The Anacapa crew blows, vacuums, and even hoses out the used soda, which basically turns to talc on impact and can't be used again.
Water on bare sheetmetal? Yep. Vega claims the soda dries out the panels so thoroughly that as long as there's no standing water on the steel, it won't oxidize for days, even weeks. (Anacapa is located in Oxnard, California, near the coast, and we saw a lot of bare metal there that hadn't started to oxidize even after sitting for months.)
Because it's a relatively soft medium, soda will leave the bare metal fairly smooth. Some painters may want to scuff the metal with fine paper to promote adhesion before shooting primer. A medium like StarBlast, on the other hand, leaves the surface a little rougher, so no sanding is necessary prior to priming, Hambright said.
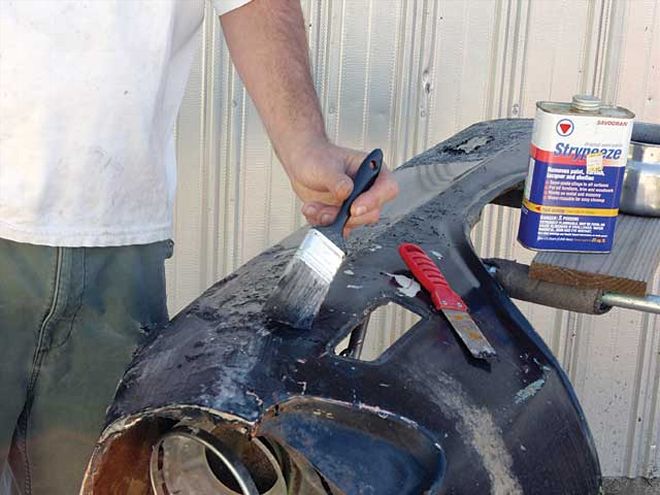
Many do-it-yourselfers prefer chemical stripping to sanding because it's faster and requires less physical effort. Special care must be taken, though, to keep the stripper out of body seams, otherwise the stripper could seep out over time and ruin the new paint job. <br><br>
Strip or Dip
As with mechanical stripping, there's a do-it-yourself way to chemically strip and a do-it-for-me method.
DIY-ers can purchase bottles, cans, or drums of chemical stripper, brush it onto the sheetmetal, let the chemistry work its magic, then scrape off the residue with some sort of edged tool. Using a plastic or nylon scraper or even a body filler spreader instead of a metal blade will prevent scratching or gouging the metal. Plan on using a couple of gallons of stripper to do a complete fullsize car, with the chemicals costing from $30 to $50 per gallon.
Chemical stripper works fairly quickly -- anywhere from 10 minutes to a couple of hours, depending on the type of stripper and the paint's type and thickness -- and the brush-on/scrape-off process takes less effort than hours of sanding. However, the process doesn't stop at the scraping; some strippers need to be neutralized, and the body will need cleaning and sanding to prep it for primer.
You also have to keep stripper away from seams, as these folded-metal areas tend to retain the stripper. Eventually those chemicals will seep out of the seams and ruin your new paint job. Dan Swanson of Sears said trying to stop stripper from running into creases and seams "can turn into a project itself." Sloane of Eastwood recommends masking over seams before brushing on the stripper, then going back and stripping the seams mechanically with an abrasive wheel.
If you have the funds, you can avoid the hassle (and hazardous waste) of chemical stripping by having your car dipped. This is by far the most thorough means of taking paint off a car because the caustic chemicals in the stripping tank leach into the sheetmetal's every nook, cranny, and crevice, seen and unseen. Every other means of stripping we've discussed is limited by access; you're removing paint only from where you can see or reach. The dip tank, on the other hand, strips every bit of paint off a car -- as well as all body filler, sealer, caulk, weatherstripping, undercoating, rust, you name it. When a car comes out of a dipping tank, it's all steel and nothing else.
Because only steel, brass or, copper can safely go into the tank without risk of damage, your car has to be completely stripped of every nonferrous part prior to dipping. It must be totally disassembled, too, so that the chemicals can reach otherwise hidden places, such as the areas behind door hinges. Typically the car's body will go into the tank by itself, while the doors, hood, and other parts will be placed in a big, steel basket and dipped separately.
The time your car spends in the tank is just one part of the dipping process. After the car comes out, it's washed with a high-pressure hose to clean off any remaining chemicals and debris. Then the parts are dipped again, this time in a phosphate bath that coats the metal with a protective finish to keep it from rusting. Charlie Masters, who operates Strip Clean in Santa Ana, California, likens the phosphate coating to an etching primer. "You can paint right over it after scuffing it with Scotchbrite or a fine sandpaper."
The thoroughness of the dipping tank does have its drawbacks, though. Remember how we said paint is removed from areas both seen and unseen? If you can't see -- or reach -- part of the car, you can't repaint it. That means there will be portions of the car that remain covered with nothing but the phosphate coating.
Nailing down the cost of dipping was like getting an exact blasting price -- nearly impossible because of all the variables involved. The car's age, size, whether it's body-on-frame or unibody, and whether you're having the frame dipped were among the factors that affected the dip price. Masters was able to give us these estimates, though: A unit-body musclecar, such as a Mustang, would cost around $1,600 to dip. "Something like a Cadillac, a really big sumbitch, would cost a couple hundred more," Masters said. A non-unit-body car, like a '40 Ford, would be between $1,000 and $1,600, while a Deuce roadster would run around $850.
Is there one stripping method that's best? No. Each car is a unique case, as is each car owner. Your car's condition, your ability (or desire) to get your hands dirty, and the size of your bank account will all factor into which approach works best for your particular situation. Just be sure that, whichever method you choose, the stripping job is as perfect as it can be. Because at this point, you're starting to lay the foundation upon which the rest of the paint process will be built. And a mistake at this stage can ruin a whole lot of subsequent work. You don't want that.
Compressor Tips
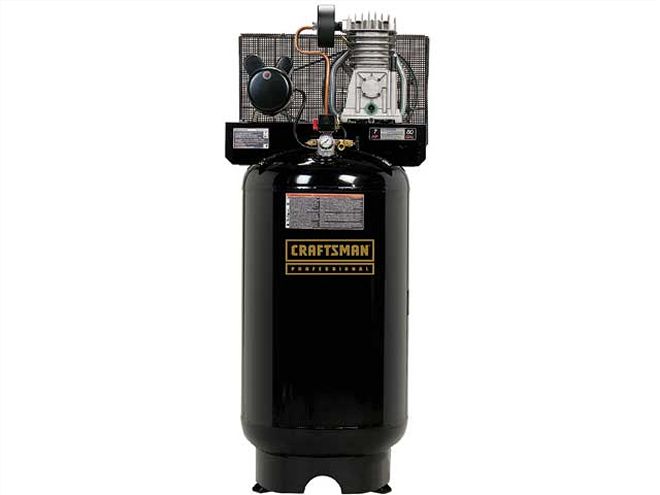
Power: According to Sears' Dan Swanson, the compressor industry is in a state of transition, as major manufacturers switch their horsepower ratings from "maximum" to what's called "running" horsepower, a more realistic appraisal of the compressor's output. A 5hp maximum-rated compressor would have more like a 2hp running rating. But not all compressor-makers are complying, so take care when comparing power figures.
Output: "You want the compressor capacity to be in excess of the tool's average cfm if you're not willing to wait around for the compressor to catch up with you," Swanson said.
Tank capacity: Go big on the tank and you can sand longer before having to wait for the tank to fill. But Swanson actually doesn't mind switching between sanding and other tasks while the tank fills. "It's nice to give your hands a break from the vibration."