
There's nothing car guys like more than viewing vehicular carnage--except possibly to see the carnage restored to like-new condition. Want proof? Read Poncho Post from the last few issues. Everyone wants to see Before and After pictures of the pristine Pontiacs that grace the pages of this magazine. The comments are very much alike; they all want to see how far the Pontiac has come back from the dead.
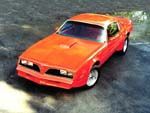
Well, we aim to please and since we happen to have an in-house project Pontiac that just went through two years worth of bodywork, we have a perfect candidate for Before and After photos. So for all those who have faithfully followed the Poncho Body Basics series, the moment of truth has arrived. No, it's not completely finished; some trim parts still need to be installed and final polishing performed before we apply the graphics. But our T/A is painted, wet sanded and buffed. At the hands of the technicians at Melvin Benzaquen's Classic Restorations, our 1977 Trans Am is in the final stretch, at least as far as the body is concerned, and it is stunning.
In Part XII, we covered all the specifics of the paintwork when the basecoat was applied. In this second to last installment of the series, we'll of course discuss the clearcoat application but, more importantly, we'll show you just how far this T/A has come over the last couple of years in Before and After photos. Follow along as we showcase the quality work of Classic Restorations and the many parts and supplies provided by Year One, 3M and PPG. Auto Body Specialties also contributed sheetmetal to the project and Totally Stainless a front end bolt kit.
What we have here is a win/win situation. The multitude of readers who supported the series get to see the result and the readers who aren't fans of bodywork can rejoice in the knowledge that the series is near completion. Happy viewing.
Poncho Body Basics Series Index
InstallmentSubjectIssue DatePart IInstall A Quarter SkinJun-99Part IIInstall A Full Quarter PanelAug-99BonusPatch A Rear QuarterAug-99Part IIITrunk Floor And Frame Rail ReplacementOct-99Part IVReplacing A Rocker PanelDec-99Part VFloorpan ReplacementFeb-00Part VIA/C To Non-A/C ConversionApr-00Part VIIDoor Skin ReplacementJun-00Part VIIISub-Frame Cage Nut RepairAug-00Part IXHang A Door, Hinge TechOct-00Part XFender Patch InstallationDec-00Part XIReskinning An A-PillarFeb-01Part XIIBase Coat ApplicationApr-01Part XIIISecond-Gen. T/A Spoiler TechJun-01Part XIVAssembling For Final PaintAug-01Part XVA Two Year Body Resto In 4 PagesDec-01