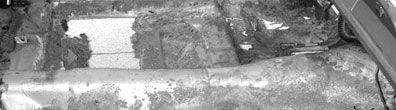
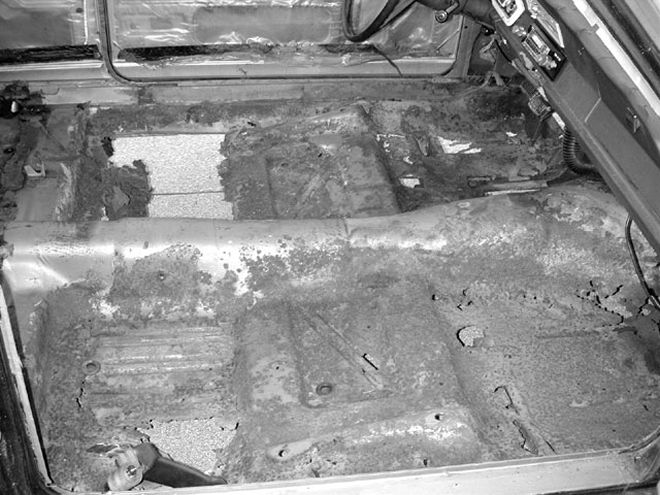
 The owner told me in advance that the car needed floors, and, boy, he wasn't kiddin'. With the interior removed, we could see how bad the floors really were.
Our '67 Valiant was in solid shape. The quarters were good and there were no signs of serious body damage to the outside. The interior was another matter altogether. Condensation had formed between the factory-issued floormat and the bare metal floor pans, never drying out. You can imagine the result-move over, Fred Flintstone! However, the frame and the remaining interior sheetmetal were in excellent shape. We could've probably found floors in the western part of the country at an automotive recycling yard, but then we'd have to get the parts shipped here, cleaned, and trimmed to fit. We instead opted to order a set of floor pans from Year One so we'd have virgin sheetmetal in a few days that we knew would fit. Both the front and rear pans retailed in our catalog for $284 total.
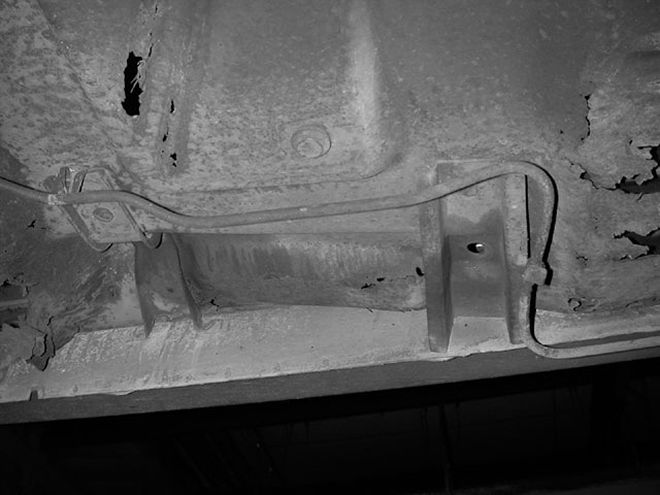 Before you get the torch out, or a cut-off wheel like we did, check underneath to see where the fuel and brake lines are. These need to be moved out of the way (or safer yet, completely removed from the car).
So, now that I've got that new-car feeling with a '67 Valiant (somebody help me), it's time to make it roadworthy. By no means am I a body man; the guys who do restoration work for a living could probably replace these pans and you'd never know. Me, well, all I can do is fire up the welder (which I do have some experience with) for a presentable job. Granted, I have access to tools to do the job, but the talent?...Anyway, follow along in the fun as we give it a Valiant effort.
Final Notes
You've seen how we installed our front and rear floor pans from Year One; just repeat the steps on the other side as needed and get rid of Fred Flintstone syndrome. When you start this project, make sure the suspension or the suspension mounting areas support the weight of the car to simulate the natural weight distribution. If not, when you do put your car back on its own footing, it may place unneeded stress on the welds you just applied. Also, the welds can be dressed up (ground smooth) for a nicer appearance (if you're going to do that, the nicer the initial welding, the less grinding you'll need to do). Well, now that we are able to keep our feet inside of Project Valiant Effort, what's next? Stay tuned!