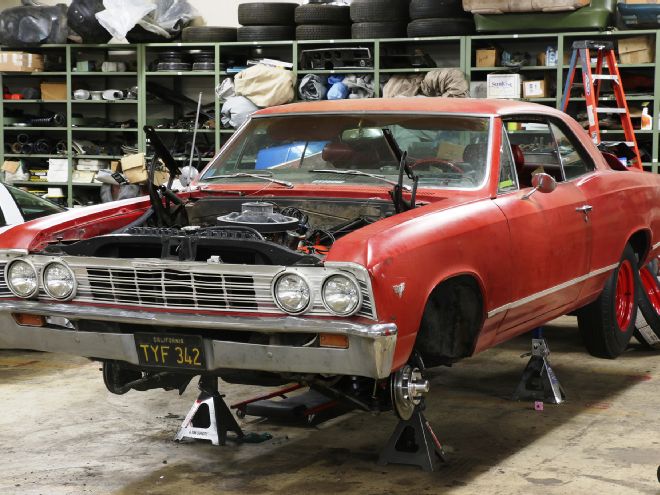
The MaliBeater build has been an attempt to create a car that could have been seen storming the streets of northern New Jersey in the late 1960s and early 1970s. Though not born a true muscle car, the original-paint, 283-powered, 1967 136-code Malibu has been upgraded with a Chevrolet Performance 427ci/480hp engine, a Muncie M22 four-speed manual transmission, a 3 1/2-inch Quarter Master driveshaft, and a 4.10 Posi rear with Strange Engineering and Eaton components. As you might imagine, the MaliBeater had sufficient go-power. It did, however, lack whoa-power.
The 1967 Chevy Malibu came standard with four-wheel drum brakes. The purist side of me likes drum brakes for a car that is only going to experience casual cruising. Drum brakes are cheaper, will lock the wheels up for one or two consecutive panic stops (if you do three or four panic stops in a row in daily driving, it's time for Uber), and require less brake line pressure. However, heat buildup in a drum brake system creates brake fade, meaning they become less effective during repeated use. Also, drum brake shoes are more difficult to install than disc brake pads.
The let's-make-this-car-safe-for-high-performance-driving side of me likes disc brakes. Properly dialed in, disc brakes stop a car in a shorter distance. Disc brakes also dissipate heat better and therefore experience less brake fade, making them safer in all driving conditions.
Some concerns about a disc brake system are worth mentioning. Disc brakes require more line pressure than drum brakes. For that reason, a power brake booster will often be the preferred setup for heavier street cars. The Wilwood Engineering conversion kit used on the MaliBeater is a four-wheel manual disc brake system, which has worked very well in real-world driving. Brake pedal feel is great, connecting the driver to the car. However, the pedal pressure required for these brakes is more than the typical late-model Ford Taurus. A future upgrade to a power-assisted system for the MaliBeater is not out of the question.
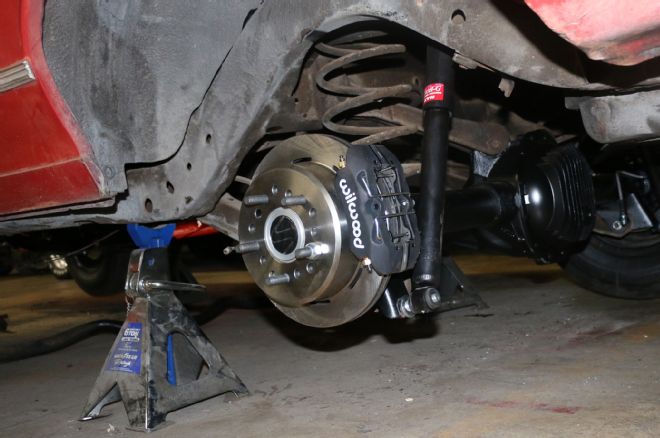
One concern often voiced about disc brakes is whether they will fit behind muscle car wheels. We chose Wilwood's 11-inch rotors for both the front and back wheels for that reason. My 15x5 Coker OE-style steel rims, 15x6 OE steel rims, 15x6 Cragars, and 15x7 Coker Chevy Rally wheels all worked well mounted to the front brakes, with no rubbing or interference at all.
Wheel fitment with the rear wheels was almost as good. My 15x6 OE steel rims, 15x7 OE steel rims, 15x7 Coker Chevy Rally Wheels, 15x8 Coker OE steel rims, 15x8 reversed Cragars, and 15x10 Coker OE steel rims all fit fine with the Wilwood brakes. My boss vintage 15x8 chrome slots did not work with these brakes. Sadly, the inside of the rim rubbed against the caliper. Rats!
Follow along as we highlight the steps needed to convert factory four-wheel drum brakes to a more competent four-wheel disc brake system.
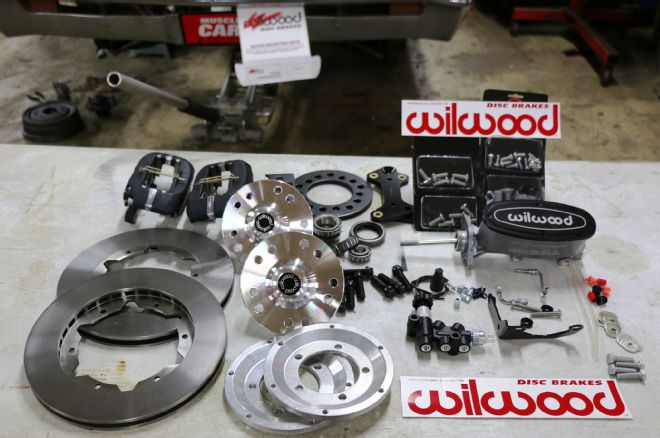
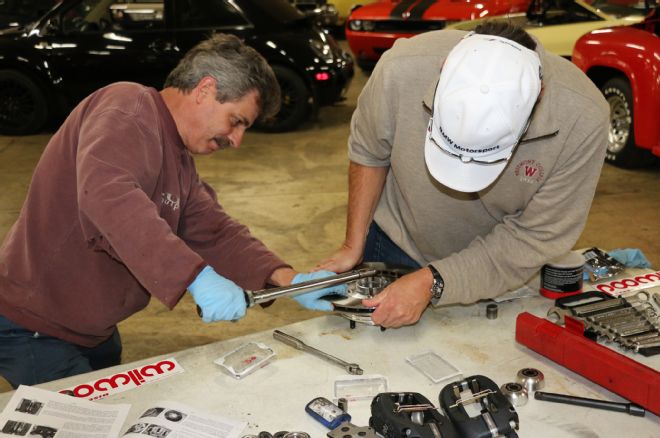
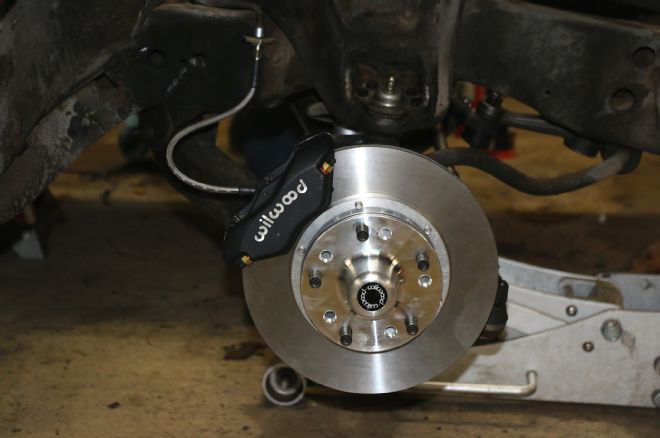
1 Not wanting to battle problems with interference between the wheel and the brake caliper or rotor, we decided to use 11-inch rotors at all four corners. The Wilwood front disc brake kit we used (PN 140-10996) is available from Summit Racing Equipment for less than $700. The kit includes Ultralite HP 30 11-inch solid-surface rotors, forged Dynalite black anodized four-piston calipers, aluminum hubs, and all the hardware necessary for a disc brake conversion using the drum brake spindle. Also pictured is the Wilwood aluminum 15/16-inch-bore tandem master cylinder kit with proportioning valve and bracket (PN 261-13626), available for around $300 from Summit.
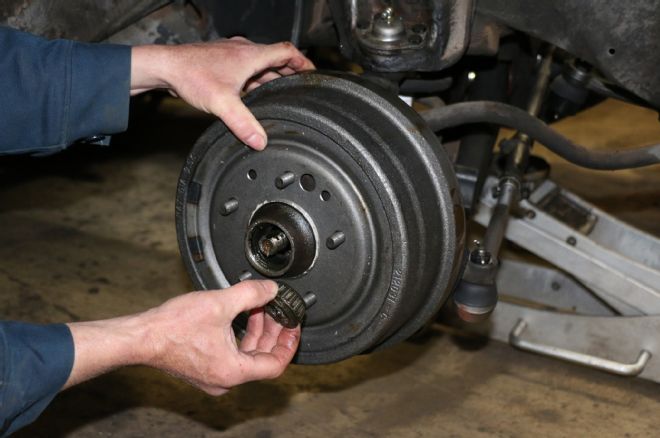
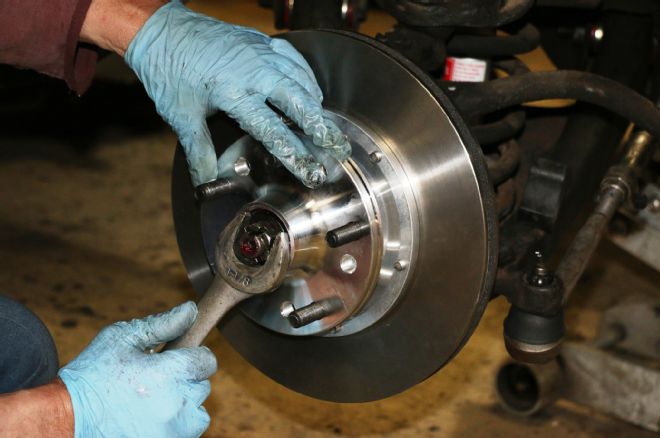
2 First step is to remove the existing brake hardware. Scott Litt pops the wheel bearing out and removes the drum, hub, and the brake shoe assembly.
3 Next step is to remove the backing plate. Save these parts, as they might be useful for a future project. Note that this picture is taken from the passenger side of the car.
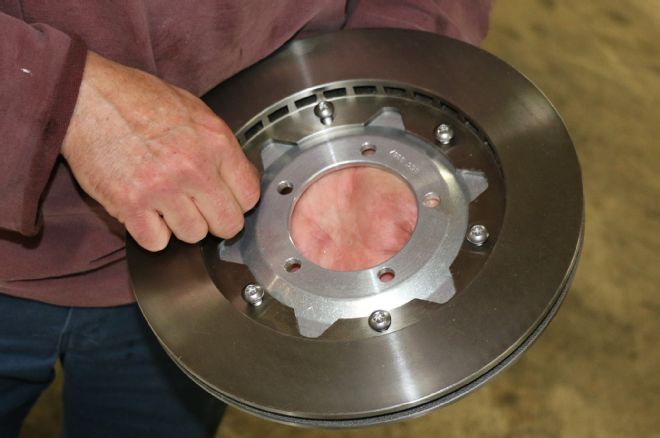
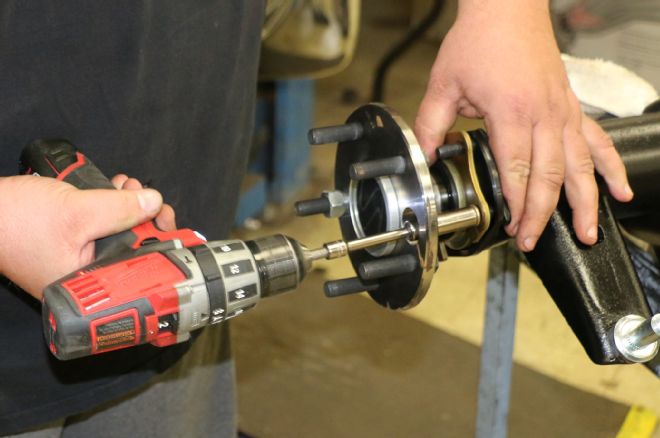
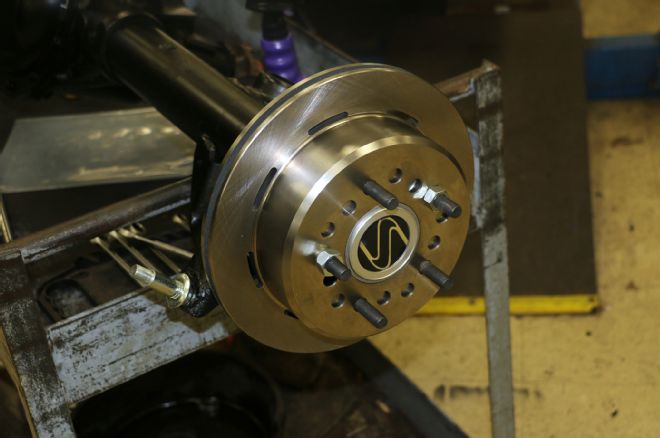
4 It's time to put together the hub/rotor assembly. Litt attaches the rotor to the adapter plate using the supplied fasteners. Loctite 271 was applied to all fasteners, as per instructions. The rotor-to-adapter bolts are tightened to 35 lb-ft.
5 The lugs are treated to Loctite 271, installed to the hub assembly (using the correct 4 3/4-inch bolt circle), and then torqued to 77 lb-ft. Litt enlists the Buick guy with the hat, Mike Vujica, to hold the rotor hub assembly while he torques the Loctite 271-treated hub-to-rotor bolts to 55 lb-ft.
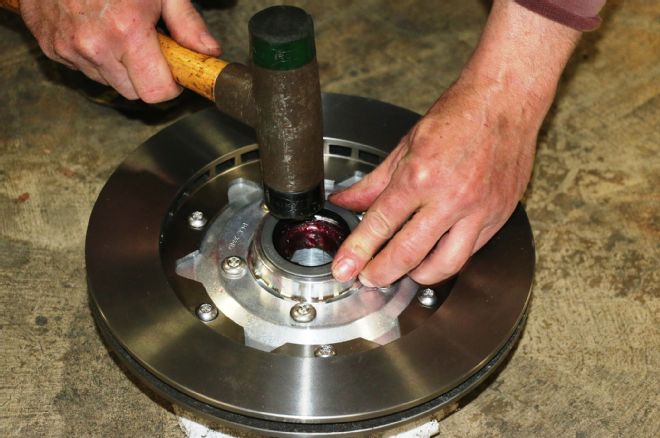
6 Litt packs the new inner wheel bearing with high-temp bearing grease, and sets the inner bearing in place. The inner wheel bearing seal is then gently tapped until flush.
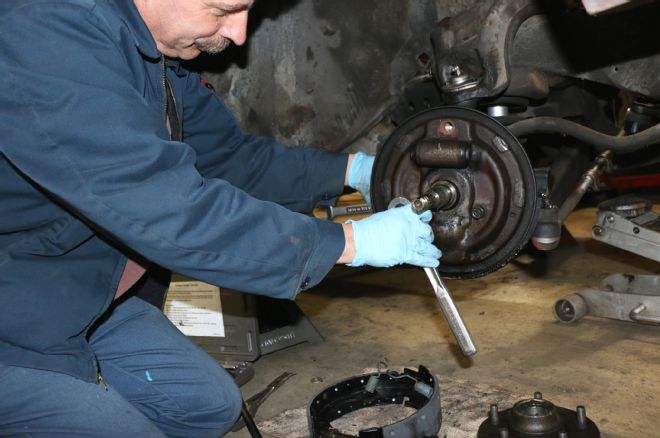
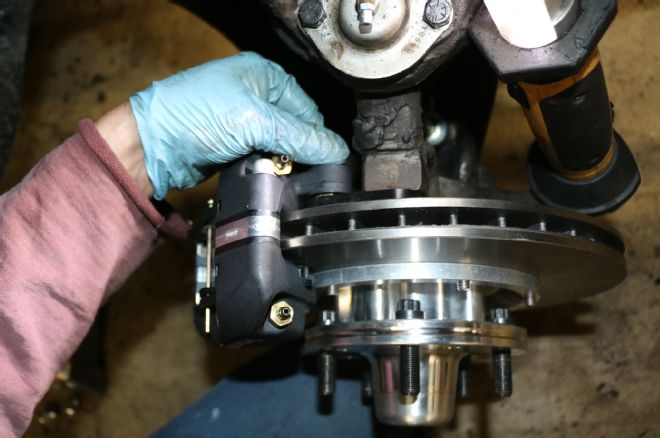
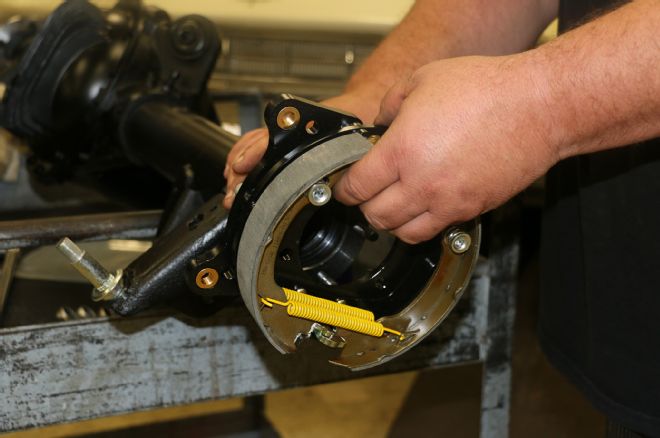
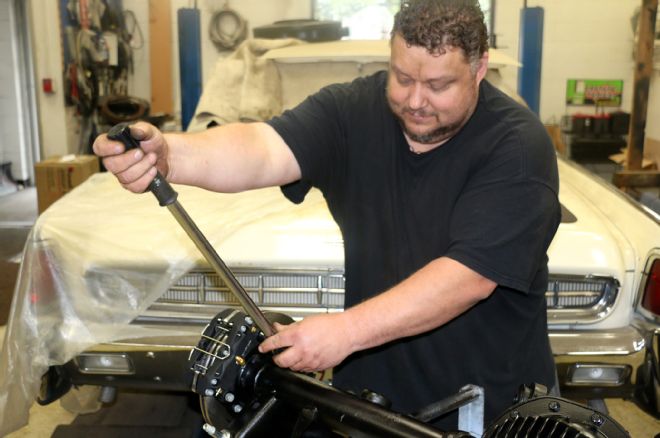
7 Switching to the driver side, the spindle is cleaned and then treated to a layer of grease. Litt attaches the caliper mounting bracket to the spindle face, using a bolt, a washer, and a 0.090-inch-thick spacer positioned between the bracket and the spindle face. That bolt is finger tightened. The upper bolt for the caliper bracket is then installed and finger tightened. The OE drum brake spindle (like this spindle) requires no spacer for that upper bolt, but the OE disc brake spindle will require a spacer.
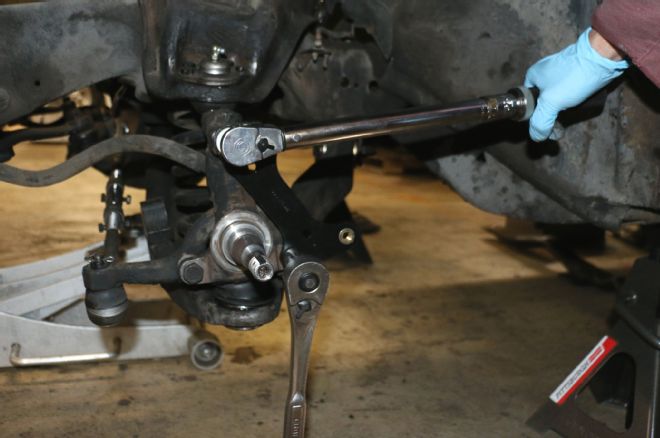
8 The hub/rotor assembly is then temporarily installed. Bracket alignment to the hub/rotor assembly is checked to be parallel with the bracket. The hub/rotor assembly is removed, and the bracket bolts are removed one at a time. The bolts receive Loctite 271, then the upper bolt is torqued to 120 lb-ft and the lower to 77 lb-ft. Litt installs the hub/rotor assembly on the spindle, making sure the rotor seats properly at the rear. The outer wheel bearings are packed with high-temp bearing grease, the spindle washer and castle nut are installed on the spindle, and the cotter pin is inserted to keep everything in place.
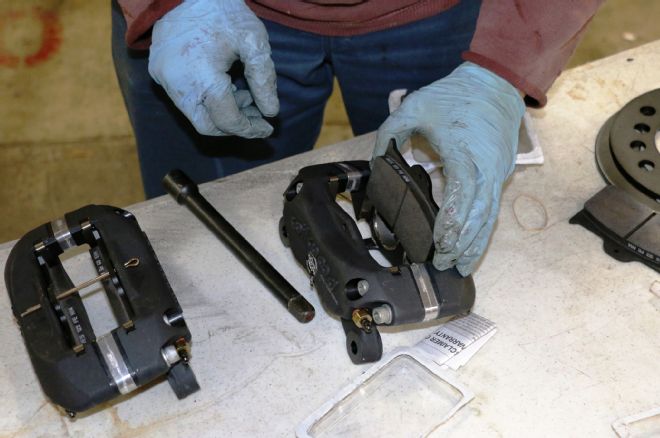
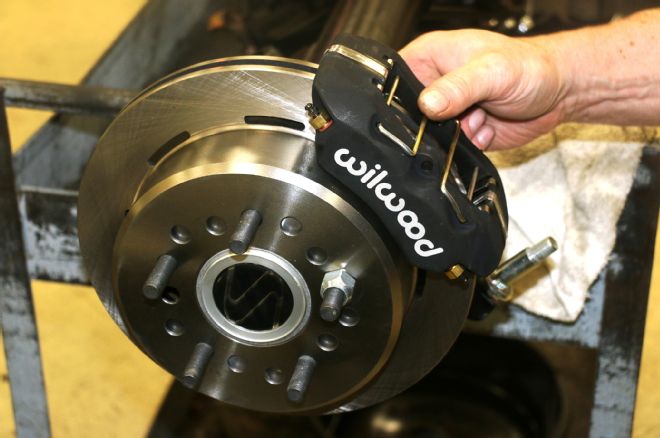
9 Litt installs the BP-10 disc brake pads in the caliper with the friction material facing the rotor. The center cotter pin is then inserted for proper location, followed by the quick-clip retainer.
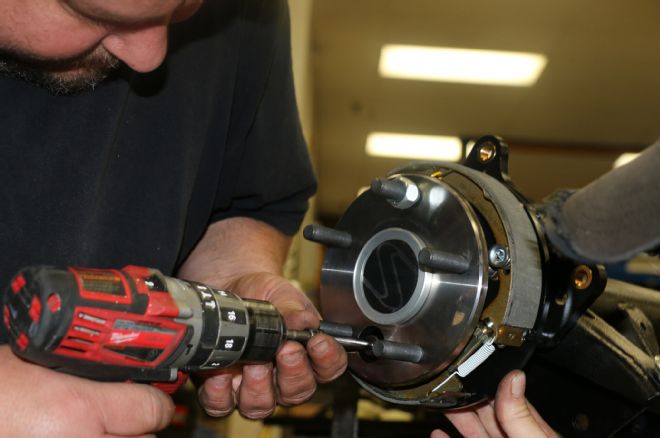
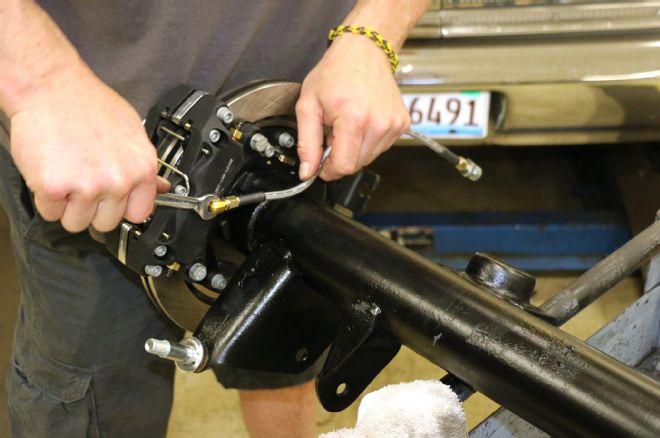
10 The caliper is attached to the caliper bracket and centered over the rotor. Shims are supplied to adjust the caliper so it is centered over the rotor. The caliper bolts receive Loctite 271 and are tightened to 35 lb-ft. The caliper inlet threads are coated with PTFE thread tape and screwed into the caliper.
11 The Wilwood Flex Line Kit (PN 220-7056) sells for about $60 from Summit and includes a pair of these slick braided steel lines and the necessary fittings to run fluid from the factory brake lines to the caliper.
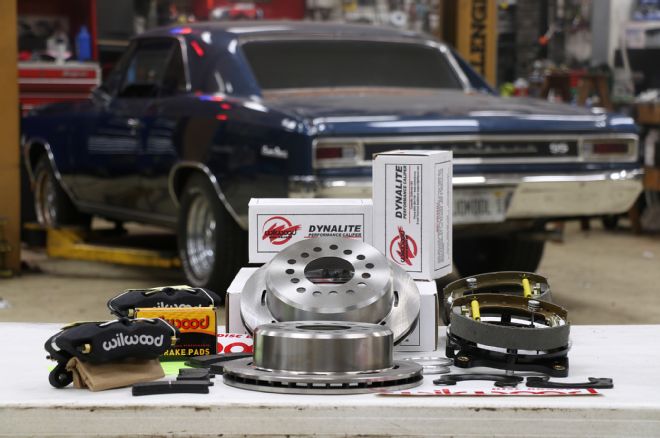
12 The Wilwood Dynapro Low Profile Brake Kit (PN 140-11389) for the rear features vented Ultralite HP 32 11-inch rotors (with parking brake) and forged Dynapro low-profile black anodized four-piston calipers. The kit is available from Summit for around $650.
13 The 12-bolt rear had been fitted with late-model Ford housing ends at Strange Engineering. The rearend was intentionally not installed for better pictures and easier brake installation. First step is to remove the axles and carefully set them aside in a clean place.
14 The Wilwood instructions detail the steps to ready this parking brake drum brake assembly for installation. Summit offers the Wilwood parking brake cables (PN 330-9371) for less than $150 and parking brake cable clamps (PN 300-11636) for less than a buck.
15 With the parking brake assembly in place, Matt Renz installs the Strange Engineering axle. The bearing retainer bolts are aligned with the holes in the parking brake assembly and the axle flange. The nuts are tightened via the access hole in the axle.
16 The rotor fits over the internal parking brake mechanism, and lug nuts are installed to properly center the caliper over the rotor. The photo shows two lugs in place, while Wilwood recommends using three. We took the photo too soon.
17 Renz installs the BP-10 disc brake pads, followed by the quick-clip retainer. He centers the caliper on the bracket, using shims as necessary.
18 Renz applies Loctite 271 to the caliper mounting bolts and torques them to 40 lb-ft.
19 Wilwood flex lines are installed to the caliper with PTFE thread tape. At this time the parking brake shoes can be adjusted outward while spinning the rotor until slight drag is felt against the rotor hat.
20 With the rearend installed, Renz ran new brake hard lines from the Wilwood braided steel lines to the center factory junction. Now is the time to attach the parking brake cables, checking to keep the cables as straight as possible.
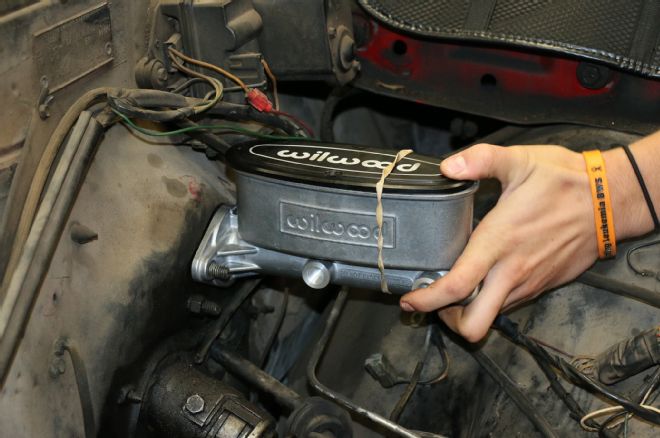
21 The Wilwood aluminum tandem master cylinder should be bench bled prior to installation using Wilwood Hi-Temp 570 brake fluid. Renz chose to mount the master cylinder to the firewall and then bench-bleed the master with someone in the car working the master cylinder pushrod. At that point the proportioning valve is installed, and the brakes are bled according to Wilwood instructions. Assuming a good pedal, the car must be tested at very low speeds (2 to 5 mph) to ensure that the brakes are working properly. All new brake components must be checked again. Then follow the Wilwood instructions for properly bedding (breaking in) the brake pads.