Back in the ’60s, drum brakes didn’t seem that bad since most cars were hobbled with the same lack of stopping prowess. Fast forward a few decades and it matters a bit more that it takes you an additional 60 feet, or more, to stop than it does for the guy in front of you. Add in the fact that engines are putting out far more power, and the need for better-performing brake systems become even more important.
Upgrading to disc brakes is a big improvement over four-wheel drums, but there are different levels of discs brakes. A basic “OEM-style” disc system will work fine, but larger rotors and calipers give another advantage; repeatability. Sure, any new disc-brake system will shave more than a few feet off the stopping distance, but the big payoff of a bigger brake kit will be the ability to pull off repeated heavy braking over and over while better resisting brake fade.
Brakes work by converting forward momentum into heat energy, and this heat needs to be properly controlled. It has to be insulated from the brake fluid, and most importantly dissipated quickly from the rotors. This is where the larger mass and curved-vane arrangement of a high-performance aftermarket rotor really pays off. More mass means the rotor can hold more heat, while the design of the vanes helps move air through the rotor more efficiently than the less expensive factory-style rotors. Today, holes in the rotors are more for looks, but slots still play a role by providing smoother pad engagement and improved thermal balance across the rotor. The larger rotor diameter also moves the caliper away from the hub, thus increasing its leverage. Now, one might think that all this weight might hurt other performance areas, and to some degree it does, but the benefits far outweigh the downsides.
Our ’65 Chevelle was stopping on the same drum brakes that it came with new, and driving around in today’s traffic resulted in quite a few “pucker up” moments. It was also still fielding the stock, single-chamber master cylinder, which isn’t the safest idea out there. So, to get our Chevy up to 21st century standards we opted to toss on a set of Wilwood disc brakes and their latest tandem master cylinder. We figured we would rather spend the money here instead of repairing front end sheetmetal damage.
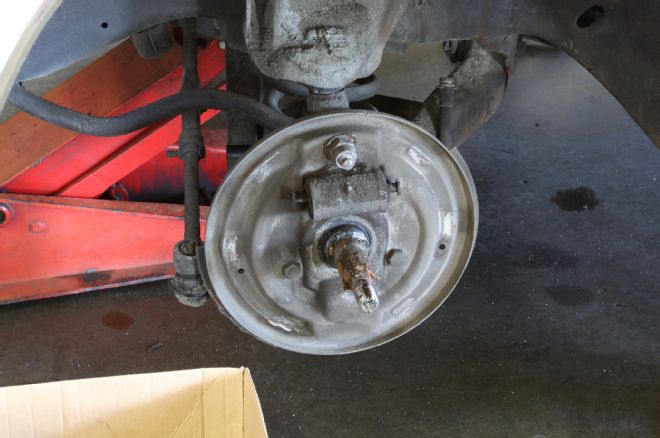
01. We’ve all seen old brakes before, so no need to dwell here. In the case of this ’65 Chevelle they were the drum variety all the way around. To make a long story shorter, we simply removed the old parts.
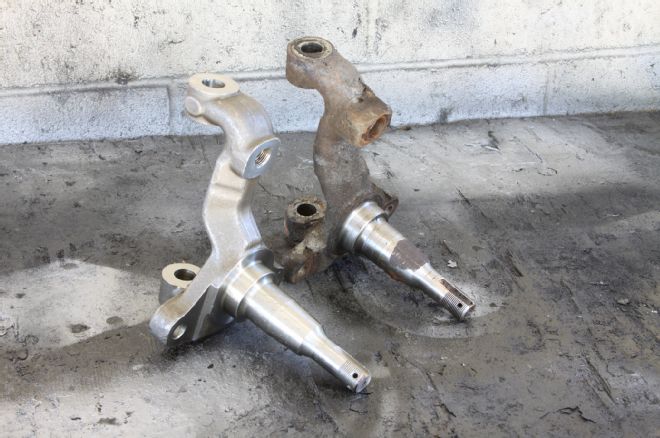
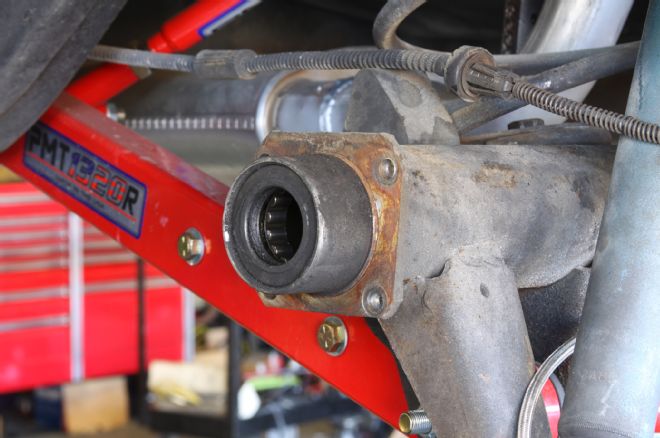
02. We also went ahead and replaced the drum brake spindles with some forged-steel disc brake versions (PN 910-34900, $125 pair) from Speedway Motors. They came in raw steel so we taped off the pins and gave them a coat of black paint.
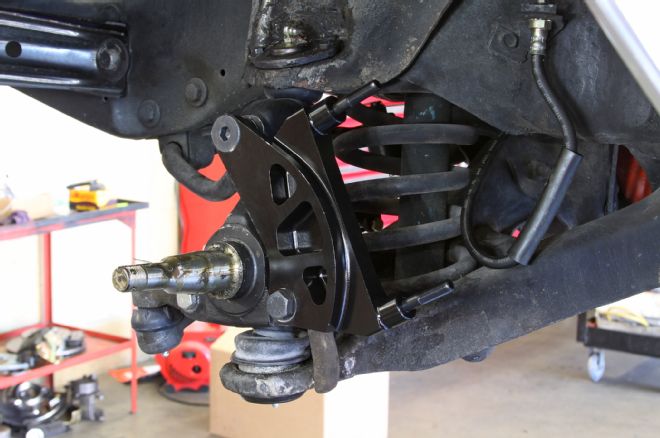
03. The caliper brackets from the Wilwood front brake kit were then bolted in place. In this way we were able to run modern, radial-mount calipers on the original-style spindles.
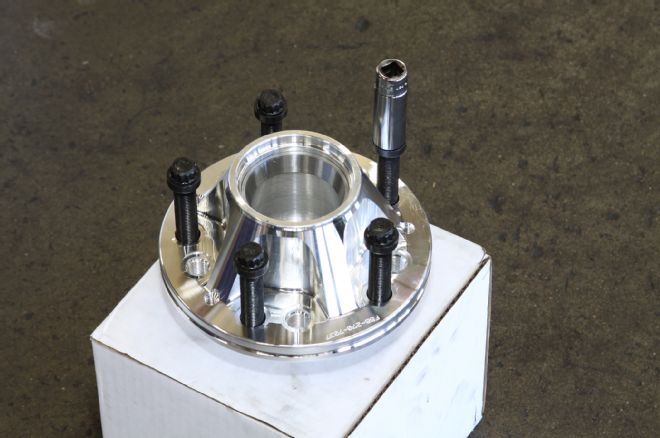
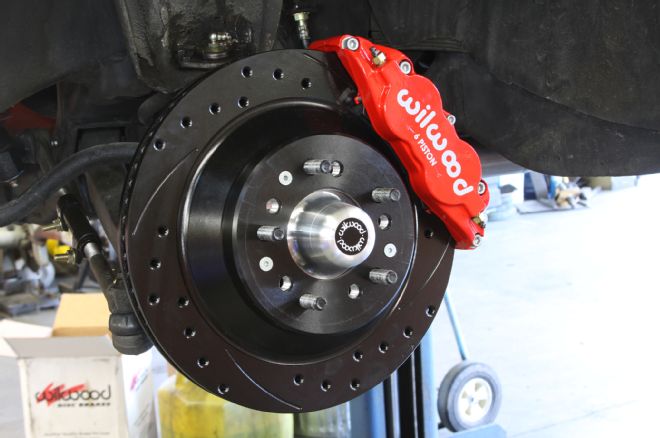
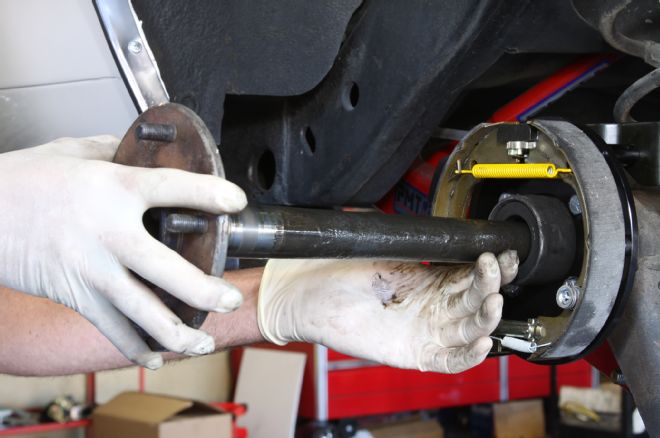
04. The Wilwood forged hubs (PN 270-7037, $135) are almost too pretty to hide behind the rotors. They came unassembled. So, before installing the bearings we spun in the wheel studs.
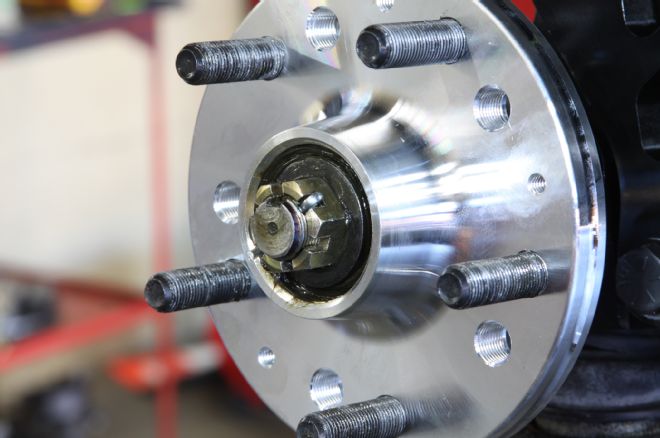
05. After packing the bearings with some high-quality grease, we slid the hub assembly onto the spindle and secured it with a castle nut and cotter pin. Keep in mind that the Wilwood kit doesn’t contain the special washer or castle nut, so make sure you have them on hand.
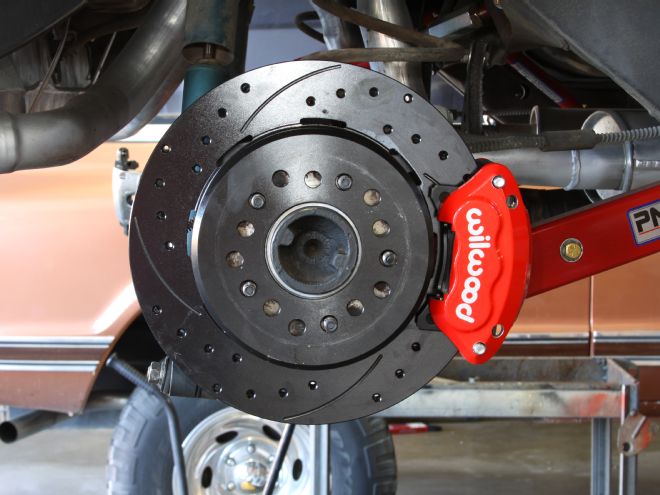
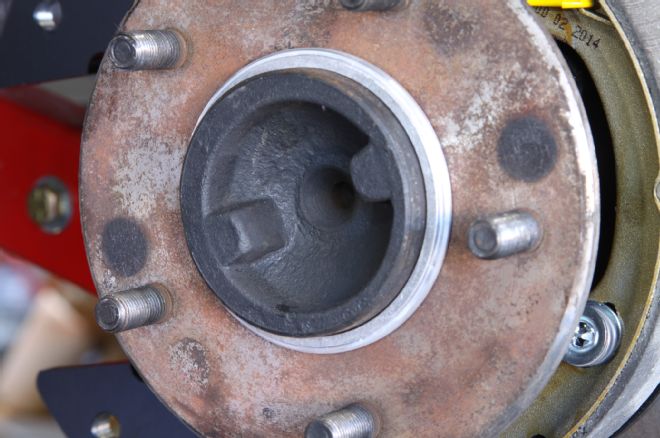
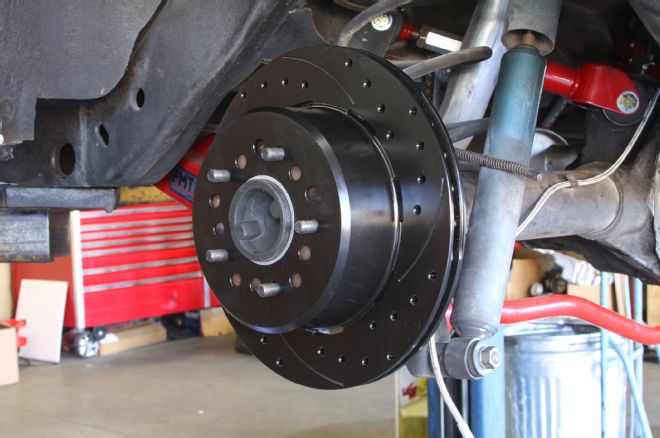
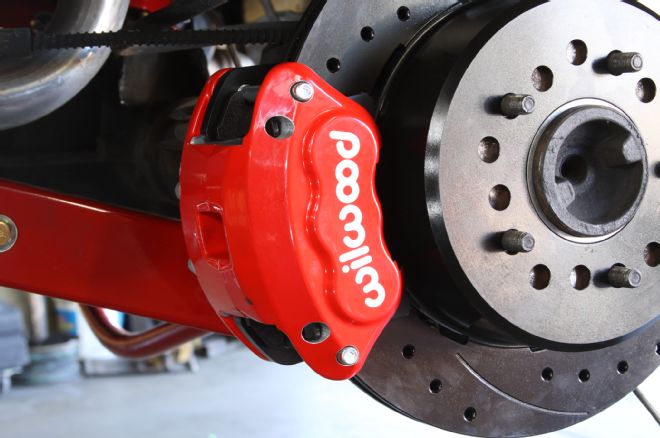
06. The new one-piece E-coated rotor was then slid over the wheel studs. The black coating was developed by Wilwood many years ago and has proven to be far more durable than zinc, especially under hard use. The coating on the rotor face, where the pads make contact, will be removed once the pads are bedded in.
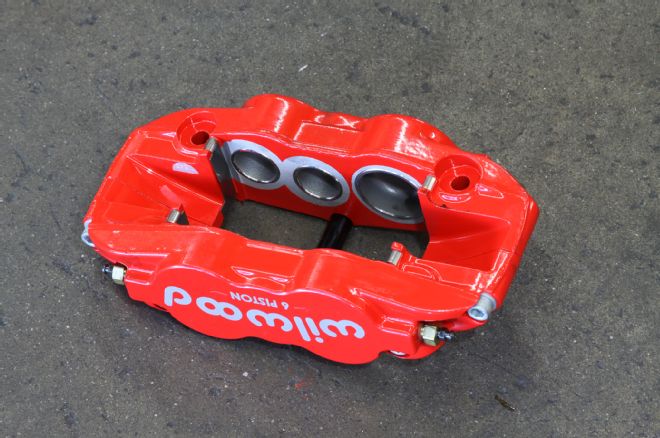
07. The six stainless steel pistons in the Forged Superlite 6R (PN FNSL6R, $354) calipers use differential sizing to apply even pressure across the entire pad. This helps keep the pads from wearing at strange angles, which could shorten the life and performance of the pads. In case you’re curious, the large piston is 1.62 inches, while the smaller ones are 1.12 inches for a total piston area of 4.04 inches.
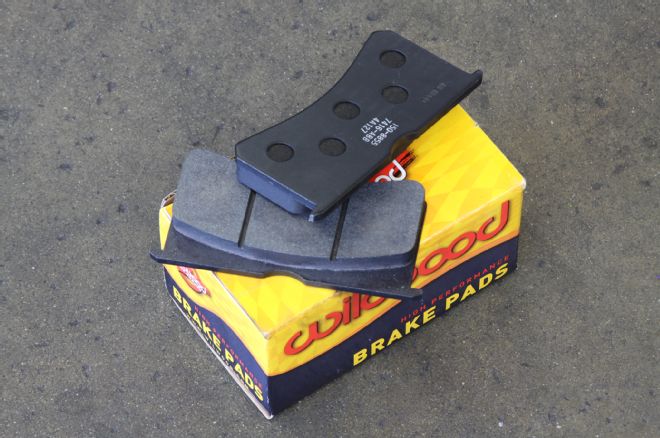
08. We went with Wilwood’s medium-duty BP-10 smart pads. They offer a good balance between high-performance stopping power and low-dust/low-noise street manners. If heavier track use is in your future, then we would suggest stepping up to their BP-20 pads.
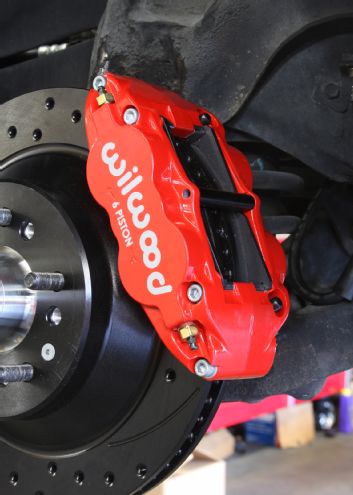
09. With the pads loaded, we slid on the radial-mount caliper. The kit came with a pack of shims, which we used to make sure the caliper was centered over the rotor and spaced out the right distance. Our last step was to plumb in the brake lines.
10. After repeating the procedures on the other side of the car, our front brakes were done and we were ready to move to the rear of the Chevelle.
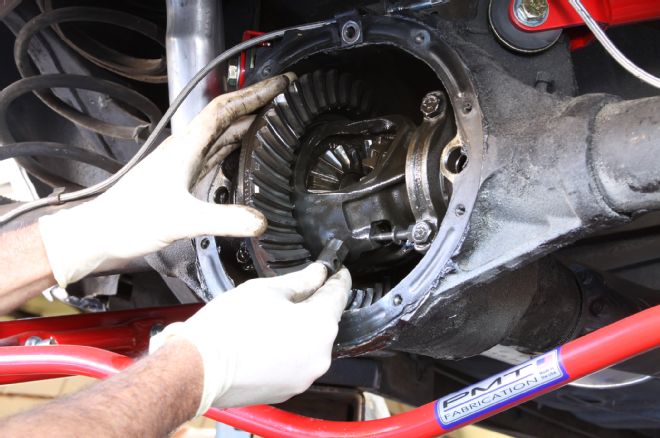
11. To install the rear brakes we had to pull the axles on our 10-bolt. That meant opening the differential. We dropped the pin to remove the C-clips, and at this point, we were very careful not to spin the axles.
12. With the old drum brakes and axles removed, this is a great time to check your axle bearings and replace if needed. Ours were in great shape, so we moved along.

13. The rear parking brake assembly came as one unit complete with the caliper mounting brackets. This made installation a snap since we only had to secure it to the flange using four of the new bolts in the kit.
14. With that installed, we slid the axles back in place and replaced the C-clips and the pin.
15. Before sliding on the new rotor, we installed this indexing ring that came in the kit.
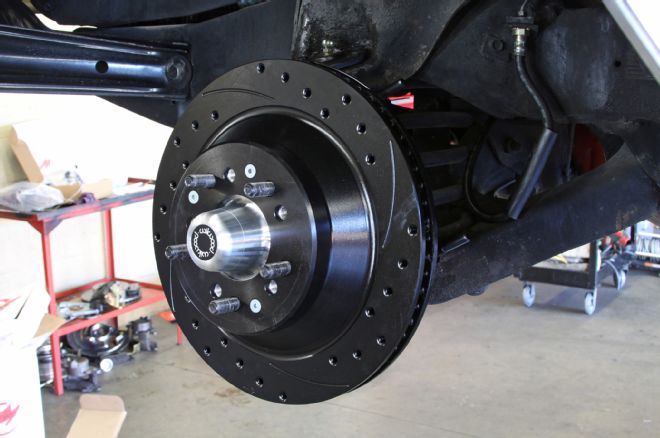
16. The new drilled and slotted SRP performance rotor (PN 160-9815-BK, $227) had a diameter of 12.19 inches and a thickness of 0.81 inches. The iron rotor had 32 cooling vanes and came fully E-coated. This will be a big step up from our worn drum brakes.
17. Most of a car’s braking is done by the fronts, so the rear brakes don’t need to be nearly as large. The rear kit came with a pair of these D154 (PN 120-11875-RD, $178) twin-piston forged billet aluminum calipers. These are a great alternative to the cast-iron GM calipers used from 1978-’02, and they feature stainless steel (1.120-inch) pistons as well as high-temperature seals.
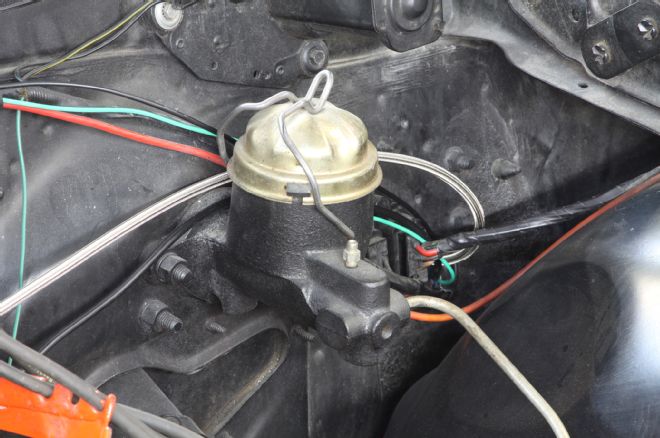
18. This single-reservoir master cylinder is how they rolled back in the mid ’60’s, and it’s the poster child for “putting all of your eggs in one basket.” Aside from the safety aspect, we needed to switch to something more suitable for our new four-wheel disc system.
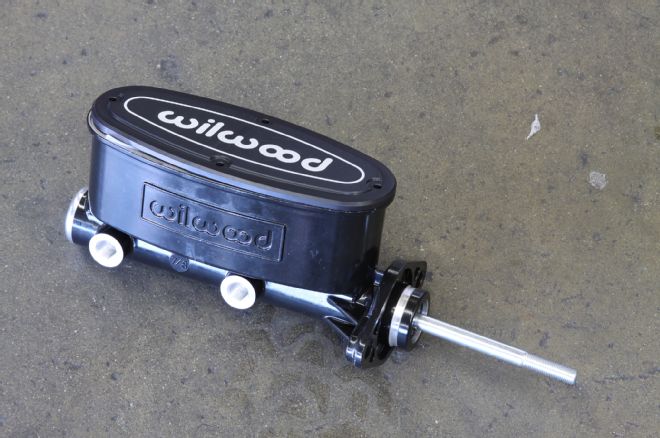
19. And that master turned out to be a Wilwood tandem 7/8-inch piece (PN 260-9439-BK, $259). Aside from looking good, it will give us the safety of a modern two-chamber design.
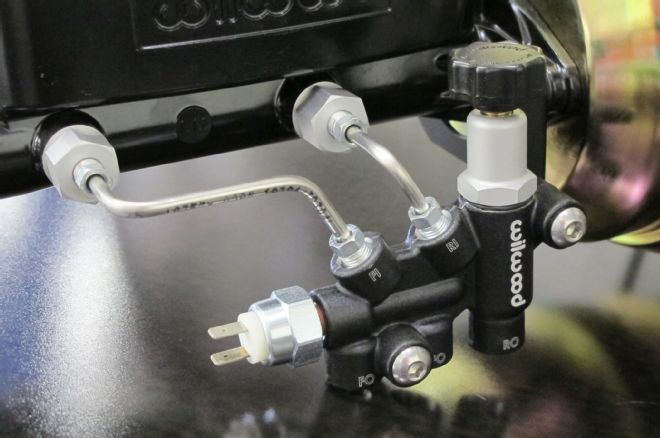
20. We paired the black master up with Wilwood’s new proportioning valve and mounting bracket kit (PN 260-13190, $116). The kit makes install a snap since it comes with the valve, mounting brackets, and the two pre-bent lines from the master to the prop valve.