We took a brief look at some of the varied wheels seen on street rods in the last issue and also examined in detail what really makes up a wheel. The truth is, there's a lot of choice out there, and tires most certainly compound that diversity. The bottom line here is, name your poison. If you dream it, it likely exists when it comes to rolling stock. In this installment, we'll not only take a detailed look at mounting tires on wheels, we'll also look at things like lug nuts, wheel studs, nitrogen refills, and even roadside repairs-there's something here for every street rodder.
Rolling On Down The HighwayMount And Balance Wheels And TiresIn the photos that follow, you'll see how a pretty common BFGoodrich Radial T/A is mounted on a 16x10.00-inch Real Rodders wheel. A new wheel was used as an example, but in many cases, a rodder will bring in a used wheel. BFG mentions that all used wheels that are about to be mounted should be cleaned. You'd be surprised how many street rod wheels are actually covered in rubber debris and dirt. Not only is it tough to mount a tire on such a wheel, it makes balancing diffi cult. Tires should be kept clean too, so use a common tire cleaner or protectant such as Armor All, but never use a brake-cleaning chemical on tires. BFG also points out that you should remove all old weights along with any tape used to cover the weights. It's also easier for technicians to handle tires that aren't flat, so keep the tires full of air when returning rolling stock for a remount.
For a closer look at how the pros mount tires, check out the following images.
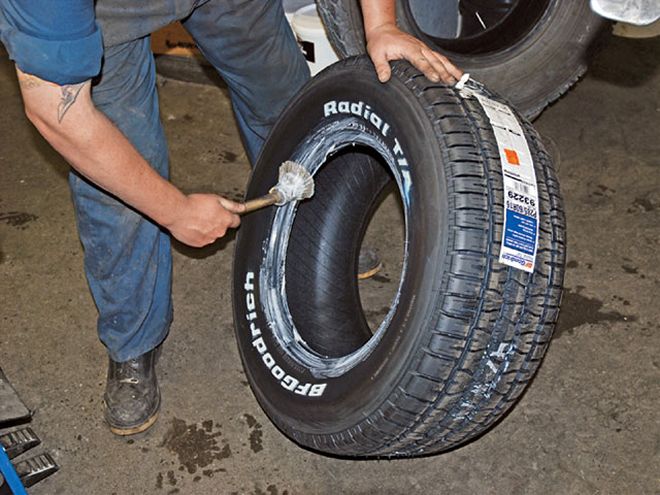
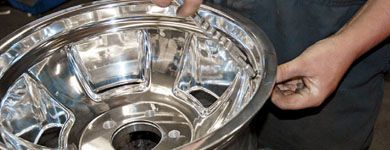
The tire used in the example is a BFG P285/60R16 Radial T/A. This is a tall radial with a tread width of 10 inches, an overall diameter of 29.5 inches, and a measured section width (bulge dimension) of 12 inches. The tire is designed for use on wheel width ranging from 8 to 10 inches. The bead on the tire, along with the inside of the wheel, should be coated with a lube of some sort before mounting. Here, Prema Euro Paste mounting compound-designed to reduce bead damage and help eliminate rim slippage (tires turningon the wheel rim) at the same time-is brushed on. It doesn't freeze or harden either. The third benefit of using this stuff is the ability to inhibit rust; many tire lubricants are water-based and corrosion will develop on the wheel in the tire bead area if the solution doesn't include corrosion inhibitors. This corrosion will build up and can eventually cause the tire to leak between the bead and rim. Also, the corrosion can cause a form of "welding" between the tire bead and the wheel, making it very dif- ficult to break the bead when the tire is dismounted later. Using unusual force to break a bead may cause bead damage. By the way, some shops still use a mix of good, old-fashioned liquid dish detergent and water.
The next step involves installing the tire over the wheel. It's common practice to install the backside first, followed by the front side or face side of the There's nothing fancy here, but care is taken not to damage the wheel or the tire.
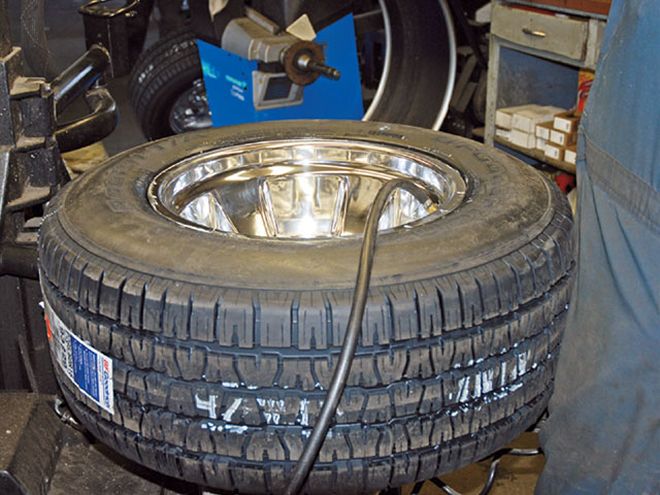
At this point, the core is installed in the valve and the tire is filled to a maximum of 40 lbs psi to seat the bead to the wheel rim. If the bead doesn't seat at that pressure, then the tire should be broken off the rim and re-coated withsoap or mounting paste (in essence, you have to start from the beginningagain). The use of excessive air pressure when mounting tires isn't a goodidea. Once the tire has seated, reduce the air to the approximate intending running pressure. In this case, it's set at 35 lbs psi. Keep in mind, street rods don't have exact pressures you can use, so each car will mandate how little or how much pressure is required. It's usually a matter of trial and error.
You have a couple of options when it comes to balancing-use a good old-fashioned bubble balancer or, as shown here, a modern spin balancer. Keep in mind there are two types of imbalance you'll most likely encounter when balancing a tire: static or dynamic. Static imbalance is vertical movement resulting from heavy or light spots in a tire. This imbalance can be corrected using either a static bubble balancer or a dynamic spin balancer. On the other hand, dynamic imbalance is caused by lateral movement (wobble or shimmy) that comes from unequal weight on both sides of the tire and wheel/wheel assembly centerline. This imbalance can only be corrected with a dynamic spin balancer. In case you're wondering, dynamic balancing doesn't mean the ugly weights have to be placed on the outside. A proficient tire technician can manipulate the setup so that the weights all tuck on the backside of the wheel. Another issue is tire "out of round." It's not that common on modern tires, but there's always a possibility the tire has high spots with vintage bias-ply rubber. In fact, just before the radial became uber-popular in the early '70s, plenty of tire shops "trued" out-of-round tires. Essentially, this process literally shaves the mounted tire with sharp blades as a machine spins it. The reason for truing the tires was (and still is, if you have vintage rubber on your rod) because you'd often find a biasply tire or even a complete set could not be balanced. You'd end up with a vibration at one speed or another. Graybeards will remember how this vibration grief drove them nuts, and truing was the only answer. There are select shops out there today that still do the work (think places that mount and balance big truck tires).
A modern tire balancer, such as this Hofman Geodyna Optima, is pretty much hands-free once the wheel and tire is mounted. A laser system determines where the weights go and how much weight is required. By manipulating the weight location, the technician can hide the tape weight on the backside of the wheel. In fact, this setup allows the technician to hide the weights behind wheel spokes. While more common on wheels and tires destined for racing, some shops add a strip of duct tape over the tape weight when complete.
We've looked at nitrogen refills in the past (see SRM, January 2008, "It's A Gas"), but here's a short refresher. One of the benefits of filling your tires with nitrogen is the fact that air pressure is more easily retained. According to Ingersoll Rand, "Diffusion out of the tire sidewall is 30 to 40 percent slower than oxygen. That's why a nitrogen-filled tire maintains pressure longer." An even bigger benefit for street rods could be the fact that nitrogen prevents oxidation. Oxidation leads to tread separation, but it also leads to corrosion of the rim. Don't believe it? Forget to drain an air compressor after a few days of use and you'll see just how much water is found in compressed air. So, what's the downside? That's simple. Most of us don't have nitrogen refill stations in our own shops, so you have to take the car to a shop and have the tires filled when required. And the key for refills is usually the green filler hose (shown in the second photo). Nitrogen refill stationsare often green in color, too.