Text and Photos by Kaizenspeed
The Kaizenspeed Rear Trailing Arm Assembly is designed to extend the wheelbase for FWD drag cars. Compatible with '92-'00 Civics and '94-'01 Integras, the kit allows you to extend your vehicle's wheelbase from 3/4 to 2 inches. Look closely at some of the fastest FWD cars in the world (T1, Speedfactory, KS Tuned), and you'll see the rear wheels positioned further back in the wheelwells as compared to a factory setup. Some of these cars have expensive suspension kits that are out of reach for the average competitor, but this race car technology is now available to everyone! Extended wheelbase is designed to reduce weight transfer on the launch, allowing more weight to remain on the front drive wheels. Extending the wheelbase essentially follows the same principle as wheelie bars, keeping as much weight as possible on the front.
The Kaizenspeed Rear Trailing Arm and Staging Brake completely replaces the rear trailing arm assembly. Gone are those heavy arms and sloppy bushings. Let's face it; your bushings are somewhere around 20 years old, which means 20 years of winters and summers, debris and rubber bushing deflection.
Note:
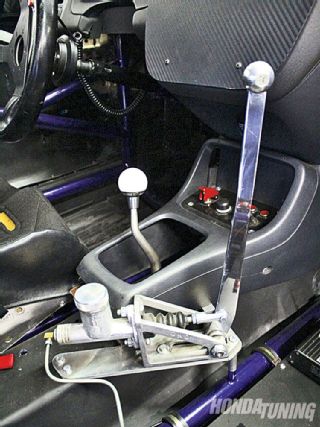
This product is intended for drag race builds and designed specifically to stage a car. It is not designed to apply the brakes on the pedal. It's for a hydraulic handbrake only and does not work with a factory e-brake cable. Braking with skinnies is dangerous on a FWD vehicle as the tire is so narrow, it can easily lock up and cause a skid. If this happens at the end of the dragstrip, and above 150 mph, the car can get squirrelly with the quickness! Kaizenspeed always recommends that the rear brakes are on a hand-operated staging brake and not connected to the brake pedal when drag racing a FWD fitted with rear skinnies.
 | Kaizenspeed Rear Trailing Arm Assembly CNC Hydraulic Handbrake 02
(We recommend that you connect your new brake lines to a hydraulic handbrake such as this handbrake from CNC.)
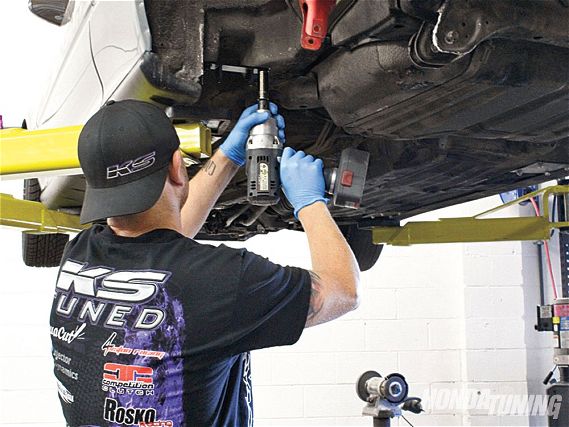
To start with our rear trailing arm and staging brake installation, you need to jack up and safely support the vehicle. Remove the wheel and completely remove the rear trailing arm assembly.
*If you have factory disc brakes:
Remove your factory hub:
*If you have factory drum brakes:
You'll need a hub from a car with disc brakes in the rear. These are available from auto parts stores brand new or from salvage yards. The drum brake rear spindle is 1.100," and the disc brake rear spindle is 1.180." You'll need a hub that fits the larger 1.180" spindle.
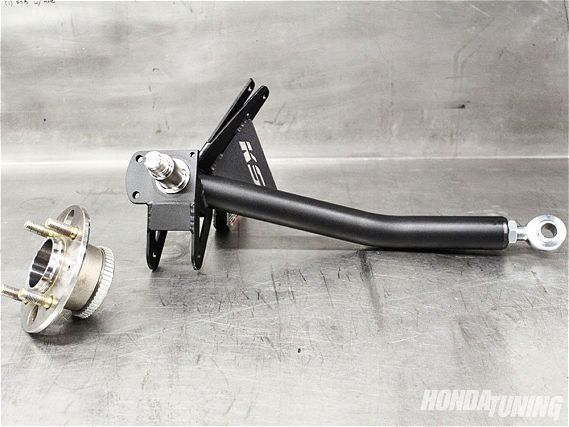
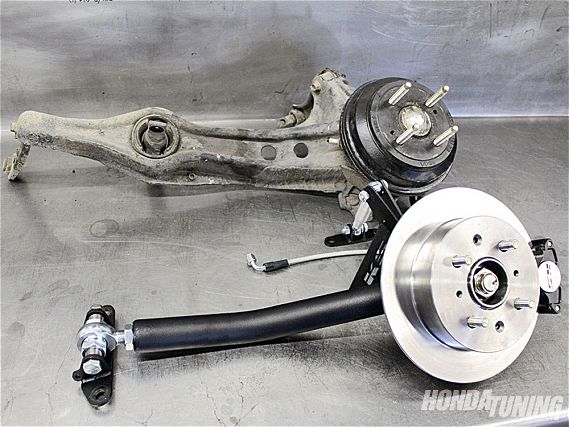 | Kaizenspeed Rear Trailing Arm Assembly Drum Brake Rear Trailing Arm Comparison 03
Drum brake rear trailing arm versus Kaizenspeed Rear Trailing Arm Assembly.
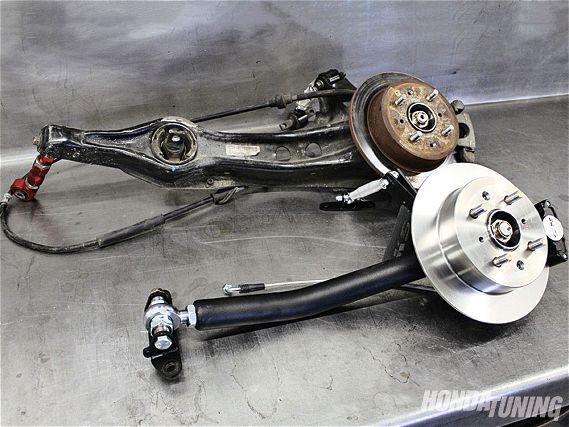 | Kaizenspeed Rear Trailing Arm Assembly Disc Brake Trailing Arm Comparison 04
Disc brake rear trailing arm versus Kaizenspeed Rear Trailing Arm Assembly.
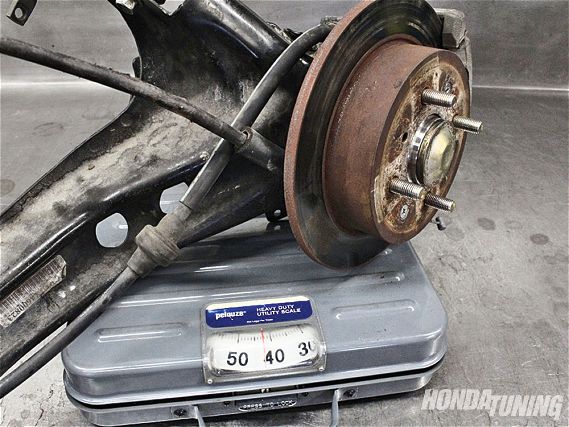 | Kaizenspeed Rear Trailing Arm Assembly Weight Comparison 05
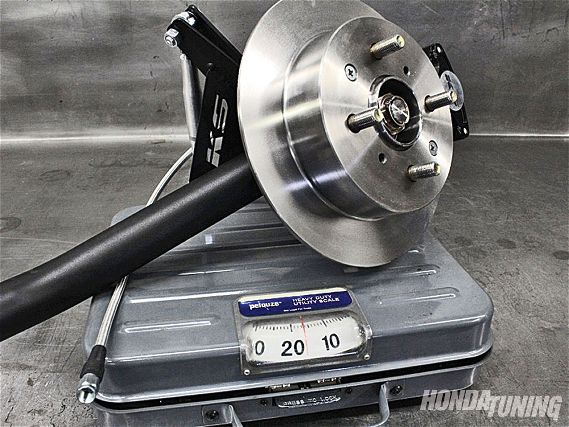 | Kaizenspeed Rear Trailing Arm Assembly Weight Comparison 06
Weight comparison between stock and the Kaizenspeed kit
*Note, the factory rear-trailing arm shown has the e-brake cable cut. The e-brake cable will have to be removed from the handle (inside the car) before the OEM rear trailing arm can be removed.
Installing the KAIZENSPEED Rear Trailing Arm and Staging Brake assembly:
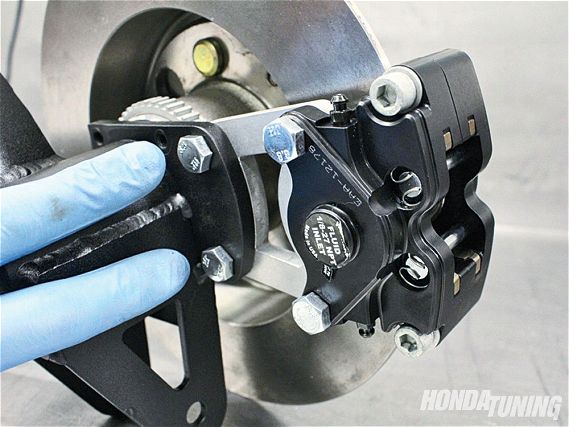
 | Kaizenspeed Rear Trailing Arm Assembly Hub And Spindle Attachment 07
 | Kaizenspeed Rear Trailing Arm Assembly Hub And Spindle Install 08
1: Using the nut and washer removed from your OEM rear trailing arms (32mm head x 1, plus washer) slide the hub onto the new spindle. Now tighten the nut, reinstall the dust cap, and slide the new rotor onto the hub. *If you had factory disc brakes, you can use your OEM countersunk fasteners to attach the rotor to the hub.
Traction control?
2: Yes! Install the wheel speed sensor and bracket (optional).
There are two wheel speed sensors (for traction control) options:
A: Use our Hall sensor bracket. It counts the back of the stud as it goes around and generates a pulse every time it passes by the sensor. This can be compared to the front wheel speed and you can identify traction loss.
B: Recycle your ABS sensor and use the ABS sensor bracket.
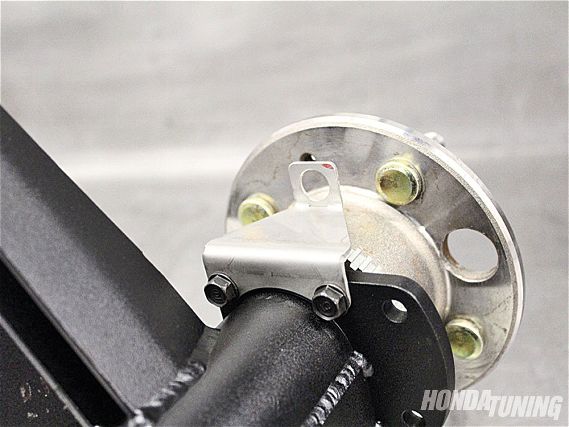 | Kaizenspeed Rear Trailing Arm Assembly Hall Effect Sensor Bracket 09
Hall-effect sensor bracket mounts a sensor to count the wheel studs for wheel speed detection (for traction control.)
 | Kaizenspeed Rear Trailing Arm Assembly ABS Sensor Bracket 10
The ABS sensor bracket allows you to use the factory ABS ring and sensor. *The ABS sensor is a mag sensor, which produces a sine wave. For use in modern ECU's, you'll need a signal converter (MSD PN 8509) to convert from a sine wave to a square wave signal.
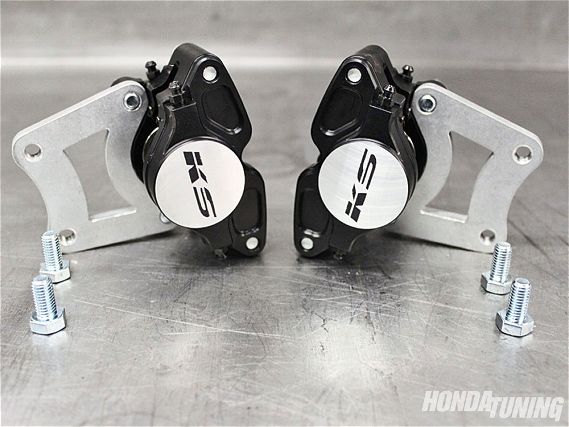
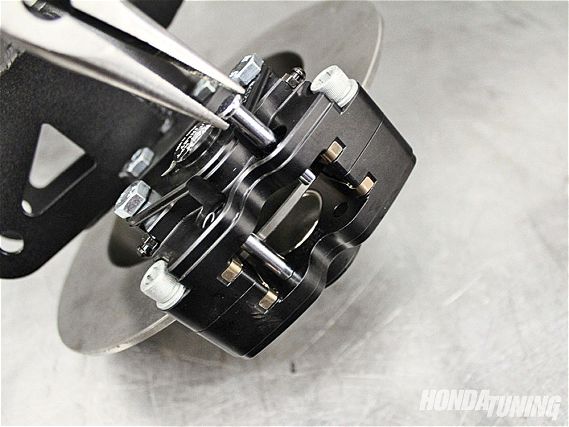
| Kaizenspeed Rear Trailing Arm Assembly Brake Pad Install 11
 | Kaizenspeed Rear Trailing Arm Assembly Brake Caliper Install 12
3: Install brake pads into the calipers and bolt the caliper assembly to the arm. (Using the supplied bolts, attach the caliper to the bracket then bolt the assembly to the arm.)
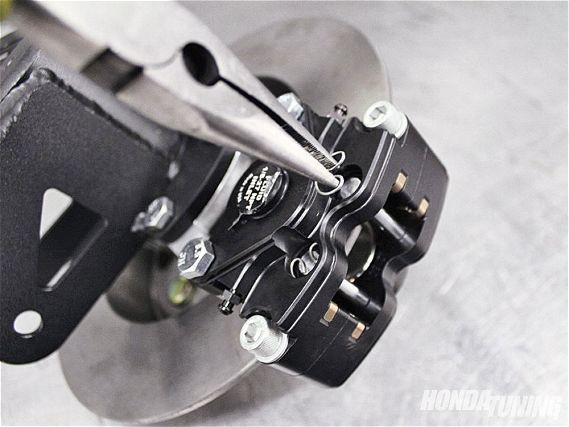 | Kaizenspeed Rear Trailing Arm Assembly Brake Pad Clip 13
Remove the two clips, then remove the pins and install the pads.)
 | Kaizenspeed Rear Trailing Arm Assembly Brake Pad Pin 14
Remove the pins.
(This brake pad is small enough to fit in the palm of your hand, and is designed only for staging.)
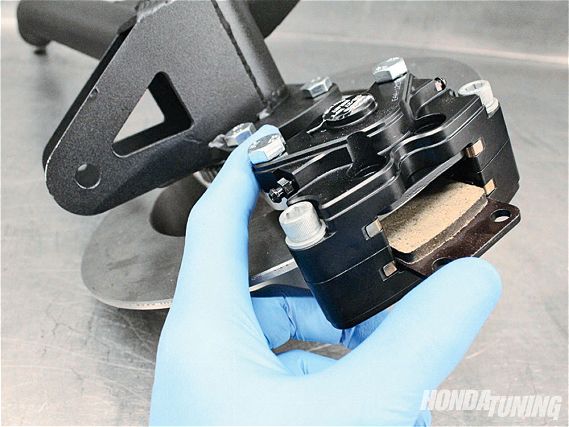 | Kaizenspeed Rear Trailing Arm Assembly Brake Pad Caliper Install 15
With the pins removed, slide the brake pads into the caliper. After the pads are installed, slide the pins back in and reinstall the clips.
 | Kaizenspeed Rear Trailing Arm Assembly Front Toe Link Install 16
Install the front toe-link threaded rod into the front toe link.
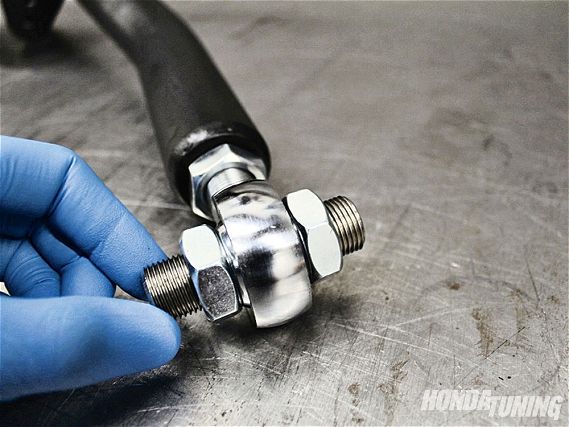 | Kaizenspeed Rear Trailing Arm Assembly Threaded Rod Install 17
Install the threaded rod and thread jam nuts on both sides. Toe adjustment and wheelbase extension is done at this point.
 | Kaizenspeed Rear Trailing Arm Assembly Toe Bracket Install 18
Using your OEM trailing arm bushing bolts (17mm head x 2), attach the functional toe bracket to the chassis. *Make sure the bracket with the extra hole in it faces inward.
 | Kaizenspeed Rear Trailing Arm Assembly Toe Bracket Install 19
Install the functional toe bracket using OEM fasteners.
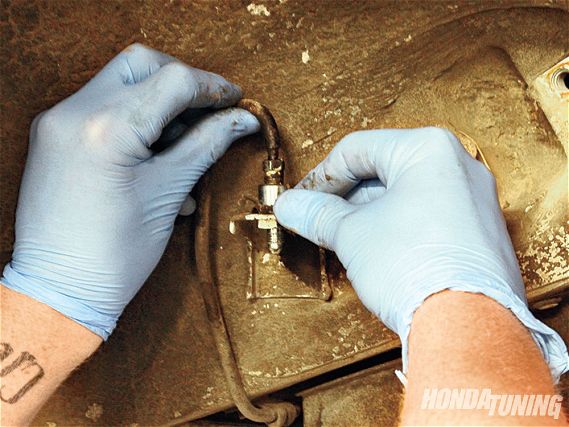 | Kaizenspeed Rear Trailing Arm Assembly Brake Line Fitting Install 20
Install the supplied brake line fitting. (The supplied adapter fitting converts from inverted flare to -3AN and threads directly to the supplied stainless brake line.)
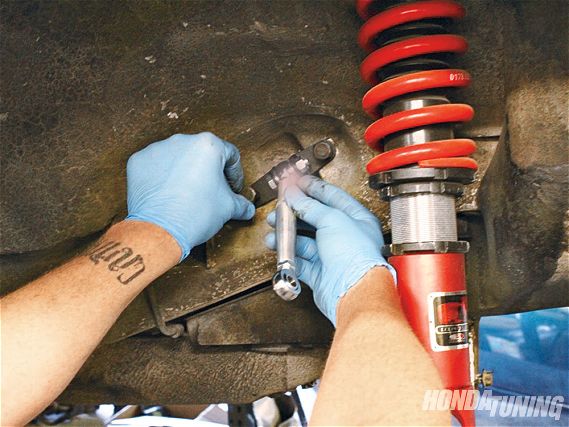 | Kaizenspeed Rear Trailing Arm Assembly Upper Camber Arm And Bracket Install 21
Attach the new upper camber arm and bracket to your chassis. (Using the supplied fasteners, attach the upper camber arm to the chassis.)
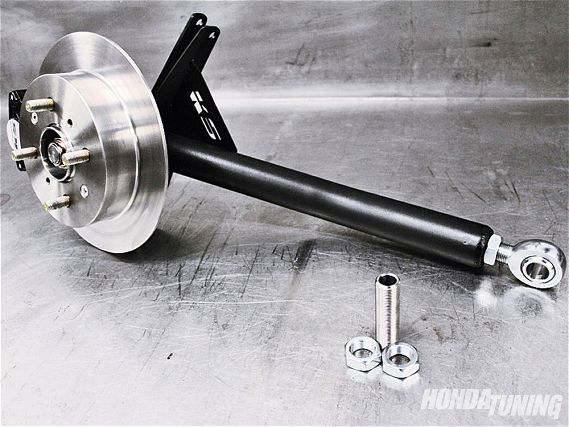
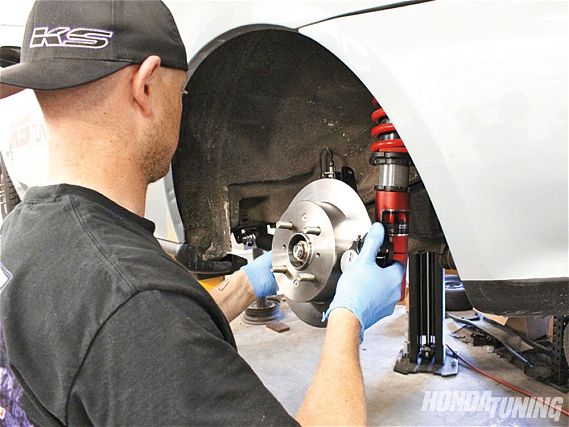 | Kaizenspeed Rear Trailing Arm Assembly Install 22
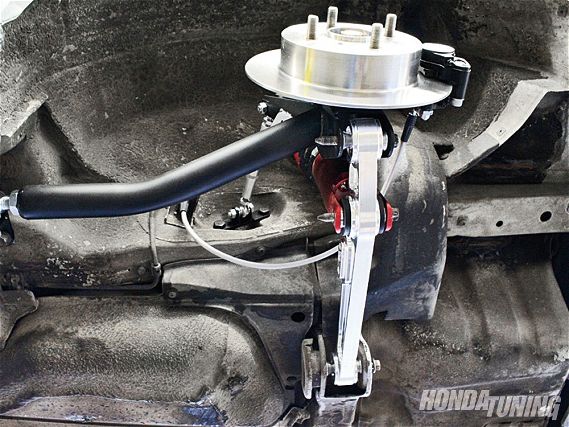
Install the Kaizenspeed Rear Trailing Arm Assembly.
 | Kaizenspeed Rear Trailing Arm Assembly Front Toe Link Install 23
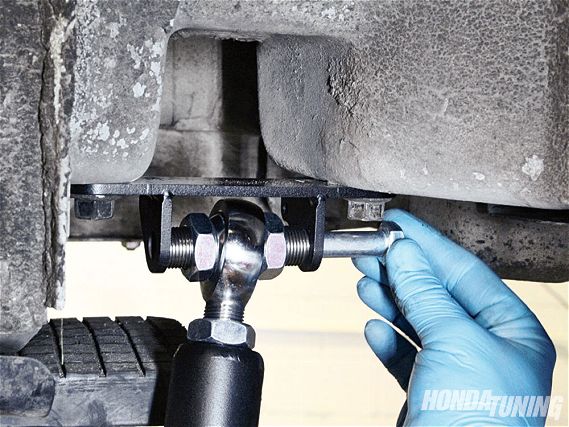
Using the supplied bolt, attach the front toe link to the functional toe bracket. Toe adjustment and wheelbase extension is all accomplished at this link. To adjust the toe, simply loosen the locknuts and slide the heim on the threaded rod in the direction you need. All of the heim joints used are sealed for long life even in dusty environments. This front heim is rated at 28,081 pounds.
 | Kaizenspeed Rear Trailing Arm Assembly Toe Link Adjusting 24
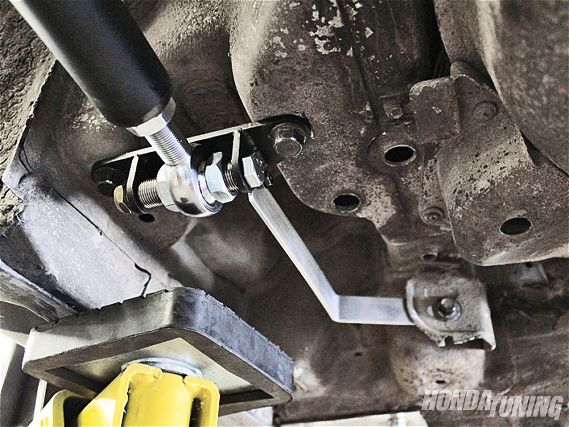
Here you can see the toe link adjusted for more toe-in, and the wheelbase extended. Also note the aluminum toe-link dummy bracket. This ensures legality for all racing classes requiring "all suspension locations" to be used.
 | Kaizenspeed Rear Trailing Arm Assembly Upper Camber Arm Install 25
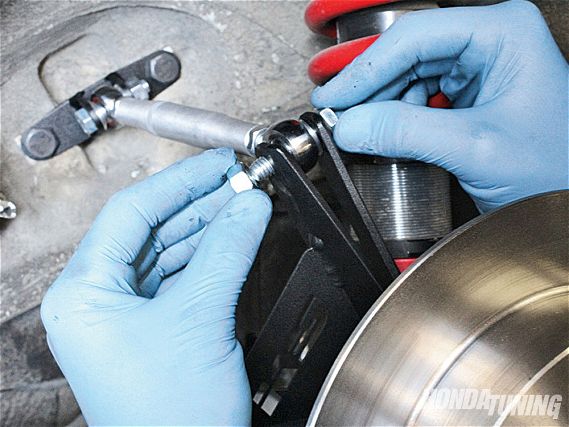
Attach the upper camber arm to the rear trailing arm assembly using the supplied nut and bolt.
 | Kaizenspeed Rear Trailing Arm Assembly Brake Line Install 26
Install the supplied brake line.
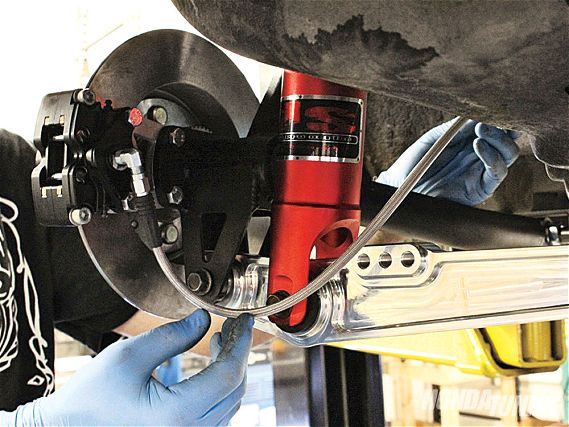 | Kaizenspeed Rear Trailing Arm Assembly Brake Line Routing 27
One routing option for the brake line.
 | Kaizenspeed Rear Trailing Arm Assembly Lower Control Arm Install 28
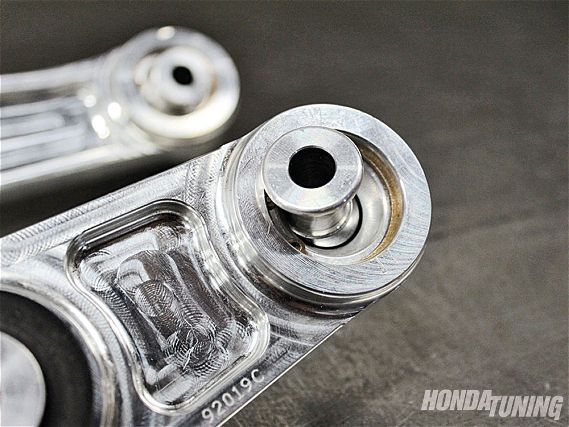
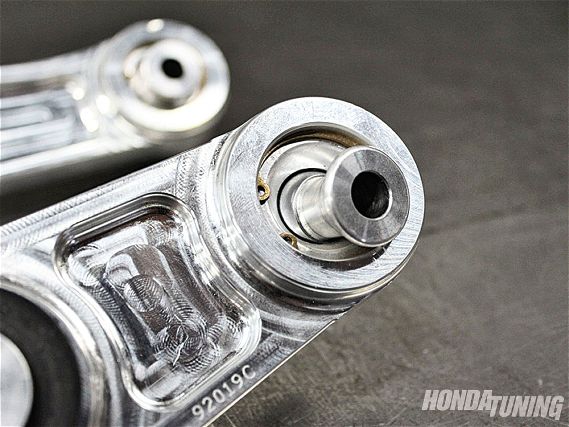 | Kaizenspeed Rear Trailing Arm Assembly Spherical Heim Joints 29
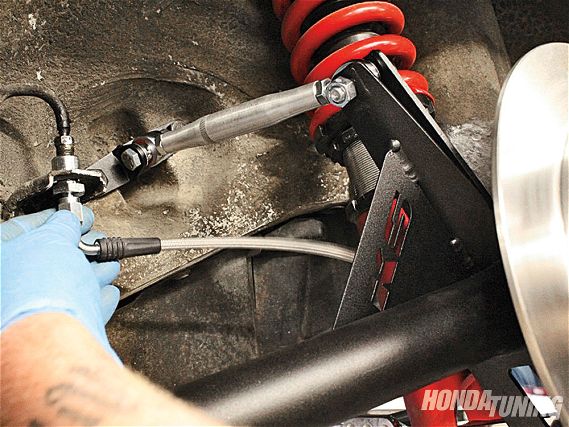
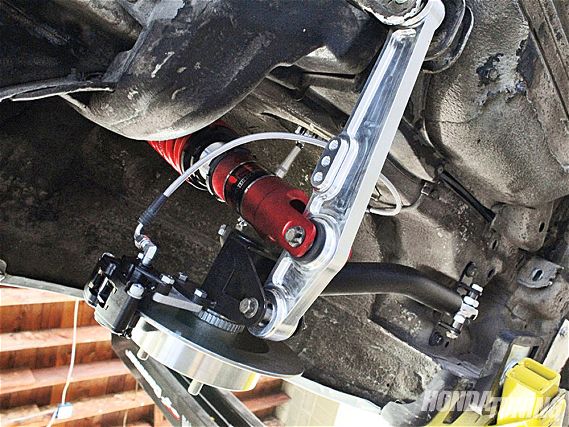
Install the lower control arm. Kaizenspeed offers an optional lower control arm with spherical heim joints at the chassis and the arm to completely eliminate bushing deflection at those points. Here you can see the spherical bearing movement.
 | Kaizenspeed Rear Trailing Arm Assembly Lower Control Arm Install 30
Done!
 | Kaizenspeed Rear Trailing Arm Assembly Optional Lower Control Arm31
The complete rear trailing arm assembly installed with optional lower control arm. *Dummy toe bracket not installed in this picture.
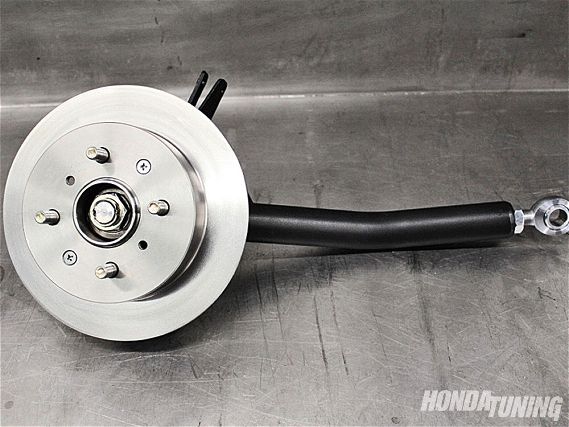
 | Kaizenspeed Rear Trailing Arm Assembly Comparison 32
 | Kaizenspeed Rear Trailing Arm Assembly Comparison 33
Stock arms compared to Kaizenspeed's kit--Based out nearly 2-inches!
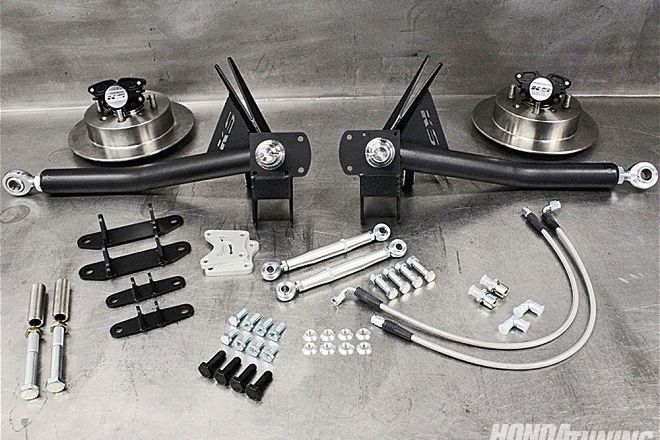
What's included?
- Arms
- Rotors
- Calipers/pads
- Stainless brake lines and fittings
- All necessary brackets, bolts, and washers are included
The kit is designed to extend the wheelbase 3/4 to 2 inches. We recommend our lower control arm with spherical bearings for customers who are trying to run a wheelbase that is close to factory. Our lower control arm angle gets better as you extend the wheelbase closer to 2-inches longer than factory.
The Kaizenspeed Rear Trailing Arm and Staging Brake assembly is available now, in stock, and ready to ship immediately. On the East Coast, you can have your RTA's overnighted from the official East Coast distributor, Xenocron. Orders west of the Mississippi are handled by KStuned.com directly.