Technical
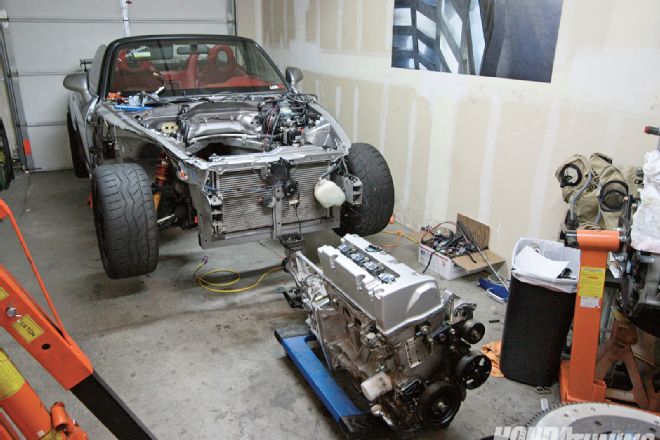
As much as we love Honda's coveted roadster, there's one area that has always bothered many owners and admirers: the power plant. The F20/F22 is an amazing motor right from the factory, and in a sense, that's the problem. It simply doesn't take well to the basic bolt-on, and it's been a rugged road trying to find naturally aspirated power. On the flip side, the K series motors that we've all come to know and love seem to take quite well to just about anything you throw at them. As they get older, K motors are becoming easier to find, cheaper to purchase, and are being bombarded by the aftermarket; three excellent reasons for S2000 owners to consider this new option (especially after we explained how to acquire a K24 for dirt cheap in the April '10 issue of Honda Tuning).
To get to the bottom of this revolutionary swap, read along as Kevin Nguyen explains exactly what he did in order to make this transplant happen, as well as how much you can expect the "extras" to run.
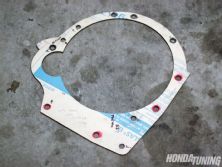
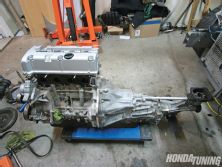
Adapter Plate
Knowing that this would be the most important piece to get the motor working, I spent the first month developing a way to connect the S2000 transmission to the K series motor. I ended up making an aluminum plate that allows the engine to bolt in from one side, and the transmission from the other. We got lucky, and the plate fit perfectly after only the second iteration.
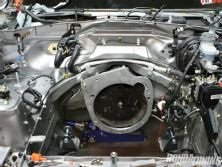
Engine Mounts
The engine mounts had to be custom made since no one has done this motor in this car before. We started with a stock set of S2000 Innovative mounts, which we found, after mocking up with the engine in place, were very close to working and we would just need to change the way the mount bolted into the engine itself. Looking at the motor, we realized that we could use the holes on the block for the OEM rear mount on the passenger side, and the driveshaft holder on the driver's side. I made up some steel plates that would bolt to the motor and modified the Innovative mounts to be able to weld to the new plates I'd just made. This secured the motor in a place very similar to where the OEM F20C sat.
 |
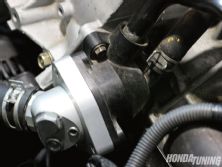
Mocking up passenger-side motor mount.
|
Mocking up passenger-side motor mount.
Flywheel/Clutch
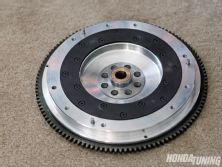
Because of the adapter plate there would be issues not only getting the clutch to engage, because it is a half-inch further from the engine, but also that there would be a problem with the input shaft shaking because it wouldn't be long enough to reach the pilot bearing. I set out to design a half-inch thicker aluminum flywheel utilizing the ring gear and friction surface from a standard Clutch Masters clutch. After designing the piece in solid works, getting some quotes from machine shops, and finding out that this was going to be very expensive, I decided to just give Clutch Masters a call. They were able to make a flywheel to my exact specification, even allowing me to use any OEM fitment S2000 clutch and pressure plate. (I went with their stage 4, 6-puck setup) Clutch Masters also developed a way to push the pilot bearing toward the transmission so there wouldn't be any play in the input shaft.
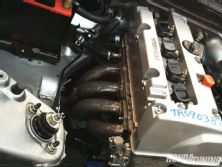
Intake Manifold
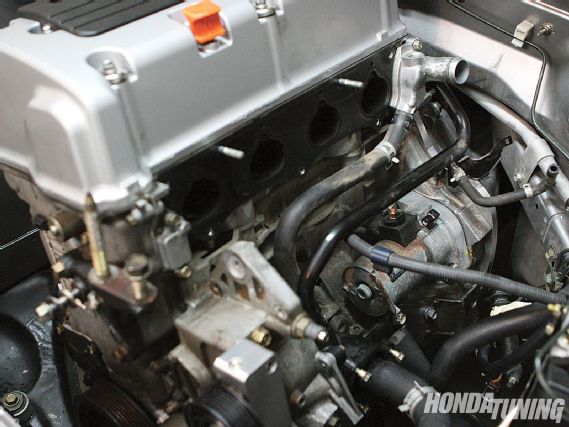
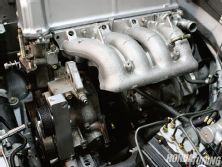
Knowing that using an OEM K series intake manifold would put the throttle body into the firewall, I started looking at some possible solutions. The first try was to take a PRC type R manifold, cut it, then weld it onto a new plenum. This worked well for the initial fitment of the motor, but eventually I realized my power goals would make use of a nice custom piece. I had Magnus make me a mirrored version of their K series aluminum manifold, which places the throttle body on the correct side.
Coolant System
The beauty of the K series swap is that most everything is in the same place as it is on the F series motor. The main hurdles were getting the coolant neck to come out of the side of the motor instead of into the firewall. Once this was tacked, I realized that I could use the OEM hoses with the help of a swivel K-Tuned thermostat, and K-Tuned coolant neck. For a cleaner look, I ordered the K-Tuned -16 AN adapters for the pieces and ran braided lines for my radiator, though they weren't necessary for the swap. I also "V mounted" the radiator for a cleaner intake exit which also does not need to be done for the swap.
|
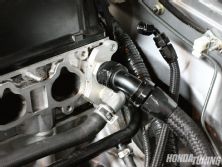
Original attempt to move upper coolant hose away from Firewall.
Fuel System
The Fuel system is very similar to any other motor swap. I used Earl's compression fittings to convert my hard lines to AN lines, then ran them into a K-Tuned Fuel rail and pressure regulator. Like other swaps, if you are doing it on a budget, you can utilize OEM lines, but the AN products are cleaner, and a bit safer in my opinion.
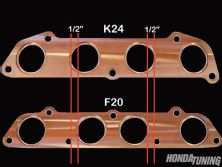
Exhaust Manifold
I thought that the header would be as simple as welding a new flange to my OEM S2000 header. It's a little more complicated. Although the runners for cylinder one and four are the same; pistons two and three are spread further apart on the K series motor by about a half-inch in each direction. We had to modify the two and three tubes on the OEM header before it would weld in the right place on the K series flange. The nice part is that once the work was done and bolted to the motor, it sat in nearly the same place as an OEM S2000 header, which allowed me to use a standard exhaust system.
Wiring
The wiring on the car is similar to most any other K swap. We were able to retain use of all of the OEM gauges except the temperature sensor (which could be fixed with the use of an ECT module available from Modifry). The engine harness was connected to the car via an adapter harness, which was made after carefully studying the K harness and the S2K harness wiring.
Accessories
I know some people are probably wondering about A/C. After mocking up the mounts and test fitting everything, it seems that the A/C compressor clears the steering components in the S2000. It sits in almost the same spot as the original A/C unit in the car, meaning that you could get away with visiting an A/C shop, and you'd see minimal damage to your wallet.
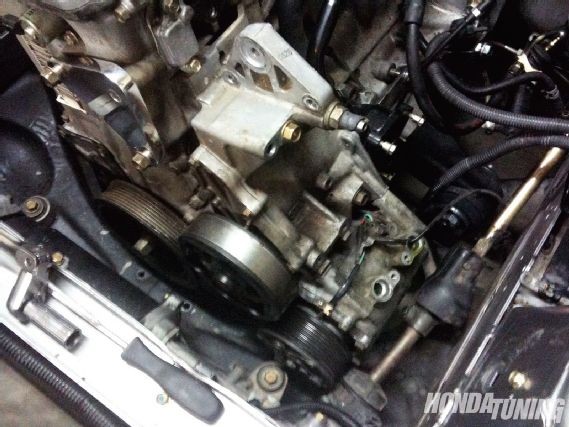 |
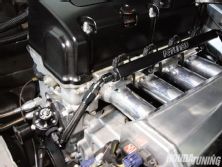
A/C compressor fitted to motor.
|
A/C compressor fitted to motor.
COST SHEET K24 engine (K24a1 CRV) $800 complete Adapter Plate $200 (made and designed by me) Flywheel $500 (custom Clutch Masters piece) Engine harness conversion $100 (modified Rsx harness) Mounts $300 (needed to be customized to work)
Fuel system $250-$500 Intake Manifold $300-$800 Header $50 (cost of K flange and welding) ECU $995(K-Pro) + Core
As the popularity of this swap begins to grow, you can expect to see various industry leaders step up their efforts to make this process even easier. It won't be long before we're seeing built, boosted, and even K24/K20 Frankenstein combos coming out of the woodwork. Stay tuned. . .