An oil-cooling system is the life line on the track because going fast doesn't really matter if you can't keep an engine from grenading under continuous full-throttle conditions. Any racer will tell you this, and that's why we weren't going to hit a track day before this matter was addressed.
 |
Project Nissan 350Z - Oil Cooling System Install - Sending A Life Line
|
Project Nissan 350Z - Oil Cooling System Install - Sending A Life Line
In the case of Nissan's VQ engine, oil temps are its worst enemy. Even in stock form, there's barely enough airflow and cooling going to the engine bay to keep the bearings from disintegrating at the track. Nissan engineers knew this and finally convinced the bean counters to allow them to add an oil-temperature sensor on later versions of the Z (and the new 370Z) so the ECU could figure out when to go into limp mode if oil temperatures shot past 280 degrees Fahrenheit. Add in two turbos, almost twice the horsepower and even less airflow from the front-mount intercooler, and you've got a recipe for disaster. Most owners with a forced induction Z already know about this common problem, and we found out the hard way when our Z was supercharged and nuked the motor from improper oil cooling.
That's why we're dedicating an entire installment to building what we hope will be the ultimate oil-cooling solution for Project 350Z. Unfortunately, putting an oil cooler and accumulator into the tight confines of the Z33 with twin turbos, a front-mount intercooler and all of its OEM hardware isn't an easy task. It's like stuffing 20 lbs of parts into a 10-lb bag.
Without too much planning, we started with a simple Stillen oil cooler kit for the stock 350Z. The kit included a reasonably sized Setrab oil cooler, an oil filter sandwich plate, a mounting bracket that places the oil cooler in front of the radiator in the mouth of the bumper, and -8 AN hardware and lines. This would've been just fine if our Z didn't already have a front-mount intercooler that directly occupied the space where this oil cooler is supposed to be mounted. Even if we managed to fabricate brackets that allowed the oil cooler to be fitted there, there would still be an issue with the amount of cooling that the engine would get because the incoming air now had to pass through the 250-degree oil cooler, side-by-side Jim Wolf Technology front-mount intercoolers, the A/C condenser and then finally to our radiator.
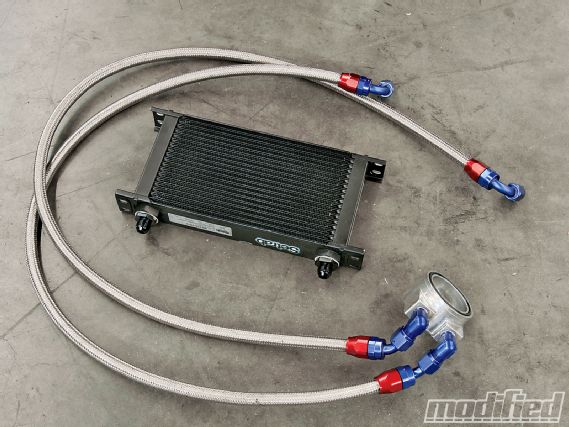 |
The Stillen oil cooler kit comes with a Setrab oil cooler, an oil filter sandwich plate, -8 AN lines and fittings, and a mounting bracket that places the oil cooler in front of the radiator in the main bumper opening.
|
The Stillen oil cooler kit comes with a Setrab oil cooler, an oil filter sandwich plate, -8 AN lines and fittings, and a mounting bracket that places the oil cooler in front of the radiator in the main bumper opening.
The decision was made to go big with the oil-cooling system and we decided to build it as robust as possible, given the limited space we had. We called up the guys at Earl's Performance Plumbing (now a division of Holley Performance Products) for some additional line and -AN hardware to allow us to place the oil cooler in the only location left available: in front of the driver-side wheelwell. Their helpful and knowledgeable staff started off by suggesting that we upgrade our existing hardware from -8 AN to the next step up, a -10 AN. This would increase our tubing ID from 11.18 to 14.48mm and increase the cross-sectional area by 68 percent. Just this one change would hugely increase our overall oil capacity as well as flow restrictions across the line, both of which would increase the cooling abilities of our limited-size oil cooler.

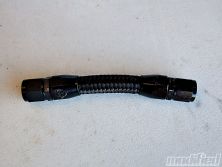
Earl's also recommended that we try out its new Pro-Lite 350 lines and Ano-Tuff fittings. The Pro-Lite 350 series line was designed as Earl's solution for serious weight-conscious racers. The Pro-Lite 350 is rated to a maximum pressure of 350 psi and is just as temperature tolerant as conventional stainless steel braided lines, but they weigh about half as much and are more flexible. By using a multi-layered, abrasion-resistant nylon sheathing (instead of the single layer stainless steel wire braid), the Pro-Lite 350 line sheds off the weight and saves your fingers from the painful bloody pricks when trying to work with the line. To go with the new lines, Earl's also introduced its Ano-Tuff line of hose ends and -AN swivel fittings. These new fittings ditch the old red and blue -AN color combo for black Mil Spec Type III hard anodizing that better protects thread and taper profiles for better sealing. The stronger anodized coating also holds up to alcohol fuels and marine environments.
 |
The original Stillen oil cooler kit used a -8 AN sandwich plate (left). In order to accommodate more flow, we stepped up to -10 AN lines and fittings. This also meant we needed a sandwich plate large enough for -10 AN fittings. Technosquare offers just such a piece (right) that has larger-fitting orifices and a specially machined passage for minimal flow restriction.
|
The original Stillen oil cooler kit used a -8 AN sandwich plate (left). In order to accommodate more flow, we stepped up to -10 AN lines and fittings. This also meant we needed a sandwich plate large enough for -10 AN fittings. Technosquare offers just such a piece (right) that has larger-fitting orifices and a specially machined passage for minimal flow restriction.
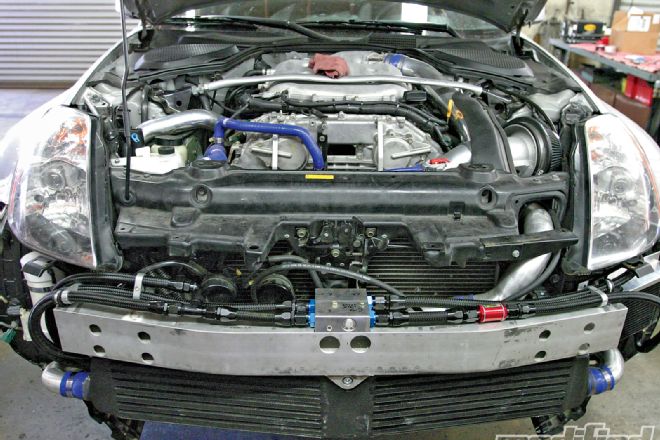
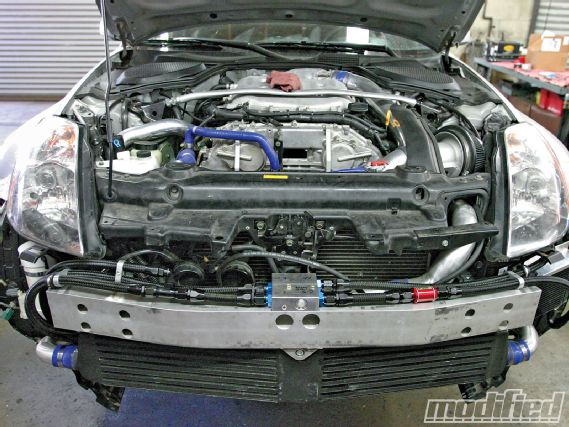
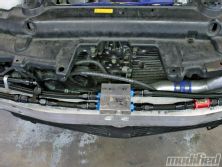
We approached Mark DiBella of MD Automotive in Westminster, California, again for help with our oil-cooler installation. The oil cooler itself was mounted on a modified Earl's aluminum oil-cooler bracket that was cantilevered off the stock radiator support assembly. This was the only cool space available, even though the location offered minimal airflow with the stock bumper. Even so, the fit was tight behind the stock short-nose bumper. The lines were plumbed across the top of the front bumper crash beam and down behind the passenger-side headlight toward the oil filter. Behind the oil cooler, we cut out the louvered sections of the plastic fender liner so hot air would have a way of escaping, and an aluminum mesh was cut and riveted to the plastic liner to prevent rubber marbles on track from being kicked up and thrown into the oil-cooler fins.
With the space restrictions in the engine bay, we decided to forego the remote-mounted oil filter solution and placed most of our oil plumbing hardware on top of the front aluminum bumper crash beam. To make sure our oil reached operating temperatures during highway cruising on a cold day, we also installed an Earl's Oil thermostat (PN 501ERL) that opens and allows oil to reach the cooler only when oil temperatures reached 160 degrees. By bolting this directly to the bumper beam and sandwiching some dielectric grease as a heat conductor, we could use the bumper beam and the thermostat (basically an aluminum block) as giant heat sinks to help dissipate heat. To further increase the heat convected from the thermostat, we also added an ARC Cool Fin to the top of the thermostat to increase heat dissipation.
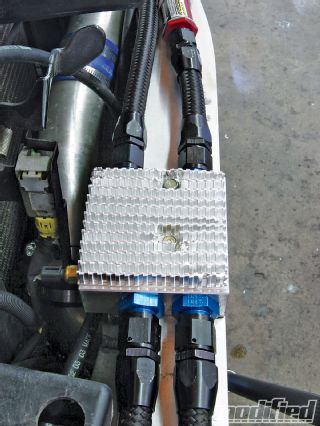 |
By placing the oil thermostat on top of the aluminum bumper beam and placing an ARC Cool Fin radiator fins on top of the thermostat, we were able to utilize the airflow over the bumper beam and maximize the heat-sink effects of the entire assembly. The thermostat conveniently has sensor ports machined into it, which allowed us to take oil temperature readings off the thermostat return itself.
|
By placing the oil thermostat on top of the aluminum bumper beam and placing an ARC Cool Fin radiator fins on top of the thermostat, we were able to utilize the airflow over the bumper beam and maximize the heat-sink effects of the entire assembly. The thermostat conveniently has sensor ports machined into it, which allowed us to take oil temperature readings off the thermostat return itself.
The sandwich plate was plumbed with a -10 AN line and placed between the simple OEM oil-to-coolant oil cooler and the oil filter. It could be argued that by leaving the stock oil cooler on, we could have diminished the ultimate cooling ability of our new air-to-oil oil cooler.
We decided to leave the stock unit in because it would bring coolant and oil to operating temperature faster from a cold start as well as add an additional cooling buffer (coolant should never exceed 210 degrees and oil starts breaking down near 300 degrees). If this idea backfires, it's a simple task to remove the unit and plug the hole.
The final addition to our oil system was the Accusump oil accumulator from Canton Racing Products, which acts like a capacitor for high-pressure oil. The Accusump is basically a pressurized oil reservoir that dumps high-pressure oil into your engine should something fail catastrophically, giving you precious seconds to pull over and shut down before something really eats itself.
In other words, it's there to save our engine should something go really bad. The Accusump also has an added benefit for priming engines. For expensive, tight-tolerance race engines or cars that have a lot of downtime, it's important to pressurize and prime the oil system prior to start-up. By having an oil accumulator, pressurized oil an be shot into the engine prior to turning it over, which can increase engine life.
 |
Project Nissan 350Z - Oil Cooling System Install - Sending A Life Line
|
Project Nissan 350Z - Oil Cooling System Install - Sending A Life Line
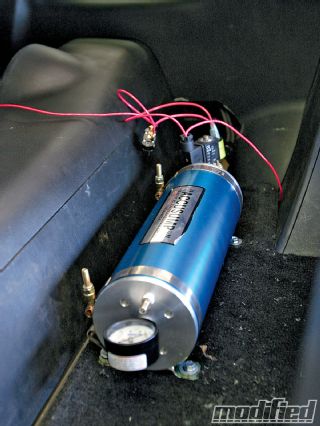
We installed a 3-quart Accusump in the trunk of the car behind the passenger seat along with some additional 10 feet of line to plumb it through the cabin, firewall and under the headlight to the oil thermostat. The process required pulling out much of the interior paneling, passenger-side seat and carpet to run the continuous length of -10 hose under the dash to the main firewall ECU grommet and into the engine bay. Using a single piece of line is important for a street car because finding a leak from the hidden line under the carpet is impossible. We also strapped it with insulation at every possible location to prevent possible abrasion against the chassis sheetmetal.
After properly priming and topping off our engine and Accusump with oil, we're ready to roll. Although the oil cooler will only marginally cool theoil without proper ducting, this is a good start. Before heading off to the track for our inaugural shakedown, we'll also replace the body work with something more functionally aerodynamic and streetable, and also work on the ducting work for our intake, oil cooler and other elements to make our Z survive the rigors of track work. Cross your fingers.
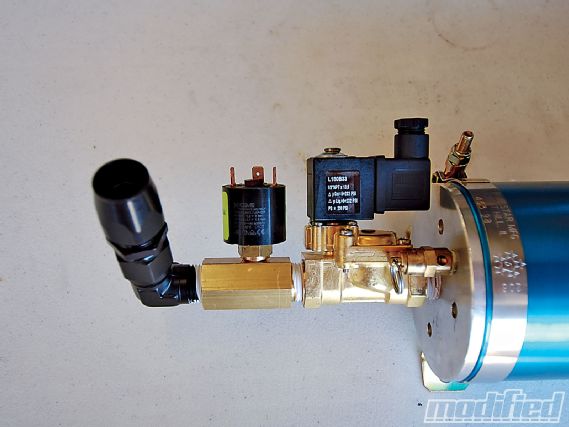 |
Canton Racing Products' Accusump oil accumulator acts as a pressurized oil reservoir or capacitor. The unit stores pressurized oil to feed to the engine during low-pressure conditions like start-up and a catastrophic oil system failure. We mounted our 3-quart unit behind the passenger seat in the rear hatch. The system includes both a pressure-regulated valve and an electronic main valve.
|
Canton Racing Products' Accusump oil accumulator acts as a pressurized oil reservoir or capacitor. The unit stores pressurized oil to feed to the engine during low-pressure conditions like start-up and a catastrophic oil system failure. We mounted our 3-quart unit behind the passenger seat in the rear hatch. The system includes both a pressure-regulated valve and an electronic main valve.
Assembling -An Fittings And Lines
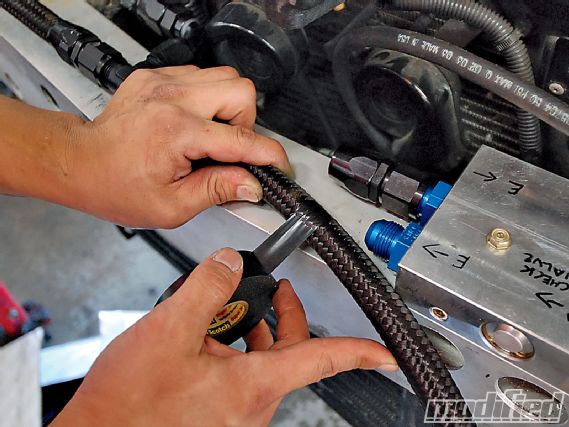
If you're planning to build an oil cooler or do any custom fluid plumbing for your car, Earl's Performance Plumbing has already done the legwork. It's almost idiot-proof as long as you do your homework before buying the parts. The first step is to get a copy of the Earl's Performance Plumbing Catalog. Although Earl's website offers a wealth of information, building and designing your plumbing kit is best done through the print catalog which includes a wealth of technical and instructional information. Here we show you step-by-step how to cut, prep and assemble Earl's Pro-Lite 350 lines with its Ano-Tuff swivel seal fittings.
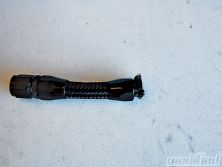
01 Measure off the cut hose length with electrical tape. Tape the hose so the tape is centered on the cut. This way, the tape holds the braided nylon or prevents the stainless steel sleeve from fraying.
 |
|
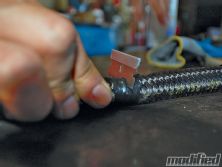
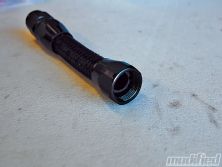
02 Using a razor or a sharp knife, cut through the hose at the center of the tape. Using a chisel or sharp blade with a hammer is the easiest way to get a clean, perpendicular cut with the nylon-sleeved Pro-Lite 350. Sawing through the hose results in a jagged hose end. Hacksaws will be necessary for hoses with stainless steel braided sleeves.
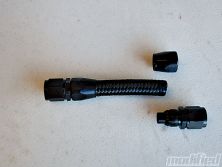
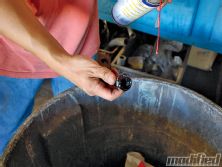
03 Spray down the cut hose end and the electrical tape with WD-40 and slide the female threaded portion of the hose end down until the tape-wrapped portion of the hose is exposed past the fitting. Remove the tape and trim the excess braided sleeve material with wire cutters for stainless steel sleeved lines. Slide the fitting back toward the end of the hose in a turning motion until the rubber portion of the hose is 1/16- to 1/8-inch past the threads.
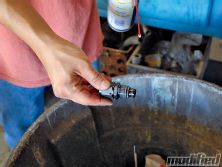
04 Spray both the female and male threaded section of the hose end (as well as the inside of the tube) with WD-40 just prior to assembly.
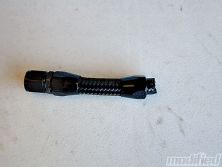
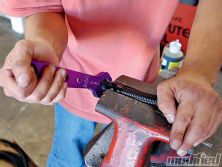
05 Clamp the female swivel fitting and hose into a bench vise and carefully thread the male end onto the hose. Use Earl's aluminum hose end wrenches to torque the hose ends together.
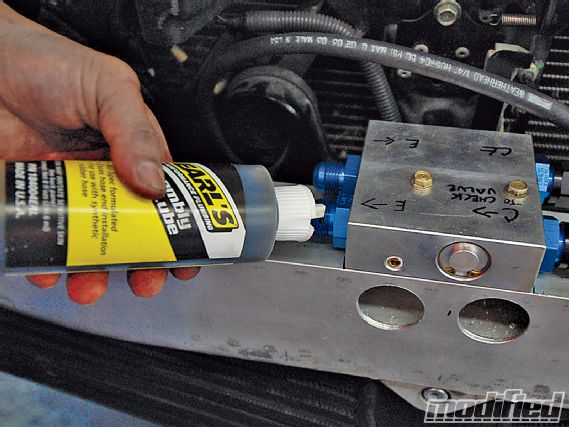
06 Apply Earl's assembly lube onto the threads of the hose end fittings and fitting adaptors. Using two Earl's hose end wrenches, torque the adaptor and hose end together until the wrenches slip off the fittings.
 |
|