
Things You’ll Need:
- Air compressor
- Paint sprayer (HVLP, LVLP, or airless)
- Orbital sander with multiple-grade sanding pads
- Hand sandpaper in grits from 120-800 for prep to finished sanding
- Solvents (acetone/Eastwood Pre) for cleaning surfaces
- Masking tape and paper
- Body filler for repairs
- Primer
- Basecoat paint
- Clearcoat
- Paint thinner and catalyst or hardener
- Respirator, eye protection
Prepping
1. Sand the paint either to the bare metal, the original primer, or at least sufficiently for the new paint to adhere. Dry sand using 180-grit sandpaper to remove rust or surface damage before moving on to a 320-grit paper to remove your previous 180-grit scratches. Whichever method that you decide, follow it up using 400- to 600-grit sandpaper to sand the paint to prep the existing paint surface for the new coatings to be applied.
2. How much you choose to sand is up to you, but the best results will require removing the paint down to bare metal, re-priming the surface with an automotive primer, and then applying your finish paint.
3. When you paint a car or parts, be sure to always sand the edges extremely well. If paint is going to lose adhesion and start peeling, it will probably start from an edge of a panel that was not sanded properly.
 | Prepping And Painting Your Car, Part 2
Dent Repair
Small dents and small patches are easy to fill with body filler. Body Filler is a plastic resin that is sandable, adheres well to metal, and lasts a long time but, more importantly, can make a dent completely invisible. We used Eastwood’s Contour Premium Body Filler. The Contour “all-in-one” filler actually inhibits rust long after painting, and offers unique self-etching properties that bite into the surface for maximum adhesion.
 |
Prepping And Painting Your Car, Part 2
|
Prepping And Painting Your Car, Part 2
All it takes is a small amount of hardener to be mixed with filler material. We recommend a small ribbon-sized line across your filler (size of a pea). When combining the two agents, never whip or aerate the mixture. This will cause bubbles or pinholes to appear when applied
 |
Prepping And Painting Your Car, Part 2
|
Prepping And Painting Your Car, Part 2
 | Prepping And Painting Your Car, Part 2
Wait for it to harden, and then sand it smooth. Keep in mind that proper prep work is the key to a good paintjob.
 |
Prepping And Painting Your Car, Part 2
|
Prepping And Painting Your Car, Part 2
 | Prepping And Painting Your Car, Part 2
Use Bondo glazing and spot putty to eliminate any pinholes or minor imperfections prior to laying down your primer.
 |
Prepping And Painting Your Car, Part 2
|
Prepping And Painting Your Car, Part 2
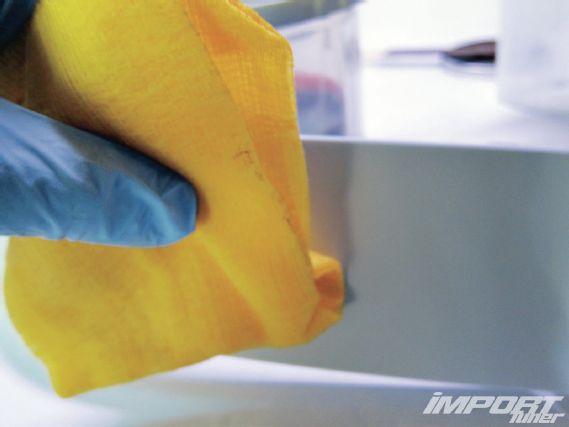
Eastwood’s PRE Paint Prep was used to remove silicone, wax, polish, grease, and dirt, which would otherwise contaminate the surface when painting.
 |
Prepping And Painting Your Car, Part 2
|
Prepping And Painting Your Car, Part 2
Automotive Touchup’s tack cloth removes contaminating particulates, such as dust or lint to ensure a clean surface for paint.
 |
Prepping And Painting Your Car, Part 2
|
Prepping And Painting Your Car, Part 2
An Eastwood Concours HVLP paint gun was used to apply our primer, basecoat, and clearcoat. Eastwood offers a variety of paint guns from Eastwood, DeVilbiss, Binks, and more. An Eastwood electronic air pressure regulator and moisture filter was installed prior to paint.
 |
Prepping And Painting Your Car, Part 2
|
Prepping And Painting Your Car, Part 2
Are you planning on living past 30 years old? Consider using a respirator. Fumes can be harmful and potentially lethal, because of this we purchased a 3M respirator from Automotive Touchup to avoid the inhalation of toxic chemicals.
 |
Prepping And Painting Your Car, Part 2
|
Prepping And Painting Your Car, Part 2
Primer
Prime any surface you used body filler to fill scratches or pits left in the preparation process. Primer will fill in 180- to 320-grit sand scratches.
 |
Prepping And Painting Your Car, Part 2
|
Prepping And Painting Your Car, Part 2
Always stir and never shake your paint. Notice the pinholes caused from bubbling primer, which came from a can that was shaken.
 |
Prepping And Painting Your Car, Part 2
|
Prepping And Painting Your Car, Part 2
 | Prepping And Painting Your Car, Part 2
Use 600-grit wet/dry paper to smooth paint runs or drips smooth to the surface, being careful not to sand too far and exposing the metal again.
 |
Prepping And Painting Your Car, Part 2
|
Prepping And Painting Your Car, Part 2
Paint
Prepare the paint for spraying according to manufacturer’s directions. Automotive enamels and some polyurethane give better results with a hardener or catalyst. Make sure the paint is thinned correctly for the equipment you are using, but avoid over-thinning, which will decrease the gloss of the finished surface and can cause runs.
 |
Prepping And Painting Your Car, Part 2
|
Prepping And Painting Your Car, Part 2
 | Prepping And Painting Your Car, Part 2
Automotive Touchup offers an extensive lineup of OEM color paints. All basecoat mixtures are premixed and ready to spray, eliminating the guesswork with mixing paint. We chose the color Torino Red according to the OEM color code located on the side of our door.
 |
Prepping And Painting Your Car, Part 2
|
Prepping And Painting Your Car, Part 2
When pouring paint, always use a screen to filter out contaminants from being poured into the paint gun.
 |
Prepping And Painting Your Car, Part 2
|
Prepping And Painting Your Car, Part 2
To minimize clutter and speed up cleaning, we used DeVilbliss DeKups disposable cups which only require pouring into a disposable cup, placing into a container, capping off, and attaching directly to the gun.
 |
Prepping And Painting Your Car, Part 2
|
Prepping And Painting Your Car, Part 2


A tack cloth was used once again prior to laying down the basecoat.
 |
Prepping And Painting Your Car, Part 2
|
Prepping And Painting Your Car, Part 2
Depending on the type of paint you plan to spray, you may need additional tips and nozzle caps for the gun. Some paint guns come with tips and nozzle caps to spray heavy primers, while others are better suited for spraying lighter-bodied paints and clears. For lacquers, enamels, urethanes, basecoats, and clearcoats, you’ll want a spray gun with a 1.3 to 1.5mm fluid tip. For spraying water-based automotive paints, you’ll want a spray gun with a 1.0mm fluid tip. For heavy paints and primers, a spray gun with a 1.8 to 2.2mm fluid tip is ideal. We sprayed onto a sample sheet to compare colors prior to applying the final paint.
 |
Prepping And Painting Your Car, Part 2
|
Prepping And Painting Your Car, Part 2
Apply a flash coat for the first application. Allow the last layer of basecoat color application to properly dry before moving to the final clearcoat stage. Do not wet sand or use prep solvent in-between coats of touch-up paint or clearcoat. Apply two to three coats of clearcoat using a smooth left-to-right motion while allowing 5 to 10 minutes in-between each coat, depending on the weather and activator used.
 |
Prepping And Painting Your Car, Part 2
|
Prepping And Painting Your Car, Part 2
There are different types of clearcoats available on the market today as shown from right to left: U-Pol 1K single stage aerosol; Acme two-stage 2K we purchased from Automotive Paint, which requires a catalyst mixture; and Eastwood two-stage 2K aerosol clear. We recommend the 2K-type clearcoats for their durability and chemical resistance.
 |
Prepping And Painting Your Car, Part 2
|
Prepping And Painting Your Car, Part 2
Eastwood’s 2K Clear aerosols allow you to paint with the durability and precision of a two-component coating without the paint gun. The innovative nozzle and valve technology, combined with its two internal chambers ensure the right ratio when pressing the button on the bottom to activate the mixture.
 |
Prepping And Painting Your Car, Part 2
|
Prepping And Painting Your Car, Part 2
Clearcoat may be sanded with 1,500-grit wet sand paper to remove small runs, dirt, and other minor imperfections. Use Rubbing Compound once fully dry to bring out and optimum level of gloss.
 |
Prepping And Painting Your Car, Part 2
|
Prepping And Painting Your Car, Part 2
Our clearcoat applied smooth like glass, to a point where we didn’t need to wet sand. Learning how to paint a car requires patience, and should not be rushed. Keep in mind to be patient and meticulous! Paint slowly. Don’t rush it or you may have to redo it, which is a hassle.
 |
Prepping And Painting Your Car, Part 2
|
Prepping And Painting Your Car, Part 2