 | Body Repair Part 1 - Tricks of the Trade
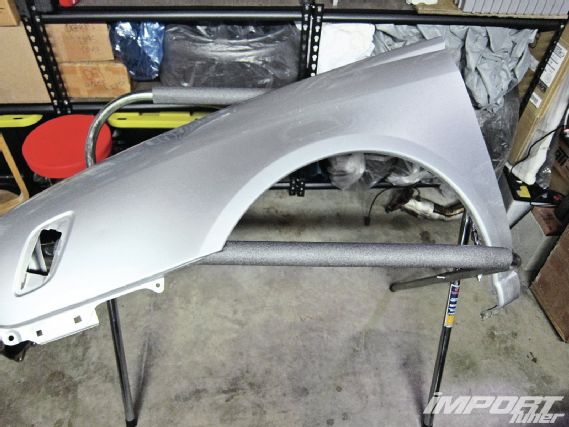
Our bodywork begins with a front fender that suffered a big impact dent that’s nearly 3 inches in diameter. The dent was not only an eyesore but severely stretched and deformed the steel. To begin, we removed the damaged panel(s)/fenders from the vehicle to gain access on both the front and back side of the panel, an area that’s not accessible when still on the car. An Eastwood 500-pound capacity work stand was used to securely hold the fender during repairs.
 |
Body Repair Part 1 - Tricks of the Trade
|
Body Repair Part 1 - Tricks of the Trade
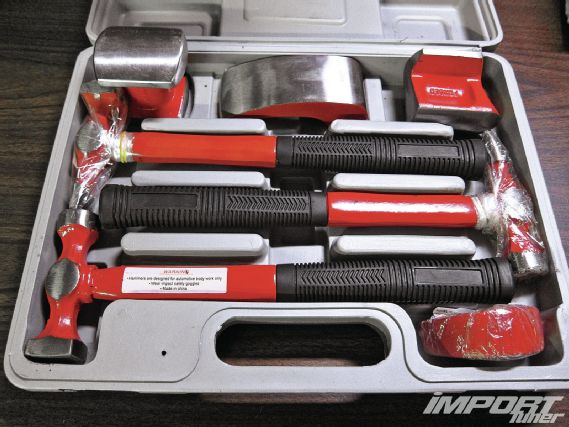
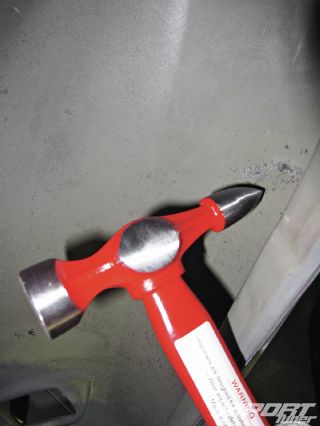
1. For dents that are accessible from the back side, reshape it to its original contour using a hammer and dolly technique. Dollies are handheld pieces of hardened steel and come in many shapes and sizes. Body hammers also vary in size and shape. We purchased our kit from Harbor Freight. Which tool you use depends on the nature of the dent and the contour of the panel.
 |
Body Repair Part 1 - Tricks of the Trade
|
Body Repair Part 1 - Tricks of the Trade
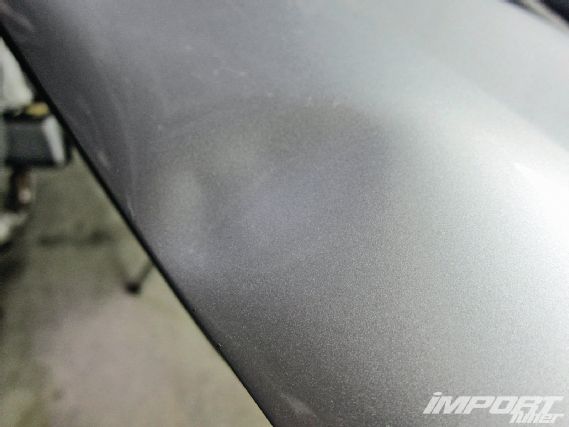
2. We addressed the dent by gently pounding from the inside to push out as much of the dent as possible using a body hammer. Then, we followed things up by spraying a light coat of Eastwood guidecoat.
 |
Impp 1304 05 O+Body Repair Part 1+Eastwood Guidecoat Spray
|
Impp 1304 05 O+Body Repair Part 1+Eastwood Guidecoat Spray
3. Choose a dolly that matches the contour of the panel. It doesn’t matter if it’s a heel dolly or rail dolly. Never pick a dolly that has a lower crown or is flatter than the panel, as it will flatten out the panel. Pick a dolly with too much crown and it can stretch the metal out pretty quickly and create a high spot.
 |
Body Repair Part 1 - Tricks of the Trade
|
Body Repair Part 1 - Tricks of the Trade
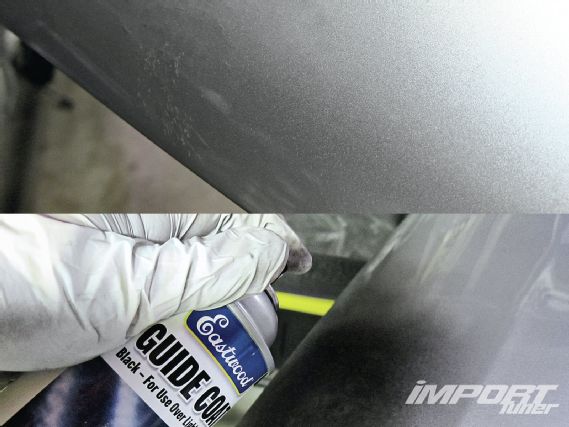
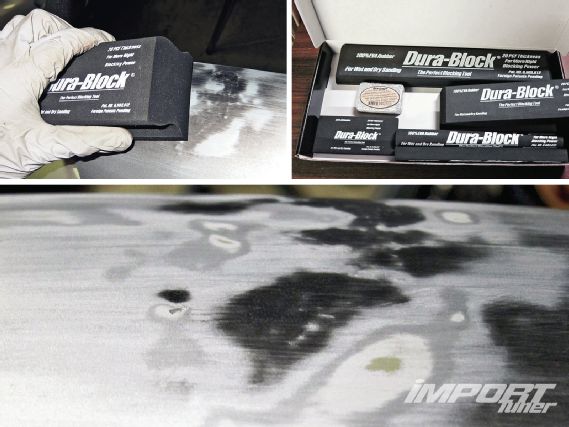
4. We sanded down the surface using Eastwood’s Dura-Block sanding block with 180-grit paper to reveal any high and low spots we might have caused or missed when using the hammer. A permanent marker is also helpful to physically see the dents, and monitor where your body hammer is hitting the metal. Once sanded, you can see any metal that is shinier than the surrounding metal, which would indicate high spots while the black (guidecoat) areas represent low spots.
 |
Impp 1304 07 O+Body Repair Part 1+Eastwood Sanding Dura Block
|
Impp 1304 07 O+Body Repair Part 1+Eastwood Sanding Dura Block
5. If you’re a novice body repairman, we recommend you stay away from shrinking hammers. Shrink hammer in the wrong hands can cause some severe damage that can’t be fixed. On the other hand the pick tools can be beneficial and are used in the final stages to bring up low spots. Used correctly they are a great tool; the sharper the point, the smaller the spot it will raise, but can increase the potential for damage in the wrong hands.
 |
Body Repair Part 1 - Tricks of the Trade
|
Body Repair Part 1 - Tricks of the Trade
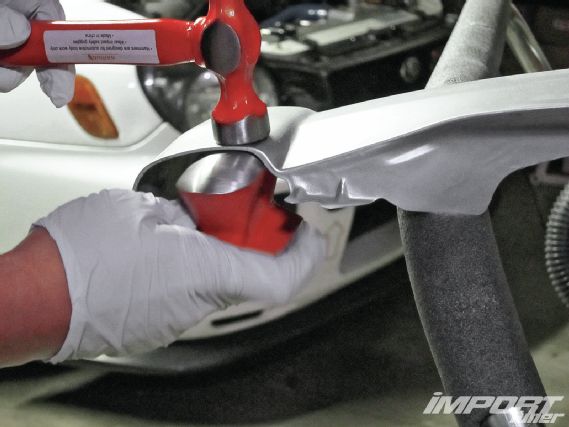
6. While holding the dolly flush against the exterior side of the dent, tap the interior side of the dent with the hammer until the desired contour is achieved. Make sure you let the dolly “bounce” so that the metal panel does not stretch. Don’t pound the area with excessive force. The body hammer will create small dents. Strike the high side of the dent with the hammer while holding the dolly against the low side of the dent. You will feel the dolly bounce off the panel if you have struck the dent correctly. The amount of force you apply when striking the hammer depends upon the size of the dent.
 |
Body Repair Part 1 - Tricks of the Trade
|
Body Repair Part 1 - Tricks of the Trade
Check your work using your hands to feel the surface for any imperfections and repeat the process using the marker or guidecoat if necessary. Keep in mind that the smoother the surface, the less body filler will be needed for final repairs.
Stay tuned for our next installment as we tackle the basics of body filler.