 | Volkswagen Mk3 Golf - Rontend Face Lift - Tuner Tech
Tech Facts:
Fiber Images carbon-fiber hood, $575; Vento front bumper with rebar, $295; Vento rear bumper, $349; Euro radiator support, $199; Euro VR6 Vento molding, $149; Euro fender flares, $129; Euro plate tub, $99; Euro VR6 lip spoiler, $99; Bonrath three-bar badgeless grille, $149; Votex smoked long foglights, $179; Euro smoked blinkers, $129; smoked Mk IV-look Golf headlights, $495
MSRP: $2,846
Additional Info:
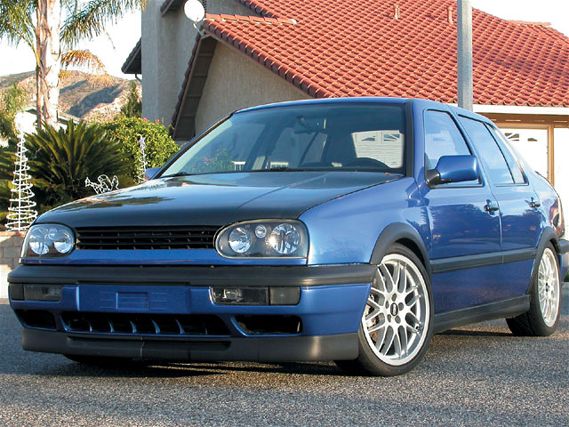
It doesn't matter whether you like the smooth top bumpers or the textured top bumpers-Euro is the way VW intended it. There is a variety of ways to get the Euro look across; we went for the OEM-spec Euro style to set our Jetta apart from the crowd. Another added bonus to swapping the U.S.-spec parts out for the Euro-spec counterparts is decreased weight. Most of this weight is spared with the Euro rebar; the radiator support really doesn't save any weight but makes things more simple. Overall, you will save about 60-75 pounds.
Shameless Plugs:
Fiber Images, 661/274-9500, www.fiberimages.comM1 Auto Body, 626/575-1926RPI Equipped, 604/944-0494, www.rpi-equipped.comTuning Zubehor, 800/ZUBEHOR, www.tuningzubehor.com
It all started when a car rearended me on the 405 freeway in sunny Southern California. I had to get the car fixed, but I didn't want to just throw the standard U.S. bumper back on. I was planning on doing a Euro bumper swap anyway, so this incident simply sped up the conversion. With a fistful of cash from the insurance company, what I had managed to save up, and a few nice little old ladies I mugged, I called around for the textured top bumpers. I decided that I would just remodel the whole car the way I wanted to see it. Another excuse I used to justify spending this much on body mods was the fact that I would save weight; we all know that the weight in front of the axle on a VR6 is not your friend, so you do what you can to lighten it up. I also went ahead with the Golf conversion because, in my humble opinion, the Jetta should have come with the Golf front and the Golf with the Jetta front-but I'm just odd. The way I feel about body mods is this: No matter what you do to the car, it should come out clean. Whatever kit you use should accent the car and flow with its lines; the kit should never take attention away from the body of the car.
I contacted RPI in Canada to get my parts. Because of time constraints, I had to look elsewhere for the Vento rear bumper. RPI can get everything for the conversion; they were just waiting for a shipment of parts to arrive. When Dustan from RPI and I figured out that the parts would not arrive on time, he suggested a few shops that would have those parts already in stock. It was very professional and customer oriented to offer that. With some shop numbers in hand, I called Matt at Tuning Zubehor in Southern California for the remainder of my parts. Tuning Zubehor received everything I needed in plenty of time to do the conversion. The company's staff is very informed and knew all the right questions to ask so I didn't forget any necessary items.
Next on the agenda was the finishing piece for my look: a carbon-fiber hood. I gave Fiber Images in Palmdale, California, a call, and within days, my hood was ready. This was an amazing feat for all of these companies, considering that a large portion of each shop's staff was preparing for SEMA, which was just around the corner.
The next thing I needed to do was get the pieces painted, so with next to no time left before SEMA, I called M1 Auto Body to take care of this job for me. One major problem was that I couldn't leave the car with the shop, so the pieces needed to be painted while off the car. This might be a problem for most shops, but not for M1. Two days later, the company called me and said the parts were done. I was surprised to say the least, and not only that, but the finish was absolutely amazing and matched the Porcelain Blue paint perfectly. With everything ready, all that was left for me to do was put it all together, so read on to the captions and see how I did it.
Preparation1.You will not be using a lot of the hardware that came off the car, so don't be alarmed when you have a pile of spare nuts and bolts.2 You'll need longer screws to mount the headlights in place. Those can be purchased at any hardware store.3 Depending on the headlights you use, you may need an adapter kit.4 Your exhaust will need to be shortened due to the shorter rear bumper.