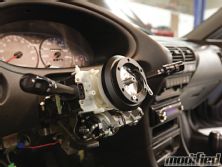
In an effort to further reduce weight and add a little security to the theft-prone Integra, an NRG Innovations Gen 3.0 quick release setup and Personal steering wheel would replace the heavier factory steering wheel. The wheel itself doesn’t weigh all that much, it’s the airbag that packs the pounds (approximately 5 lbs).
 |
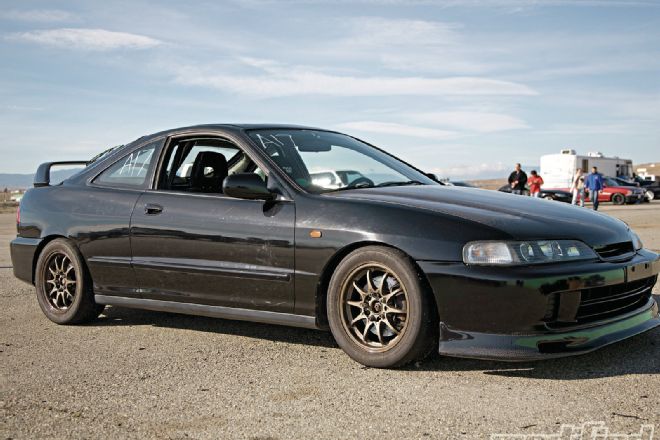
Project DC2 Spring Cleaning
|
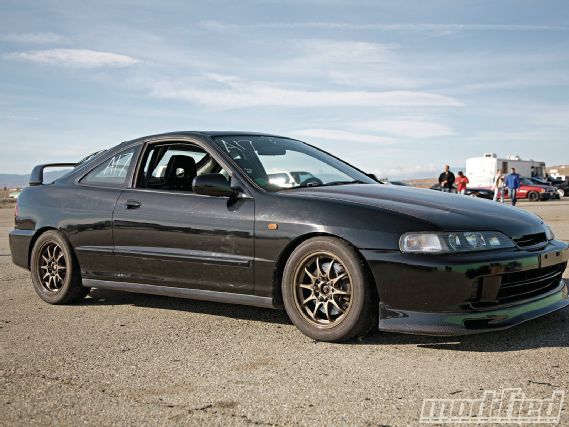
Project DC2 Spring Cleaning
Aside from the aforementioned benefits, adding a quick release and hub also moves the wheel closer to the driver, which allows the use of more shoulder and back muscles instead of your forearms, reducing fatigue during driving and providing much better steering input and feedback.
Removing the OEM steering wheel with an SRS airbag usually requires a special torx socket, but in my case someone had already tampered with the airbag and the original torx screws were replaced with normal screws. Before you start working on any airbag, remember to disconnect the battery, otherwise you could be on the receiving end of a potentially deadly knockout punch before you know it.
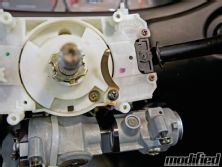
After the wheel is off, you’ll notice a plastic hub that has numerous wires coming out of it you have to remove this in order to install the aftermarket parts (most of the wires are for the airbag anyway). The only wire of concern to you is for the horn. A lot of people get lazy here and simply don’t wire in a horn, but it’s not that difficult to do.
The tricky part is making the connection between the new hub’s metal backing and the steering column. You can either fab up a small metal tab, or do like I did and buy a factory Honda brass shoe horn (Honda part number 35259-SH3-A02). After that, all you need to do is run a wire from the shoe horn to the plug that houses the horn ground wire. Now the adapter hub can be installed.
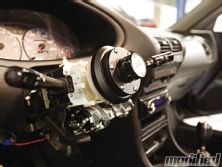
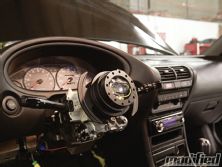
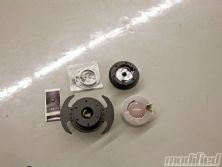
NRG Innovations makes an excellent short hub that moves the steering wheel slightly closer to the driver, but not nearly as much as most conventional hubs on the market. It’s a personal preference as to how close you want to have your steering wheel to your body. If you’ll be using the car for street duty, then the NRG short hub is ideal because a longer hub makes it hard to get in and out of the car.
NRG Innovations is by far the most popular for quick release options, and its new Gen 3.0 design offers two large levers (that can be removed if you don’t like the look) for quick and easy hub removal. The ball-and-lock mechanism secures the steering wheel in place with no play or slop whatsoever.
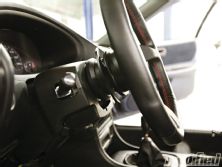
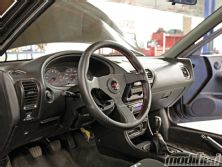
Choosing a steering wheel also comes down to what you like. I had a Personal Grinta 350mm leather-wrapped steering wheel lying around that was perfect for this project. I’m not a huge fan of small steering wheels (320mm or smaller) because they’re a bit harder to turn and not as comfortable to hold onto in terms of arm position, hence why I like the 350mm size. It’s a little smaller than stock, but still provides a relatively normal driving position.
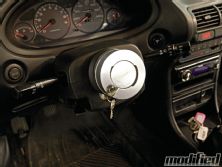
With the benefit of removing the steering wheel for added security, why not add even more protection with an NRG Innovations Quick Lock. It slides right over the quick release and locks into place, preventing anyone from installing their own wheel. The quick lock is good for two reasons: it provides yet another security measure that thieves have to worry about, and it allows you to leave your steering wheel in the car instead of having to carry it around.
Powerflex Bushing Install
After finishing up the steering wheel and quick release install, I decided to tackle the rear control trailing arm bushings since they were worn and cracked, a common occurrence on older-aged cars.
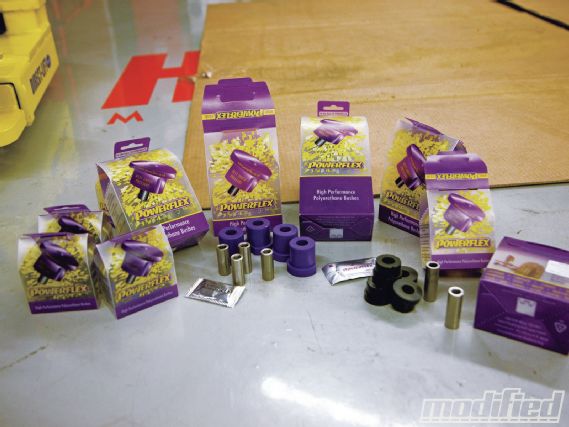 |
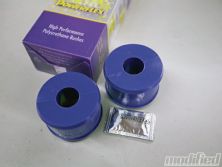
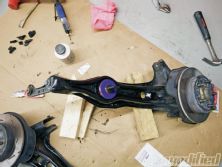
Powerflex provides a complete bushing solution for the Integra. The bushings are 25–30 percent stiffer than stock and will provide a more compliant suspension setup.
|
Powerflex provides a complete bushing solution for the Integra. The bushings are 25–30 percent stiffer than stock and will provide a more compliant suspension setup.
PowerflexUSA supplied me with not just the rear bushings but an entire bushing kit for all the suspension joints on the Integra. After checking my bushings, though, they were all in great shape. I decided to replace only the worn trailing arm bushings and tackle the other bushings as they wear out.
The main reason to replace old and worn bushings with polyurethane ones is that over time, as rubber degrades and softens, it allows for more movement and play in the suspension’s geometry, degrading handling performance. Polyurethane is about 2530 percent stiffer than rubber, and therefore reduces any improper movement in the suspension, which is great for the track where you want as little deflection from the suspension as possible. It also absorbs noise and vibrations pretty well, and while it won’t be as comfy as stock, you won’t notice that much of a difference in vibration. However, if you’re building a track car, then this should be of no concern to you anyway.
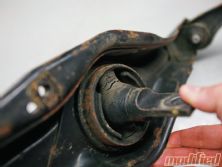
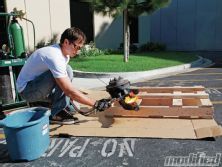
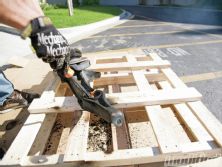
To do the rear trailing arm bushings, almost all of the entire rear suspension assembly has to be dropped, making this job a bit time consuming. The challenging part will be removing the old bushing. It’s a pressed-in part that can normally be removed with the use of a hydraulic press, but in this case it needs to be burned out because the outer metal sleeve needs to be reused with the Powerflex bushing.
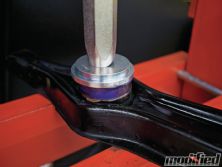
Armed with an oxyacetylene torch (and a lot or patience), I burned both bushings out of the trailing arms. Take your time with this and be sure to wear protective eyewear the flame from the torch can burn your retina. With the hard part over, the next step is to find a hydraulic press and squeeze the Powerflex bushings in. You’ll have to reuse the OEM mounting insert, but that can be pressed in with a set of pliers.
Once you reinstall everything back onto the car, an alignment should soon follow since the suspension geometry will surely be off. That about does it for suspension upgrades on the DC2. It’s time to focus a bit more on the engine and power delivery. A mild cam upgrade is in the works while a baffled oil pan has been ordered to ensure the engine never starves itself of oil.
Sourcebox
NRG Innovations
Gen 3.0 Quick Release, Short Hub & Quick Lock
getnrg.com
626-369-2668
Powerflex
Complete Integra Bushing Kit
powerflexusa.com
540-674-5212
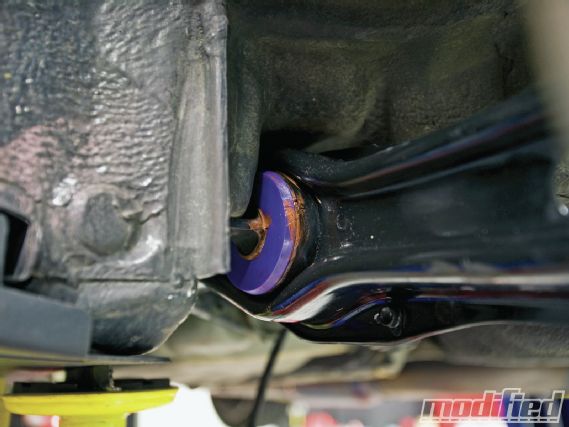 |
With the new bushings in place, the rear trailing arm will now stay put rather than flexing during hard cornering loads.
|
With the new bushings in place, the rear trailing arm will now stay put rather than flexing during hard cornering loads.