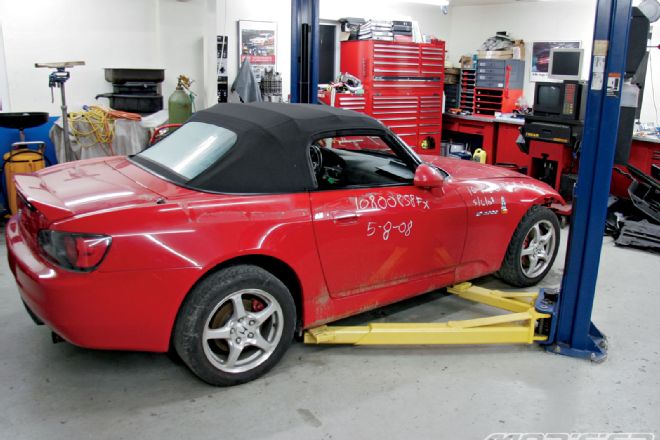
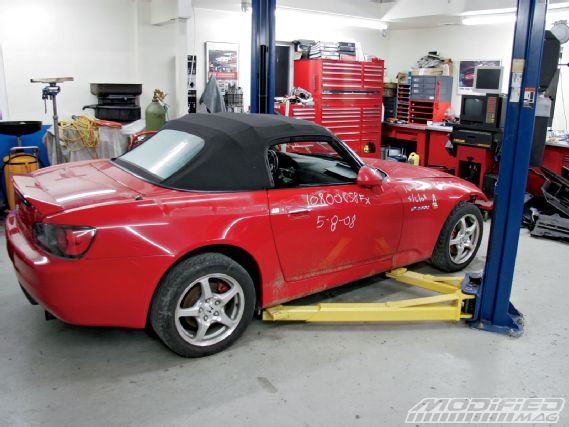
The decision to use a new chassis after the unfortunate accident at VIR meant that some build plans have changed. Say goodbye to the old black AP2 S2000 (which has been returned to stock) and say hello to our new theft-recovery AP1 S2K. Along with the new chassis, our goals have changed as well. We will be building an Unlimited class Time Attack S2000 rather than keeping it in the Street class. This way we can focus on more hard-core chassis and engine development and show you what it takes to build a car of this caliber—the right way.
 |
Project Honda S2000 - The New “Unlimited” S2000 Build
|
Project Honda S2000 - The New “Unlimited” S2000 Build
After taking delivery of our theft-recovery S2000, we wasted no time getting to work on the build. The first step was to remove all components down to a rolling chassis. We removed the complete engine/trans, interior, roof and all the wiring. We used masking tape to label the connectors and their corresponding function to make stripping the unnecessary wiring and installation easier. We also stored all hardware and small brackets in labeled zip-lock bags to once again make for an easier installation.
The next step was to prepare the car for the installation of the rollcage. You want your cage builder to do as nice a job as possible, so make sure to take the following steps to make his job as easy as possible. When welding the backing plates for the rollcage, any paint and sound-deadener will burn and create a nasty-smelling toxic smoke. There are two ways to remove the underbody sealant: acid dip or scrape by hand. Acid dipping removes everything down to bare metal, and consequently requires the chassis to be stripped down to a bare shell as opposed to just a roller. Also, acid dipping is around $1,500 for a complete car and will then require the chassis to be primed immediately to prevent rust from forming. It can be difficult to get primer in the crevices where the acid has collected, which means an acid-dipped chassis can continue to erode even after the chassis has been painted.
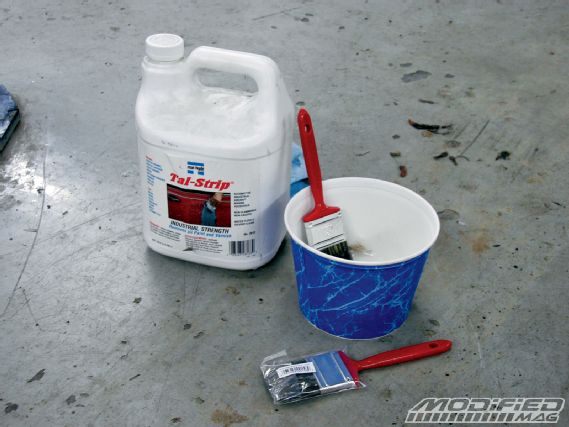 |
Using Tal-Strip, we were able to remove a lot of the stock undercoating which may not seem like much, but the weight savings are well worth it.
|
Using Tal-Strip, we were able to remove a lot of the stock undercoating which may not seem like much, but the weight savings are well worth it.
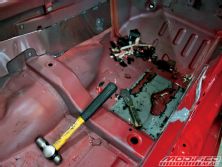
With the cost and potential corrosion issue associated with acid dipping, we opted to scrape the chassis by hand. For this, we picked up an assortment of putty knives from the hardware store, a honing stone to sharpen the putty knives as they wear and a gallon of chemical Tal-Strip. Be sure to wear gloves, long sleeves and safety glasses when using the Tal-Strip overhead. Apply it to the underbody sealant. Allow it to work its magic and then begin scraping with the putty knives. You will quickly find which scraper works best. Sometimes tapping the scraper with a hammer can help speed up the process, but be careful not to gouge or split any seams as you go. Once this is complete, move to the interior, where in Hondas you will find a black sound-deadening tar. It is quite brittle and with a scraper we were able to remove this quickly without damaging the floor. If your tar is stubborn, some have had success with an air chisel or by using dry ice and a hammer to shatter the tar; however, start with a scraper because you have the most control and can avoid damaging the sheetmetal.
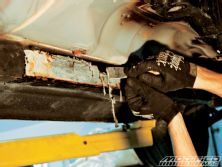
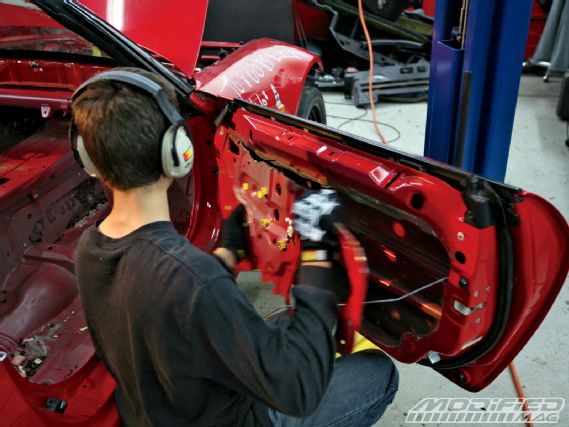
With all of the underbody sealant and sound-deadening tar removed, we started working on the doors. There is a substantial amount of weight to be saved in gutting the doors, which also allows the door bars to be fitted as far outboard as possible, improving safety in a side impact. We retained the OEM window slider to allow for lexan side windows to be fitted and manually operated, offering improved aerodynamics with the windows up (or they can be rolled down when it’s required by the racing series). With this in mind, we marked the pattern, then using a small reciprocating saw and a 3-inch cut-off wheel, removed the inner doorskin. We kept the OEM double door bars as a sacrificial intrusion protection in addition to the rollcage’s X bracing,as opposed to fitting the NASCAR-type bent door bars and fully gutting the door. Finally, we cut and formed a carbon skin to cover the opening and provide a clean appearance with no sharp edges.

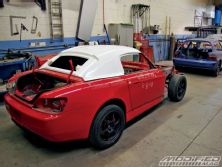
Next, we installed the necessary components for the cage to be fitted. For this, we kept the steering column in place and loosely fit the dash. The dash bar will need to mount to the steering column and the dash is required to fit to the A-pillar tubing. We then installed the racing seat in our desired position, since this is needed to locate the harness bar when building the cage. We opted to use Taitech seat rails from ScienceofSpeed because it allows for a low mounting position that maximizes headroom while maintaining a slider to accommodate multiple drivers. We also chose a seat with head restraints because they offer additional support and protection in case of a side impact. Finally, we needed to choose a hardtop because this will allow the cage builder to closely fit the main hoop and upper bracing to its contours. We decided to go with a Spoon coupe hardtop from A&J Racing. This roof is very light at 28 lbs and minimizes aero drag with its long coupe-like shape, making it a perfect match for our lightweight Time Attack build.
 |
Project Honda S2000 - The New “Unlimited” S2000 Build
|
Project Honda S2000 - The New “Unlimited” S2000 Build
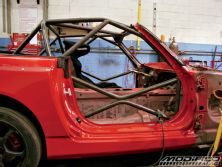
Now we were ready to deliver the S2K to our cage builder. Having built multiple cages myself, I can assure you it is a long, uncomfortable task, and unless your welding skills are top notch, it is best left to an expert. The best way to choose a cage builder is to go to your local racetrack and check out the cages in the cars. | The inner guts of the door will shed some more weight while the CF cover adds a nice aesthetic touch.
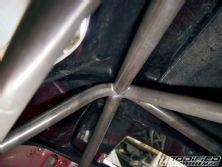
As it stands, our S2000 cage is about half complete at this point and is looking fantastic. Stay tuned as the remaining elements are installed along with beautiful dimple-dyed sheetmetal gussets.