 | Project Car: Audi TT - Body Building Part 1 - Proven
We recently picked up a 2008 Audi TT with the 2.0-liter turbocharged FSI engine. Along with the new engine (replacing the 1.8T), the second-gen TT has more chiseled lines for a fresh take on the popular coupe.
After a few weeks we couldn’t help ourselves, and first looked to see what was available in the Audi Genuine Accessories catalog. As it happens, they have a surprising assortment of upgrades, all with the quality you expect from a carmaker.
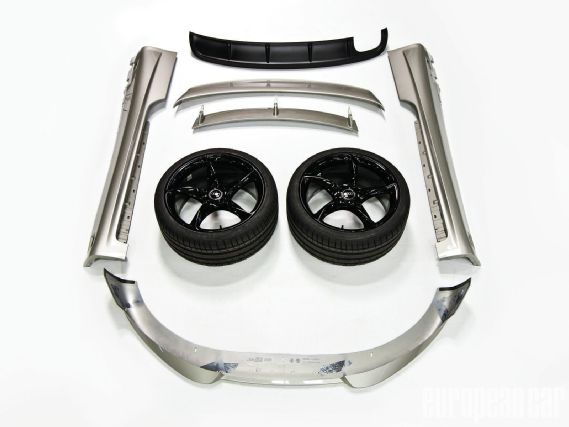
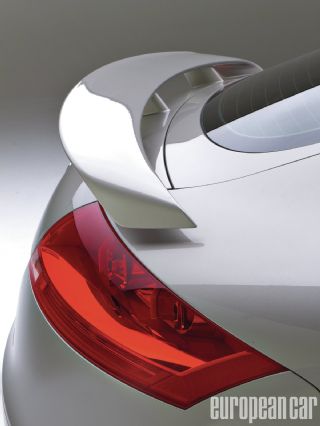
So we ordered a front spoiler, side skirts and rear diffuser from our local dealer. We also decided to replace the electronic trunk spoiler with a fixed item very similar to the TT RS. We were even attracted by Audi’s wheel options, selecting 19" Turbo Twist wheels wrapped in our favorite Continetial ExtremeContact DW tires.
Body Kit
You can follow the full installation a europeancarweb.com.
 | Project Car: Audi TT - Body Building Part 1 - Proven
You’ll see our body kit arrived paint-matched perfectly to the TT’s Sahara Silver. The kit parts come with installation instructions and almost everything you will need to fit them.
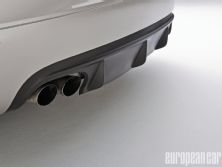
In our table below, only the trunk spoiler is listed with a painted price. The front spoiler and skirts are the unpainted price. This is because the Audi Dealer Painted Parts Program is brand new and final prices had yet to be established. Your local dealer will be able to update these prices. Also note that the diffuser is supplied matte grey and doesn’t need painting.
If you’re confident, these parts are a DIY task, although we took them to FMS Automotive in Cerritos, CA. The company has been responsible for some of VW/Audi’s accessory development and installation of dealer-fit parts such as this since the ’90s, even building show cars for both manufacturers. They manage the delivery port installations and drop-ship the OEM body kit parts to dealers worldwide. Additionally, they advise on fitting, painting and even train the body shops. As such, they were over-qualified to show us the ropes in order that we could pass on the correct techniques to you.
 |
Project Car: Audi TT - Body Building Part 1 - Proven
|
Project Car: Audi TT - Body Building Part 1 - Proven
Constructed from flexible, durable, OE-quality plastics, the pieces felt robust and will withstand harsh conditions. The fit of each component was predictably perfect, enhancing the original lines as we’d hoped.
Installation
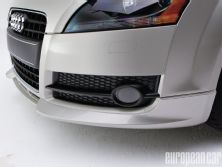
Upon the parts’ arrival, the front spoiler’s inner edge needed to be textured with sandpaper before the glue was applied to ensure good adhesion. Then Gil Plasencia from FMS carefully moved the spoiler into place, securing it with painter’s tape and clamps while the adhesive dried.
There are three holes in the bottom edge of the spoiler for the self-tapping screws supplied. Tighten them into the bottom of the bumper for extra security.
While the glue dried, the factory side skirts were removed by pulling back the weather strip and sill panels to access six T25 screws under the door sills. There are another three T25 screws in the front wheel wells, along with eight pushpins under the skirts.
Gil grasped the skirt near the rear wheel and pulled it out and away. You’re going to break the four clips between the door and rear wheel to release the skirts; it was just part of the process and new clips should be ordered before you start the installation (they cost $1.24 each).
Once removed, fit the new clips at the rear, then push the skirts into place and refit the original pushpins and T25 screws.
At the rear, the diffuser is held in with integral plastic tabs, so simply start on the passenger’s side, prying it away from the bumper as you move around to the exhaust.
 | Project Car: Audi TT - Body Building Part 1 - Proven
Fitting the new diffuser is simply the reverse process—pushing the tabs into place. No glue or screws are required.
The trunk spoiler was slightly more complicated. Start by removing the trim on the underside of the tailgate. Then unplug the factory spoiler’s motor before loosening the ten 10mm nuts that secure it.
Now take the new spoiler and apply glue to its underside, either side of a white plastic housing. This housing incorporates the resistor module to trick the car into thinking the OE spoiler is operational.
Glue an O-ring around that housing and place the spoiler into the tailgate. It’s then bolted into place with the original 10mm nuts and four additional ones (14 in total), with one of these hiding behind the control module.
FMS used painter’s tape to hold everything in place while the glue dried. The motor control plugs into the plastic housing to complete the job.
For our full step-by-step guide and online video, visit europeancarweb.com
Wheels & Tires
 | Project Car: Audi TT - Body Building Part 1 - Proven
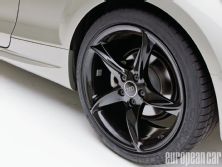
Once the body kit was installed, a set of 19x9” Audi Turbo Twist wheels were selected and fitted. Again, these were ordered from our local dealer. They’re available for the Mk2 Audi TT in either silver, white or black finishes.
We chose black because it contrasts our Sahara Silver paintwork and gives the car real presence on the freeway. However, be aware the center caps are a separate item to order.
FMS transferred TPMS tire pressure sensors into the new wheels. They can be taken from your original wheels or ordered separately from your Audi dealer. Having the sensors will prevent the tire deflation warning light appearing on the dash every time you start the car.
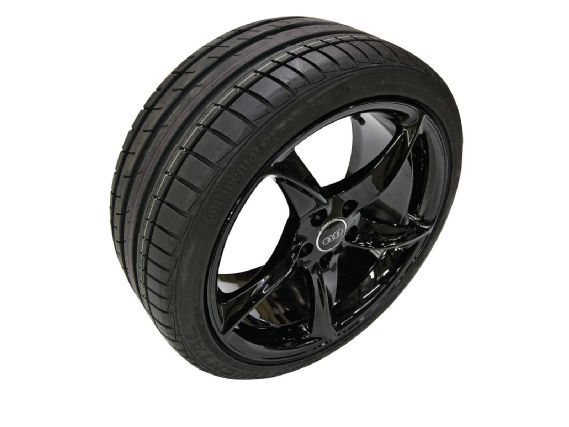
Obviously, the offset and bolt pattern was specifically designed for the TT, so no fitting or clearance problems should be encountered, provided you fit the recommended tire size.
In this instance it was 255/35 R19, and we again opted for the Continental ExtremeContact DW tread pattern because we’ve had such great results with them in the past. After extensive tire tests we’re confident they provide high levels of grip in both wet and dry conditions. They’ll also have plenty in reserve for when we add more power in an upcoming installment.
Next Month
We plan to fit adjustable sports suspension, anti-roll bars and possibly a big brake kit.
Supplier Part Price Contact Audi front spoiler $556 audicollection.com Audi side skirts $689 audicollection.com Audi rear diffuser $424 audicollection.com Audi trunk spoiler (painted) $635.30 audicollection.com Audi 19x9" wheels $690 each audicollection.com Audi 255/35 R19 Extreme Contact DW $POA conti-online.com