 | 1998 Honda Civic - Fuel The Fire - Project Civic
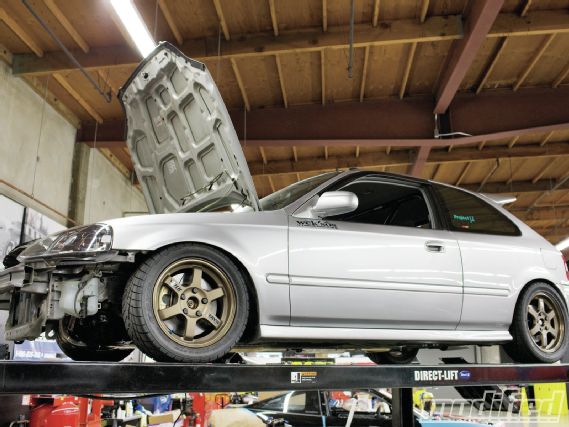
Now that Project Civic has started to take form, it’s time to work on dialing in the specifics. I want this car to be fun to drive on track, meaning I need to be comfortable and informed of the car’s condition as much as possible and doing everything I can to ensure that it runs properly and efficiently.
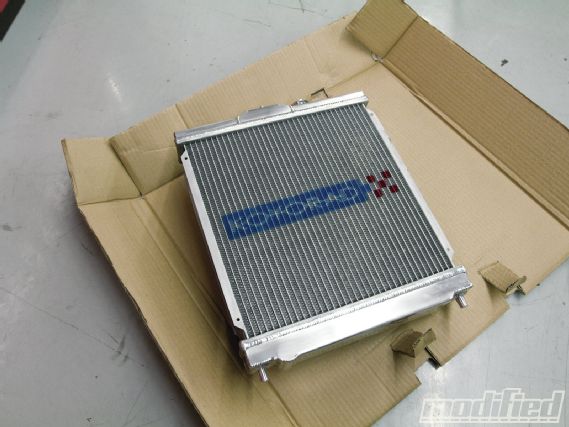
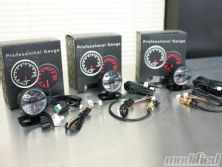
I decided that a few gauges would help ease my mind, while adding a nice bit of visual flare at the same time. The parameters I’m most concerned with for my NA Civic are water temperature, A/F ratio, oil temp and oil pressure. But before I get to the gauges, I decided to upgrade my factory cooling system. Koyorad supplied me with its high-capacity replacement radiator, a massive improvement over the stock Civic unit. Koyorad radiators are constructed of 100 percent aluminum and feature welded end tanks, while maintaining factory fitment. The fit is tight, but that’s mostly because the 53mm thickness of the Koyorad unit is a lot more than the stock radiator. Increased core thickness allows for higher cooling capacity and, theoretically, lower engine operating temperatures. Another nice thing about the Koyorad units is their ability to use the stock fan and shroud if you so desire.
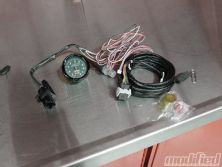
With the new radiator in place, I turned my attention to how I planned on monitoring water temperatures. While the Civic obviously has a factory water temperature gauge in the dash like nearly every car, I wanted something a little more accurate. To get the most relevant readings, I turned to Phase 2 Motor Trend for a set of its S Gear water temperature, oil temp and oil pressure gauges. These gauges are extremely clean looking and feature 280-degree stepping motors to ensure accurate readings. Each gauge includes all required wiring and sensors, as well as detailed installation instructions. To monitor my A/F ratio, AEM has supplied me with its analog wideband, which includes a Bosch O2 sensor and all required wiring. Because the AEM wideband doesn’t include a pod of any sort to mount the gauge, I had to get creative. More on that later.
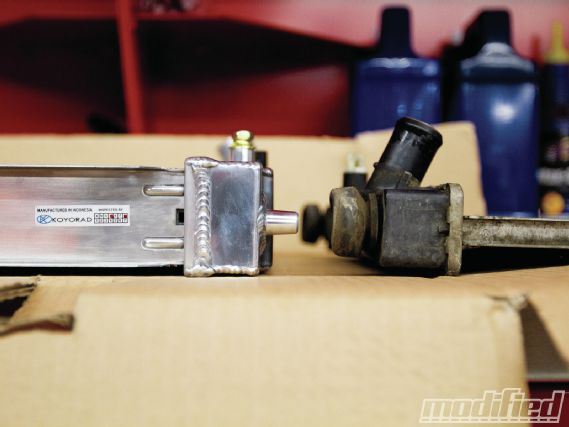
I decided to place my water temp sensor near the upper neck of the radiator between the rad and engine block. The easiest way to get a sensor in this location is to use a water hose sensor adaptor; Buddy club offers a 30mm sizing, which is correct for Hondas of my era.
 |
1998 Honda Civic - Fuel The Fire - Project Civic
|
1998 Honda Civic - Fuel The Fire - Project Civic
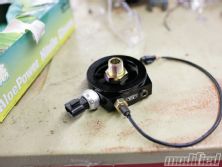
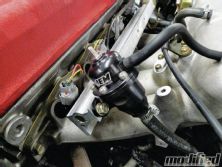
For the two oil sensors (temperature and pressure), I decided to go with the common and effective solution of an oil filter block adaptor from BLOX Racing. This simple billet piece mounts between the engine block and the oil filter, providing several provisions for different purposes. Installing this piece is straightforward — just thread it on between the block and filter, make sure it’s tight (no leaks), and you’re ready to go.
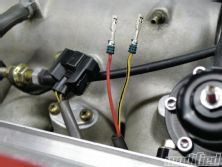
To monitor the A/F ratio, it’s necessary to weld a bung into the exhaust path. The test pipe seems like a good spot for it, and after a few minutes on the cutting table, head honcho Peter Tarach cleanly and securely welded the necessary provision for the additional O2 sensor in place, and we were in business to begin wiring everything up.
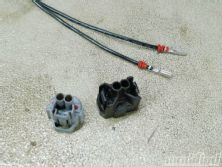
My Civic’s engine bay isn’t exactly what we would call “show quality,” meaning the wiring harness isn’t tucked. I wanted to make sure the wiring for my gauges was efficient and safe, and wouldn’t interfere with anything that’s already in the bay. A few zip-ties, and I had the wires attached and out of the way. So where do they go into the cabin? Just below the battery tray there was an open provision in the firewall, filled with a rubber grommet. By taking out this grommet and cutting a small hole in the middle, I was able to run the wires through the grommet and maintain most of the sound deadening it provides.
 |
The new radiator is ready to go in. Note how much thicker the core is than the stock Civic rad; there’s no question this will help increase cooling capacity.
|
The new radiator is ready to go in. Note how much thicker the core is than the stock Civic rad; there’s no question this will help increase cooling capacity.


To route the wiring, some interior disassembly is required. Luckily, Hondas of the EK/DC2 era are fairly easy to take apart. Philips screws and plastic tabs hold the majority of the interior together, so removing the panels is a matter of less than 20 minutes if you’ve done it before. I wanted to place the water temp, oil temp and oil pressure gauges in line along the middle of my dashboard. We decided to tap into the controls for the factory stereo to find switched and constant power. Once the gauges were powered up and clipped in, we loomed the wires together with black zip-ties and routed them into the dash behind the stereo face.
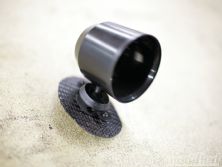
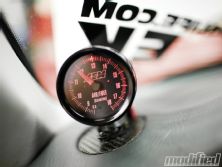
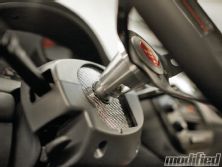
For the AEM wideband A/F meter, the mounting wasn’t as easy. Because the AEM unit doesn’t come with a gauge pod of any sort, I needed to come up with a creative solution for mounting. On the ’96–00 Civic dashboards, there are two vents on either end that are designed to help defrost your windows. This spot on the driver side is perfect for mounting the wideband because it’s easy to see in the driver seat.
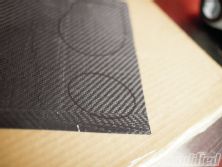
I turned to Auto-Tech Interiors for help finding a pod that would fit the AEM wideband. ATI has a wide variety of gauge pod solutions, most of which are direct fit. For my application, I opted to go with a 52mm pod originally designed for a Miata. I made use of an old piece of carbon fiber I had laying around by cutting a base plate shaped just right for the oval dashboard vent. A couple of quick drill holes and a little bit of hot glue later, and I had my wideband mounted.
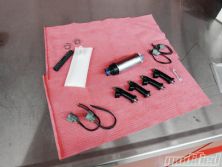
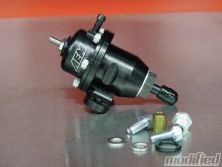
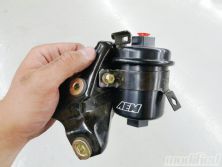
With the gauges installed and working properly, we turned our attention to the Civic’s anemic fuel delivery system. Stock B16A injectors aren’t up to the duty of heavy and regular high-rpm loads. On the last trip to the dyno with Church Automotive Testing, we discovered that my fuel system was at full capacity by about 7000 rpm. To remedy this, we installed new 450cc injectors and a 300-lph fuel pump from DeatschWerks, complemented by an AEM fuel pressure regulator and replacement fuel filter.
Installing these parts is fairly simple. To swap out the fuel injectors, fuel pressure regulator and fuel filter, start by relieving the fuel system pressure in the engine bay; the FPR and filter are plug-and-play solutions. In this case, the injectors required some work, but nothing major. Because the new DeatschWerks injectors are a newer and different style of injector, it’s necessary to re-pin the injector plugs. Take my word for it, re-pinning is much easier than cutting and trying to solder the new clips in place. Save yourself the hassle! For the fuel pump, my life was made even easier by the fact that my rear seat was already removed. It’s only a matter of a few bolts and plugs to remove the factory fuel pump. The DeatschWerks pump is also a plug-and-play solution, fitting neatly into place with no struggles.
Now that everything is in and working, it’s time to bring the car back for a final tuning session with Church Automotive Testing. I’m not looking to make any more power than last time, but rather hope to find my fuel system needs to be fulfilled. From there, it’s back to the track!
We tackle a much-needed fuel system upgrade and install gauges to monitor vital engine parameters.
I decided to make use of an old piece of carbon fiber I had laying around by cutting a base plate shaped just right for the oval dashboard vent.
Believe in the Weave
Since I had my sheet of carbon fiber out and already cut up, I found a way to make use of the spare scraps instead of tossing them out. The Splash steering hub I’ve installed is a cool piece, but there’s one problem: all the nasty wires and SRS stuff is visible, so I took the extra half of my carbon-fiber sheet and made a block-off plate to cover up all the gross stuff in the steering column.
Sourcebox
AEM
Fuel Pressure Regulator Fuel Filter, Wideband A/F Monitor
aempower.com
Auto-Tech Interiors
52mm Gauge Pod
autotechinteriors.com
DeatschWerks
420cc Fuel Injectors 300-lph Fuel Pump
deatschwerks.com
Phase 2 Motor Trend
S Gear Gauges
phase2motortrend.com
Auto-Tech Interiors
Gauge Pod
autotechinteriors.com
BLOX Racing
Oil Filter Block Adaptor
bloxracing.com
Koyo
High-performance Radiator
koyoradracing.com
Buddy club
Water Hose Sensor Adaptor
buddyclub.us