 | Project Acura RSX Type-S Turbo
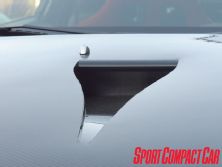
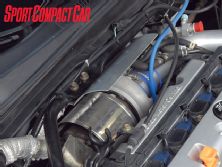
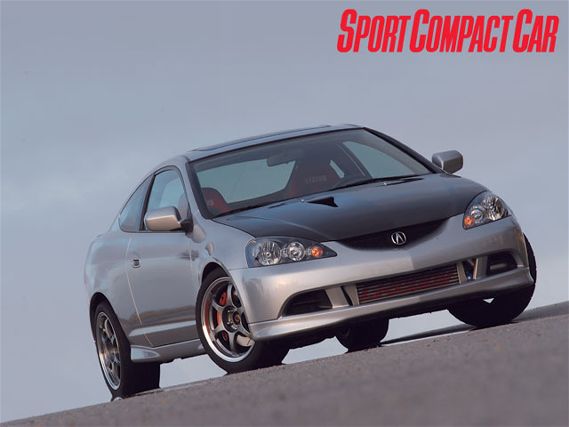
We're applying the lessons of the Sport Compact Car Technical Assistance Program to Project RSX--taking a perfectly nice car and making it lighter to go faster. While the initial cost of such an effort can be low, experienced readers may recall that results are not always without compromise. For example, a stock RSX has a back seat, making it an acceptable means of taking friends out to a movie that's not too far away. It's also fairly quiet, with front seats that are comfortable for a long distance. You can hear the stereo clearly. It is a well-balanced, all-rounder of a car. You wouldn't hesitate to drive it a long distance. The world is full of cars like that. They are for sissies. Exterior Non-structural body panels are usually heavier than they need to be, so we looked around for lighter options. We've seen Seibon parts on other cars, so we chose an OE-style hood for Project RSX. It was initially installed in about 15 minutes with one 10mm combination wrench, and all the gaps were, if not as precise as Acura's, far better than average for aftermarket carbon fiber parts. We were pleased. We already noted that the turbocharger's turbine heat shield actually touches a power steering line, and other plumbing and wiring is also close. GReddy instructed us to install some sort of duct or scoop to direct air to this region for cooling if we intended to use the car on the track. A NACA duct looks way cooler than a scoop sticking up into the air stream, so we decided it would be the way to go. Skip to the sidebar to see how we built a real NACA duct in our spare time at home, using simple tools any former model airplane nerd will have around.
 | Project Acura RSX Type-S Turbo
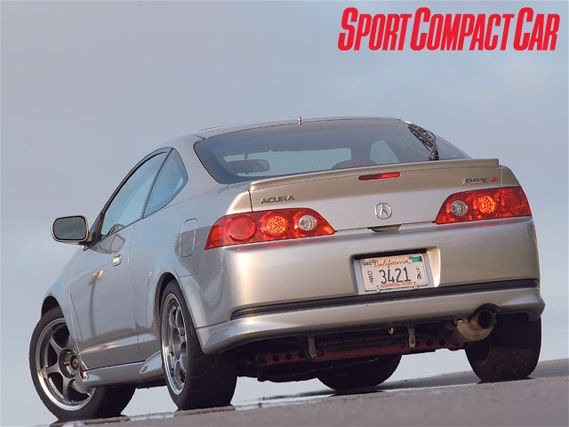
We also installed Seibon's carbon-fiber hatch. This was much lighter than the stock unit, fit the outline of the car quite well and looked bitchin'. It was much fiddlier and more time-consuming to install, however, as the portion of the wiring harness that goes inside is difficult to get in and out, especially with the rough surfaces inside the new hatch. When we eventually made that work, there remained several issues with hardware. The latch could not be adjusted far enough without modification to hold the hatch all the way shut. The mounting features for the third brake light simply didn't exist, so we would have had to modify the brake light assembly and glue it in place. Finally, the handle to open the latch did not bolt up in a straightforward manner. We were less pleased.
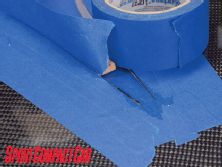
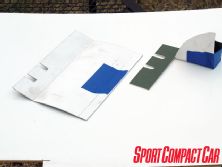
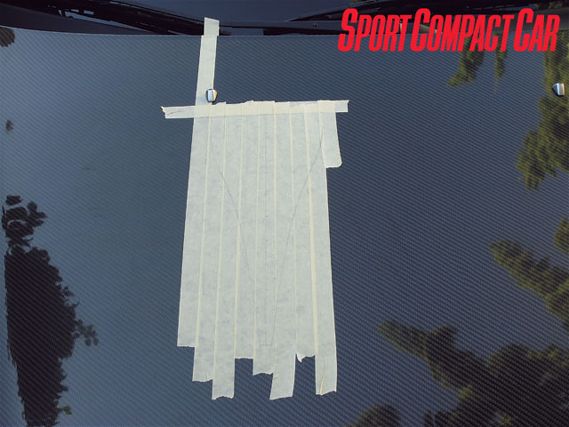 | Lay out the location on the car. Masking tape and pencil are a good strategy when starting out. Overlap of the hood with the cowl area can be deceiving. Measure to ensure the opening will actually deliver air where you intend it to go under the hood. Also, make sure there is enough vertical clearance so that the duct doesn't run into underhood components, such as the engine or throttle cable.
We paired the carbon fiber hatch with another weight-reduction strategy that turned out to be a bit of a headache. Flex-A-Lite manufactures pre-molded, scratch-resistant polycarbonate windows for the RSX and other Hondas. Plastic is lighter than glass, so we had to try. Flex-A-Lite does not recommend the windows for use in street cars. We ignored this guidance, confident that a warning about race parts not being for the street should not apply to us.We soon remembered that polycarbonate has a high coefficient of thermal expansion, which is a problem with large panels. On hot days, if the RSX was parked in sunlight, the rear window expanded to the point that it overlapped the edges of the rear-window inset, rubbing the paint on the outer surface of the car, and the upper edge interfered with opening the hatch.
Not good. We could have trimmed the whole thing so these problems didn't occur, but then the gaps around the edges would have been excessive when the window was cold. Also, we tried to be really careful when washing the window, rinsing all the dust off first and using a microfiber cloth with plenty of gentle car-wash soap. We still got light scratches on the surface.
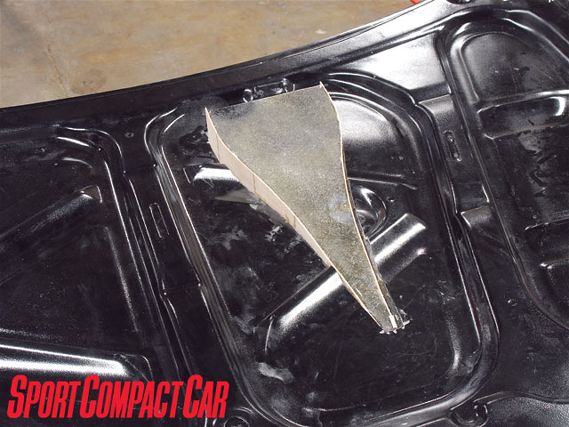
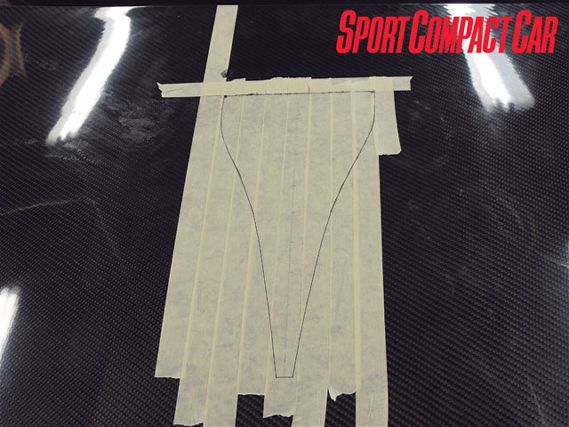 | Commit to your penciled-in outline by retracing it in pen. Drill small holes at the square corners, both to mark the position of the duct on both sides of the hood and to provide a starting point for cutting.
Since both sets of headaches were attached to each other, we took them off and reinstalled the stock hatch. Doing so also eliminated a mysterious electrical drain that had required us to disconnect the battery when parking the RSX for longer than a day. That removed all the things that made the RSX a non-streetable PITA (pain in the ass--for the uninitiated). We crossed the line, backed up, and now we're good.Seats Seats are among the heaviest items in many cars' interiors. Most stock seats are more about accommodating a wide range of posteriors (or a range of wide posteriors) than about supporting the driver and communicating the car's behavior.
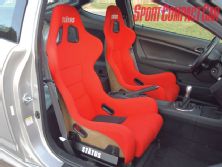
We sought to improve both areas by installing a set of Status Racing Monte Carlo seats. These Kevlar shell seats are lightweight, just 11.7 to 12.5 pounds each. The color also works with our red/black/silver theme. Any Status Racing seat can be ordered in Kevlar, carbon fiber, or glass-reinforced plastic (GRP, or fiberglass) for those on a budget, as well as cloth, suede or leather upholstery.
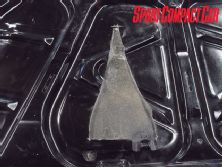

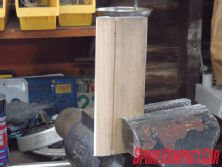
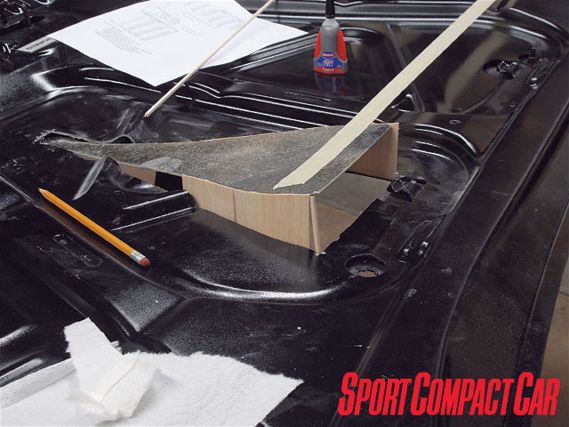 | The need to make a strong and light aerodynamic structure reminded us of a youth misspent building model airplanes. We made the duct walls of 1/16-inch balsa wood. With the grain vertical, it can easily flex to follow the required curves, but has good compressive strength. Start by supporting the back of the duct floor at the required height. We used masking tape to hold it in alignment from side to side.
Since Project RSX was put together, Status has discontinued the Monte Carlo, but the same shell is available as the Ring, with slightly different detailing. Kevlar versions of all Status seats have passed FIA testing, and other models are pending approval. The standard-width versions are definitely not for bigger-boned drivers. For someone with six-foot-four proportions, lateral support is concentrated at the hips, rather than the rib cage. Status now offers the Laguna and Ring in GT versions that are a full inch wider in the bottom two-thirds of the seat and fit up to a 40-inch waist comfortably.
Installation was simple, using Wedge Engineering custom brackets. The stock seatbelts are positioned well enough with the Monte Carlos in this installation that we're comfortable using them. Other race seats we've installed required the use of racing harnesses to make us confident in their safety. Our experience with shell seats is that they are typically flexible in torsion until firmly bolted to the mounting structure. Though ultimately offering much greater tensile strength, Kevlar is inherently more flexible than carbon or GRP. It's hard to say whether the flex that remains is inherent in the seats themselves or originates with the included side brackets without replacing said brackets. Since it doesn't keep us from beating on the car, we haven't isolated the issue, and when we mentioned it to Josh Decker, Status Racing's CEO, he pointed out the successful FIA testing.
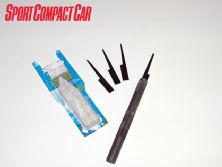
 | Each section of balsa is marked to follow the hood's contour, trimmed along the marked curve, and then trimmed with some excess length. It is then glued to the inside surface of the hood and the side of the duct floor with cyanoacrylate adhesive (the generic name for products like Super Glue). A medium- or thick-viscosity, gap-filling version is best, to prevent the end grain of the balsa from wicking all the glue away from the joint, as well as to fill in imperfections. The glue sets in just a few seconds, so each piece can be held in place by hand and progress is rapid.
Once the Status seats were installed, access to the back seats became difficult. Going with the flow, we removed everything in the interior from the B-pillars back, turning it into a two-seat sports car. As with the Technical Assistance Program's `convertible' option, we're sure that really increased Project RSX's sex appeal.
Modern cars are engineered to be assembled as quickly as possible, minimizing the amount of time trained monkeys spend turning screwdrivers. As a result, most interior parts that aren't seats or belts can be removed with bare hands, and quickly. That's what we did, and is about as far as we've gone.
If we were really motivated, as with a race car, we'd have done the entire interior. Strip everything, get rid of all the insulation, sound deadening, goo, schmoo, tar and useless gaskets. Remove any no-longer-used brackets, studs and other doo-dads. Strip the undercoating and repaint under the car. Remove anything that doesn't make the car fast, stiff or safe. Anything that's left should be examined for ways to make it lighter or replace it with something that is. Replace steel fasteners with aluminum or even nylon if appropriate. Strip unused wires (sound system, A/C, etc.) from the body and engine harnesses. But we already proved we aren't that committed by reinstalling the stock hatch and glass.
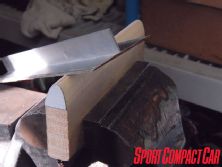
 | The walls will eventually be done, at which point the duct is basically stabilized, but not finished. Trim the bottom of the balsa wood walls flush with the fiberglass on the duct floor.
There are also middle-ground ways to make the car a sleeper. For example, you might leave the panels and carpet, but remove all the insulation, padding and sound deadening behind them. Casual onlooker sees a full interior, but the car is a lot lighter.
In a perfect world, we would be rid of the moonroof. Glass, motors and the rest of that stuff is heavy, and the roof is a bad place for weight. Thankfully, Acura asked us not to mess with that particular detail, so we didn't have to get into it with this car. In the past, SCC has replaced sunroofs and moonroofs with flush-fitting panels made from carbon fiber (good) or polycarbonate (bad, see above) and aluminum panels riveted on top of the roof (good for a race car). We've also seen steel panels welded in to replace the sunroof, or the metal sunroof itself welded shut. We've even seen the entire roof removed and a new, sunroof-free roof installed. This is radical, and best justified if it facilitates the construction of a cage. Suffice it to say, the weight removal has always been noticeable.
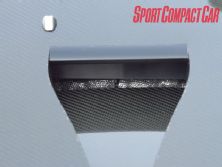
| From the top, it's starting to look like something. Don't round off the edges, they need to be at right angles in order to create turbulence and pull air in.
Stock, Project RSX weighed 2840 pounds. Now, it weighs 2670 pounds. That's after adding the weight of the rear anti-roll bar to the back and turbo system to the front. Remember, though, that the turbo system eliminated the front bumper, and we chose to remove all underhood A/C components. We were surprised to find that the weight distribution with your 245-pound writer in the driver's seat changed less than half a percent on the front/rear and left/right axes. A reduction of 170 pounds is a useful improvement for all areas of performance. There's obviously more to be done if you're building a dedicated track or race car, but then you'd also be adding back the weight of safety equipment.
Sure, Project RSX may be noisy, but for going fast, it works great. From here, we will revisit the tuning and show we actually had some kind of plan when we invested in building the engine. We'll get into the pretty red brakes and test the whole thing. Then we'll declare it finished. n