Regardless of what conditions you drive in—big city gridlock or wide open country roads—brake performance matters, a lot. From stop-and-go traffic constantly on the pedal to the occasional full lock-up panic stop at top speed to avoid that deer in the headlights, there should never be a question about having a quality set of brakes under your truck.
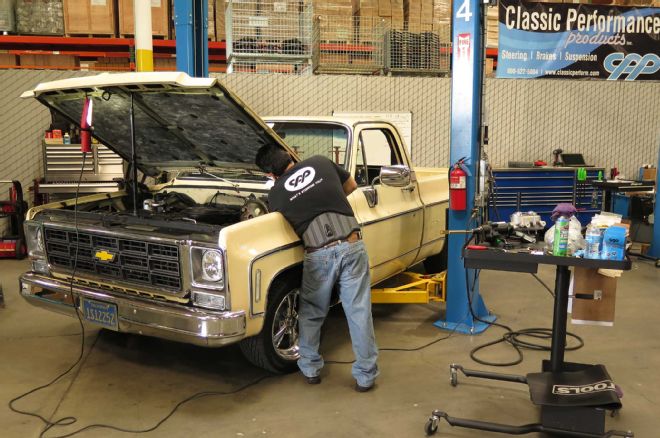
That quality aspect goes far beyond the particular binders tucked behind your wheels, obviously, and one way to ensure the system in your old truck performs on par with that in your new truck is simple: Equip it with the same technology. Classic Performance Products has the answer for not only the last-generation C10s, but every series of truck previous to that, with its Hydra Stop hydraulic-assist power booster.
Instead of relying on vacuum from the engine, the Hydra Stop taps into the power steering system, using hydraulic fluid pressure to assist in the braking chores. In contrast to vacuum boost, which depends upon variables such as the size and configuration of the booster for its usable pressure, hydraulic pressure is considerably higher, providing more usable/consistent power assist to the calipers during normal operation. A standard 7-inch vacuum booster mated to a 1 1/8-inch bore master cylinder produces approximately 350 psi of available pressure. Once that psi is fully tapped during a hard stop, the remaining pressure must be supplied manually via the brake pedal. Hydraulically generated pressure, on the other hand, is less likely to be completely tapped out, as the Hydra Stop's accumulator stores enough hydraulic pressure to power three to four stops before the unit reverts to manual function.
| Cpp Hydra Stop For C10s C10 Truck
What's required to facilitate CPP's Hydra Stop with either four-wheel disc or disc/drum applications is a standard (preferably new) power steering box or rack-and-pinion with (preferably) a built-in reservoir style power steering pump. The unit can be powered by a remote-reservoir style pump and no steering gear (i.e., manual steering box application), just as long as the system produces a minimum 1,200 psi (when dealing with the plumbing in this situation, the box/rack feed line will act as a return).
The swap from vacuum-boost or manual is quite simple, really, and the plumbing choices above and beyond the hydraulics depend on your C10's particular master cylinder and valve configuration. For all intents and purposes, an afternoon to a full day worth of labor should be more than sufficient time to bring an older truck up to modern braking standards.
For the ultimate in power-assist for your truck's brake system, you can't beat the benefits and modern performance of a Hydra Stop, hands down.
| Cpp Hydra Stop For C10s Standard Dual Diaphram Booster
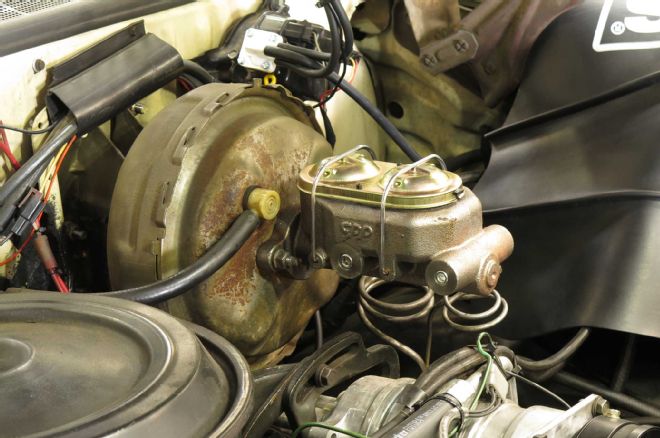
Standard dual-diaphragm 11-inch booster equipped '79 C10 is the perfect candidate for Classic Performance Products' Street Beast Hydra Stop unit. It eliminates vacuum assist from the engine by pulling high-pressure assist from the power steering system.
| Cpp Hydra Stop For C10s Oe Component Removal
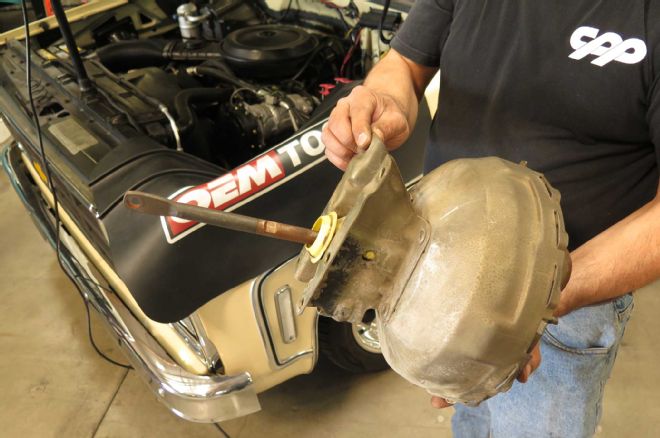
First step is to remove the OE components, from the master clear to the firewall. Speaking of which, the factory booster mounts to six preinstalled studs; the Hydra Stop will locate off the lower four.
| Cpp Hydra Stop For C10s Pushrod Disconnect
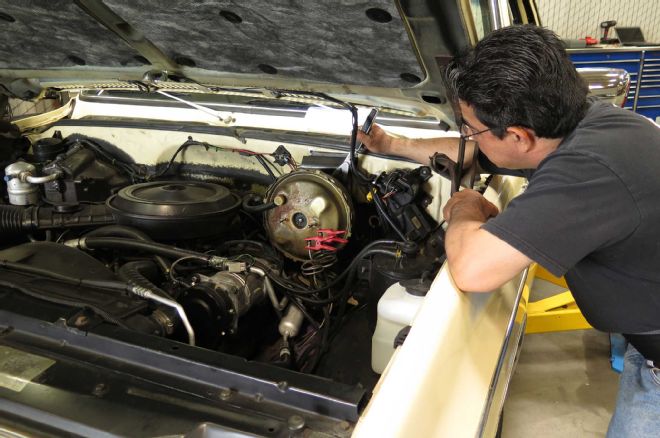
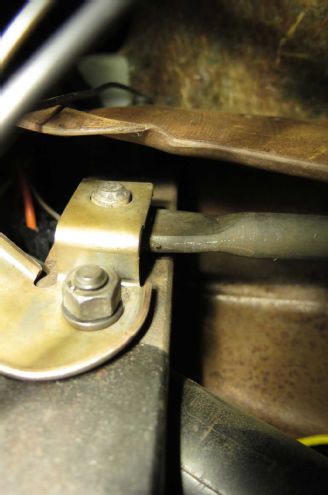
Before you attempt to pull the booster from the engine bay, squeeze beneath the dash and disconnect the pushrod from the brake pedal. It's a tight fit under there, especially on factory A/C trucks.
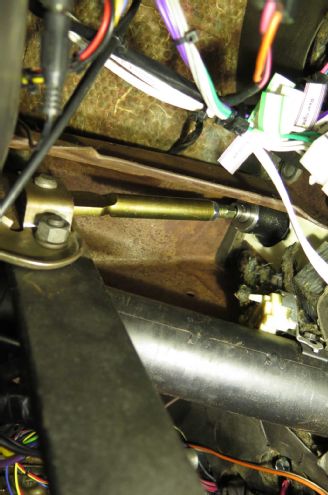
| Cpp Hydra Stop For C10s Pushrod Measuring
| Cpp Hydra Stop For C10s Pushrod Measuring
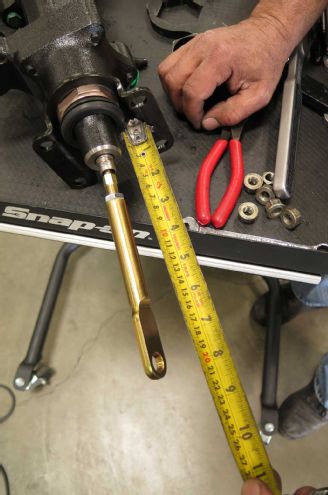
Measure the stock pushrod and transfer length reference to the new Hydra Stop pushrod. It is much easier to do prior to installing the unit in the truck.
| Cpp Hydra Stop For C10s Fluid Fitting
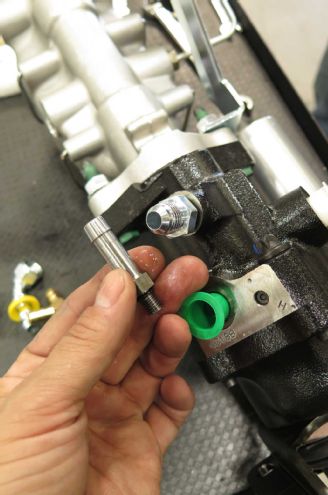
Also, before bolting the assist unit to the firewall, install the supplied fluid fittings, including swapping out the return line barb for the AN one.
| Cpp Hydra Stop For C10s Hose Set
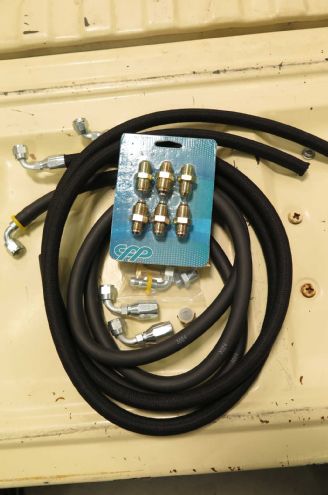
Along with the aforementioned fittings, the Street Beast comes with a complete, cut-to-fit hose set comprised of cloth-encased, high-pressure line and high-grade rubber return line and clamps.
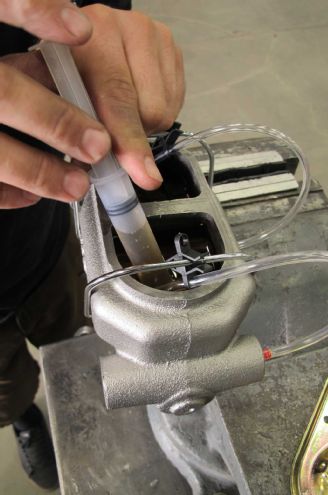
| Cpp Hydra Stop For C10s Bench Bleeding
One last (not-so-minor) preinstallation step: Bench-bleed the master cylinder. Separate the master from the hydraulic unit (making sure not to actuate the valve, as it can seriously damage the unit) and using the supplied bleeder kit, remove as much air from the master as possible. CPP recommends using their syringe bleeder, available separately.
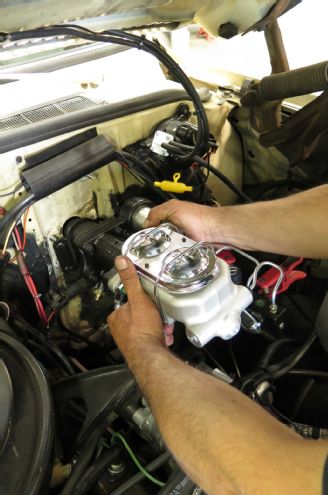
| Cpp Hydra Stop For C10s Master And Valve Install
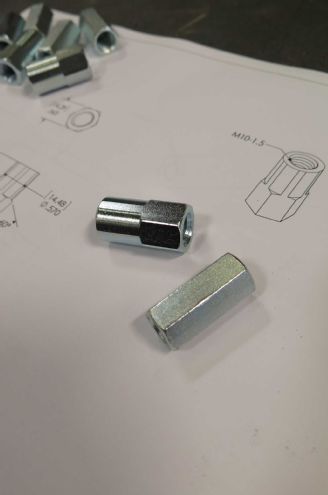
| Cpp Hydra Stop For C10s Master And Valve Nuts
The reunited master and valve can now be installed onto the firewall. The kit is supplied with both standard and metric stud nuts, the latter have a machined-down shoulder to fit the tight parameters of the mounting bracket.
| Cpp Hydra Stop For C10s Brake Line Plumbing
Brake line plumbing will depend on your C10's factory setup and/or recent modifications—if in the event your stock-proportioning valve is located on the front crossmember (below radiator), substitute valve for union connectors, as the Hydra Stop utilizes a master-mounted prop valve.
| Cpp Hydra Stop For C10s Power Steering Hoses
| Cpp Hydra Stop For C10s Power Steering Hoses
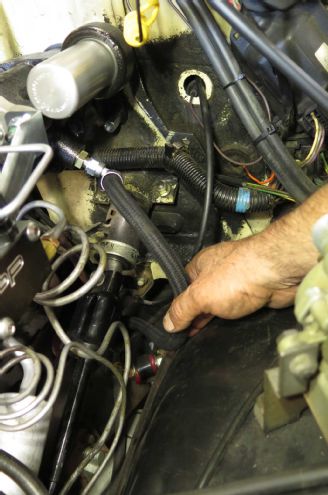
With the brake plumbing hooked up, disconnect and remove the stock power steering hoses, using a drip pan to catch draining PS fluid below.

| Cpp Hydra Stop For C10s Poster Steering Box Fittings
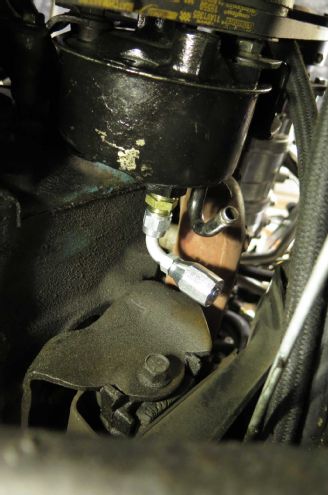
| Cpp Hydra Stop For C10s Power Steering Fitting
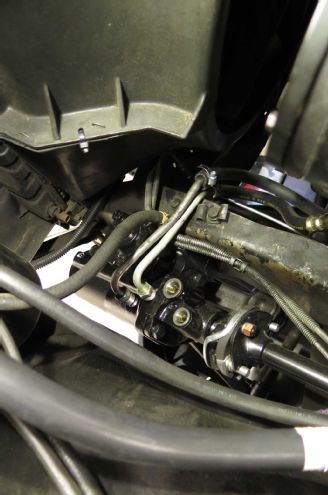
Install the supplied fittings on the power steering box as well as the rear of the pump reservoir.
| Cpp Hydra Stop For C10s Hydra Stop Lines
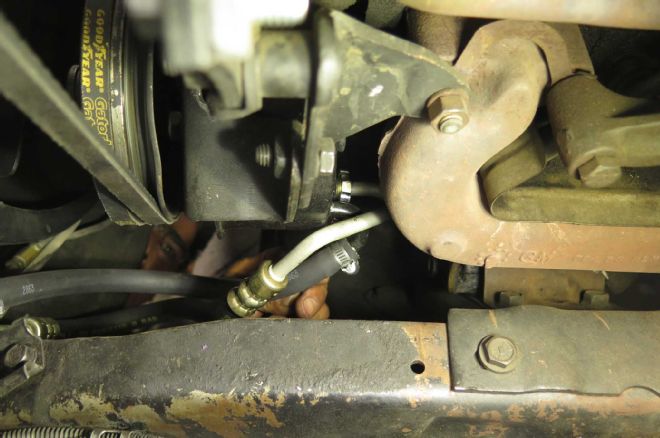
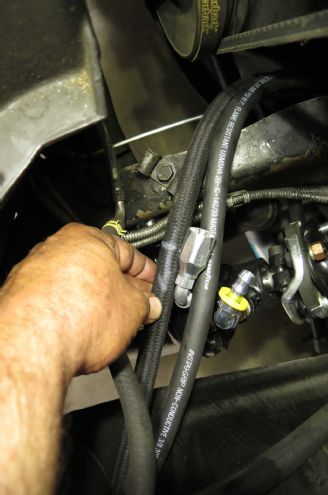
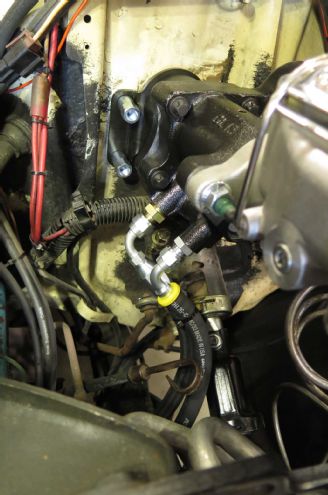
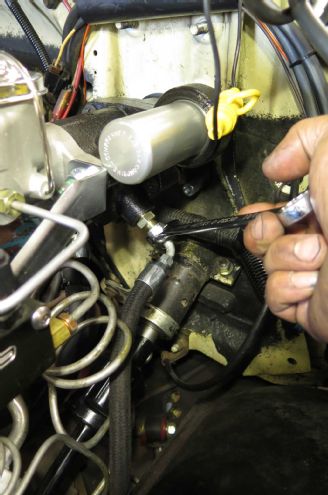
When cutting the Hydra Stop lines to size, connect the preinstalled fitting side to either the hydraulic unit or the steering box and route as intended, making sure to keep lines clear of exhaust and any moving objects such as steering linkage.
| Cpp Hydra Stop For C10s Hose Fittings
Once length is determined, mark clearly, including hose fitting orientation for reference when installing them.
| Cpp Hydra Stop For C10s High Pressure Hose Cutting
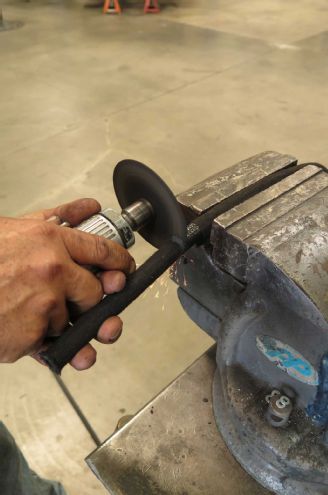
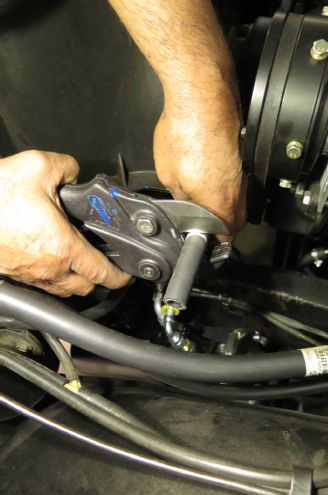
Because the high-pressure hose has a steel-braided inner lining, it must be cut accordingly. Wrap the area to be cut with tape to help prevent excess fraying, and using a high-speed pneumatic cutoff wheel (with thin disc), carefully trim.
| Cpp Hydra Stop For C10s Fitting Install
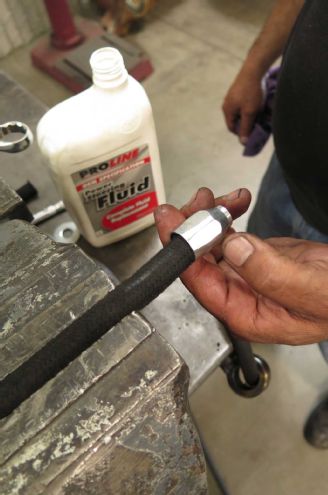
Start installing the fittings by threading the collar onto the hose counterclockwise, as it's left-hand threaded internally.
| Cpp Hydra Stop For C10s Connector Fitting Install
| Cpp Hydra Stop For C10s Connector Fitting Install
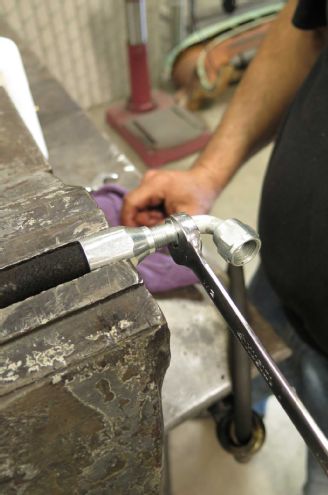
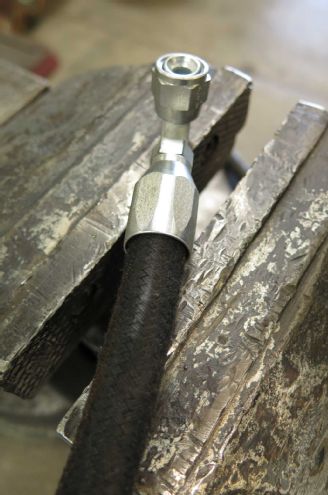
Using power steering fluid for lubrication, install the connector fitting with the collar secured in a vise; the marking made in the engine compartment will indicate where the 90-degree turn needs to be.
| Cpp Hydra Stop For C10s Line Install
Loosely connect the lines—including the low-pressure return—to the Hydra Stop and route to the box/pump.
| Cpp Hydra Stop For C10s Return Line
The return line, once sized to fit, can be trimmed with standard (albeit very sharp) hose cutters.
| Cpp Hydra Stop For C10s Return Line
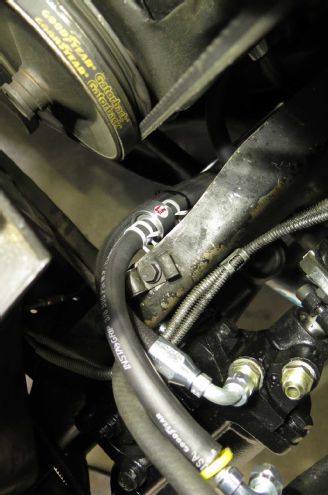
The return line will flow directly from the unit to the fluid reservoir; the steering box return (with the inline filter installed) will tee off and use the supplied push-to-connect fitting to connect with the box.
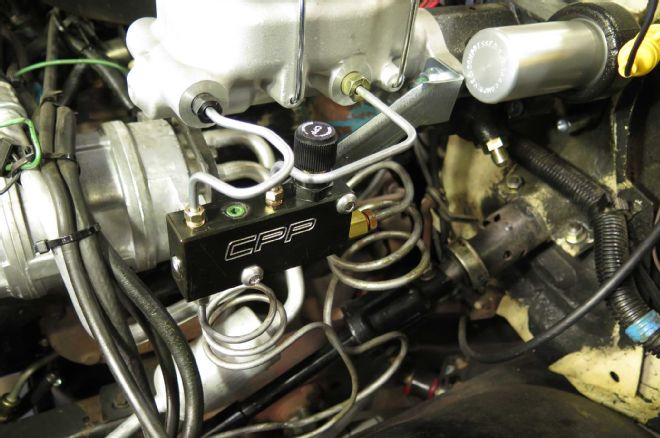
| Cpp Hydra Stop For C10s Line Fittings
Once all lines are fit, connected, and routed securely, tighten down all fittings.
| Cpp Hydra Stop For C10s Hydra Stop Pushrod
Without engaging, connect the Hydra Stop pushrod to the brake pedal. Ensure there is no booster preload (1/4-inch free play); adjust if necessary.
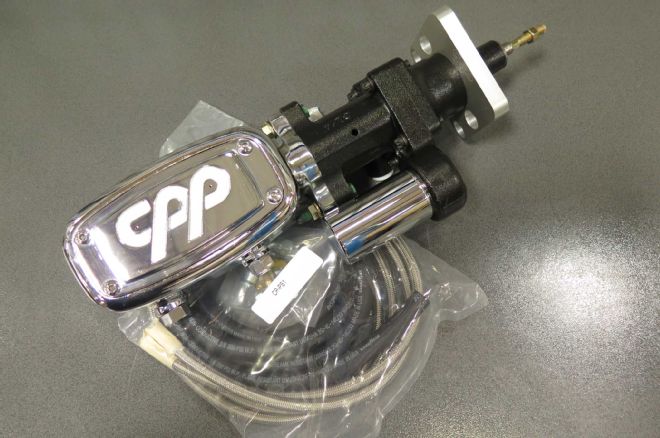
| Cpp Hydra Stop For C10s Street Beast Hydrastop Unit
Closely follow the included instructions and guidelines for initially setting up the Hydra Stop before driving; along with bleeding the brakes, the hydraulic system must be purged of air as well. Allow up to 500 miles of operation for systems to fully settle and properly break in.
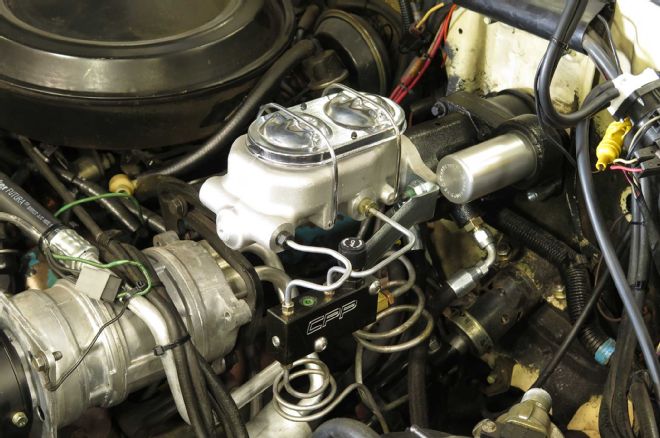
| Cpp Hydra Stop For C10s Show Stopper Hydra Stop
For engine compartments with a little more flash (the '79 wanted to retain a certain amount of OE appearance), CPP offers their Hydra Stop in a Show Stopper version, featuring a chromed MCPV1 master cylinder, billet firewall bracket, and stainless braided line kit.