Stopping a heavy fullsize Chevy 2500HD truck requires a lot of braking power. This is especially true if you tow with the workhorse or have bigger, heavier aftermarket wheels and tires. With the weight of both trailer and truck bearing down on the braking components, you will want each and every part of the braking system to function perfectly to prevent any accidents. Taking the time to carefully inspect and properly service your truck’s brakes will keep you in the safe zone for years to come.
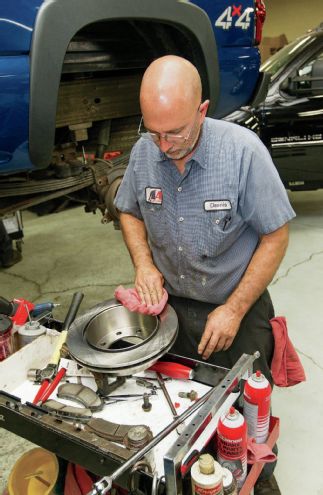
Our ’04½ Chevy Silverado 2500HD had run through the service life of the factory rear brakes, and the good folks at Merchant Automotive were willing to take us through their process for positive braking and replacement parts. We have compiled some of the top tricks in the MA tool bag, and we want to share these with you for your next big brake overhaul. Before we start, be sure the truck is secure on a lift or jackstands prior to removing wheels for service. You do not want to get injured for not taking this simple precaution!
The fresh braking capability of our 2500HD truck is not only a mental relief but also ensures our rig will stop when asked. If left untreated, the brakes can ruin more than just the pads. Heavy brakes create heat, and worn brakes create more heat than average. This can shorten the life of the caliper, overheat axle bearings and seals, and lead to broken parts that can cause catastrophic failure and possibly fatal results. Take your time and be sure to do the job right or hire a professional.
| Rear Brake Caliper
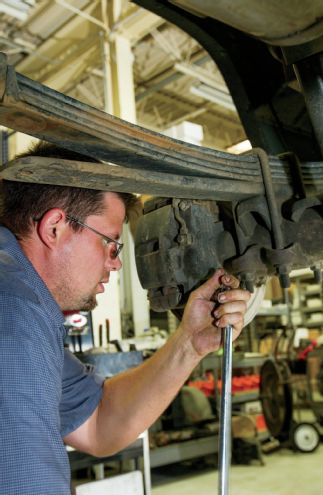
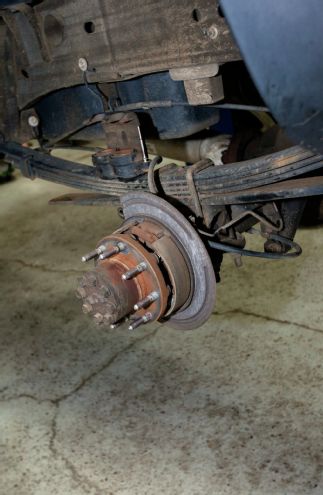
After wheel removal, turn your attention to the rear of the brake caliper. The two caliper pin bolts have a Torx head fastener that uses a T55 Torx head socket to remove. Remove the bottom caliper pin bolt and not the top, as you can simply raise the bottom of the caliper up and maneuver the top pin out of the caliper bracket. The caliper can be laid on top of the leaf springs and out of the way temporarily. Note: You can also remove the entire assembly at one time without separating the caliper from its bracket (as we did), but it makes it hard to get the bracket bolts loose, as you lose leverage from the solid mount on the rear end.
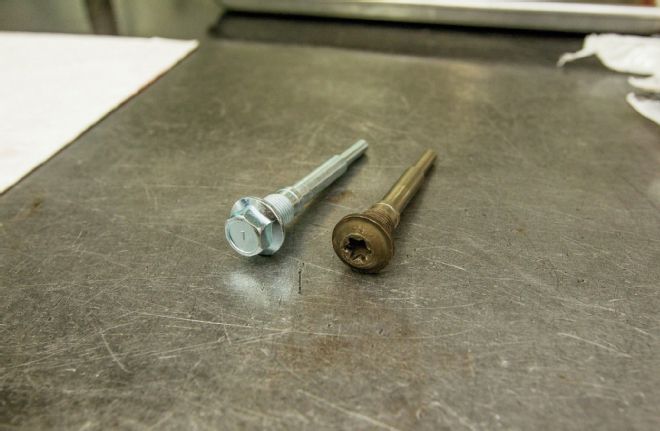
| Top Caliper Bolt
Once removed, the top caliper bolt can be replaced with the Merchant Automotive version, which offers a standard hex bolt head to get a wrench onto. Some may choose to simply leave the factory bolt in place like we did, but should you decide to opt for a replacement, it’s always good to know there is an option.
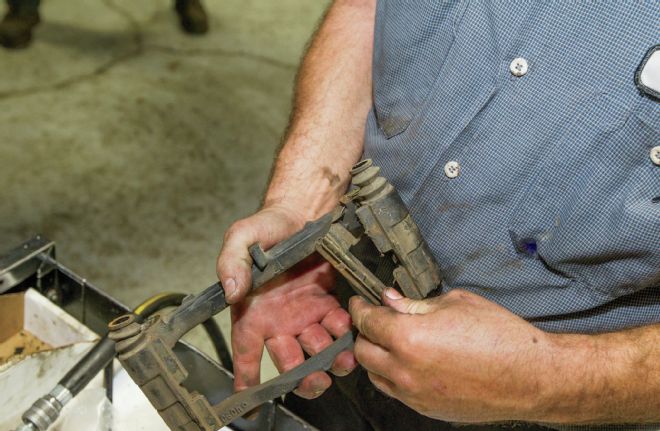
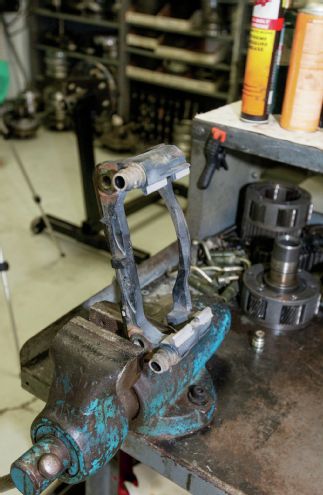
| Brake Caliper Bracket Bolts
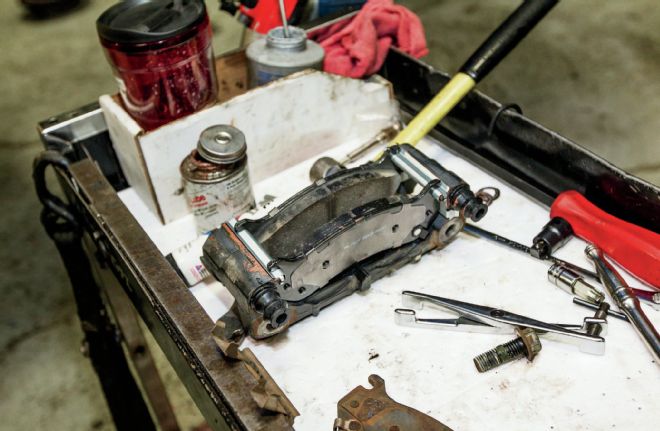
The two brake caliper bracket bolts have 18mm six-point heads for easy removal. You can either remove the old pads at this point or wait for the bracket to be removed to get the old pads out. Be sure to keep up with the pad sliders, as some brake pad kits will not offer new ones. Luckily, our ACDelco replacement pads did come with new sliders.
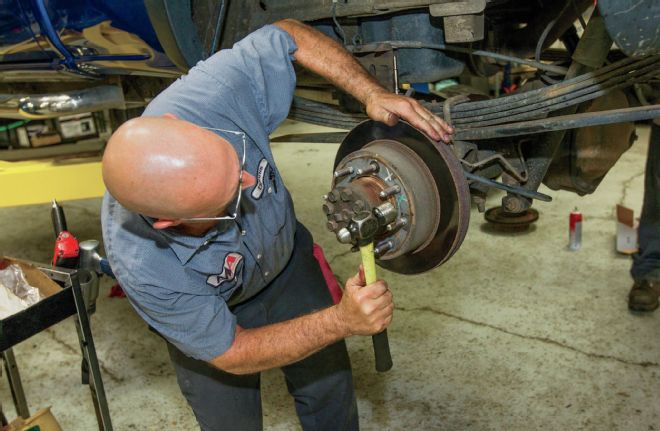
| Factory Floating Rotors
Our factory floating rotors were held in place by two small rotor clips on opposing lugs. These can be pulled off with needle-nose pliers and discarded, as they are installed for the truck’s build process and serve no further use. Rotors that are being removed for the first time can be fickle, so using a small hammer to tap the rotor loose from the rust and corrosion is the normal procedure. Tapping the rotor a little on the face with a hammer between the lugs can help loosen the rotor.
| Scdelco Rotors
Once the rotors were removed, it became clear they needed to be replaced. The new ACDelco rotors Merchant Automotive installed came with a coating of oil that needs to be removed before installation. A shop rag and some degreaser took the coating right off. This coating prevents corrosion on the rotors as they sit on the shelf.
| Parking Brake Shoes
While the rotors are removed, be sure to inspect the parking brake shoes. These pads will typically last a lot longer than normal brake pads, because they do not get used very much. However, they do need to receive attention while the system is apart.
| Sand Blast Cabinet
Using a sand blast cabinet, we cleared the corrosion on the brake caliper brackets so the new sliders would work perfectly. If you do not have access to a blasting cabinet, you can clean the slider mounts with a Scotch-Brite pad to ensure a great fit. Be sure to plug the caliper bolt pinholes if you choose the sand blast option, as you will want to keep abrasives away from this area.
| 3m Brake Lube
Using an antiseize compound (such as 3M’s Brake Lube) on the back of the brake pads, under the caliper slider brackets, and on the face of the phenolic brake piston faces will prevent corrosion and reduce friction on these surfaces.
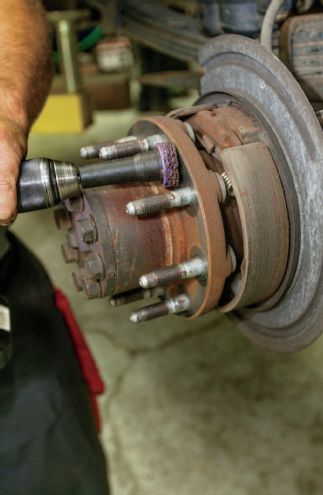
|
Using a Scotch-Brite brake hub cleaning product, we were able to get all the surface rust and corrosion off the hub. Adding some antiseize to the surface after a good cleaning just helps ensure the surface will remain corrosion free.
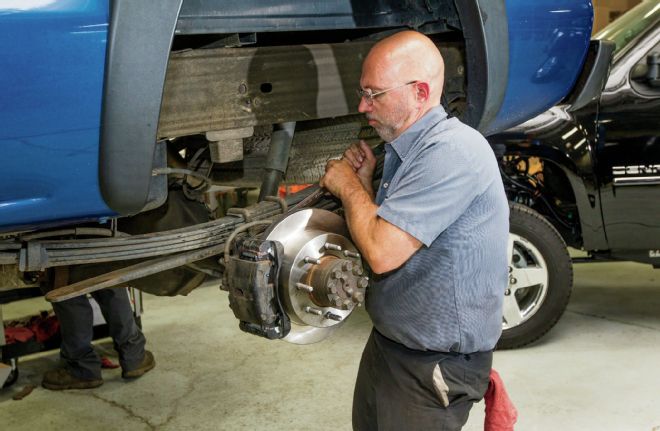
| Brake Calipers Assembled
After our brake calipers were reassembled, it was time to put it all back together. Be sure to pump the brake pedal before driving off for the first time after the overhaul.