There have been countless articles written about how to weld, or install a lowering kit, and even measuring the backspacing of a wheel. What you don't see are the tricks used to make certain jobs a little easier, more reliable, or simply better. Being that I have been fabricating almost every day of the last 15 years, I feel as though I might have a trick or two that might be worth sharing. Some might be obvious to you if you already employ them, but for those who don't, these can be as wondrous as the day you first learned how to weld. OK, maybe not that awesome, but at the very least as amazing as the first time you saw a unicorn.
Locking Sanding Discs
Roloc sanding discs, as 3M calls them, are used by almost every fabricator I've ever met. They move some serious material, are affordable, and are nowhere near as aggressive as a grinding disc. There are really only two issues with them as far as I'm concerned: 1) Unless you buy the expensive ones, they have a curl to them that just sucks; 2) They always wear out on the edges leaving the center nearly untouched and useless. Luckily for you, we have come up with a cure for both of these problems. We started placing an appropriate-sized die-grinder disc over the stud on the sanding disc and tightening the disc onto the arbor. This makes for a much more stable sander and also helps to keep the disc from 'digging' into surrounding metal (sheetmetal guys know what I'm talking about here).

| secret Society Of Sweet Garage Technique Users sanding Disc
And to cure the prematurely worn-out edges? To be fair, this isn't a cure for the worn out edges, but it does get a lot more use out of the disc. We started by sanding the arbor down to approximately 1 inch (roughly the size of the plastic piece they glue to the back of the disc) and used different-sized die-grinder discs depending on our needs or how worn out the sanding disc is. Once the outer edge of the disc is worn out, we switched to a smaller die-grinder blade and use a sacrificial screwdriver to cut the worn-out edge of the sanding disc off while the disc is spinning. Once again, this can be dangerous, so don't be stupid! Use goggles and point the grinder into a corner or somewhere that nothing can get hurt while doing this because most of the time the edge comes off with a vengeance. We keep cups of used sanding discs in varying stages of 'decomposition' on top of the toolbox. You'll be surprised how much more life you'll get out of them once you start doing this. I'm sure 3M is going to bury me deep in a desert for this.

| secret Society Of Sweet Garage Technique Users sanding Disc Trimming
Anti-Seize Compound
Most mechanical types have this in their shop and use it for the usual smearing on spark plug threads, but it has so many more uses than that. I smear a dab on almost every wheel stud to prevent rusting and galling (galling definition: to lose metal to the other because of heat or molecular attraction resulting from friction). It may not seem like a big deal, but once you've destroyed a few studs, you'll take the 5 minutes to do it. It would be brilliant if someone were to inform those of you who own custom wheels with center caps to use a little on the threads. I see more trashed caps from galled threads than I care to remember. Also (this is important for you wet-climate folk and especially for those of you who live near the ocean) smearing some anti-seize over the entire shank of the bolts used to hold on your A-arms, four-link bars, shocks, or anything else where the bolt has the potential to sit in trapped water. Understand that while the zinc coating does a decent job of protecting the bolt from corrosion, it is no match for trapped water. It is also a fantastic lubricant for urethane bushings and seems to keep the squeaking quite minimal for some reason. The jar we have at the shop has lasted about eight years so far, so go buy some and start slathering.

| secret Society Of Sweet Garage Technique Users anti Seize Lubicant
Muriatic Acid
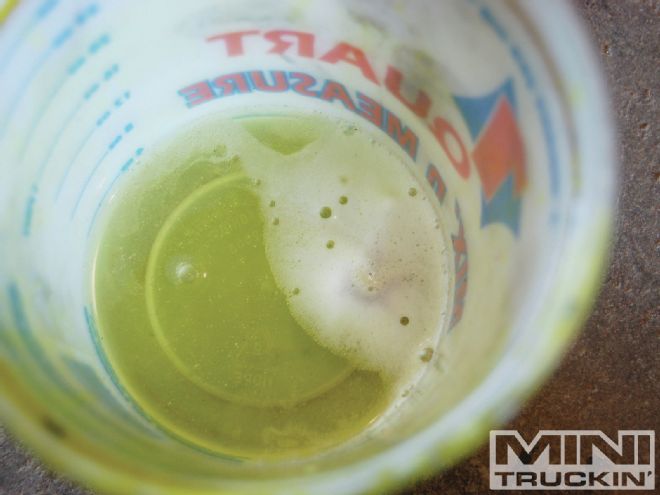
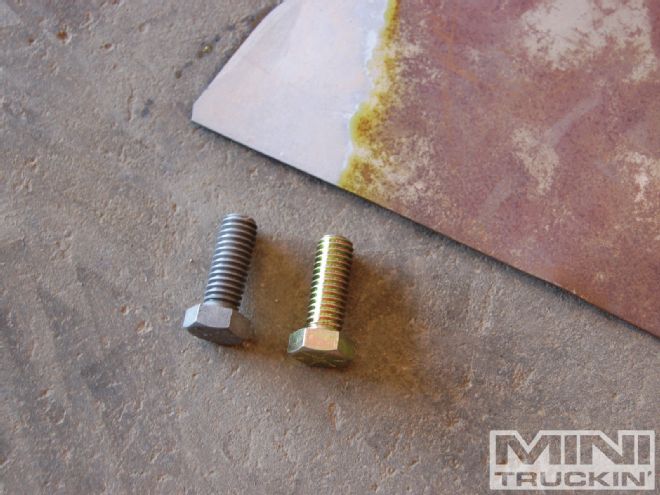
Yes, the chemical used to lower the PH level of your pool. That is the beauty of it too; it is readily accessible and it's cheap. A gallon will run you less than $10 for the good stuff and when I say good stuff, I mean the stuff you get from pool supply stores. Don't buy it from any of the big name stores, they let it sit around for too long and leave it in the sun to die. So what is so special about muriatic acid and how can it help you fabricate? Well for starters, it's pretty much the easiest way to remove rust. Just place a small rusty part in a cup of acid and walk away for a few minutes. When you return, the part will be shiny and rust-free. What I use it for mostly is to remove the zinc coating off of bolts and nuts before I weld to them. It keeps you from getting poisoned by the smoke that comes off of them while you weld and the bead is much cleaner too. As a bonus, it can also be used to ‘sharpen' files. Just leave the files immersed in some acid for a day and it will eat all of the built up metal and crap from in between the grooves and leave the file itself untouched. I will warn you though, the only real trick to remember when using muriatic acid on anything it to rinse everything thoroughly with fresh water and dry it immediately. A bucket of water to rinse your parts off is not enough. Remember, you use only capfuls of this stuff to treat an entire pool. The parts NEED to be rinsed with fresh water.

| secret Society Of Sweet Garage Technique Users muriatic Acid
MT Disclaimer
Why hasn't anyone told you about this magical elixir yet? Because it's a dangerous liquid! If you get even a drop on your skin, it will burn like hell immediately and if you leave a cup of it next to your frame while you work, it will rust everything the fumes touch, strip chrome off, severely irritate your nose and throat, and generally piss off everything around it. So be extra careful when using this stuff, if you don't, you will learn very quickly when you come out the next morning and everything in the garage is rusty and your hands are sloughing off the dead skin. The reason that I'm still sharing this information with you despite the dangers associated with it is because I believe that just as a chopsaw can cut off your hand if you don't take precautions, its usefulness is worth the effort of being careful.
Cold-rolled and P&O
Say what?! Anybody who welds knows how nasty the grey-scale that is on steel sheet is. It MIG-welds like crap and TIG-welds even worse. Try to grind it away and you either trash a good flap-wheel or gouge the hell out of the metal with a grinding disc, so just accept the evil scale and try to make the best of it. But wait, most thin sheetmetal doesn't have the nasty grey-scale. Why not and where does it come from? The grey scale comes from the forming process used to roll the steel into manageable sheets. “Hot-rolled” as it's called, is the process of heating the steel to a red-hot condition and then forcing it through a number of rollers until it reaches the desired thickness. Most of you have seen the nasty scale that rises to the surface of a red-hot piece of steel after welding or torching and can now understand where that nasty demon-spawn coating came from. Thinner sheets of steel (1/8-inch and smaller) can be produced by a "cold-rolling" process, which does not leave the nasty scale behind. The cold-rolling process also makes the material slightly stronger as well, so it's kind of a win-win. So what if you need material thicker than 1/8 inch? That's where the "P&O" part of the title comes from—it stands for "pickled and oiled." This process removes the offensive grey-scale and leaves a far more desirable welding surface behind on hot-rolled material. The most beautiful part of cold-rolled and P&O is that it is only marginally more expensive and totally worth the few extra dollars spent. You can thank me later.

| secret Society Of Sweet Garage Technique Users cold Rolled Steel
Circle Template
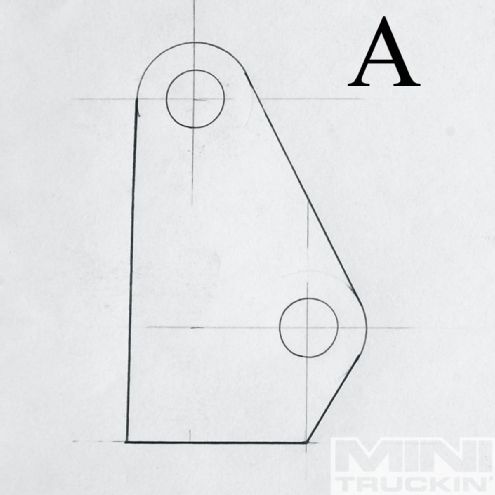
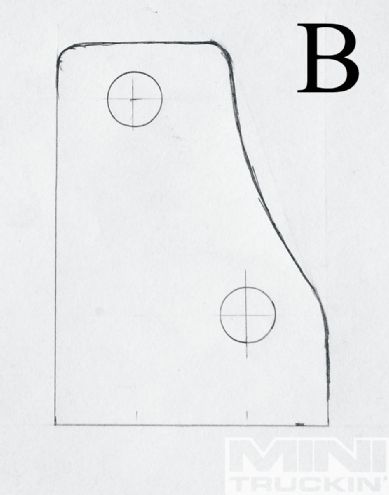
When I started drawing my own patterns instead of buying pre-made tabs and brackets, I would try to freehand all of the shapes. I thought to myself, "Hey, I can draw pretty decent, I can do this." Guess what? They all looked like crap. Some more so than others, but still all crap. Then one day an ol' timer showed me a circle template. "It's so simple!" I thought, "and so obvious" as I chided myself. A $5 circle pattern from an art supply store made all the difference in the world when it came to my pattern drawing abilities. The basic idea is that the shape of your part should make sense compared to its intended use. If you look at figure A, the bracket is both hand-drawn and the shape makes no sense compared to where the bolt holes are, while the bracket in figure B uses the holes to somewhat 'set' the shape of the part. It's the little things like this that set apart the professionals from the amateurs. The effort it takes to cut out an ugly part or a nice part is nearly identical, so why not spend the time to make it look nice?

| secret Society Of Sweet Garage Technique Users circle Template
In Conclusion
We find new tricks every day in the shop; I just wish I could share more. Half of the problem isn't space or time to share them, but remembering all of them. They have become normal, everyday habits that I've adapted to over time, so they don't stand out as anything worth sharing. I will try to remember more and write another list if I get enough, and if you have something that you've found to be magical and can't believe the rest of the world hasn't figured it out yet, let me know. I'm curious and still quite willing to learn. Until next time!


