There is no such thing as too much horsepower. Since 2014, Toyota had decided to ax the 4.0 V-6 as an engine option for the Tundra. That left the 4.6 and 5.7 as choices off the lot, with the TRD Pro coming standard with the 5.7. All around, PRO package is extremely capable, offering Bilstein remote reserve shocks, front coil springs, a protective 1/4 ¼-inch aluminum front skid plate, and a TRD-developed cat-back dual exhaust system. These let you ride in style and comfort and with the benefit of the largest engine Toyota offers.
Could there still be more power? How? Well, by adding a supercharger, of course! A properly developed supercharger system generates reliable, measurable horsepower and torque using the tried and true method of cramming the engine with a consistent supply of cold, dense air. This results in an intake cycle that receives more oxygen, letting it burn more fuel, and produce more power. Yeah, most images of a supercharger conjure up a large mass of shiny metal aggressively sticking through the hood of a muscle car, or proudly on display atop the engine of a hood-less hot rod, Toyota has developed a system that’s a little more incognito.
Toyota has developed an Eaton TVS Roots-type supercharger that uses twin, four-lobe rotors, which produces gobs of horsepower and torque on demand, but fits discreetly beneath the hood of this ’15 Tundra TRD Pro. It has the additional benefit of being produced in-house since ’08 and is available as an off-the-shelf install at dealerships when purchased new. With this install, the truck and the supercharger are purchased at separate times, but are still installed at a dealership to maintain continuity. With dealership installation, the warranty is kept intact and the work is performed by trained installation techs.
We headed over to Sierra Toyota in Lancaster, California, to take advantage of their large repair center and be able to have plenty of room to move around. Follow along as we install this factory developed supercharger kit on this ’15 Toyota Tundra TRD Pro.
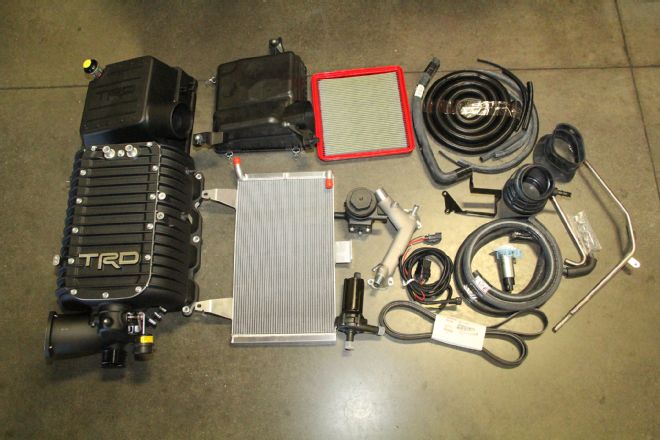
| 01 2015 Toyota Tundra TRD Pro Supercharger Install
The kit was sent from Toyota in two separate boxes, complete with the supercharger itself, a new airbox lid and filter, coolant crossover manifold, a new oil cooler tube, and thermostat bypass tube, fuel injectors, fuel pump, the all-important intercooler and pump, as well as a mile of new hoses, and shiny new mounting hardware to lock it all down.
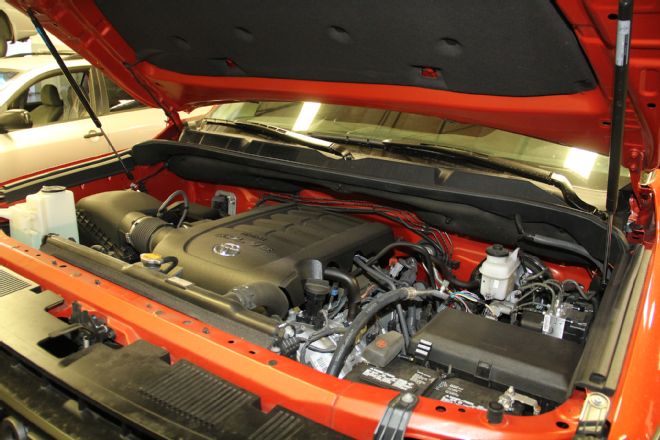
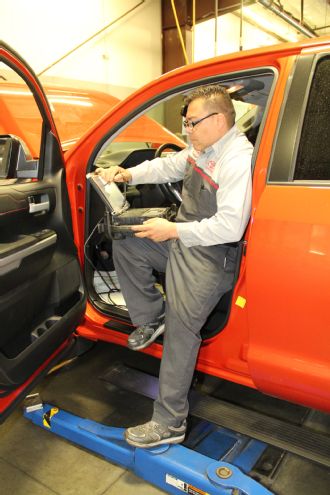
| 02 2015 Toyota Tundra TRD Pro Supercharger Install
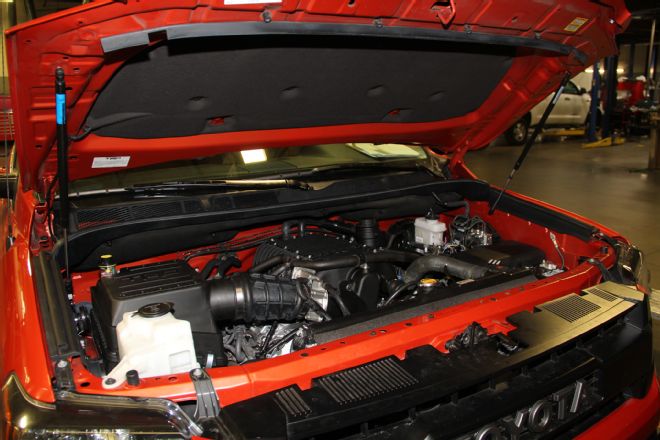
With this ’15 seeing little use so far, the engine bay was nice and clean, which made for a very pleasant install for our techs, Rodrigo (AKA Rigo) and Rey from Sierra Toyota in Lancaster. Here is Rigo performing a pre-diagnostic check to ensure all systems were code free and our install would not conflict with the ECU.
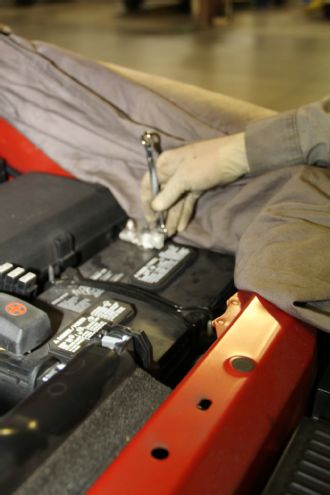
| 03 2015 Toyota Tundra TRD Pro Supercharger Install
Since there would be some electrical involvement with this install, we decided to disconnect the battery. Which is always a good idea to do at every major repair to save electrical components.
| 04 2015 Toyota Tundra TRD Pro Supercharger Install
Our Tundra was raised in the air in order to remove the skidplate and access to the lower area on the radiator to drain the coolant.
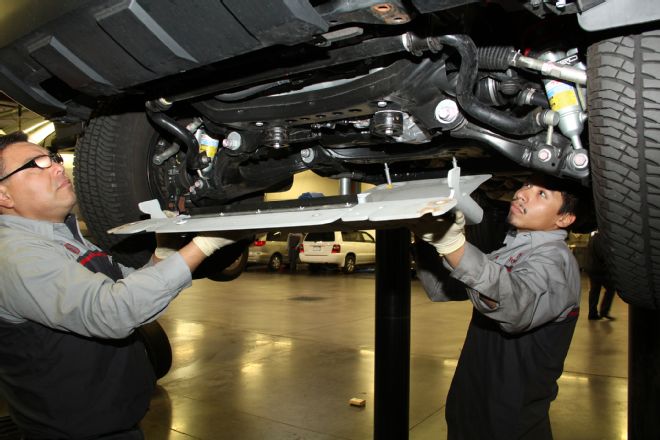
| 05 2015 Toyota Tundra TRD Pro Supercharger Install
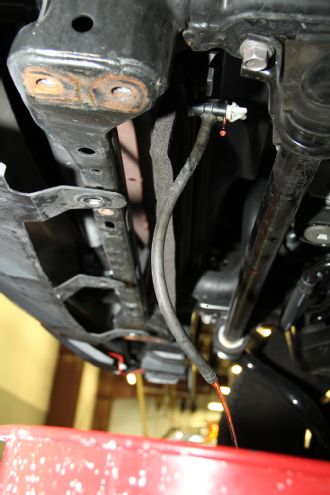
We popped the plug on our radiator and drained the coolant, so we can replace it with new coolant later on. A supercharger system requires a larger amount of fluid to keep everything cool and will require a secondary reservoir and pump, which is included in the kit.
| 06 2015 Toyota Tundra TRD Pro Supercharger Install
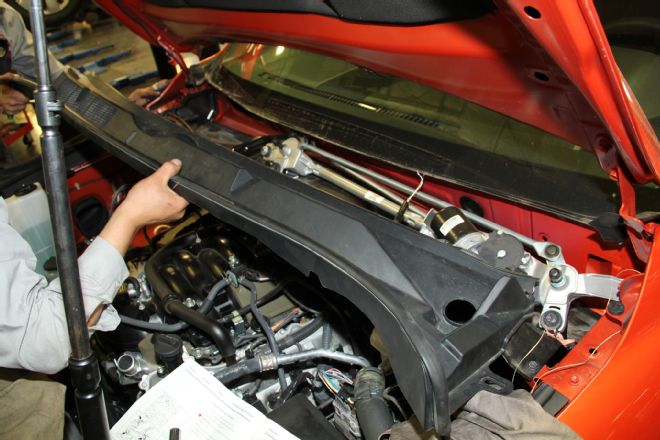
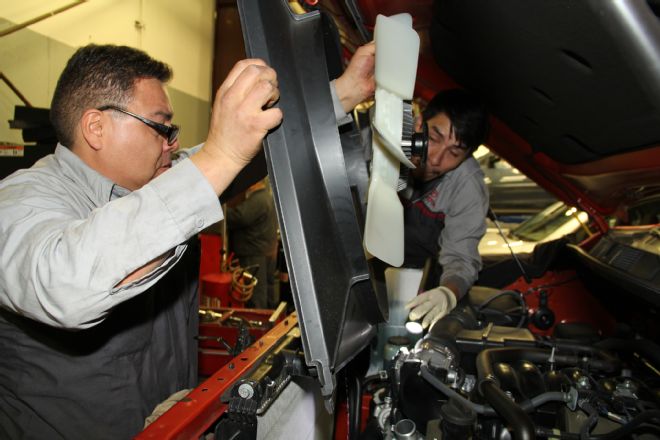
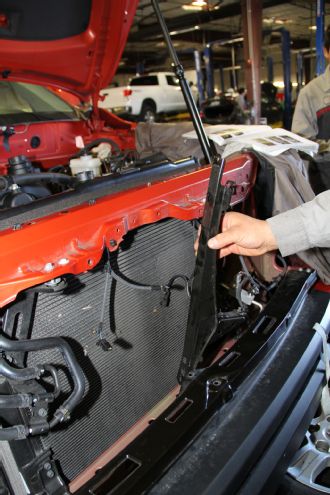
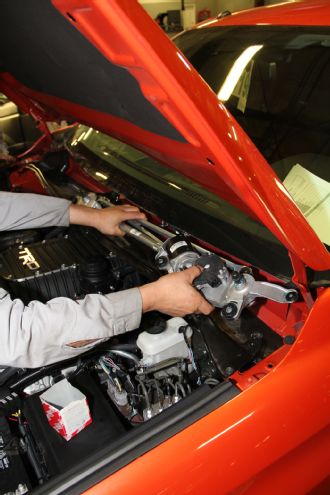
We dropped the truck back down and set to work removing the windshield wiper assembly, as well as the plastic cover above it. We will be operating in and around that area and it helps to remove it early on.
| 07 2015 Toyota Tundra TRD Pro Supercharger Install
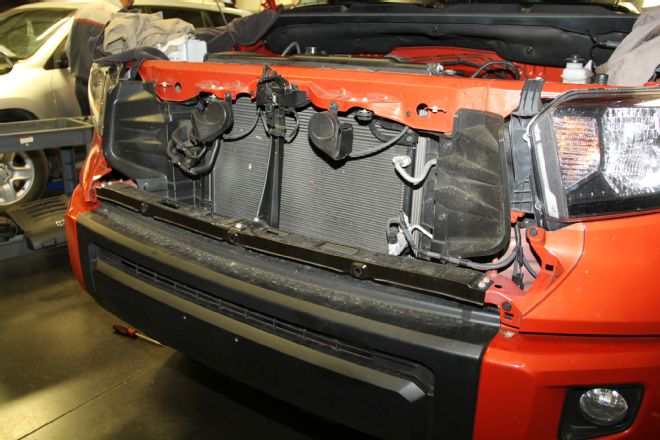
We removed the grille, as well. We will be installing an intercooler in a later step, but again, with space limitations it helps to have it out of the way. Plus, we won’t scratch it when removing things.
| 08 2015 Toyota Tundra TRD Pro Supercharger Install
We then removed the side trim piece beneath the driver’s side headlight to reach the plastic radiator deflector and modify it to accept the intercooler pump hoses that will come later.
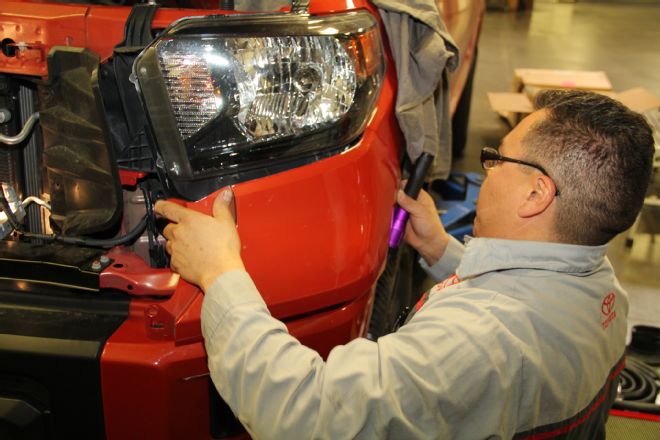
| 09 2015 Toyota Tundra TRD Pro Supercharger Install
Here is the radiator deflector before we cut it, as shown by the white lines. No fanciness here, the new holes just need to be big enough to accommodate the hoses, and we cut the plastic using a hacksaw blade.
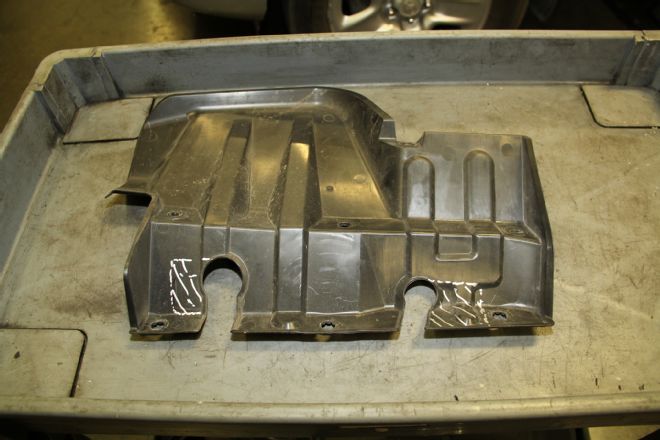
| 10 2015 Toyota Tundra TRD Pro Supercharger Install
We would to have to get to the idler pulley later, so we went ahead and removed the radiator fan and the shroud, too.
| 11 2015 Toyota Tundra TRD Pro Supercharger Install
Next on the list, remove the stock airbox and filter. The airbox lid will be replaced later, but in order to access the fenderwall, we had to remove the whole box.
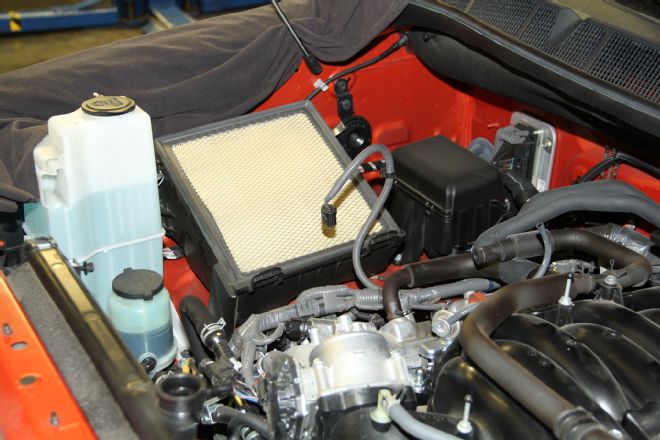
| 12 2015 Toyota Tundra TRD Pro Supercharger Install
With the airbox removed, we installed a new rubber airflow accelerator into the stock location on the fender wall.
| 13 2015 Toyota Tundra TRD Pro Supercharger Install
The throttle body was next to be removed, and we discarded the gasket as a new one would be installed in a later step. We then covered the throttle body opening to prevent any debris from entering.
| 14 2015 Toyota Tundra TRD Pro Supercharger Install
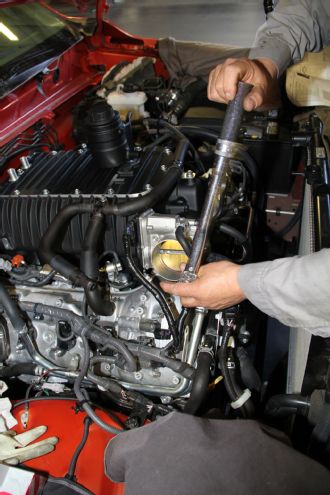
In readiness to install the supercharger in its new home, the intake manifold, we remove the eight 12mm bolts, and two nuts holding the manifold down. We saved the mounting hardware to be used later.
| 15 2015 Toyota Tundra TRD Pro Supercharger Install
With the manifold off the engine, we removed the gaskets to be cleaned and transferred to the bottom of the supercharger before installing it. We also covered the intake ports to prevent anything from entering the engine.
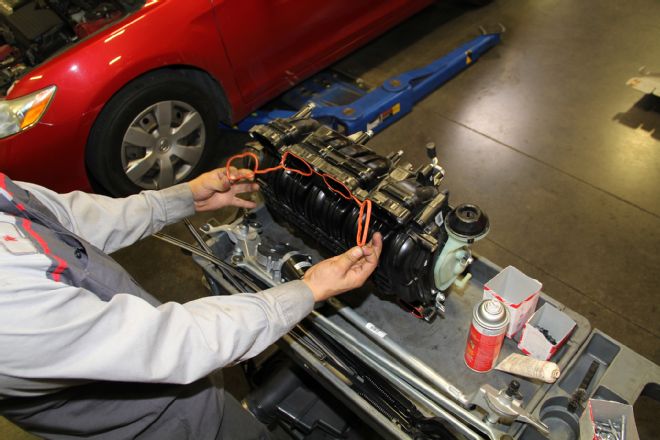
| 16 2015 Toyota Tundra TRD Pro Supercharger Install
The coolant crossover manifold at the front of the engine was next up for removal, and we replaced it with the new one from the kit, reusing the gaskets from the old manifold.
| 17 2015 Toyota Tundra TRD Pro Supercharger Install
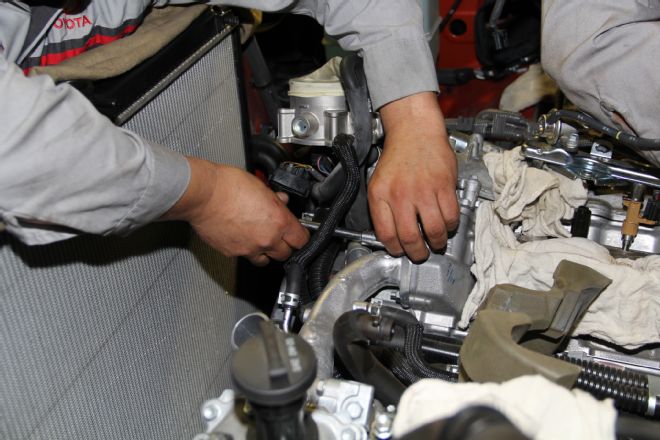
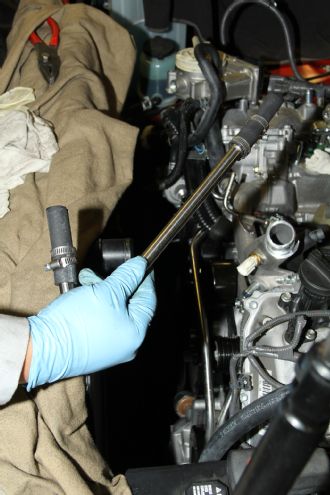
We set to work removing the fuel rails from either side. We removed the injectors and replaced them with the new injectors that came in the kit.
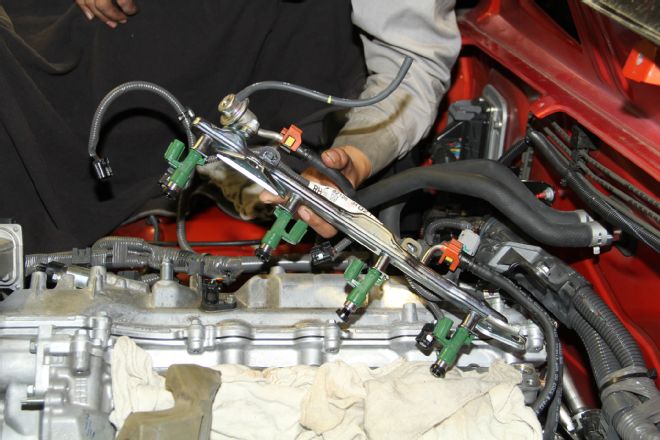
| 18 2015 Toyota Tundra TRD Pro Supercharger Install
We had to remove the old water bypass assembly and replaced it with the new one supplied in the kit. When placed side by side, the new hardline is significantly different from the old one, and it will have rubber hoses running where the hardline used to be.
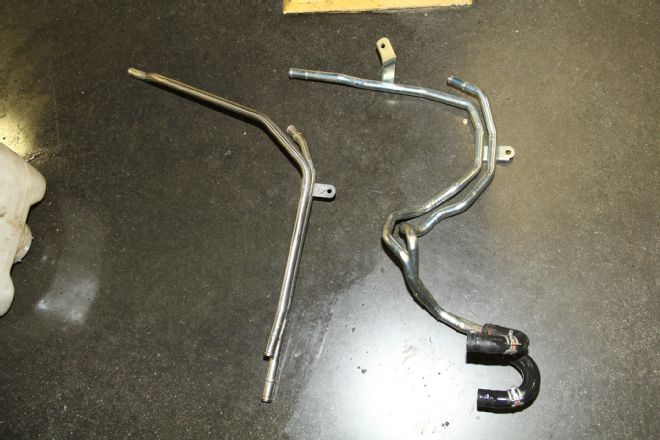
| 19 2015 Toyota Tundra TRD Pro Supercharger Install
Running the supercharger off the engine will require an idler pulley—supplied in the kit. The location of the pulley will require a bracket that sticks out and a coolant line run between the extended legs. We installed both the bracket and pulley.
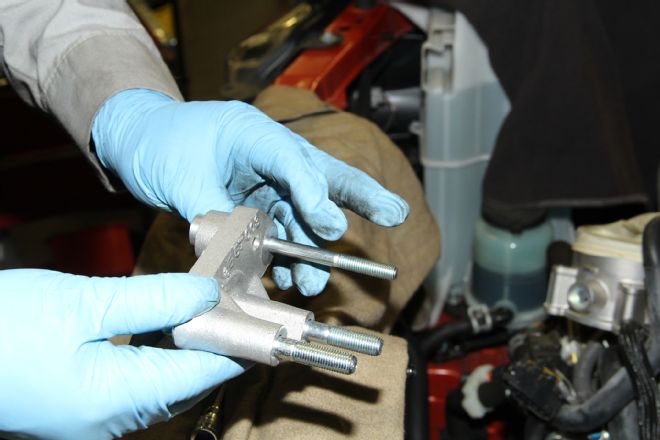
| 20 2015 Toyota Tundra TRD Pro Supercharger Install
Just above the oil cooler hard line, we installed the J-shaped thermostat bypass on the thermostat housing and the coolant crossover manifold.
| 21 2015 Toyota Tundra TRD Pro Supercharger Install
We were now in position to install the supercharger itself, and because it was heavy and required precision, we opted to use a crane. We removed our rags from the intake ports and lowered the supercharger, bolting it in using the hardware that we saved from the intake manifold.
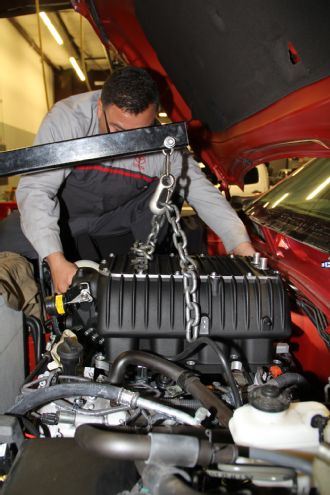
| 22 2015 Toyota Tundra TRD Pro Supercharger Install
With the supercharger firmly in place, we had to remove the vent hose assembly and doctor it a little to fit into its new location atop the ‘’charger and on the cam cover.
| 23 2015 Toyota Tundra TRD Pro Supercharger Install
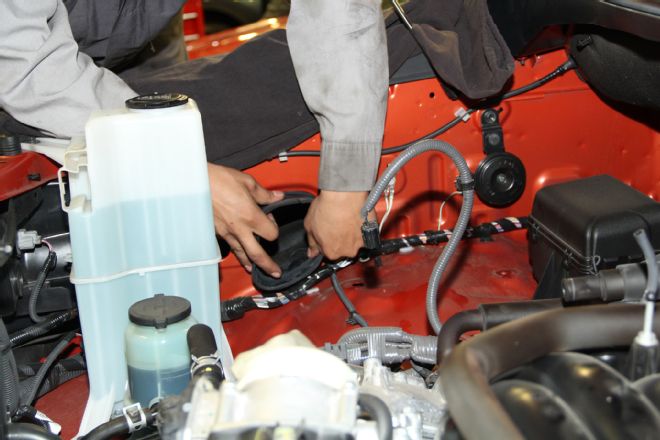
The supercharger will create a lot of heat, and heat is the enemy of cold, dense air entering the engine. That problem is handled by the additional coolant reservoir, which we installed on the driver’s side.
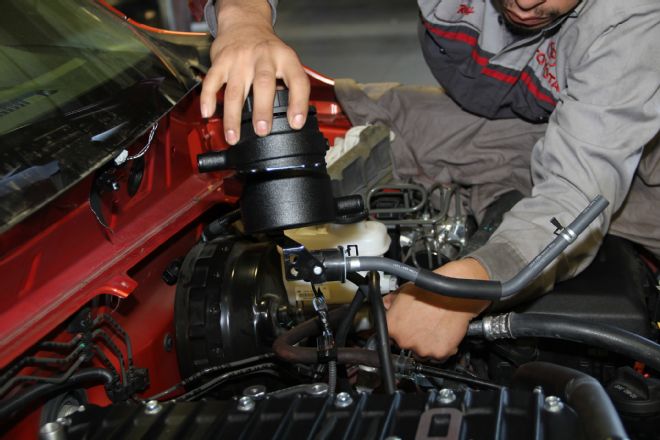
| 24 2015 Toyota Tundra TRD Pro Supercharger Install
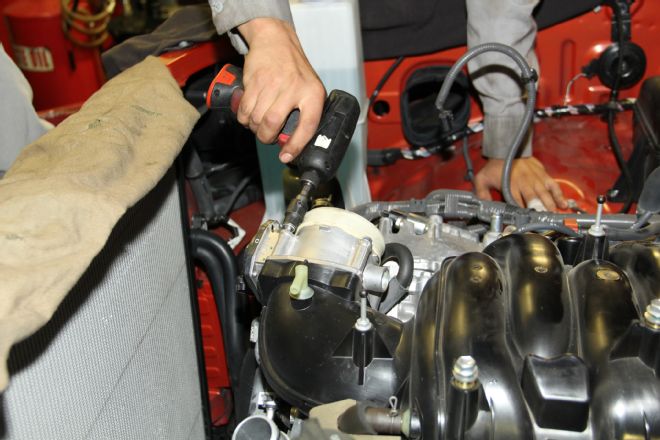
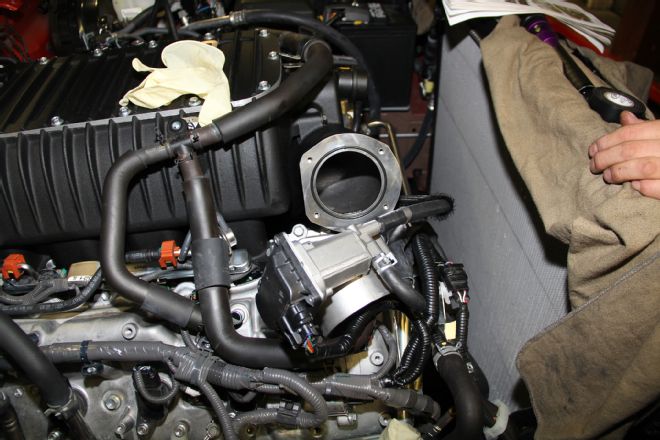
We reinstalled the stock throttle body with its new gasket from the kit, using the four bolts saved from when the earlier removal, and torqued it down to 15lb-ft.
| 25 2015 Toyota Tundra TRD Pro Supercharger Install
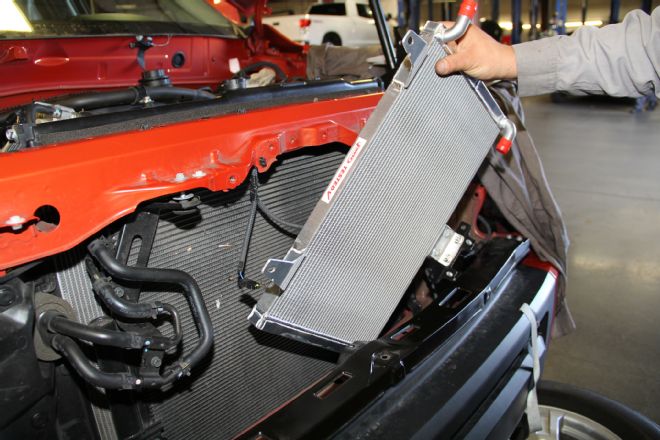
To install the intercooler, we first needed to remove both of the horns, the hood latch mechanism, and the radiator support brace. With the brace gone, we noticed there were two holes specifically for the intercooler pump mount, which was convenient.
| 26 2015 Toyota Tundra TRD Pro Supercharger Install
The intercooler slid right in over the pump mount bracket, which had two studs to mount the ’cooler, while the upper mounting tabs lined up with the horn mounting holes. Next, we reinstalled the radiator support, hood latch, and horns.
| 27 2015 Toyota Tundra TRD Pro Supercharger Install
After the intercooler was locked down, we mounted the pump on the preinstalled lower bracket, which had a circular, rubber-covered bracket of its own. We connected all the electricals and routed the coolant hoses, which ran through the section of the radiator deflector shield we had trimmed earlier.
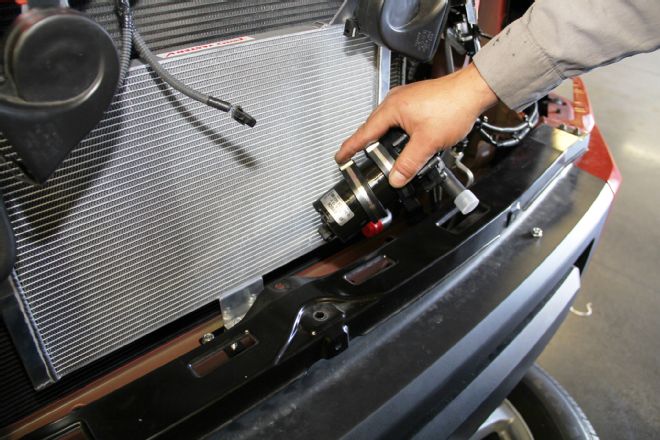
| 28 2015 Toyota Tundra TRD Pro Supercharger Install
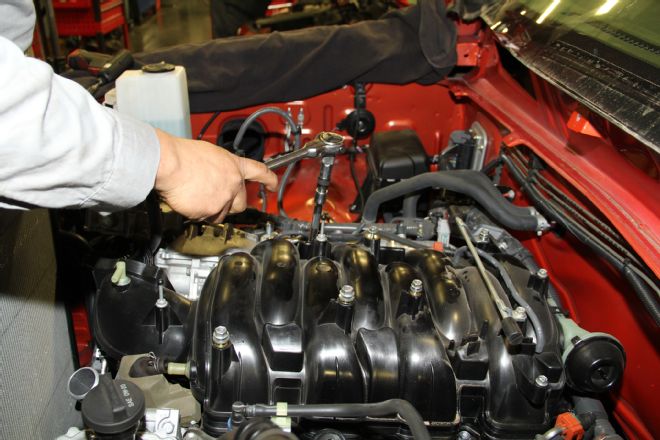
Back up to the top of the engine bay, we reinstalled the factory lower portion of the airbox and dropped in the new filter from the kit. The airbox lid was new, included a filter minder, and attached the inlet hose from the throttle body (pictured), as well.
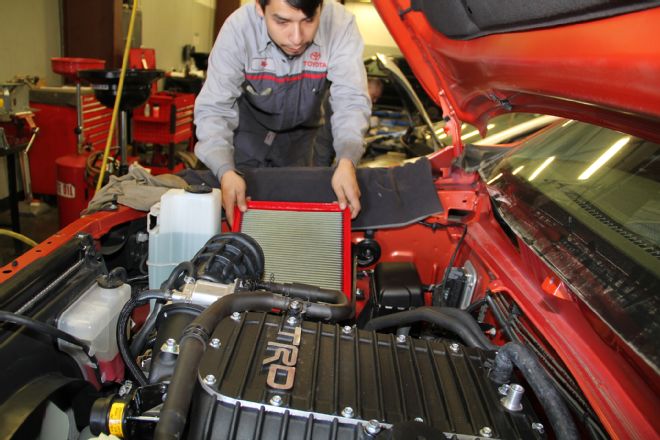
| 29 2015 Toyota Tundra TRD Pro Supercharger Install
We checked all hoses and connections to ensure no leaks would occur when we filled the cooling system, including the newly installed reservoir. Our master tech Rigo used a vacuum-assisted refill system, and we had the system filled up in no time.
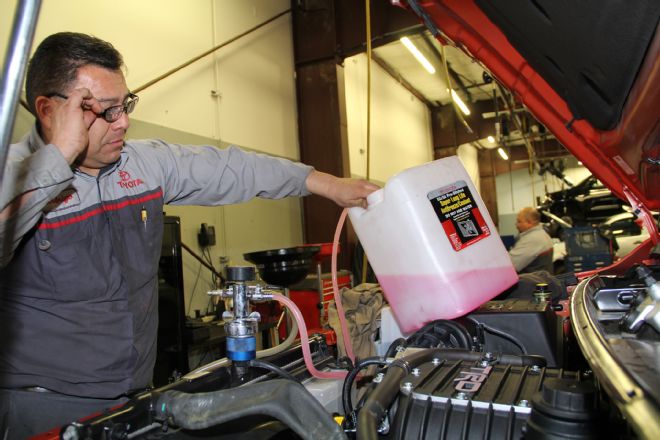
| 30 2015 Toyota Tundra TRD Pro Supercharger Install
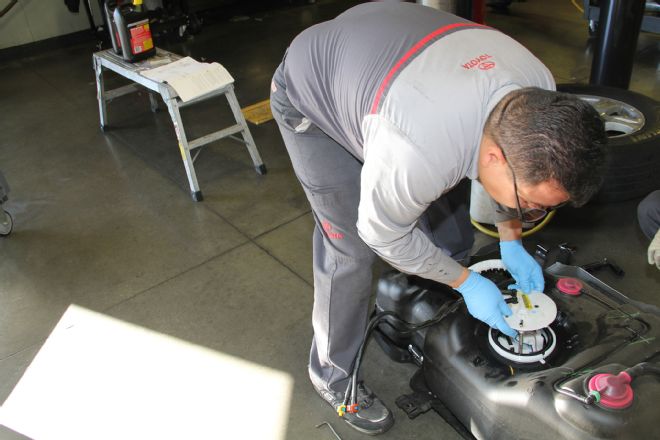
The supercharger kit is extensive and alters a great many of the Tundra’s systems. The fuel pump did not escape modification. We had to drop the tank using a hydraulic lift because it was full of fuel. Our recommendation for this build is to start with an empty tank.
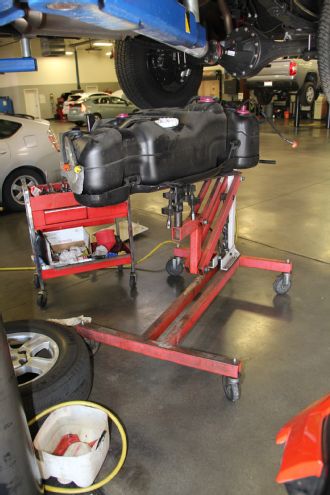
| 31 2015 Toyota Tundra TRD Pro Supercharger Install
With the tank now on the ground, we used a fuel-pump removal tool to unscrew the pump from the tank. This is a very delicate process; the pump housing is plastic and the ribs on the top are prone to bending or breaking. We used great care.
| 32 2015 Toyota Tundra TRD Pro Supercharger Install
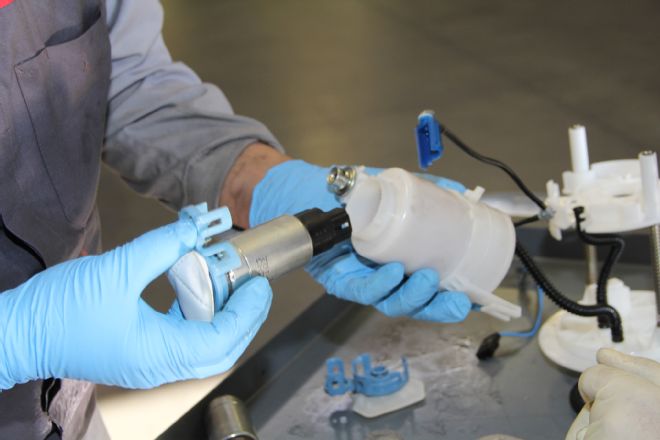
The fuel pump housing was disassembled and the pump removed to be replaced by the one in the kit. It came with a new O-ring and internal filter. The higher-capacity pump is needed to keep the now more powerful engine supplied with plenty of fuel.
| 33 2015 Toyota Tundra TRD Pro Supercharger Install
The pump housing was reassembled, and we slid it back into the tank and seated it down carefully. The treads are also plastic and known to crossthread, which can cause leaks. The tank was bolted back into place, and we were in the homestretch.
| 34 2015 Toyota Tundra TRD Pro Supercharger Install
Rigo and Rey perform a final check of all the electrical connections and new hoses to ensure steady coolant levels. After everything checked out, the skidplate was buzzed back into place.
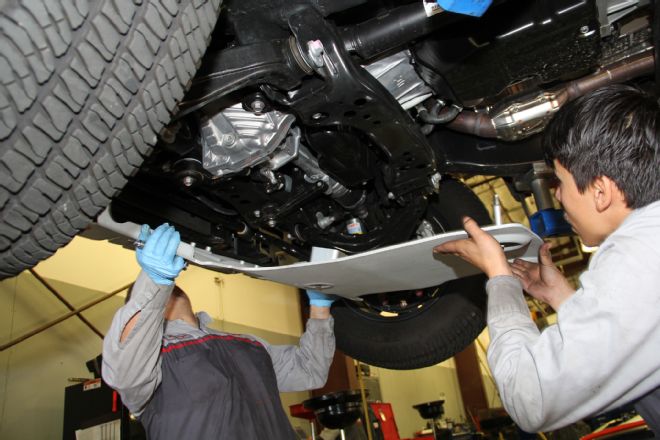
| 35 2015 Toyota Tundra TRD Pro Supercharger Install
We had to reinstall the windshield wiper assembly with the plastic cover protecting it and were done with the heavy-lifting portion of this install!
| 36 2015 Toyota Tundra TRD Pro Supercharger Install
The supercharger kit was going to alter the ECU and how it performed, and thus, had to be reflashed with the provided software. It took about 20 minutes for the software to install. In the meantime, we had a cup of coffee while the computer worked its magic.
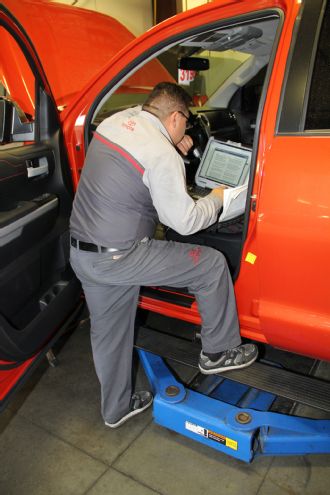
| 37 2015 Toyota Tundra TRD Pro Supercharger Install
With the engine bay all buttoned up, we warmed it up to operating temperature and gave the accelerator a few stabs just to make sure everything fit as it should. It sounded great and shot the horsepower levels up to 504 with 550lb-ft of torque over the stock 381 horsepower and 401lb•ft.
| 38 2015 Toyota Tundra TRD Pro Supercharger Install