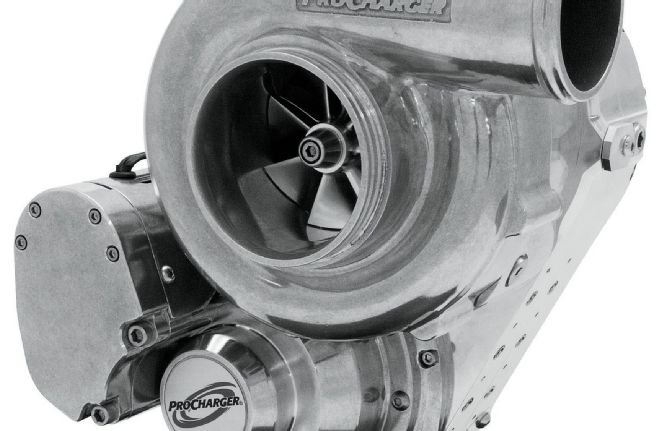
In this day and age, it’s almost unfathomable how old supercharging really is. With its humble beginnings rooted firmly in the late 1800s, the supercharger would seem to have nowhere to progress to. After all, how much room for development exists in a product nearly 150 years after its introduction? Today, with technology moving at the speed of light, the answer is…plenty. To substantiate our claims, we present you with Exhibit A: the ProCharger i-1.
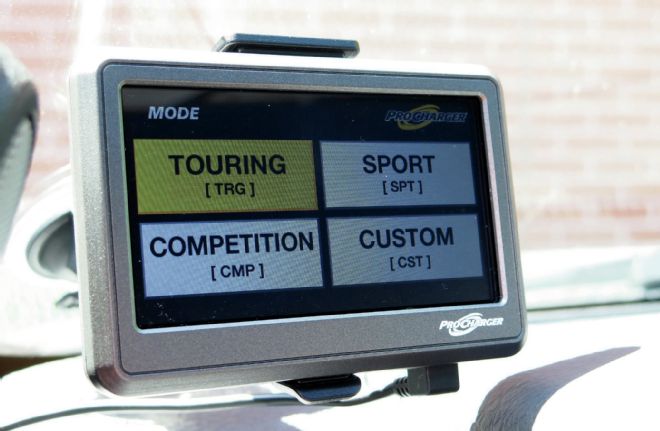
The latest addition to the ProCharger line produces not only the largest power gains but also the ultimate power curve, thanks to its multiple ratio design. Building on the benefits of centrifugal design, the i-1 uses an intelligent control system that allows drivers to switch between three factory-supplied performance modes, as well as a custom mode should you desire to upload your own race tune. Depending on your application and level of modifications, the ProCharger i-1 can support up to 900 flywheel horsepower.
With the popularity the Ford F-150 Raptor at an all time high, we decided to delve into the details of multi-ratio supercharging to see how much power could be squeezed from the 6.2L’s heart. Installing the i-1 supercharger is a smidge more difficult due to the associated wiring and electronic controls not present on the rest of ProCharger’s centrifugal lineup. To make our lives easier, we enlisted the help of LGE-CTS Motorsports in San Dimas, California, to handle the dirty work, so we could spend more time flogging the finished product. Westech Performance in Lomita, California, quantified our before and after numbers to give real-world data to what our butt already knew. Check out how programmable supercharging ratios are changing the face of performance.
| 01.
01. The ProCharger i-1 supercharger is still a beltdriven compressor, but with a twist. It is attached to a continuously variable transmission that changes the blower drive ratio. With the multiple drive settings, blower speed is increased, and therefore, boost is also increased.
| 02.
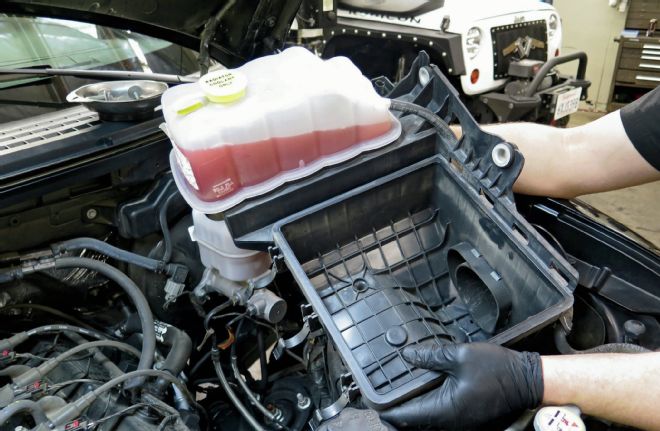
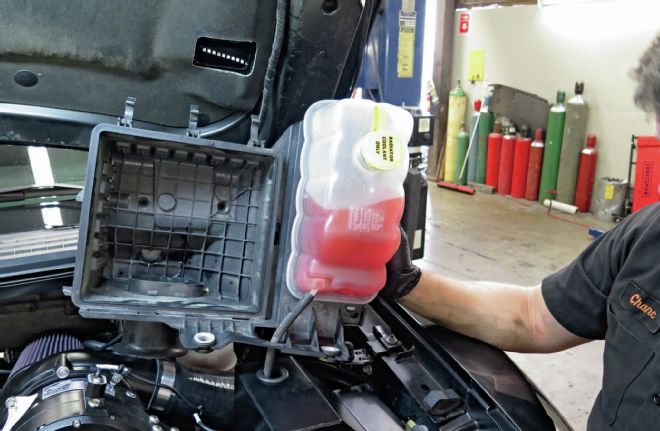
02. We began our Ford Raptor installation by removing the air intake, which included the lower box with the coolant reservoir attached.
| 03.
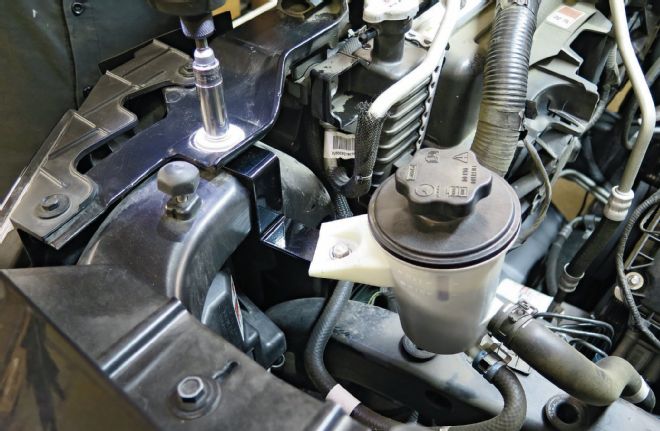
03. Only one engine peripheral needed to be relocated to allow clearance for the ProCharger i-1 supercharger. The power steering reservoir was unbolted from the radiator shroud and attached to the core support with a simple steel bracket.

| 04.
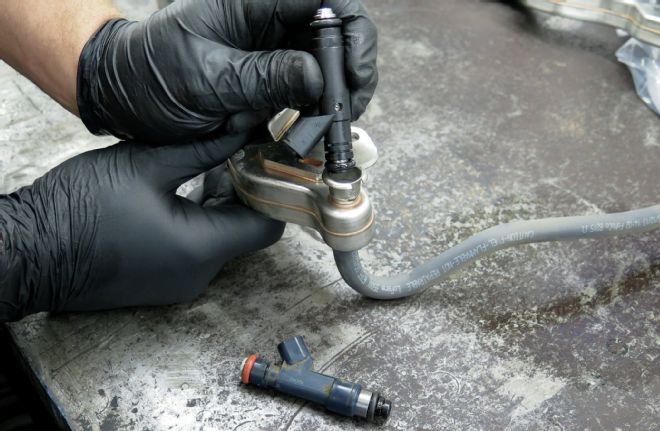
04. After unplugging the spark plug leads from the ignition coils to allow clearance, the fuel rails were removed from the engine.
| 05.
05. Supporting the extra air that would be forced into the cylinders required additional fuel to make bigger explosions in the cylinders—and more power to the tires. We replaced the original 39-pound injectors with ProCharger’s matched 60-pound units.
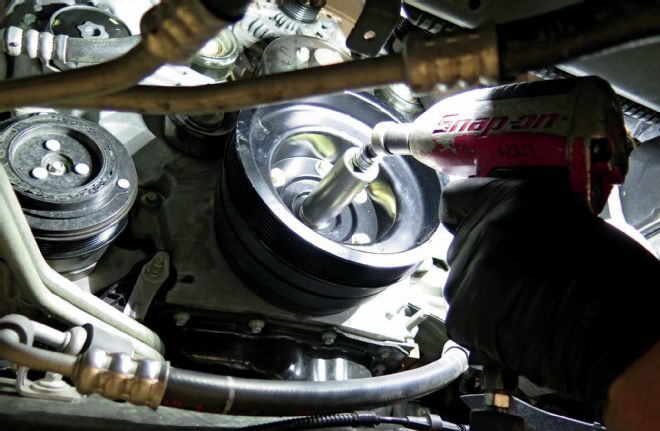
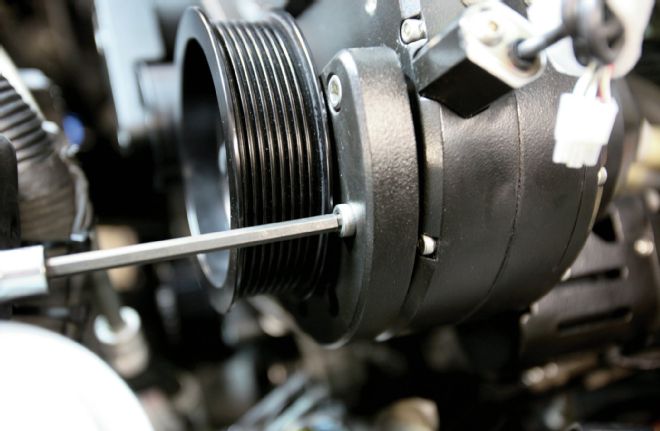
| 06.
06. To drive the supercharger, the factory crank damper was replaced by a similar damper that accepted an external pulley. The pulley was used to accommodate the supercharger’s belt.
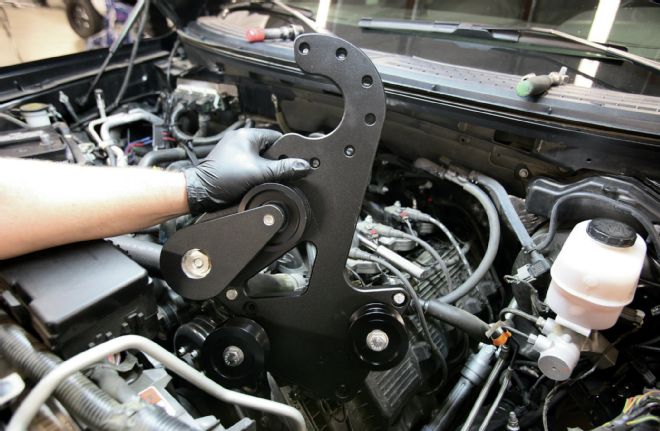
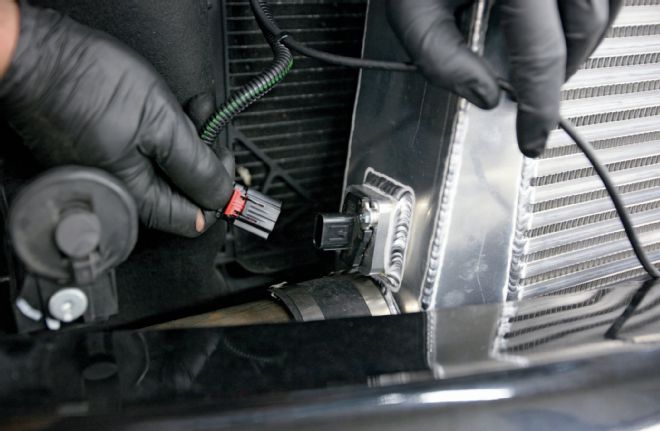
| 07.
07. It’s difficult to ascertain from the photo, but the bracket ProCharger used to support its supercharger is massively thick. It mounted right to the front of the 6.2L’s driver-side cylinder head.
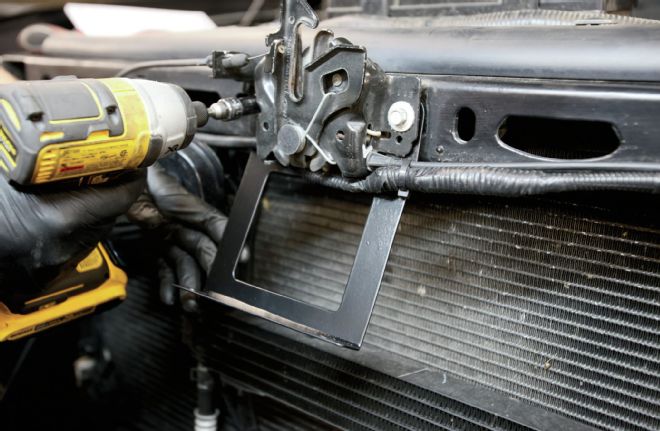
| 08.
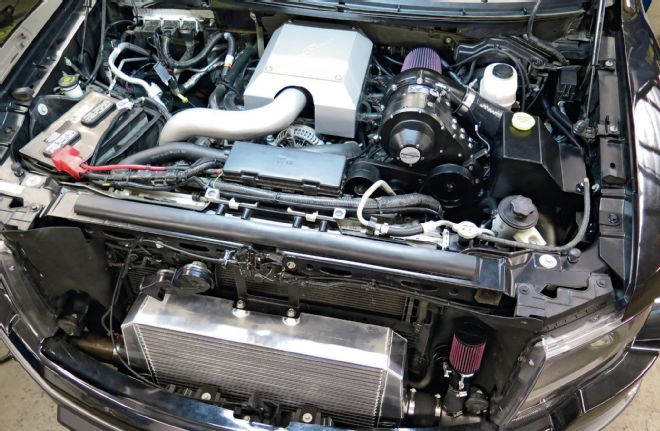
08. Before we could set the new i-1 in position, we first had to tend to a few support systems, such as the boost piping and intercooler. The top mount for the intercooler was slipped in place behind the hood latch.
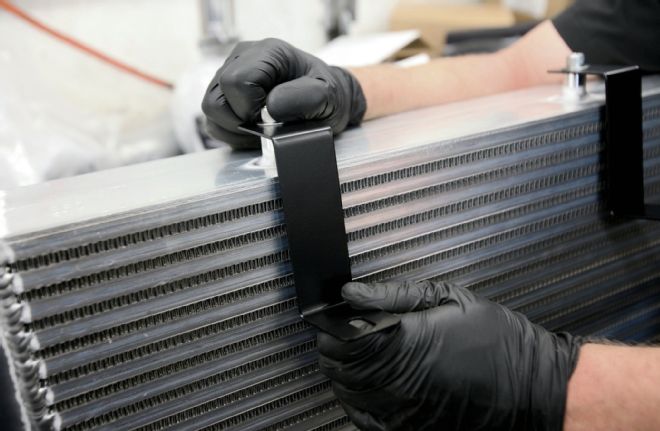
| 09.
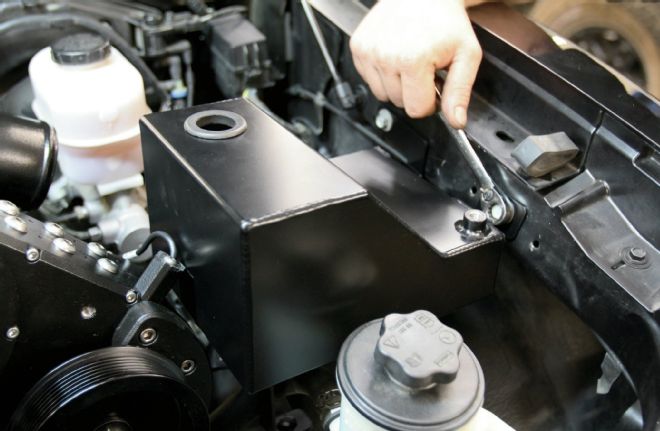
09. On the workbench, the two lower mounting tabs were loosely bolted to the intercooler itself.
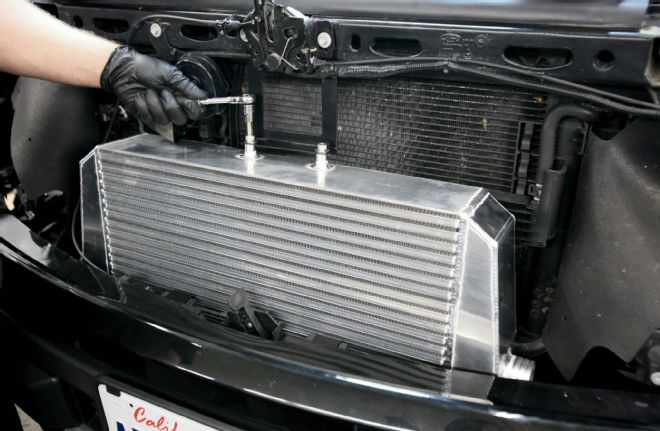
| 10.
10. The front-mounted, three-core intercooler was positioned where it would receive the maximum amount of air from the front of the vehicle without interfering with airflow to the truck’s cooling system.
| 11.
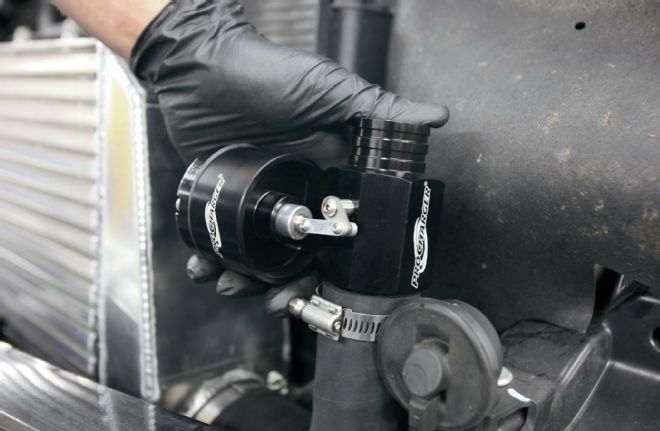
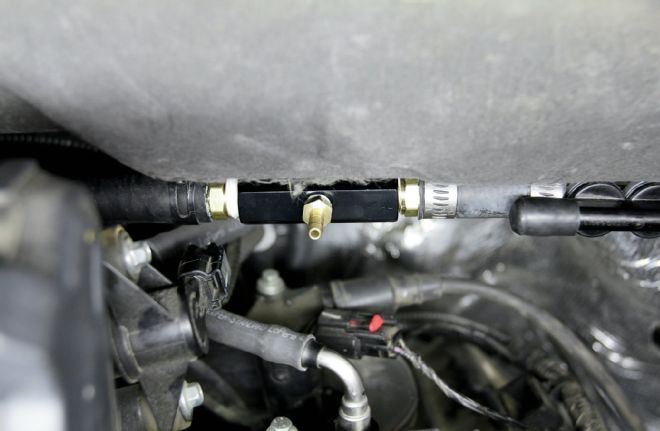
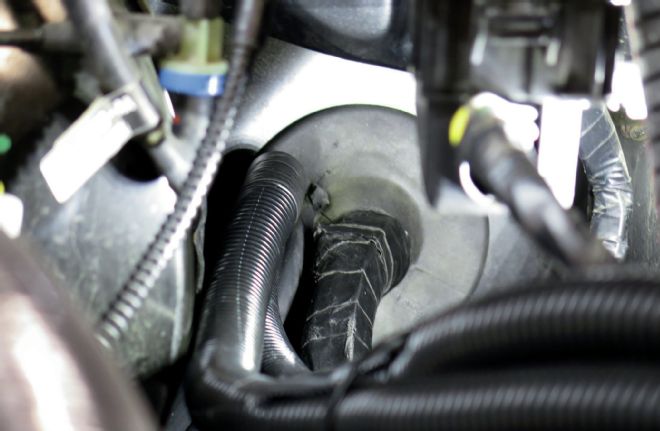
11. On the inlet side of the intercooler plumbing, the ProFlo surge valve was mounted to bleed off boost pressures when not being used. Without it, the surging compressed air could damage the supercharger.

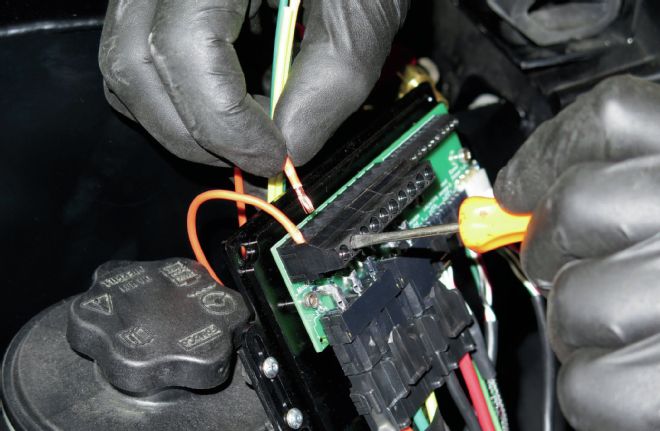
| 12.
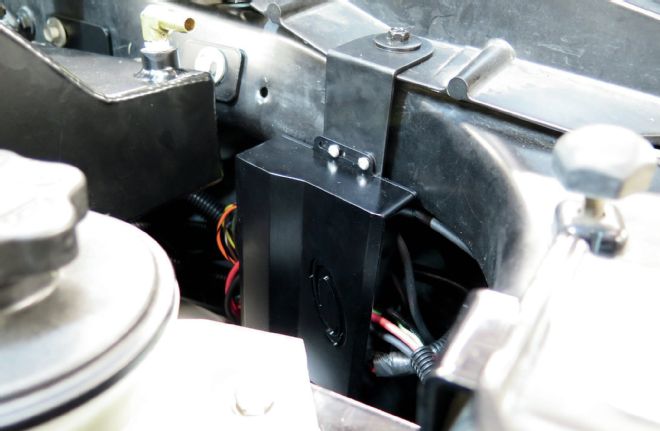
12. Adding a filter to the ProFlo valve prevented the possibility of dirt contaminating the airflow and causing detrimental, improper operation.
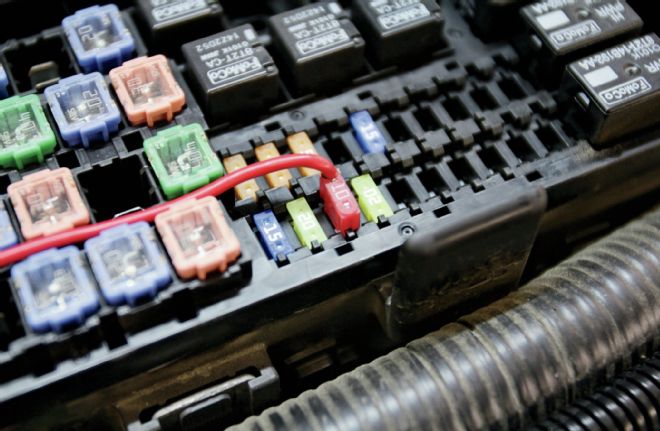
| 13.
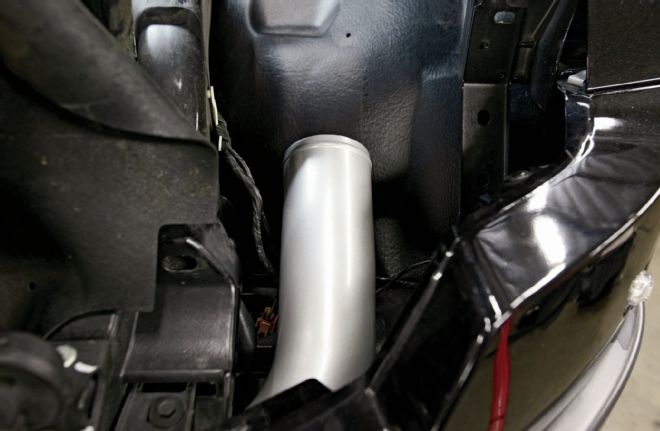
13. Modern trucks don’t have as much room under the hood as it seems. ProCharger did its homework and designed the intercooler inlet tubing to fit under the driver-side headlight and route up the inner fender.
| 14.
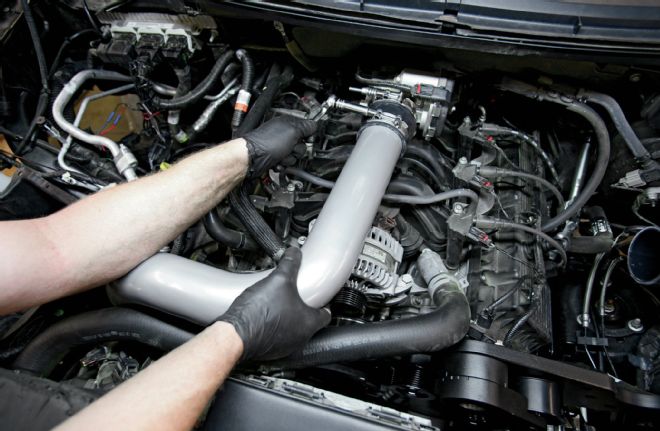
14. On the passenger side, routing the tubing from the intercooler to the throttle body was similarly tight, but we managed to get everything in place with a little finesse and finagling.
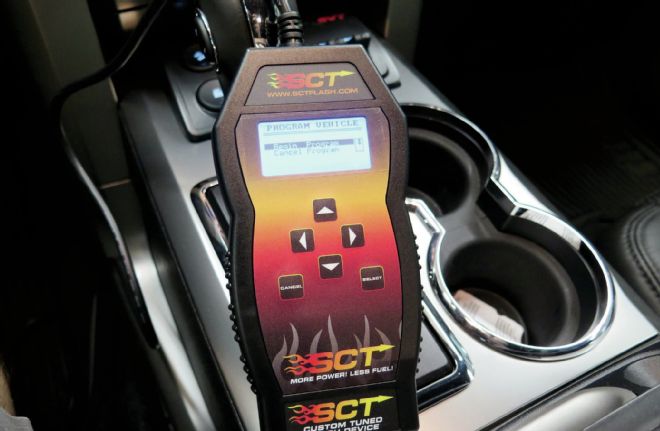
| 15.
15. The factory MAF sensor was removed from the stock air filter system and mounted in the outlet side of the intercooler. ProCharger supplied a 60-inch extension harness to reach the MAF’s new location.

| 16.
16. Cue the music! We were finally able to set the i-1 unit in place on its mount. ProCharger units normally ship with a satin finish or polished as an option. We went for the even newer wrinkle black finish for a stealthier underhood appearance.
| 17.
17. Engineering of the mount was well thought out. All the hardware securing the supercharger to the mount was countersunk and visually appealing.
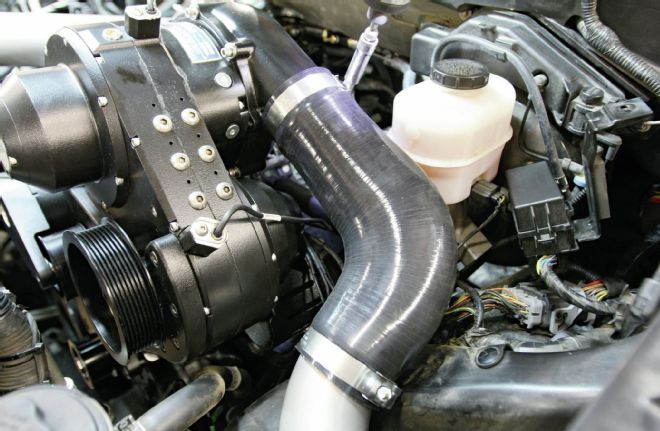
| 18.
18. A 90-degree elbow was the final tube to complete the snake of piping between the ProCharger i-1 and the throttle body.
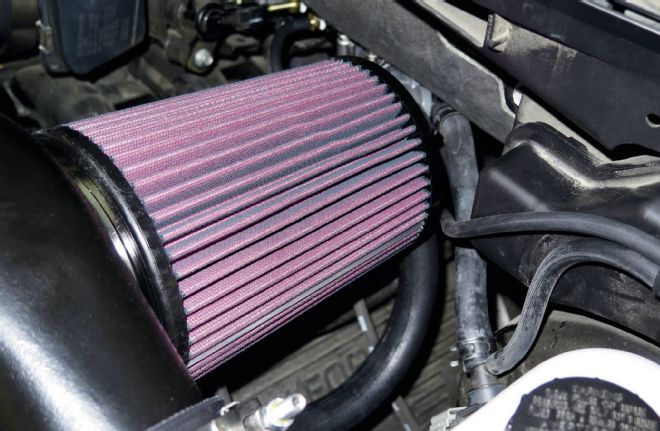
| 19.
19. As we said, underhood space on the Ford is extremely limited. As such, the intake filter on the ProCharger was as large as possible while still fitting in the limited space between the firewall and the centrifugal case.
| 20.
20. Lending to the racy appearance was the new fabricated coolant overflow tank. It bolted directly to the holes left from the removal of the lower airbox. It even utilized the factory cap off the original reservoir.
| 21.
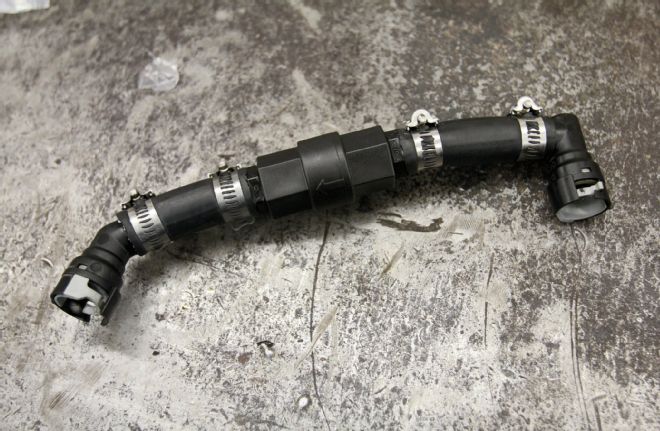
21. We strayed from the directions a bit when we installed the one-way check valve for the PCV system. Instead of just installing rubber tubing as directed, we actually cut apart the factory tube to obtain the original quick-lock fittings for a cleaner installation.
| 22.
22. A similar approach netted us a cleaner mounting location for the vacuum manifold that controlled the ProFlo valve.
| 23.
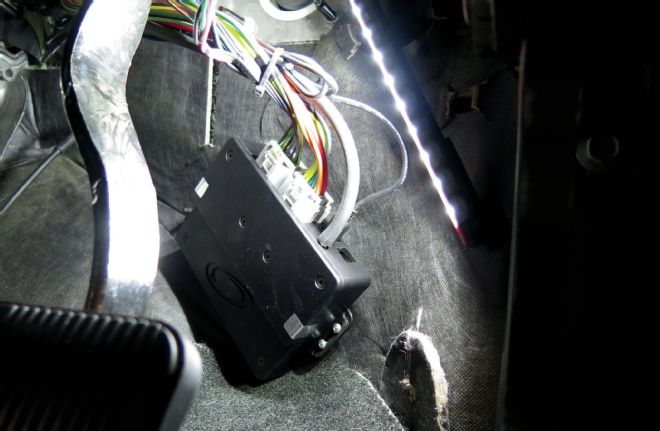
23. Under the dash, a suitable location was found for the controller that signals the i-1 to change modes based on the driver’s input.
| 24.
24. As you can imagine, a fair amount of wiring was done for the system to become operational. This firewall grommet provided a perfect location for the harness to pass through.
| 25.
25. Providing an electronic path between the i-1, battery, ignition, and controller was this terminal block. The wire leads from the controller were stripped back and placed in the block, while the rest of the accessories were direct plug-ins.
| 26.
26. Multiple mounting locations could have been used, but we chose to hang the terminal block from the fender mount located behind the driver-side headlight.
| 27.
27. An ignition 12V source was tapped from the power supply located on top of the radiator shroud.
| 28.
28. We finally got around to hooking up the hose that coupled the new coolant reservoir to the radiator. Instead of wasting the coolant in the original reservoir, we chose to pour it in and use it.
| 29.
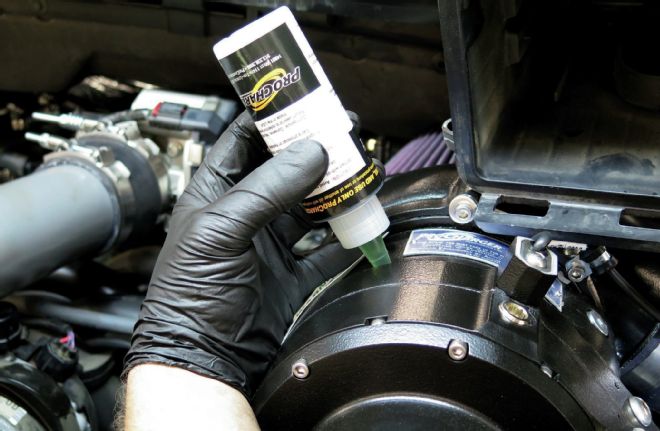
29. ProCharger shipped the supercharger sans lubrication, so we made sure to fill it up to the proper level with the included oil.
| 30.
30. The final puzzle piece under the hood was a fabricated cover that hid the top of the engine and throttle body for a more complete façade.
| 31.
31. Two choices existed for manipulating the i-1. We opted for the upgraded windshield-mounted touch screen controller, which provided additional features we desired.
| 32.
32. Telling the engine how to play nice with all the newfound power was a downloadable tune that necessitated an SCT Power Flash to deliver its message to the Raptor.