When ATS released its long-anticipated Aurora turbo system upgrade for the 7.3L Power Stroke, we couldn’t have been more excited. There are several piecemeal ways to upgrade the factory Ford turbo system and a few mild makeovers, but the Aurora was different by design—mainly because ATS didn’t start with the assumption that the 7.3L is dead.
We know what you’re thinking: Did we get overly distracted by shiny, new, high-performance parts and lose the functional driver/hauler and all-around worker ethos for our 7.3L F-350 project? Not at all. We actually have a completely responsible rationale behind the choice to upgrade. Showing off on the dyno, big smoky burnouts, and attempting to chase down muscle cars on the strip has never been on our agenda, but a big, fat, usable power curve has. OK, maybe we do care about burnouts a little bit, but 35s are expensive, and it’s certainly not at the top of our list of priorities. What we do care about is big and usable torque numbers, reliability, and low EGT.

| the Aurora Upgrade Aurora Turbo System Installation ford F350 Project Truck
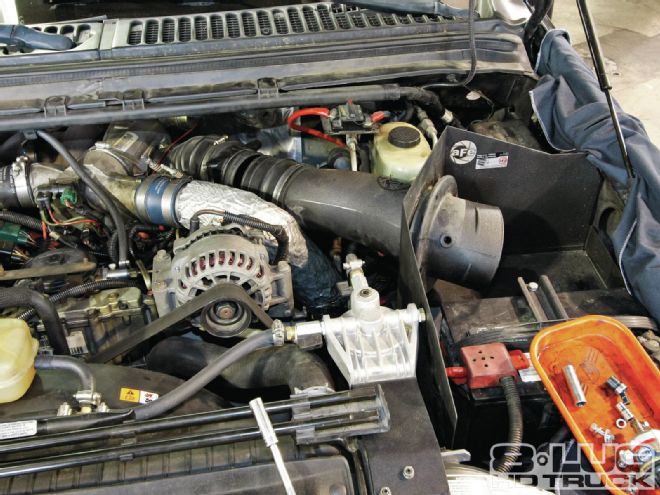
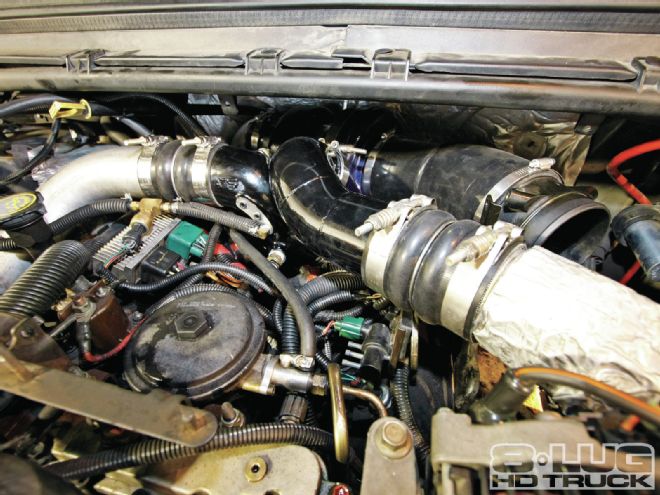
| For this level of turbo system upgrade, some disassembly is definitely required. Luckily, we had the help of the experts at Bud’s Diesel Shop in Mission Viejo, California. Here’s your ‘before’ shot (minus our air cleaner) for reference later, because much of it is about to go.
Luckily for us, the engineers at ATS had the same idea in mind for the Aurora 3000 system. Rather than Band-Aid the limitations inherent to the original Ford design, they decided that cutting corners wasn’t an option and reengineered the entire turbo system from the long-block up. On top of that, they did it with an eye toward exactly the type of stuff we wanted for our 7.3L project truck: a quick-response, high- pressure-ratio turbo that’s intended for everyday driving and heavy towing.
To further that goal, we decided to go for the Full Monty and get ATS’ SubZero intercooler along with the Aurora to see just how low the heat can go. If you’re fairly adept at wrenching on your 7.3L, this kit is something that can be installed at home in your driveway. But for our install, we sought out the experienced staff at Bud’s Diesel Shop in Mission Viejo, California. We may have knocked it out in a weekend, but they handled the swap in just a handful of hours.
1. Note that there are three connectors, one wire, and a MAP line that must be disconnected from the Y-pipe. Since we won’t be reusing this part, we removed the entire connection rather than just unplugging it.
2. One of the few bits of stock stuff we’ll be reusing is the intercooler piping and air induction, but to do the swap, all of it has to be disconnected from the boots and fully removed.
3. With the wiring and plumbing out of the way, the bands that hold the stock manifold to the turbo and to the intake ports on the heads can be removed. Don’t be surprised if it’s a bit stubborn; after 185,000 miles, ours certainly were.
4. With the manifold out of the way, it’s time to get to the meat of the teardown: removing the turbo and pedestal. Now is also a good time to remove the red pressure line that goes to the turbo wastegate.
| 04.
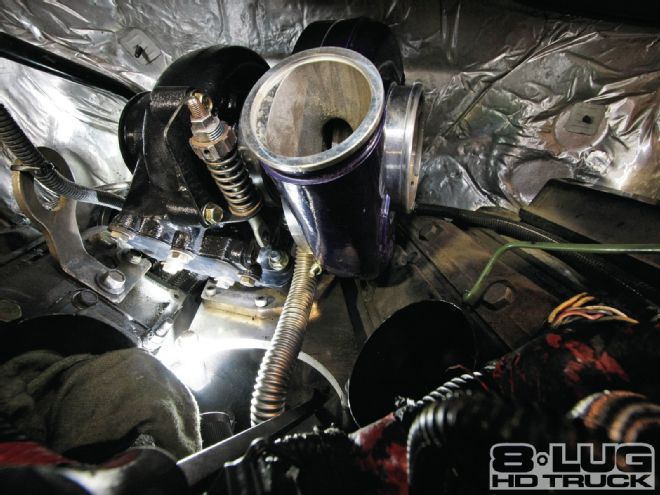
5. The V band clamp at the rear of the turbo that connects to the exhaust up-pipe is likely to be very difficult to remove on higher-mileage trucks. A hammer, screwdriver, some penetrating oil, and a good deal of patience are usually required. Also, on the left side of the turbo there is a small clip on the actuator arm that extends from the pedestal to the EBPV that has to be removed.
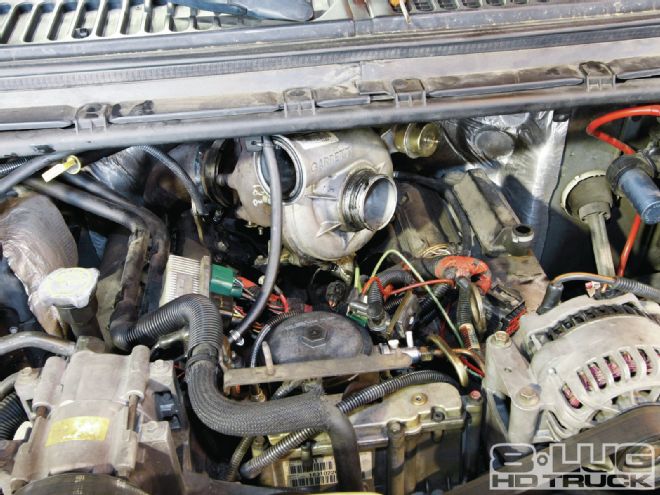
6. The factory Garrett turbo is held to the pedestal by two large bolts located between the compressor and turbine. Remove these two bolts with a 13mm deep socket and the whole turbo housing will come off if you lift straight upward. It will take a little twisting to finagle it out. Take a deep breath; it weighs a bit more than 30 pounds!
7. Here’s one of the main reasons the ATS kit replaces the pedestal: an inefficient and overly complicated non-standard mount that limits potential.
8. Here’s the Aurora 3000 next to the stock Garrett. Physically, they’re about the same size, but the Aurora uses a much more efficient housing design that is capable of at least 30 hp more than stock and creates much lower EGT. The 0.85 A/R on the turbo housing is sized to get the wheel spinning faster at lower engine rpm, giving a quicker boost rise. The compressor wheel has a 59mm, 7-blade inducer and an 83mm, 14-blade exducer. The turbine wheel has a 74mm, 11-blade inducer and a 65mm exducer.

| 08.
9. The flange for the up-pipes is very different between the Garrett and Aurora as well. We’re big fans of this change, since ATS’s design should help eliminate the common leaky donut gasket issues with the stock Garrett.
10. Highly efficient wheel design is one of the keys to the quick spooling capability of the Aurora. Also note that ATS has eliminated the wastegate on the Aurora.
11. Here’s a side-by-side comparison of the stock Ford pedestal with the ATS pedestal and much-more-efficient up-pipe manifold. The ATS pedestal was designed to employ clockwise-rotation turbochargers, since they’re widely available in many different frame sizes. For the 7.3L, ATS builds several Aurora turbochargers rated from 65 lb-min all the way up to 105 lb-min.
12. One of the best parts about the ATS Aurora kit is that the company includes these vastly improved up-pipes. The factory donut seals almost always end up leaking and it is difficult and time consuming to replace. ATS’s answer is to use a welded flange with metal gaskets and flexible connectors. These bad boys won’t be causing trouble for a long time—which is good because they’re a pain to remove!
13. Down in the valley of the engine is a small freeze plug. A hammer was used to gently tap the edge of it until it rotated so it could be pried out. Be cautious, you don’t want to knock this thing down into the engine. The hole will be used for the new oil return line from the ATS turbo.
14. The hard fuel return line running from the back of the passenger-side head to the front of the engine should be removed and replaced with the fittings and braided line supplied in the kit. The second braided line is the new oil supply line for the turbo. The MAP CAP prevents the ECM from measuring higher than factory boost and setting a check engine code. However, it should only be installed if you’re running a stock tune, or a tune that doesn’t cap the MAP signal to the ECM (most do).
15. Now that the valley is clear, the new Aurora baseplate can be bolted into place. Make sure the O-rings on the bottom are properly seated before bolting it down. Note that the factory oil drain is plugged since the Aurora will be using the freeze plug hole.
16. The new oil supply line should be installed with this orientation at the rear of the Aurora baseplate. Be sure to use a thread sealer on the pipe threads from both this line and the new braided fuel line to help prevent leaks.
17. Before bolting in the Aurora, we added about ½ ounce of clean engine oil in the supply fitting on top of the turbo cartridge while slowly spinning the compressor wheel. This will lubricate the turbo at startup.
| 18.
18. This flexible metal hose is the new—and much more efficient—oil return for the ATS turbo. It routes down to the hole left by the freeze plug that we removed. Don’t forget the drain tube gasket or the retainer included with the kit. They’ll prevent a big, oily mess.
19. With the Aurora bolted in place, we’re ready to start assembling the new, much more efficient Aurora intake system included with the kit.
20. Despite all the advances in the turbo itself, ATS managed to keep things easy on the air cleaner side for the 3000 series; the kit includes new piping, but it will route to the stock airbox location. It connected without issue to our AFE Stage 2 intake.
21. Here’s the new ATS Arc-Flow (left) vs. the stock 7.3L intake. The Arc-Flow is pre-tapped with three 1⁄8-inch NPT holes for easy installation of ATS’s WaterBoy Stage 3 water injection, nitrous, or a boost gauge. The original intake air heater, intake air temperature sensor, and MAP sensor will all be swapped over to the appropriate ports on the new Arc-Flow intake manifold as well as the 90-degree barbed fitting and pipe plugs provided in the kit.
22. Using the new ATS 3-inch silicone couplers and the 3.5-inch clamps provided in the kit, the Arc-Flow slides right into the spot vacated by the factory compressor manifold.
23. With the Arc-Flow in place and clamped down, the new ATS charge tube can be slid onto the Aurora with a silicone coupler. Be sure the internal rib is seated properly in the groove in the charge pipe before tightening the clamp, or major boost leaks will be the result.
24. If you have a 4-inch aftermarket exhaust like our stainless AFE system, the new ATS downpipe will be a perfect fit diameter wise but could require a bit of an extension, depending on the configuration of your exhaust. In our case, we just added in a leftover piece from the AFE exhaust.
25. Now it’s intercooler time! To remove the intercooler requires unbolting the centersection of the radiator core support. The hood latch and the upper radiator clamps must be removed first, as well as the air deflector and condenser mounts, of course.
26. These rubber isolation mounts also need to be unbolted to allow the core support to slide out.
27. The driver-side coupler will definitely be the most challenging to loosen. Count on these taking some significant prying to remove if they’re original. Ours were a pain.
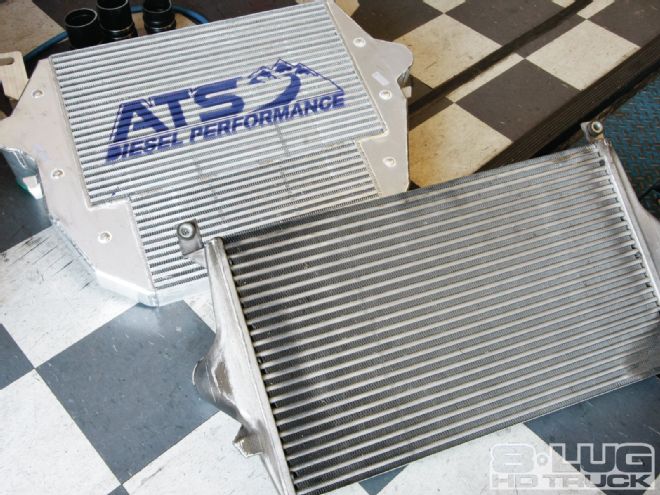
28. Here’s why we’re pulling the front of the truck apart: ATS’ super-high-efficiency SubZero intercooler upgrade for the 7.3L Power Stroke. The increased cooling capacity will serve to drop intake temp more than 200 degrees and drop our EGT by up to 150 degrees. That’s great for making power, since cooling the inlet air increases density of the charge.
| 28.
29. The kit includes new reducer couplers that will adapt the oversized ports on the SubZero to the factory pipes. These heavy-duty reinforced silicone couplers will outlast the original ones many times over.
30. Dropping the SubZero in is definitely a two-man job—not just because it’s a bit heavy and awkward, it’s also an insanely tight fit! A big thanks goes out to our buddy Pete Andreas at Wide Open Throttle Performance in Riverside, California, for lending a hand to make this an easy swap.
31. The engineers at ATS utilized every last bit of real estate they could for the SubZero. It’s a little tricky to get in, but once in place the precision manufacturing makes it look like the truck was built around it. We’re really impressed.
32. Another great thing about the ATS couplers is they feature an internal rib that will seat into the grooves on the factory charge tubes to help eliminate blow-offs from high boost levels.
33. There is one glitch on 7.3L trucks, though; some factory trans coolers interfere with intercooler installation. As a matter of fact, most will—but ATS thought ahead, and fittings and additional line are included with the kit to modify the factory lines if necessary. You’ll need a brake line tubing cutter to make the necessary clean cuts. Worth noting is that the larger ’03 to ’07 26-Row Ford 6.0L trans cooler will drop in and fit with the ATS intercooler (Ford Dealer P/N: 5C3Z-7A095-B or 5C3Z-7A095-CA).
34. Here’s how we modified our factory 7.3L cooler with the ATS-supplied lines and fittings. We plan on upgrading to the larger 6.0L design at a later date, and these lines will be reusable.
| 35.
35. Even though it’s a fully re-engineered system from the heads to the air cleaner, the fully reassembled ATS Aurora system looks factory engineered and barely stands out—and the SubZero is completely hidden. Stealth mode: We dig it. We may even put the factory 7.3L Power Stroke shield back on the HPOP reservoir.
36. We’ve proven before that the ATS Aurora system makes power and reduces intake and exhaust temps with the factory program, but that lazy tune really doesn’t showcase the capacities. So, we contacted Bill Cohron over at Power Hungry Performance (PHP) for one of his six-position chips, which includes stock, 40hp Towing, 80hp Daily Driver, 100hp Performance, 120hp Race, and 140hp Extreme tunes that Bill happily custom tailored for our new ATS system paired with the DieselSite Adrenaline HPOP previously installed.

| 36.
Review
We’ve actually been sitting on this install story for a few months, because we really wanted some substantial time to get a solid impression of the kit in differing circumstances. Even though our stock turbo system was in excellent health, we’re glad to say that we found the ATS Aurora 3000 kit to be superior to stock in every way—with and without our Power Hungry Performance tune turned on. The torque curve is broader, and the increased boost rise brings the power on quickly and at low rpm. That’s perfect for towing, which is where we saw the most benefit. When combined with the SubZero intercooler, we saw a large reduction in EGT, especially when under sustained boost while pulling up a grade. Driving, accelerating, towing—our F-350 is quite simply better at everything now.


