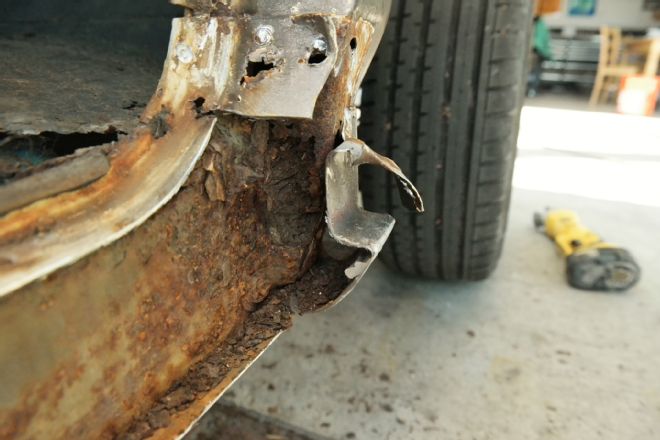
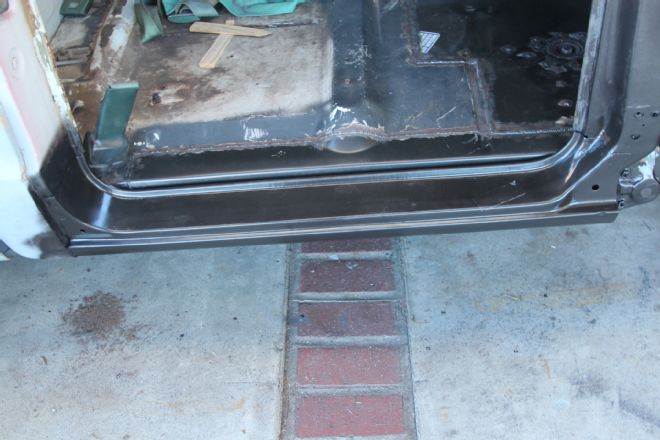
That new project truck is begging for you to restore it to its former glory. Well, if that project is a newly purchased 67-72 C-10 or one that you’ve owned for years now, some type of cancerous rust can probably be found on your truck. On these models, you’ll find rust on the lower panels under the doors (the rocker panel).
The tendency to rust on the rocker panels was an oversight the designers of this body style could never have foreseen. When years of leaves and debris collect in the lower section of the A-pillar, which prevents water from draining out the pillar’s bottom. The lingering moisture rots the metal from the inside out until it fails entirely. The only cure is to replace the panels. It’s not a death sentence by rust for the truck. We’ll show you how to replace the rotted factory sheet metal with new replacement panels from LMC truck.
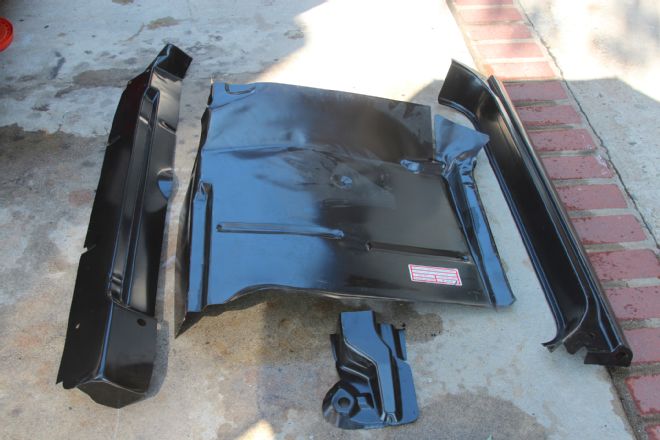
LMC has been a vital source to C-10 rehabilitators for decades, based on the company’s reputation for having a vast inventory of quality parts. The LMC’s replacement panels that we ordered were designed to fit like the factory ones, just as the original specs from the OEM dyes were used to develop LMC’s replacement parts’ dyes. Every panel from LMC is stamped out exactly like the factory ones back when GM made its stock originals. However, the panes don’t fall right into place. Every truck is unique, and every panel fits differently into each truck.
Don’t worry! In this series of photos, we’ll demonstrate how to massage the parts to fit into our vehicle, and share tips on how to fit the parts onto your truck. Follow along with us. To order the panels yourself, jump onto LMC’s website at www.lmctruck.com.
| 01 1969 Chevroler C 10 Rust Repair
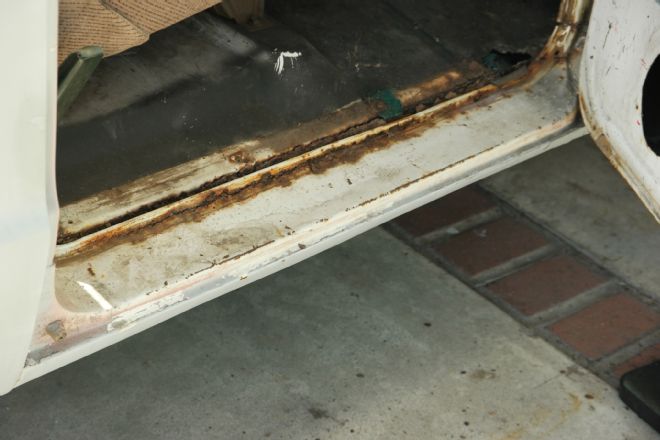
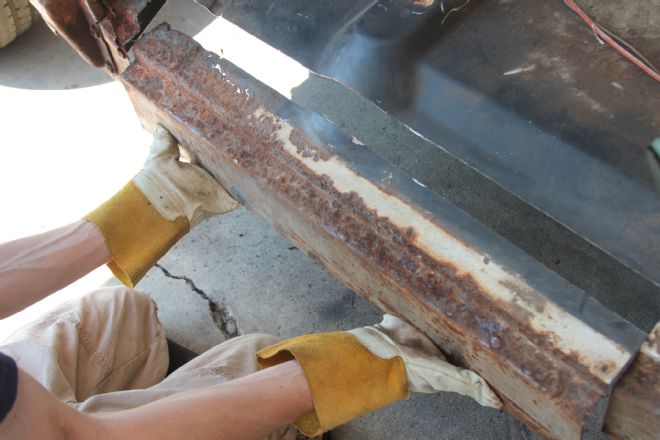
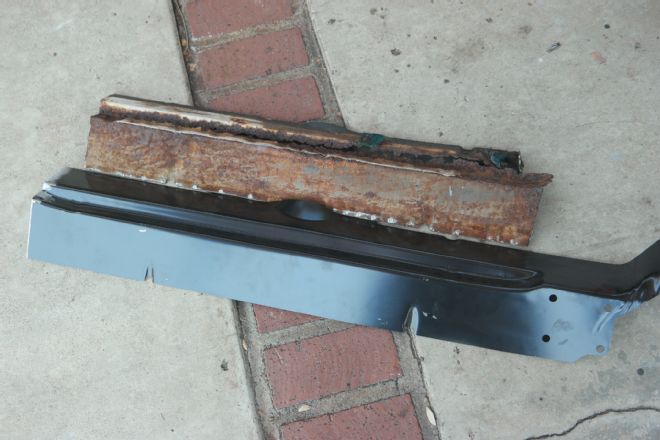
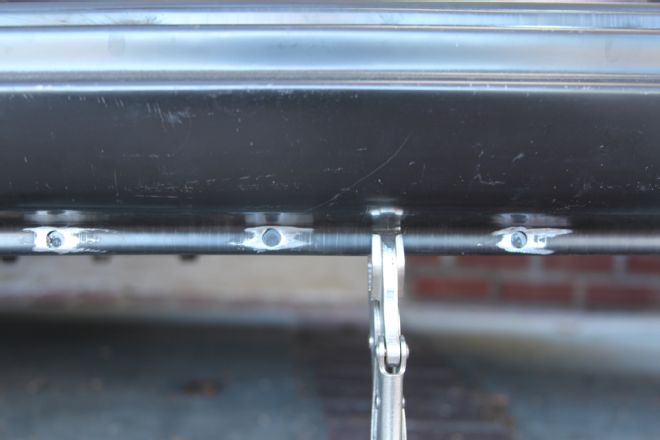
If your C-10’s rockers look like this one, don’t fret. We’ll show you step-by-step how to replace rusted ones for a new set from LMC Truck. Look, even the door seal has collected moisture, typically either via car washes or rainwater. It’s completely rotted through in some places, and well on its way to full failure in others. The only fix is to replace the entire panel.
| 02 1969 Chevroler C 10 Rust Repair
We needed to gain full access to the rocker, and possibly other panels like the outer side floor panel and the cab floor plate. The first task was to remove the fender and the door. A smart tip to ensure the door goes right back into adjustment: Drill a hole through the door hinge and the cab’s A-pillar. When you re-install the door, the hole acts as an alignment point that can be indexed by using a small screwdriver or punch. Once the bolt’s set back in place and tight, the door will operate as it did originally.
| 03 1969 Chevroler C 10 Rust Repair
We jumped right in by cutting open the rocker and ran a cut-off wheel down the length of the rocker, squaring it off at the back.
| 04 1969 Chevroler C 10 Rust Repair
To remove the front and rear sections, we drilled out the factory spot welds and released both the end pieces of the rocker panel.
| 05 1969 Chevroler C 10 Rust Repair
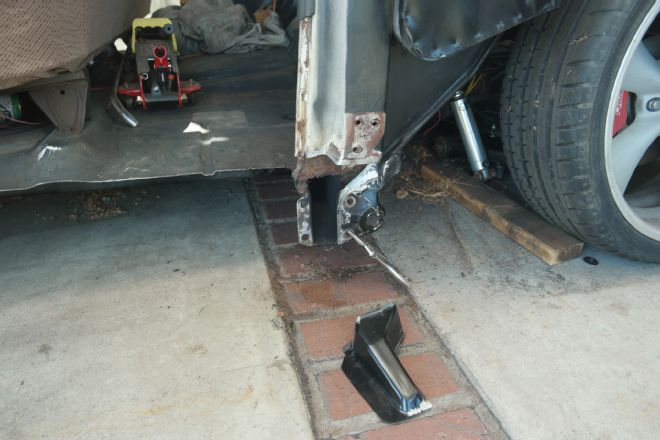
A peek inside the A-pillar’s lower section gave us an idea what to expect. In this case, full replacement of the lower door pillar, the outer side floor panel, the cab floor, and of course, the rocker panel. This damage was caused by the design of the cab’s cowl vent system. It allows leaves and other debris to settle at the bottom of the door pillar, but water can’t drain out bottom. After 40-plus years of moisture retention, this is the result.
| 06 1969 Chevroler C 10 Rust Repair
Cruising through LMC Truck’s catalog, we were able to find all the replacement parts needed to make the repair. The panels are made to the original factory specs, the same way their forefathers were made more than 45 years ago.
| 07 1969 Chevroler C 10 Rust Repair
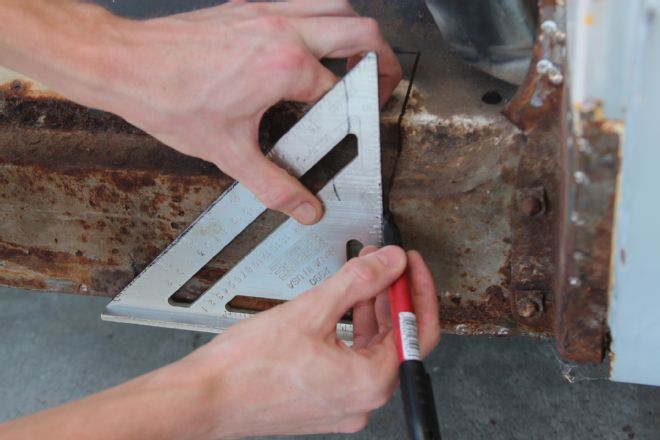
To make it easier for us to install the replacements, we cut out all the harmful rust, if necessary. The first step, measure and mark out our cut line and remove the old failed panels.
| 08 1969 Chevroler C 10 Rust Repair
Next, we cut out the rotted section using a cut-off tool from Ingersoll-Rand.
| 09 1969 Chevroler C 10 Rust Repair
Check it out. We cut out only the bad floor sections and that allows us to patch in whatever is needed, rather than replace the entire panel. This makes the job a lot easier.
| 10 1969 Chevroler C 10 Rust Repair
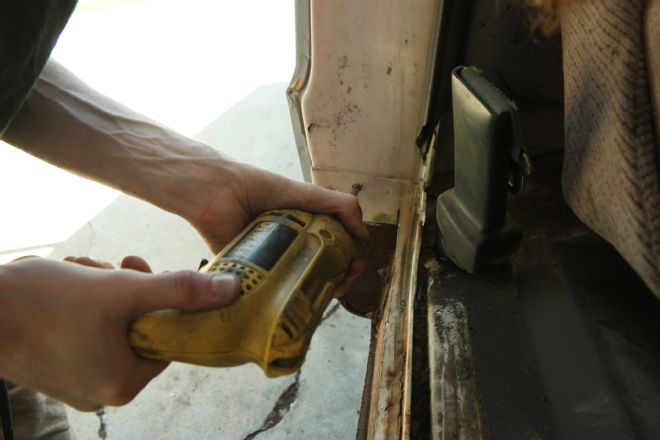
We attacked our first task by fitting the lower A-pillar section back to the factory A- pillar.
| 11 1969 Chevroler C 10 Rust Repair
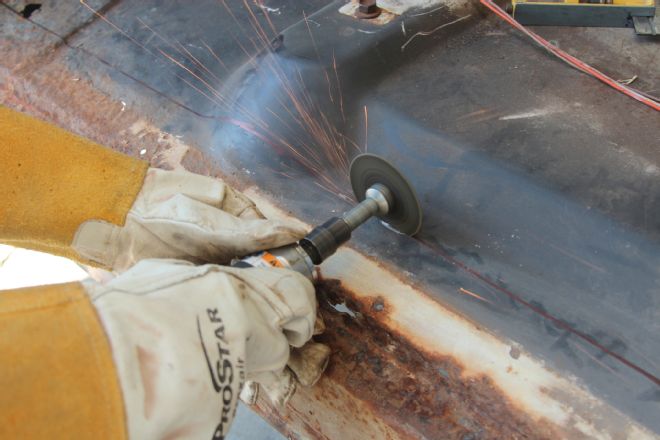
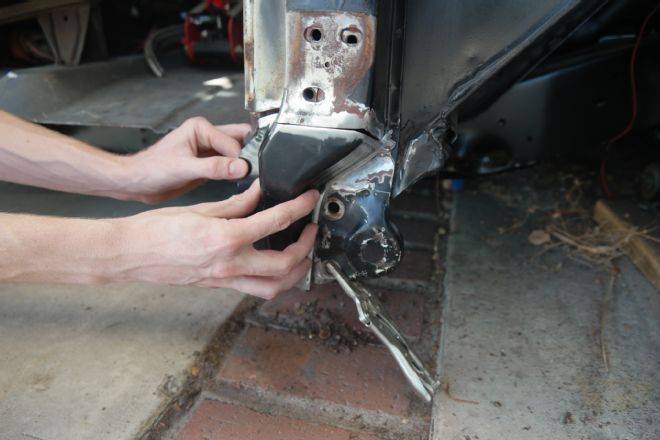
After we trimmed the piece to our liking, we ground off the protective rust coating to expose the bare metal where we planned to weld it to the A-pillar’s lower section.
| 12 1969 Chevroler C 10 Rust Repair
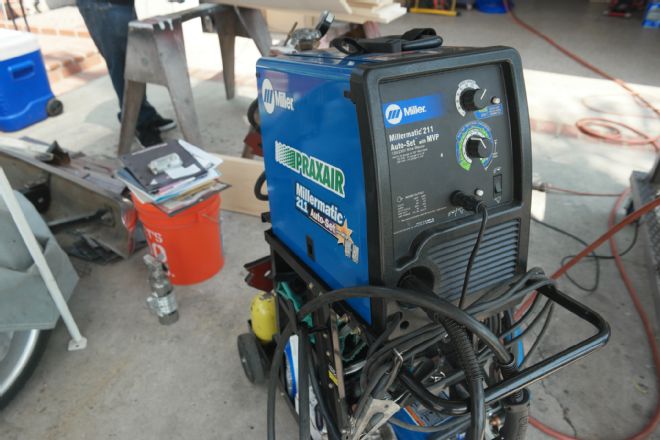
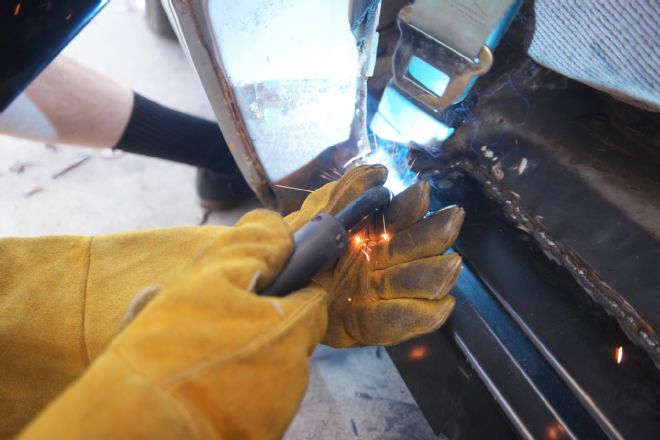
We’ve been big fans of the Miller 211 MIG welder for a while. It’s a great tool for the hobbyist and the professional. The Multi-Voltage Plug (MVP inverter technology) allows you to choose to use either a 120V service or a 230V service. Further, the auto-set feature takes the guesswork out of setting the proper voltage setting and or wire speed.
| 13 1969 Chevroler C 10 Rust Repair
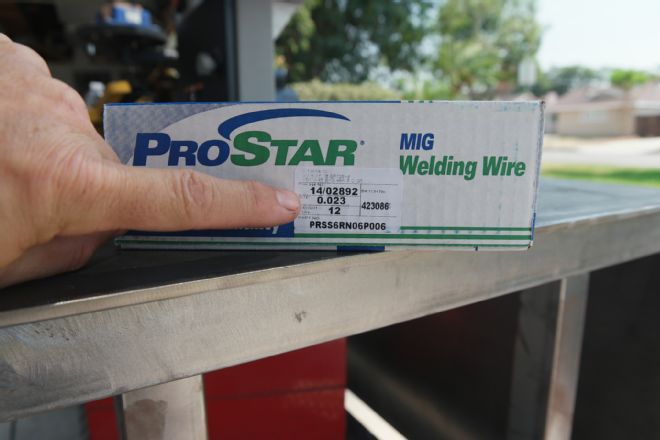
Use a smaller gauge of wire when welding thin sheet metal, such as the 18-gauge sheet metal most body panels are made from. We stopped by our local Praxair welding supply store and picked up this .023 size wire made by Prostar.
| 14 1969 Chevroler C 10 Rust Repair
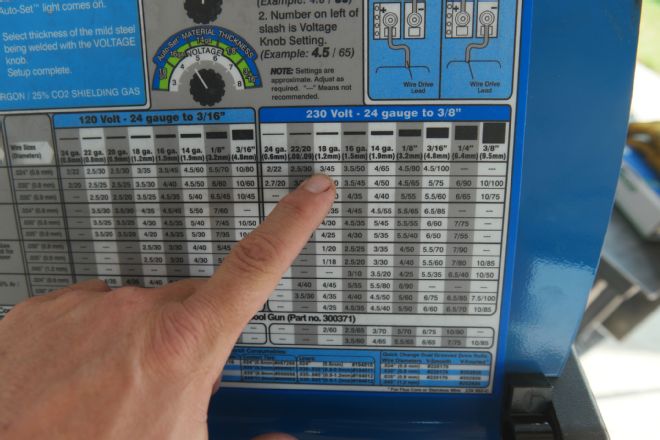
Armed with the knowledge of the wire size needed, as well as the sheet-metal gauge we were working with (18 gauge), we referred to the chart located on the underside of the machine’s cowl to provide the proper welder setting.
| 15 1969 Chevroler C 10 Rust Repair
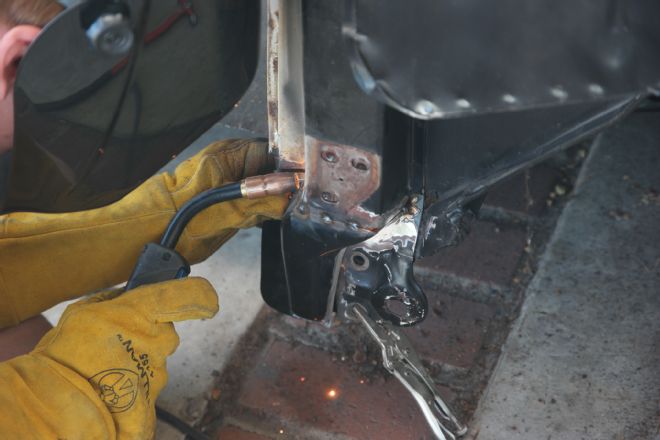
With Miller’s model 211 ready to go, we began to tack weld the lower A-pillar into place. Rather than running a bead of wire, which would overheat the thin sheet metal, we used a series of tack welds, rotating back and forth on the piece to maintain acceptable heat until the whole seam was welded together.
| 16 1969 Chevroler C 10 Rust Repair
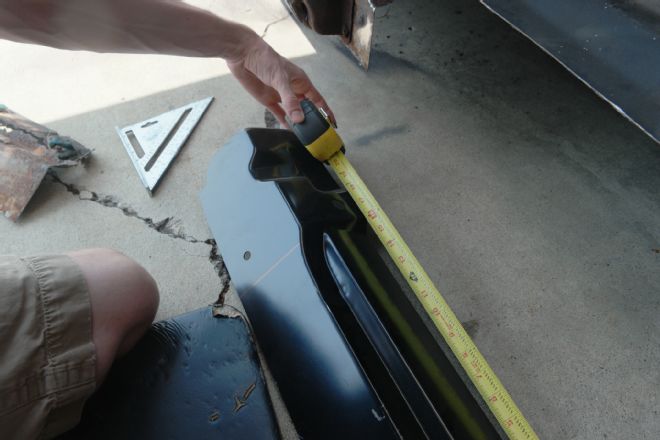
Next, we laid out the outer side floor panel and transferred our measurements to the part.
| 17 1969 Chevroler C 10 Rust Repair
Then, we made the cuts that we transferred from the old removed part
| 18 1969 Chevroler C 10 Rust Repair
Notice in the photo, the new outer panel has been left long on purpose, to replace the old panel in the floor that had rotted away.
| 19 1969 Chevroler C 10 Rust Repair
The outer floor panel was fitted into place and aligned with the lower A-pillar.

| 20 1969 Chevroler C 10 Rust Repair
Once we could determine the panel had been set back to the factory position, we used seam clamps and Cleco fasteners to hold it tightly as we welded it.
| 21 1969 Chevroler C 10 Rust Repair
With the welder set-up properly, stitching the panel back in place was a breeze.
| 22 1969 Chevroler C 10 Rust Repair
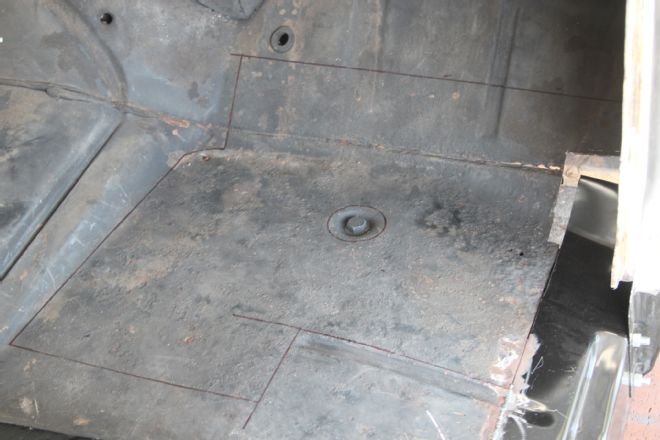
Moving on to the cab floor panel, we began mapping out our pattern for the cut by first seeking underneath the cab’s floor for any structural tabs (doublers).
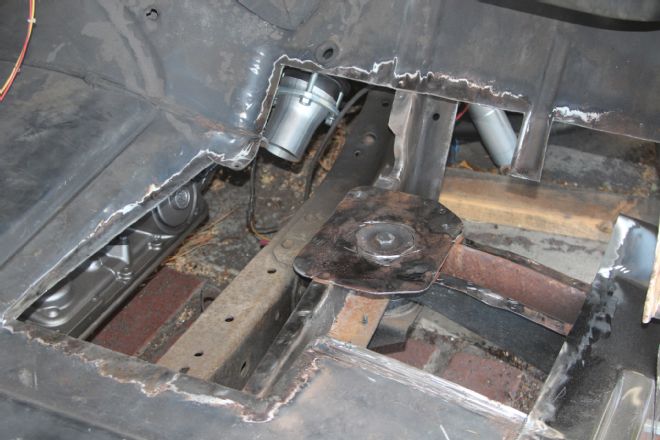
| 23 1969 Chevroler C 10 Rust Repair
We don’t want to disturb any of the structural elements of the cab’s floor like the floor’s doubler plates, so we cut around them.
| 24 1969 Chevroler C 10 Rust Repair
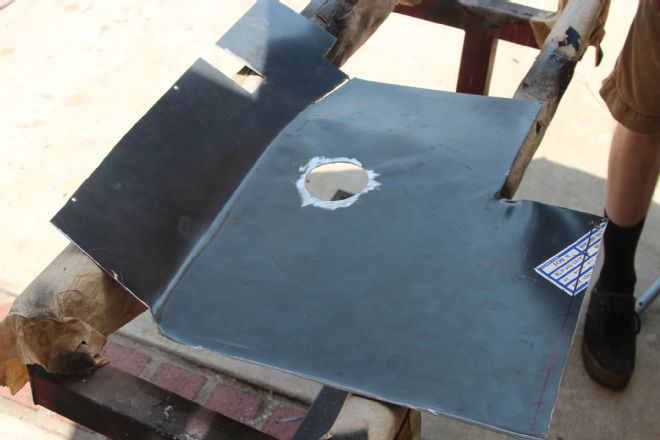
Here’s a look at the new LMC Truck cab floor panel after we had cut out the areas in which the panel will join the floor’s doubler plates
| 25 1969 Chevroler C 10 Rust Repair
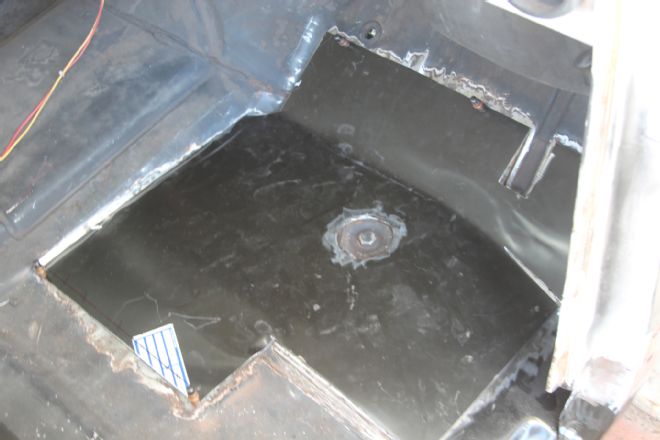
Next, we set the new floor piece into our cut out pattern on the floor. Once it was set, we used Cleco fasteners to hold the panel tight in place.
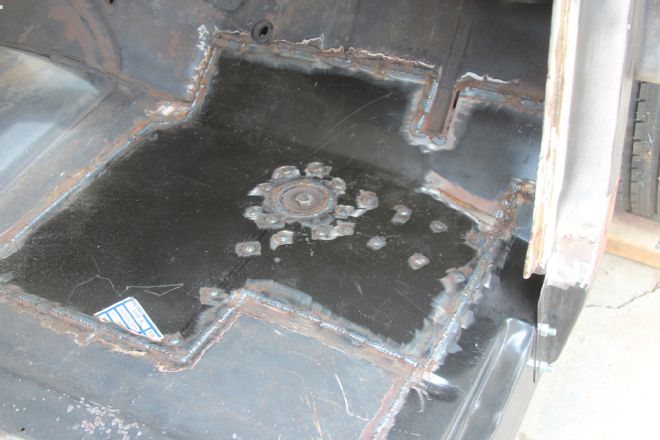
| 26 1969 Chevroler C 10 Rust Repair
Once satisfied with the fit, we welded the panel in place.

| 27 1969 Chevroler C 10 Rust Repair
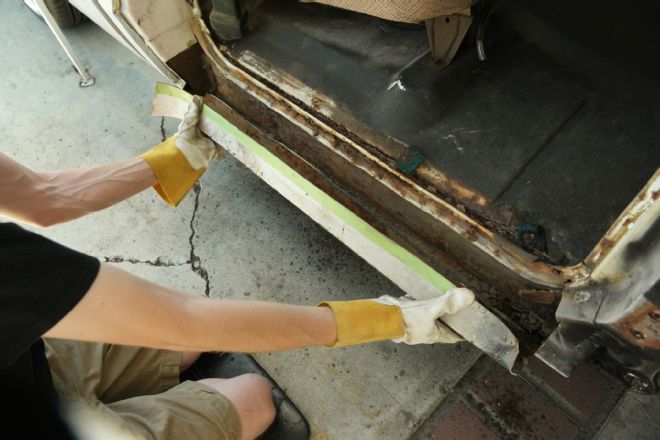
Both the rockers look exactly alike, but we’ve learned no two rockers are the same. This is normal, and nothing to worry about. The process consists of working the panel into place using a series of relief cuts and shaping the panel into place.
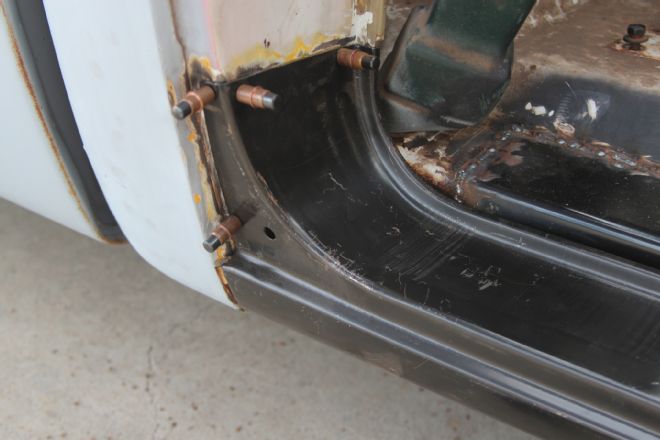
| 28 1969 Chevroler C 10 Rust Repair
First, we fit the back of the rocker to the same spot where the old one originally stood and held it in place with Clecos.
| 29 1969 Chevroler C 10 Rust Repair
Then we made a few relief cuts to form to the rocker panel to the A-pillar. Clecos helped us to hold the rocker in place as we made our cuts. We set a Cleco after each cut, until we felt the rocker was fit properly to that cab.
| 30 1969 Chevroler C 10 Rust Repair
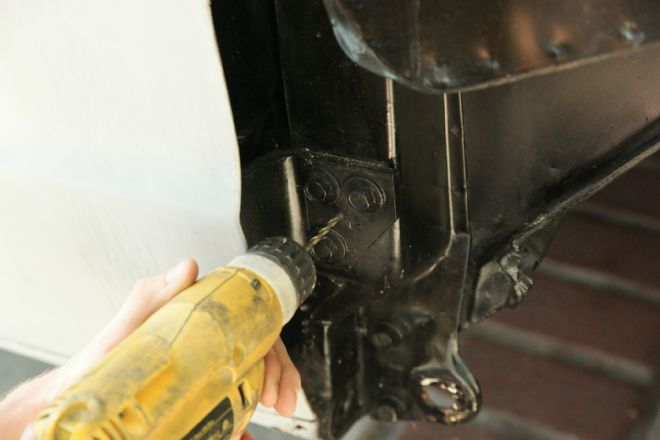
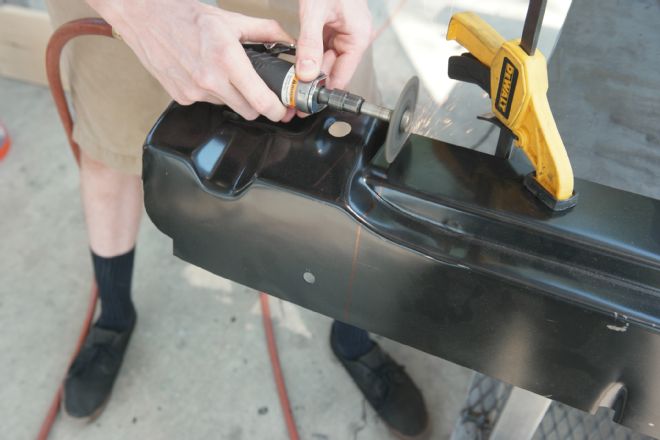
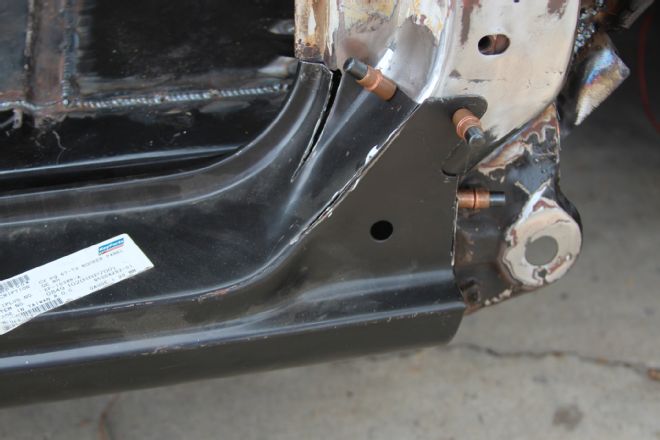
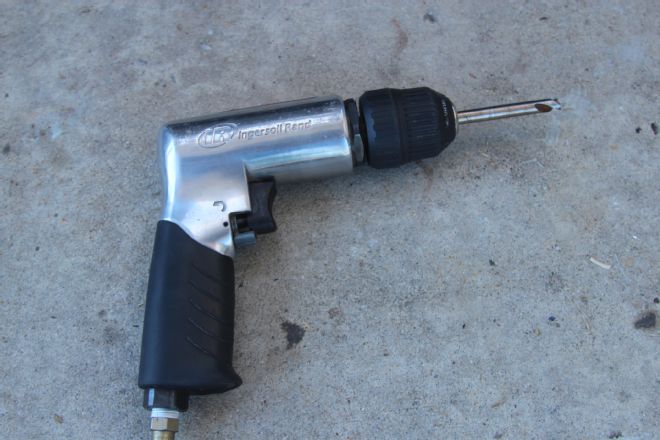
The bottom of the rocker will need to be attached to the outer floor panel, in order to do so, we used this spot weld cutting bit along with this 3/8 air drill from Ingersoll Rand.
| 31 1969 Chevroler C 10 Rust Repair
A series of plugholes were drilled through the rocker, but not through the outer floor panel, leaving the outer floor panel exposed on the backside of the rocker where we could plug weld the rocker to the outer floor panel. Once the holes were drilled out, we welded the rocker to the outer floor panel in the plugholes that we had cut.
| 32 1969 Chevroler C 10 Rust Repair
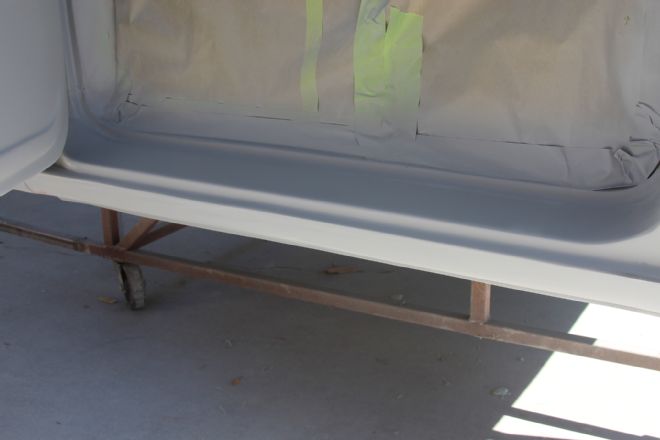
After all the welding was complete, we applied a coat of Eastwood’s rust preventive primer to curb any future problems.
| 33 1969 Chevroler C 10 Rust Repair
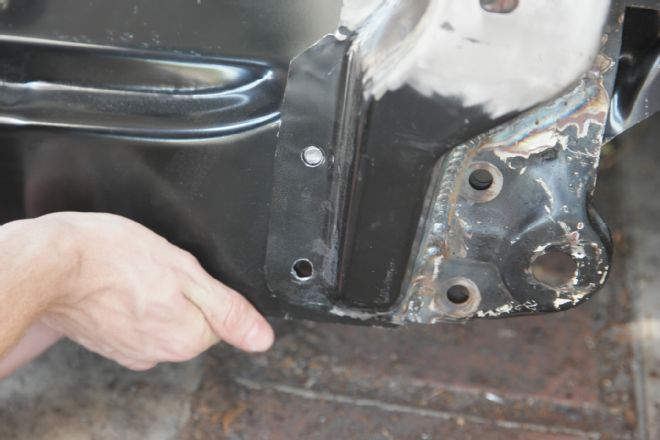
We repeated the same process on the other side of the cab, as we found the same kind of damage to the driver’s side as we had on the passenger’s side. Here’s a look at the door set back in place as the first coat of fill primer has been applied. What the photo is hiding is the minimal fill work and the incredible fitment of LMC’s replacement panels showcased on this truck.