For those of us who spend countless hours working to make our project trucks look their best, there’s no worse feeling than seeing that very same truck get damaged. Whether you got bumped by the car behind you at a stoplight, backed up into a pole, or hit a piece of debris on the highway, it’s always frustrating to see the dings and dents accumulate. In the case of this 2010 GMC Sierra bumper, this type of minor cosmetic damage meant it was time for a new set of bumpers. Rather than simply swapping them out, we decided to upgrade the truck’s appearance by paint-matching the new bumpers and adding projector headlights.
In order to accomplish this task, we called up LMC Truck. LMC’s massive selection of OEM and aftermarket parts had everything we needed, making it a one-stop shop for this build. Once our shiny new front and rear bumpers and projector headlights arrived, we got to work in our tech center. Check out the photos below to see how these simple modifications revitalized our formerly damaged Sierra.
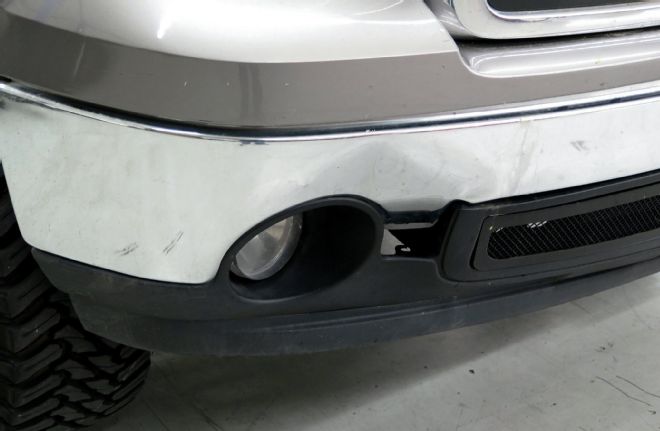
| 2010 GMC Sierra Bumper Face Lift Before
1. The GMC Sierra’s original bumpers had seen better days and were covered in pitting, scratches, and dents. After one last impact to the front bumper caved in the sheetmetal, it was time for a replacement.
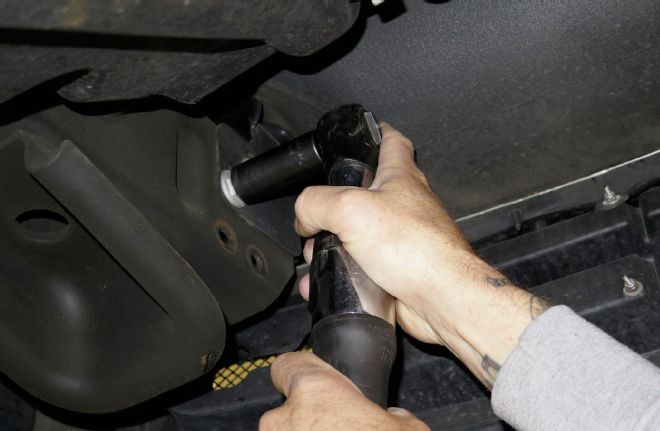
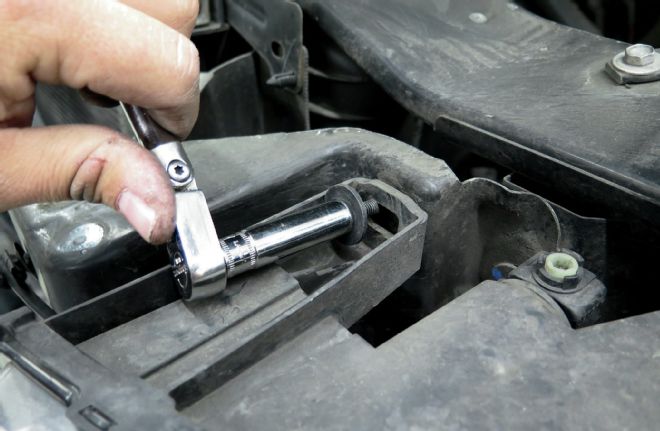
| 2010 GMC Sierra Bumper Face Lift 02
2. First, the upper bumper cover and grille were unbolted and removed. Then, an air ratchet wrench was used to loosen these large bolts that hold the front bumper in place.
| 2010 GMC Sierra Bumper Face Lift 03
3. With the bolts removed, the old front bumper was pulled off the truck and thrown into the scrap heap.
| 2010 GMC Sierra Bumper Face Lift 04
4. The rear bumper was then unbolted and removed, with special care taken to disconnect the wire harnesses for the plate lights, trailer hitch connector, and backup sensors.
| 2010 GMC Sierra Bumper Face Lift 05
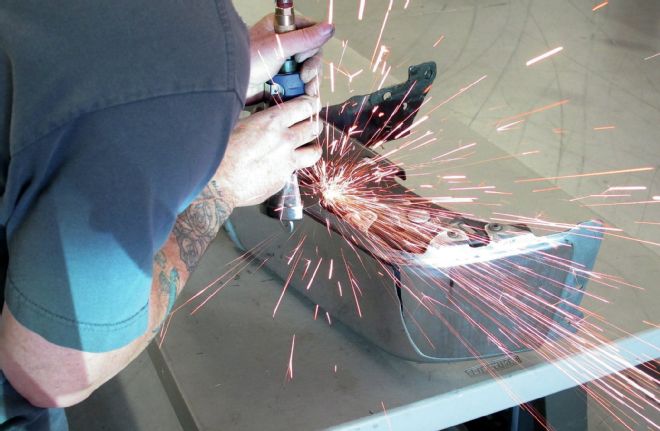
5. The plastic step pads on top of the rear bumper were removed, and the rivets holding the chrome bumper panels were cut away using a cutoff wheel.

| 2010 GMC Sierra Bumper Face Lift 06
6. Now it was time to unbox our new replacement parts from LMC Truck. For the front, we picked up a chrome bumper, valance, and air deflector. For the rear, we got new paintable end caps, side step pads, and a center step pad.
| 2010 GMC Sierra Bumper Face Lift 07
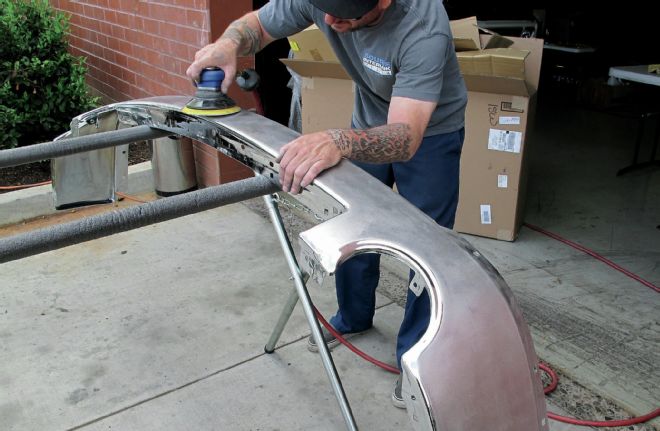
7. Since we planned to paint the bumpers to match the Sierra’s body color, we first needed to sand them down with an air sander. This ensures the primer will adhere to the metal.
| 2010 GMC Sierra Bumper Face Lift 08
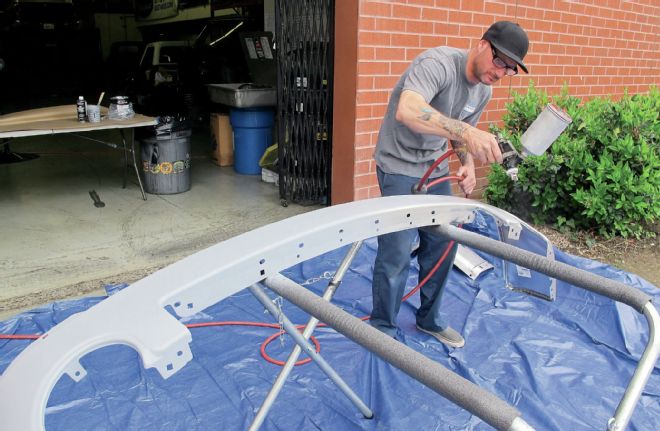
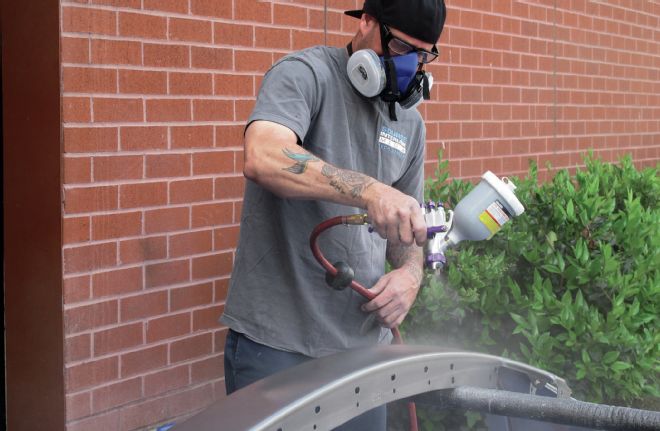
8. Eastwood primer was mixed and applied evenly to the prepped bumpers with an automotive spray gun.
| 2010 GMC Sierra Bumper Face Lift 09
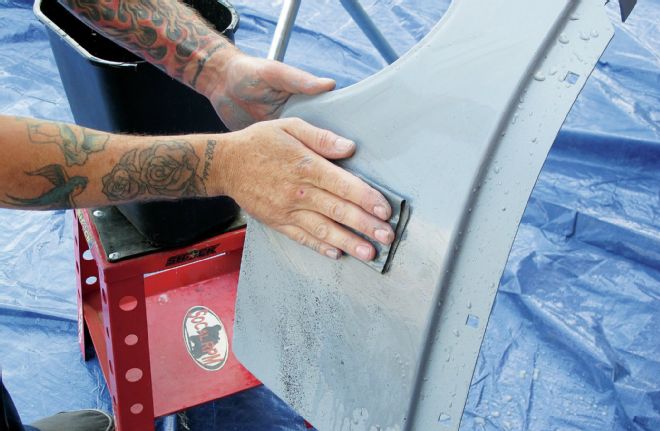
9. Once the primer was dry, it was lightly sprayed with black spray paint and wet-sanded to a smooth finish. The black spray paint allows us to track which areas have been sanded and which haven’t.
| 2010 GMC Sierra Bumper Face Lift 10
10. Next, several coats of Storm Grey Metallic paint were applied to the bumper, color-sanded, and finished with clearcoat.
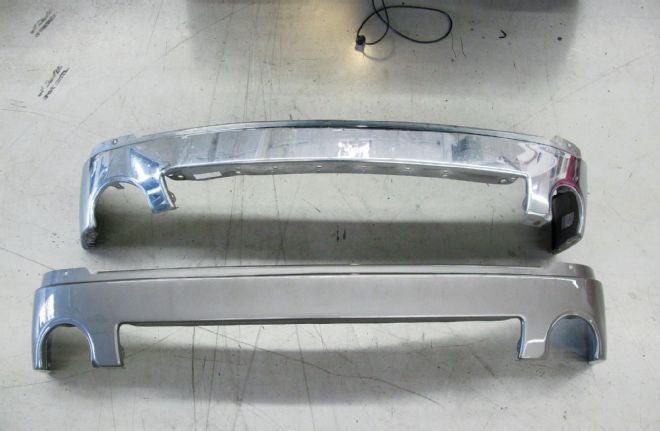
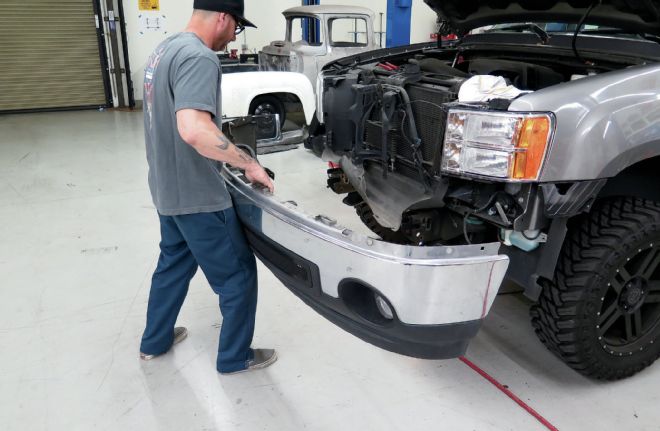
| 2010 GMC Sierra Bumper Face Lift 11
11. Once the paint was dry, we could compare the old chrome bumper to the new one. The fresh, dent-free sheetmetal and matching paint will give our GMC’s frontend a new lease on life.

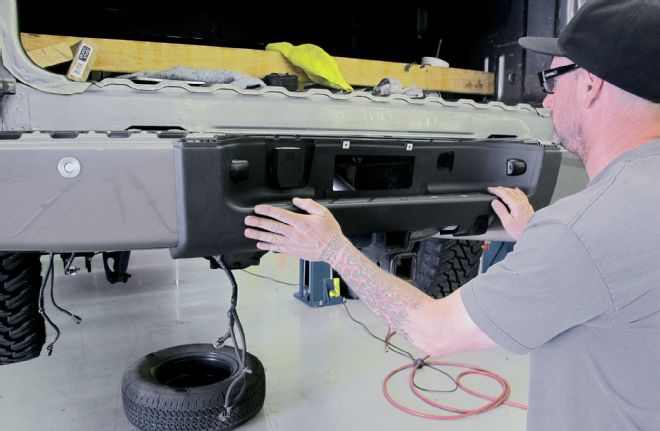
| 2010 GMC Sierra Bumper Face Lift 12
12. After the front bumper was installed using the factory hardware, the rear end caps were set in place. Since we ground out the rivets that attached the original end caps, LMC Truck provided new hardware to install the end caps.
| 2010 GMC Sierra Bumper Face Lift 13
13. The center and side step pads were installed on the bumper frame and held in place with plastic clips. We also reinstalled and reconnected the license plate lights and backup sensors at this point.
| 2010 GMC Sierra Bumper Face Lift 14
14. Finally, we would be topping this Sierra off with a new set of projector headlights from LMC Truck. The factory headlights were unbolted and removed to make way for the new units.
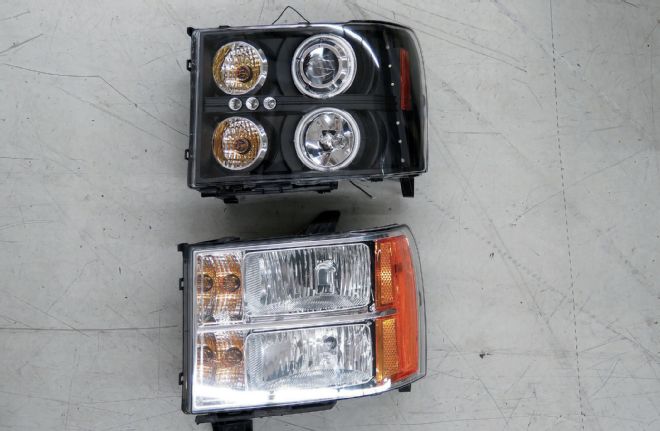
| 2010 GMC Sierra Bumper Face Lift 15
15. These new units feature black housings, LED accents, and halos for an aggressive look. Plus, their projectors will give our GMC increased light output and better nighttime visibility.
| 2010 GMC Sierra Bumper Face Lift 16
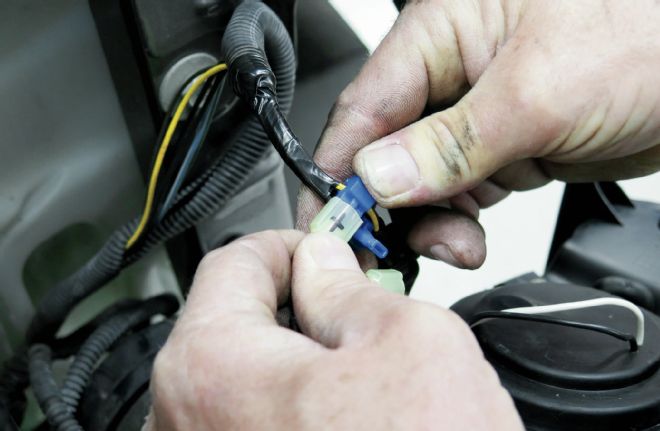
16. T-taps were used to connect the CCFL halos to a 12-volt source on the truck’s factory wiring harness. This lets us keep the halos on for use as daytime running lights.
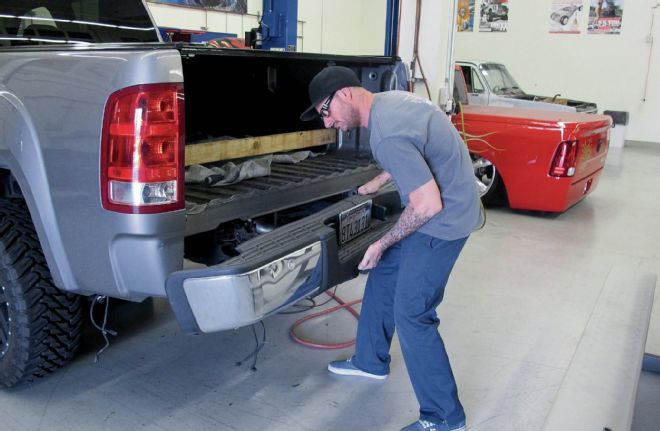
| 2010 GMC Sierra Bumper Face Lift Rear View
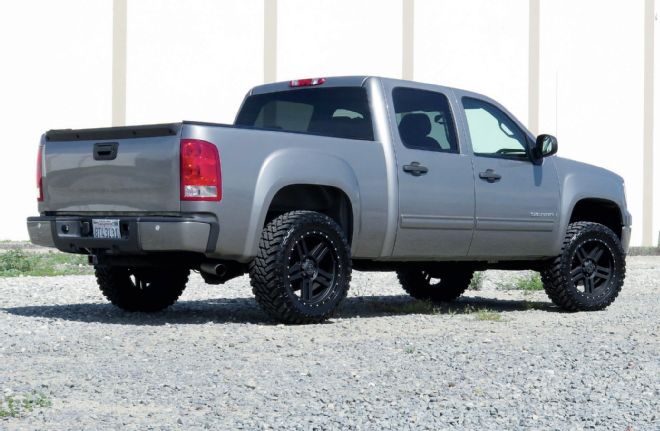
17. With its new paint-matched bumpers and projector headlights, this Sierra was looking better than ever. If your truck is suffering from dented and scratched bumpers—or just needs a clean, new look—give LMC Truck a call for all the parts you need.
You may recognize this Sierra from Issue 6, when we swapped its old 2/4 lowering kit for the leveling kit and 33s seen here. The new smooth, paint-matched bumpers we installed give the truck an upscale look, and the projector headlights add a custom touch.