Aluminum alloy rims are a highly desired item on any RV and offer a number of advantages over steel rims. They offer a better ride because they are truer and lighter than steel rims. It’s also easier to get at the valve stems without cutting your hands on the stainless steel trim rings. Oh, and did I mention, they look cool?
| restoring The Shine Cleaning Aluminum Alloy Rims aluminum Alloy Rims
The Problem
However, aluminum rims do tend to get chalky after a while. The constant abrasion from swirling dust, effects of road salt and tar, and oxidation from the atmosphere doesn’t let them retain their brilliance indefinitely. Fortunately, uncoated aluminum rims are thick and the shine can be restored to them by polishing. Polishing is really nothing more than super fine sanding.
Rims that have been exposed to the elements over time take on a chalky appearance and if allowed to continue, develop pits in the polished surface. The only way to get rid of that is by removing the offending layer. A polishing compound that is designed for alloy metals will eliminate the haze and pits. If the polish is too abrasive it will clean that up real fast but won’t leave a very shiny finish. A polish that is too fine will leave a nice polished finish but you’ll spend the entire week trying to get there so it’s important to find a good polish that is designed for aluminum wheel rims to get the right balance.
There are a number of products on the market that are designed for this application, and just like vehicle waxes, everyone has their own preference as to which one works best. For this article we won’t attempt to perform a shootout test of the various products. We used Mothers products to show you how to do your own polishing but the procedure will be the same with other brands of polishes.

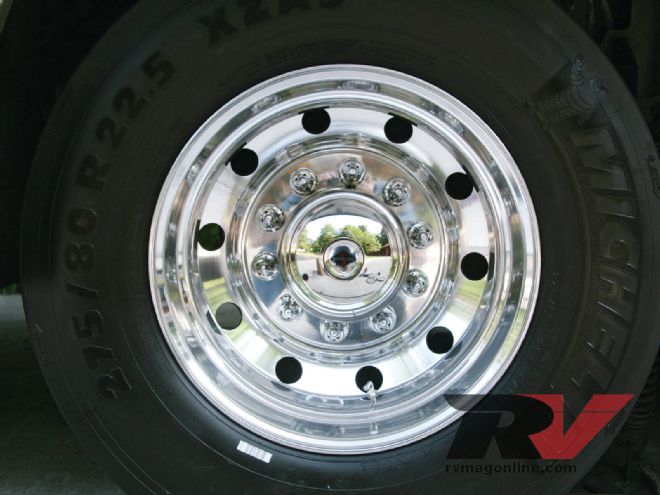
| 01. Aluminum wheel rims oxidize and lose their smooth surface after exposure to the elements. Contaminants from the road can leave pits, resulting in a dull and unattractive appearance.
The Test
The first step is to determine whether or not your wheel rims are coated or uncoated. Some rims are available with a clear coating which acts as a sealer and will protect them from oxidation. Coated rims should never be polished and must be lightly washed with soap and water. If you use anything abrasive on them, the clear coat will get scratched and look foggy. While the clear coating helps to maintain the original shine, it also never lets them look their very best because the coating does tend to dull the original shine of the aluminum.
The two most common brands of coated wheels are the Alcoa Dura-Bright and Accuride Accu-Shield rims. They may still have stampings or decals identifying them, but if not you should test them by rubbing a minute amount of polish on a paper towel to a small area by hand. The towel will turn black as the polish reacts with the aluminum. If it doesn’t, you have coated wheels and should not polish them.

| 02. The Mothers Powerball is available in two sizes. The larger size performs most of the work while the smaller mini-ball gets into those tight areas. A good power drill is necessary to do the job the fast and easy way.
The Cleanup
Begin by washing your wheels with normal soap and water to remove any dirt or grease buildup. If you begin polishing dirty wheels you’ll grind that dirt into them and scratch them. Once they are clean and dry, you can begin the polishing process. The process involves applying a bit of polish to the wheel rim and working it into the rim. The deeper the pits, the more polishing you’ll need to do to remove them. If you have some serious damage or neglect to your wheel rims you may want to use something more aggressive to make the first cut. You can try super fine steel wool or one of the finer 3M ScotchBrite pads to remove the heavy oxidation or stains prior to finish polishing.
To save time and make the job go much easier, a foam applicator such as the Mothers PowerBall or Meguiars DynaCone is a must. These foam polishing tools attach to a regular drill and greatly speed up the work.

| 03. A number of polishes are designed for polishing aluminum wheels. We chose Mothers Power Metal due to previous experience with that product.
Begin by applying some polish to the applicator. Leaving the power off, use the application tool to spread it around a small area of the wheel. Begin with a slow speed to prevent slinging the polish then bring it up to 300 to 400 rpm to polish the rim. Don’t try to do too big of an area at once. The polish only lasts so long until it turns black. Then take a towel and wipe the old polish off of the rim while the polish is still wet. Continue around the rim and in layers as needed until the desired results are achieved. Once you are finished I find that it helps to apply a final layer of polish by hand to give it the final luster. At that point, wipe everything down with a dry towel and finally, a wet towel to remove any polish still left in the pores of the rim.
Frequent application of polish will make the job much easier and will prevent the deeper pits and hazing. If you do a quick hand polishing after your RV has been washed your rims will remain shiny and make your RV that much more attractive.

| 04. The finished wheel rim has a brilliant shine and all of the pits and tarnish spots have been removed.