QuestionQUESTION: The engine turns, but will not start.
The conrod broke so I took it apart, replaced the conrod, replaced piston, new gasket sets, set the valve clearance on the intake to 0.007", outlet 0.010", and alligned the crank with the cam according to the provided dots on these parts. I cleaned the carburettor, replaced feul filters, charged the battery, cleaned the magneto/flywheel and set that clearance to standard business card, replaced spark plug with correct gap.
The engine turns, but will not start. When I set the throttle to "choke" it has somewhat of a blowback through the carburettor, but when I set the throttle to "run", it does nothing except turn the engine. I have injected feul directly into the cylinder with the spark plug removed (to make sure it's not starving of feul), and it still doesn't do anything..not even a puff of smoke.
Please advise. :-(
ANSWER: Hello Shaun:
>>You can View a Breakdown/IPL of this Engine at this Site Addy, http://www.outdoordistributors.com/parts.html and Select the B. Then Select Briggs and Stratton. Then Select Don't have Part Numbers. Then Select the File # . Then Select the Folder #. **Note: you can Download and Save the Breakdown for your Engine by Selecting the 2nd Icon from the Left at the Top of the PDF page.**
>>Send me the Model and Type or Spec Numbers Off the Engine, Please. With these I can Locate the Proper Manual and Better Assist you. The Model Numbers May be Stamped Into the Blower Housing (metal engine cover) Above the Spark Plug or the Muffler. Many horizontal shaft, overhead valve engines have these numbers stamped into the OHV rocker cover. However, on certain overhead valve powered generators, the equipment manufacturer installs a decorative chrome rocker cover OVER the Briggs cover. If your engine has a decorative cover, it may be necessary to remove it in order to locate the Model, Type, and Code. If this is a Briggs and Stratton Engine, then you can Also Use this Site Addy; http://www.briggsandstratton.com/maint_repair/BS_modeltypecode.pdf for Assistance in Locating the Model, Type and Code Numbers of a Briggs and Stratton Engine.
>>Did you Hone/Deglaze the Cylinder?
>>If No, then
>>The Compression will be too Low for the Engine to Fire and Run.
>>Did you Seat/Lap in the Valves?
>>How was the Crankshaft Positioned when you Set the Valve Clearances?
>>I am Including a Few Instruction Files for you to Review.
OHV Engine Valve Clearance Setting:
>>The Following is a Basic File I made for Setting the Valve Clearances. Any Input is Appreciated.
>>**I Do Not Use the Setting Called for by the OEMs. I have Found that the Following Works Best.
>>Remove the Valve Cover (on the Dead Cylinder for Twin Cylinder Engines).
>>Check the Push Tubes and make Sure they are Not Bent.
>>Set the Cylinder you are Setting the Valves on to Top Dead Center on the Compression Stroke When Setting the Valve Clearance. Now Loosen the Valve Adjuster Lock and Using a Blade Style Feeler Gauge, Set the Intake Valve Clearance to .???in -.???in and the Exhaust to .???in - .???in. Loosen and Tighten the Rocker Arm and the Feeler Gauge is Placed Between the Rocker Arm and the Valve Top where the Rocker Arm Pushes on the Valve.
>>***BE SURE TO TIGHTEN THE ADJUSTER LOCK AFTER YOU HAVE THE PROPER VALVE CLEARANCE***
>>I have had Better Performance Out of the Mowers and Less Burnt Valves Using these Settings. Be Sure the Piston is at TDC on the Compression Stroke.**
>>If you Remove the Valve Cover and then Turn the Engine by Hand, you can Watch the Intake Valve Movement. When the Intake Valve Closes, the Piston will Just Starting the Compression/Power Stroke.
>>On Some Engines you can Us a Straightened Coat Hanger and Feel the Piston.
>>Be Careful and Don't Jam the Wire in the Cylinder. Usually the Piston will Push the Wire Out of the Spark Plug Hole with No Problems.
L-Head Engine Valve Clearance Setting:
>>The Following is a Basic Instruction File for Setting the Valve Clearances on Non OHV Engines. If you Provided me with the Correct Make and Model of the Engine then the Specifications are Included. If Not I May be Able to Provide the Specifications if you Supply me the Make and Model Numbers.
>>The Most Common Clearances are Listed for this Engine in the Following File. Thanks. Any Input is Appreciated.
>>On this Model Engine I Usually Suggest Reseating the Valves if the Valve Clearance Requires Adjusting.
>>**Remove the Carburetor and the Crankcase Breather/Vent and the Valve (Stem) Cover so you have Access to the Valve Stems, Springs and Keepers.
>>Set 1 Cylinder (on Twin Cylinder Engines) to TDC on the Compression Stroke. Using a Blade Style Feeler Gauge, Check the Clearances. The Intake should be .???in - .???in and Exhaust .???in - .???in. If the Feeler Gauge will Not Slide Between the Valve Tip and the Tappet, then you Must Reset the Clearances.
>>**You Will Require a Small Engine Valve Spring Compressor to Remove the Springs and Keepers from the Valve Stems.** Some Engines Use a Valve Keeper that is like Automotive Keepers (2 Cone Shaped Keepers that Set in the Valve Retainer/Rotocoil Assembly)and the Other Style is a Slotted Retainer that is Moved (once the Valve Spring is Compressed) to the Larger Opening in the Retainer and the Retainer Slips Over the Valve Stem Tip for the Valve to be Removed.
>>Remove the Heads.
>>Set 1 Cylinder so the Piston is at TDC on the Compression Stroke And Check the Clearances Between the Valve Stem Tip and the Tappet. The Clearances are as Follows: Intake Valve Clearance is .005in - .007in and the Exhaust is .008in - .010in.
>>You have to Lightly Grind the Valve Stem Tip and Place the Valve Back Into the Engine (you can Hold the Valve Seated by Hand) and Check the Clearance Until you Reach the Required Clearances.
>>**++** For this Engine Model I Suggest you Reseat the Valves while you are Setting the Correct Valve Clearance. For this you will Need a Small Valve Seat Suction Tool. This can Usually be Purchased for $10.00us and has a Suction Cup that Hold the Valve Head so you can Turn the Valve Back and Forth and Dress up the Valve Seat. Valve Grinding Compound is Approximately $5.00us a Tube and a Tube Last the Shop About a Year. It Doesn't Take a Lot to Reseat 1 Engine.**++**
>> Once the Valve Clearances are Reached and the Valve Seat is Nice and Dull; Re-Install the Valves on that Cylinder and Turn the Other Cylinder to TDC on the Compression Stroke and Set that Cylinders Valve Clearances.
>>Once that Cylinder is Set, then Assemble the Engine.**
>>You can Locate the Valve Clearance Specs at this Site Addy; http://outdoorpowerinfo.com/engine_specs/ and Select Valve Clearances Under you Engines OEM (Briggs and Stratton). Then Set the Valve Clearances to the Specifications Listed on the Chart for your Engine.
Valve Seating/Lapping:
>>This Web Page; http://www.affordablegokarts.com/va
lve-lapping.php has a Fairly Good Description and Instructions on Valve Lapping and a Good Explanation of what to Look for when Seating the Valves.
>>If you Hit a Snag or this Does Not Correct the Problem, I am Here if You Require More Assistance. Hope this Helps. Let me Know What Happens, Please. I Hope you Had a Happy Holiday Season and May the All Mighty Bless You and Yours. Be Safe and Happy. Thanks.
Good Luck
Respectfully
John
PS: I am Allowed to Answer 3 Questions a Day. If you See I am Maxxed Out, then Try Submitting your Question at or Just After 8pm EST (US). My New Day Starts then. Comments and Ratings are Greatly Appreciated. Thanks.
Respectfully
John
---------- FOLLOW-UP ----------
 Ring Gap
QUESTION: Dear Sir
The information you requested
Briggs & Stratton 12.5Hp
Model : 289707
Type : 1179-E1
Code : 990709ZD
I have honed/glazed the cylinder,
I have set the valve clearances according to the links you provided ( Thank You )
You mentioned : >>The Compression will be too Low for the Engine to Fire and Run.
This made me think..So I took the engine apart once again. I found that the piston ( whilst in the cylinder with the new rings ), has quite a bit of play when I move it side to side when the piston is at TDC. I've located the part # for the piston assembly via the links you provided and found that the local dealership provided me with the correct parts. ( I think; Ref # : 25, Part # : 696397, Description : 499284 Piston Assembly Standard.
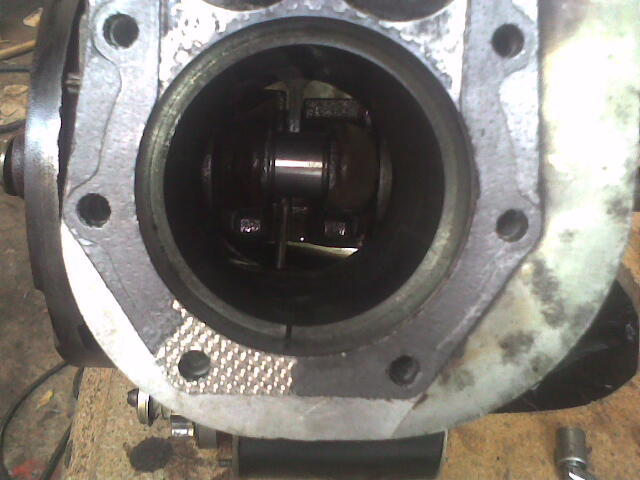
My question : Could it be possible for human error to have set in and the correct Piston might have been supplied, but with incorrect rings, i.e. oversized? (because the old rings have exactly the same "gap" when I insert the rings in the cylinder when the piston is removed). Please find attached a photo of the new ring "gap".
Thank you in advance
AnswerHello Again Shaun:
>>Thanks for the Picture.
>>The End Gap Looks about Normal for a Worn Block with New Rings.
>>It Looks like the Block is Worn and a New Piston (Oversized) may be Required.
>>Mic the Engine Block.
>>The Micrometer will Tell you How much the Block is Worn.
>>Take a Micrometer Reading at the Bottom, Middle and 1/2" from the Top of the Cylinder.
>>What are the Readings, Please.
>>What is the Clearance between the Piston and the Block?
>>Place the Piston in the Block without the Rings and Hold the Piston to 1 Side of the Block and then Slide a Blade Feeler Gauge in the Gap.
>>Take the Feeler Gauge Reading and Half it.
>>That Number will be the Correct Clearance between the Piston and the Block.
>>Usually the Piston is Centered in the Block, but I'm sure you Do Not have the Centering Tool for this (the Way I Described will Work also).
>>How Much Clearance is between the Block and Piston?
>>I Think you are going to Find that the Block is Worn and the New Piston Slop in the Cylinder is causing the Low Compression Problem.
>>You May have to Oversize (usually .010in, .020in or .030in ) the Cylinder and then Use an Oversize Piston and Ring Set also.
>>The Micrometer and Feeler Gauge Readings will Help a Lot.
>>Thanks.
Respectfully
John
PS: I am Allowed to Answer 3 Questions a Day. If you See I am Maxxed Out, then Try Submitting your Question at or Just After 8pm EST (US). My New Day Starts then. Comments and Ratings are Greatly Appreciated. Thanks.
Respectfully
John