The 2001 Nissan Frontier is equipped with front disc brakes and rear brake drums. In order to preserve the Frontier's stopping performance, the brakes must be inspected and replaced on a regular basis. The front brake pads and rear brake shoes can be replaced in under an hour with a few tools. Remember to inspect the brake components for wear and damage. This can help identify problem components that are in need of eventual replacement.
Open the Frontier's hood and disconnect the negative battery cable. Locate the brake master cylinder reservoir near the driver's side firewall. Open the top and remove one-third of the brake fluid from the reservoir with a turkey baster. Dispose of the fluid in a safe manner and close the top.
Use a lug wrench to loosen the lug nuts on the front wheels without removing them and raise the front of the Frontier with a floor jack so that the front tires clear the ground. Secure the vehicle with jack stands.
Finish removing the lug nuts and remove the front wheels from the vehicle. Set the lug nuts aside in a safe area.
Start on the front driver's side and remove the two caliper mounting bolts with a ratchet and socket. Lift the caliper off of the brake disc and suspend it in mid-air from a coil spring with mechanic's wire.
Remove the old brake pads from the caliper mount. Use one of the brake pads to hold against the brake caliper piston and use a C-clamp to compress the piston inside of the caliper.
Attach the new brake pads to the caliper mount and slide the caliper over the pads and brake disc. Reattach the mounting bolts to the caliper with a ratchet and socket.
Mount the wheel onto the axle and hand-tighten the lug nuts. Repeat the procedure on the opposite wheel. When finished, remove the jack stands and lower the vehicle to the ground. Tighten the lug nuts with a lug wrench.
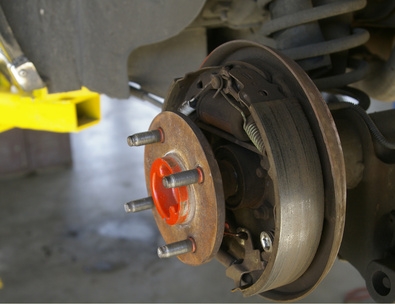
Raise the rear of the Frontier and remove the lug nuts and wheels to expose the rear drums. Locate the retaining bolt holding the drum in place and remove it with a ratchet and socket. Pull the drum away from the brake assembly to reveal the brake shoes.
Unhook the springs attached to the shoes with a flat-head screwdriver. Remove the spring bolt from the center of both brake shoes and pull the old shoes out.
Insert the new brake shoes into the assembly and attach the spring bolt to both shoes. Hook the springs back onto the brake shoes with the flat-head screwdriver. Place the brake drum onto the assembly and line the retaining bolt hole to the threaded receptacle. Insert the retaining bolt and tighten it with a ratchet and socket. Repeat the procedure for the opposite wheel.
Mount the wheel onto the axle and hand-tighten the lug nuts. Remove the jack stands from the vehicle and lower it to the ground. Tighten the lug nuts with a lug wrench.
Refill the brake master cylinder reservoir to the "Max" line with the appropriate brake fluid. Close the top and reconnect the negative battery cable. Pump the brakes four to five times in order to set the brake pads and take a test drive to check the effectiveness of the brakes.