The 1992 Oldsmobile Cutlass Supreme came equipped with a four-wheel disc brake system; anti-lock brakes were optional. Replacing the brakes on the Cutlass is similar to replacing them on other General Motors vehicles equipped with the same brake system. It requires a special tool to compress the caliper piston into the caliper housing when replacing the rear brakes. Special care must be taken to prevent sludge buildup from entering, and clogging, the anti-lock brake system's modulator valve assembly when compressing the caliper pistons.
Set the parking brake. Place wheel chocks in front of and behind the rear wheels to prevent movement of the car while you are working. Loosen the lug nuts on the front wheels slightly using a lug wrench. Lift the front of the car with a floor jack until the front wheels are off the ground. Place jack stands under the front of the car. Remove the lug nuts and place them along with the wheels out of the work area.
Remove the two 3/8-inch Allen-head slide bolts that attach the caliper to the caliper bracket using a 3/8-inch Allen socket and ratchet. Lift the caliper off the rotor and hang it on the front strut using a piece of heavy gauge wire or coat hanger.
Remove the two T-60 Torx bolts that attach the caliper bracket to the steering knuckle, using a Torx socket and ratchet and lift the bracket, along with the brake pads, off the rotor. Slide the rotor off the hub assembly.
Slide the new rotor onto the hub assembly and secure it with one of the lug nuts. Remove the old brake pads from the caliper bracket and slip the new brake pads onto the caliper bracket. Place the caliper bracket and pads over the rotor and bolt the bracket to the steering knuckle using the Torx bolts previously removed. Squeeze the pads together until both pads contact the rotor surface.
Open the bleeder screw on top of the caliper using an 8 mm wrench. Push the caliper piston into the caliper housing using a C-clamp. Close the bleeder screw and release the clamp. Slip the caliper into place over the brake pads and rotor and install the slide pins.
Reinstall the front wheels. Lift the car off the stands, remove the stands and lower the car to the ground. Tighten the lug nuts one more time using a lug wrench. Push the brake pedal several times, to expand the caliper piston, before driving.
Use wheel chocks, a floor jack, and jack stands to raise and support the rear of the vehicle as described in Section 1. Remove the rear wheels.
Remove the two 15 mm slide pin bolts using a wrench. Pry the caliper up and off the rear brake rotor. Slide the old rotor off the rear hub assembly.
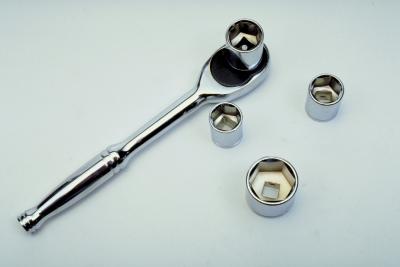
Slip the caliper piston tool into the caliper and line up the two small pins on the tool with the notches in the piston. Turn the large nut on the tool by hand until the tool expands tightly against the caliper housing. Compress the caliper piston into the caliper housing by turning the large nut on the tool counterclockwise with a 1-inch wrench while simultaneously turning the 15 mm bolt on the tool clockwise with a 15 mm wrench.
Slide the new rotor onto the hub assembly and secure it with a lug nut. Position the new pads into place over the rotor. Slip the caliper over the pads and install the 15 mm slide pin bolts.
Install the wheels and lower the car to the ground as previously described. Pump the brake pedal several times before driving.