Replacing the brake pads on your 2005 Chevy Silverado is a great way to learn how your truck's braking system works. When replacing the pads, you should always inspect the surface and condition of the rotors as well. If you've had no other side-effects in the braking system other than the surface of the pad material was getting low, you may be OK just replacing the pads. The 2005 Silverado features front brake pads and may come with rear brake pads or rear brake shoes (drum brakes).
Remove two-thirds of the brake fluid from the master cylinder with a brake fluid baster and dispose of the fluid appropriately. Replace the cover to the master cylinder.
Apply the parking brake (unless you're replacing rear brake pads) and place a tire wedge under one of the rear tires (or in front of one of the front tires if you're replacing rear brake pads).
Remove the center caps from the wheels of the axle you're replacing the pads on and then crack the lug nuts loose with the tire nut iron. Do not loosen them more than a quarter turn.
Lift the Silverado using the jack and support the truck onto jack stands to elevate the axle. Remove the nuts and tires.
Use a 6-inch C-clamp to compress the caliper piston. Place the top of the clamp on the back housing of the caliper and then place the driving base of the clamp on the bottom of the outboard pad. Tighten the clamps until the pistons are fully seated in the bores.
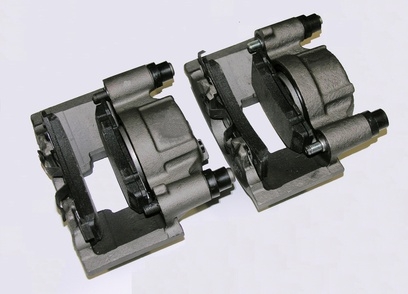
Remove the upper and lower caliper guide bolts of the caliper with a hand wrench. Set them aside.
Remove the caliper from the rotor and suspend it to the suspension with a length of durable twine or wire. This will prevent the brake hose from getting damaged.
Remove the old pads from the caliper bracket and then remove the rattle clips (both upper and lower) from the bracket.
Install the new clips onto the bracket and then apply a coating of lubricant (provided in the pad replacement kit) along the pad tabs contact points on the clips. Be careful not to get the lubricant on the rotors. If you do, wipe it off thoroughly.
Install the new pads. The outboard pad has two wear indicators and the inboard pad has one wear indicator.
Replace the caliper over the pads and rotor and then align the caliper to the knuckle. Insert the guide bolts and tighten them according to the specific series of Silverado you have to the proper torque specifications (heavy-duty, 4-wheel drive and 2-wheel drive employ different torque specifications). Use the torque wrench and suitable socket.
Replace the tires and nuts when both sides have been completed. Tighten the nuts snug and then lower the Silverado to the ground by reversing the lifting procedure.
Tighten the lug nuts in a star-pattern with the torque wrench and socket to the correct torque specifications for your model Silverado.
Pump the brake pedal several times until it feels firm. Recheck the master cylinder and add new brake fluid only to the full mark.
Test drive the truck after removing the tire wedge and releasing the parking brake (if applicable).