The rear main seal in an automobile engine is located directly behind the rearmost main bearing journal of the crankshaft.
Its job is to keep the oil that sloshes around in the crankcase and oil pan from escaping out the back of the engine. Symptoms of failure are usually a wet area on the rear of the oil pan, an oily wet spot on your driveway or a completely oil covered transmission; depending on the gravity of the leak. You can try to temporarily "fix" this problem by adding heavy 50 weight oil or thickeners, by adding chemicals that soften rubber and other schemes, but eventually you will have to remove and replace it.
If you are planning to replace this seal, prepare yourself for a very oily messy job. To have a dealer replace this part will cost upwards of $500; it is very time consuming and they charge by the hour. Don't despair however, you can do it yourself. In most cases you will not even have to remove the engine. This article will show you the steps you need to follow for a typical rear main seal replacement. Your total cost in parts and supplies should be about $50 or less.
Pressure wash, with soapy water, under the engine and transmission. The night before the fateful day, drain the oil out of the crankcase. Also drain the radiator. Yes you can let them drip all night. This will make for a cleaner job in the morning.
Remove anything that will impede the engine from being lifted a few inches. Loosen motor mounts. Remove the distributor it it's located in the back of the engine, or at least the cap and rotor. This will keep them from hitting the firewall and breaking off. Also, disconnect the radiator hoses, the fan and the fan shroud; keeps them from gouging the radiator. Unbolt the engine from the transmission if needed.
Now jack or hoist the engine off its mounts high enough to allow the removal of the oil pan. Use jack stands to safely suspend the engine. Remove the oil pan bolts. Use a sharp, stiff putty knife to pry the oil pan off the engine. Continue to jack the engine until you are able to remove the oil pan. You may have to remove the starter motor and exhaust pipes to get access to all of the oil pan bolts.

Once you have the oil pan off, remove the rear main bearing cap bolts. Pry off the bearing cap with the sharp, stiff putty knife. Be careful not to scratch the crankshaft!

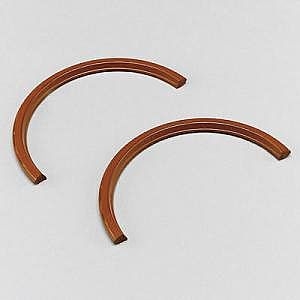
There are three kinds of rear main seals. The one piece metal clad rubber is found on newer front wheel drive cars. The two part rope type and the two part neoprene lip type are found on most of the rear wheel drive cars; we will deal with these two part seals. Look at the old oil seal; if it's neoprene, the lip should be facing towards the front of the engine. If it's not, it would be a good reason for it to leak. The rope type seal will just appear mashed in its groove.

To remove the upper part of the seal you will need a small brass punch. Tap one end of the seal with the punch in the direction the crankshaft normally rotates. As you tap, have someone turn the engine over by hand. This will make it easier to remove. Some seals have a wire embedded in the center of the seal. Try to tap on the wire if you can. When the seal shows up at the other end grab it with needle nose pliers. Use an insulated 8 gauge wire to push the seal while you pull it with the pliers. The wire insulation prevents the crankshaft from getting scratched.

To install the upper seal back over the crankshaft, soap-up the side that goes in the block and oil the side that slides on the crankshaft. Make sure you do not soak rope seal in oil; damage to the graphite in the seal will occur if it's soaked in oil. Place the seal on the crankshaft and push it into the hole while rotating the crankshaft in the same direction. Make sure the lip is facing towards the front of the engine. Make sure you push the seal with a rotating motion so as to not damage it. If your car is older and uses the rope seal, you will need a "Chinese finger" type puller. Thread this puller over the crankshaft and insert the rope seal in it. Pull until the seal is in place. Trim rope seal flush with engine block.

Press neoprene and rope seal on main cap with a very large socket. Make sure that the neoprene seal lip faces towards the front of the engine.

Use a dollop of RTV sealer on the ends of the seal before replacing the main cap. Tighten the cap bolts to 40 ft. lbs., then to about 80 ft. lbs., and lastly to 100 ft. lbs., or whatever the specifications are for your car's engine.

Clean-up the oil pan and install new gasket. Replace oil pan and torque to specifications. Jack the engine back down. Replace all other parts in reverse order of removal.

Fill engine with oil, Fill engine with coolant. Start her up and check for any leaks. After a week or so, if you still have no leaks, you will take great comfort in knowing you saved a substantial amount of money, and in a job well done.
