The cause of a broken door lock typically is found in one of two places on a Dodge Neon: the lock cylinder itself or the door latch, and the two are connected. Replacing either of these components is similar to the replacement process for most car doors. The latch on the 2003 Neon is mounted to the door with Torx screws, and it is connected to the lock cylinder with link rods. You must remove the door panel to reach these components.
Lower the door window completely. Disconnect the negative battery cable in the engine compartment.
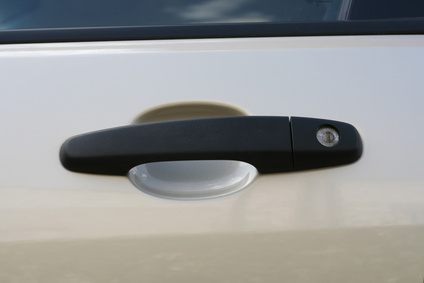
Dislodge the window-crank clip by rubbing behind the window crank with a cloth. Remove the door handle. If your Neon has power locks, pry off the controls for the windows and the lock by using a trim stick (a small plastic tool used for molding and glass work). Disconnect their electrical hookups.
Remove the three mounting screws from the door with a screwdriver. They are located behind the door handle in the top right corner of the panel.
Insert a flat blade screwdriver along the edge of the trim panel to pry the panel off its push-in fasteners.
Grasp and tilt the panel forward, away from its rear side locator pins. Lift the panel to detach it from the weatherstrip retainer at the top of the door. Remove the panel from the door. Detach the latch link from the door handle's back end.
Reconnect the window crank or power controls temporarily. Raise the window completely.
Peel off the weatherstripping from the door.
Pull out the link rods from the door latch. If the door has power locks, disconnect the electrical hookup on the door lock's motor.
Remove the three mounting screws for the latch on the outer edge of the door by using a Torx wrench. You might need to drive an impact-type screwdriver into the screws to loosen them. Detach the clips from the control rod and remove the latch from the door.
Push off the clip for the lock cylinder at the base of the door handle assembly. Remove the cylinder from the handle assembly.
Push the replacement lock cylinder into its mounting hole within the door handle assembly. Make sure its clip engages from the inside of the door.
Place the latch assembly into the door assembly, making sure the latch can be seen from the hole in the edge of the door. Apply and tighten the mounting screws with a Torx wrench. Connect the control rods to the door by using their clips.
Place the weather shield back on the door. Reconnect the trim panel using the reverse order of installation.