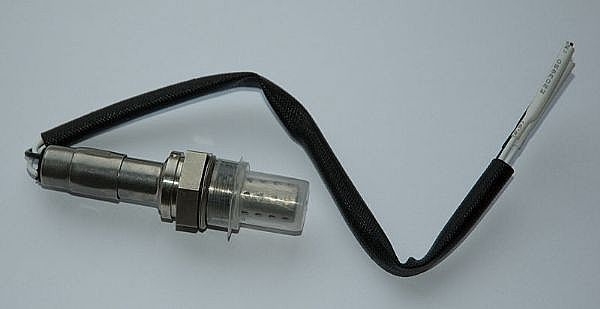
On a gasoline engine, an oxygen sensor is used to ensure that the proper air fuel ratio is reaching the engine.
Some automobile manufacturers recommend that oxygen sensors should be replaced once every 100,000 miles whether they are working or not. However, this can be very expensive, especially since many newer cars and trucks have up to 4 different O2 sensors.
Usually, a check engine light will provide the first indication that you might have a bad O2 sensor. Often, the engine code will simply state that there is a problem with the O2 Sensor, or it may say that there is a "heater circuit malfunction."
Since O2 sensors can be very expensive and the problem might not be with the oxygen sensor itself, but could be several other factors, it is a good idea to test your O2 sensor before replacing it.
Oxygen sensors can be tested both on the vehicle and off, but many prefer to leave the oxygen sensor on the vehicle. However, by taking the oxygen sensor off, you are able to visually inspect the sensor, which can often provide a good indication that there is a problem, and testing the sensor is also a little easier.
This article describes how to test an O2 Sensor while it is still on the vehicle.
Start by visually inspecting the wires leading to and from the O2 Sensor. Ensure that the wires are properly routed away from the exhaust components and that the wires are not damaged.
Next, start the car and let it run until the vehicle is warm, which usually takes about five minutes. The oxygen sensors must be about 600 degrees Fahrenheit to provide an accurate reading. This will cause the engine to become very hot, so be careful.
Connect the backprobe to the oxygen sensor's signal wire. Be very careful when using the backprobe, because the plastic connectors are often very brittle and can break easily.

Connect the positive lead from the digital voltmeter to the backprobe.

Connect the negative lead from the digital voltmeter to a good solid ground point on the chassis of the vehicle.
Turn the voltmeter on and set it to the 1 volt scale. The voltage of the O2 Sensor will fluctuate between 100 and 1,000 millivolts, which is 0.1 and 1.0 volts, so having a quality volt meter is important.
Turn the vehicle back on and check the reading on the voltmeter. The reading should fluctuate rapidly. If the reading stays at around 0.5 volts, ensure that the vehicle is fully warmed up. If the vehicle is warm and the 02 Sensor reading does not change, then there is a problem with the 02 Sensor and you can stop the test.
Next, create a vacuum leak to ensure that the O2 sensor responds properly to a lean air-fuel mixture. Most vehicles have a vacuum port on the top of the engine, which can be opened up to create a vacuum leak.
Creating a vacuum leak should cause the voltage of the 02 Sensor to drop below .1 volts and then rise above .5 volts when the leak is subsequently plugged.
If your vehicle does not have a vacuum port or if creating a vacuum leak causes the vehicle to stall, you can preform a propane enrichment test. This is done by adding some propane gas to the air intake, which should cause the voltage of the O2 Sensor to quickly rise.
As an alternative to a propane enrichment test, you can also slightly close the choke, which should cause the voltage of the O2 Sensor to quickly rise.
If during steps 8 to 10 the voltage does not change or does not change in the expected manner, then the oxygen sensor is bad and should be replaced.