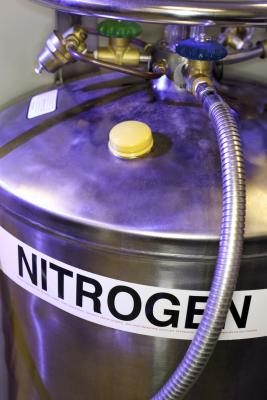
Bearings and sleeves have their own peculiarities when they have to be inserted into tight races. Sometimes bearings can be installed with the aid of an industrial press and lubrication. Some bearings, which have lesser tolerances, can be installed with C clamps, vises or even hammers. For ease of bearing installation under very close tolerances, freeze-fitting with the use of liquid nitrogen provides a good alternative. Liquid nitrogen can be used successfully for bearing installation, but some precautions and steps must be used to accomplish the task.
Obtain a large metal container or drum, and use water to rinse out the inside of the drum surface. Remove oil, varnish, wax and other foreign substances with a rag. You should have a loose fitting lid that covers the top of the drum which does not have to be pressure tight. For example, an old milk jug with a beveled lid will work adequately.
Wrap the metal container sides with a curved sheet of cardboard from top to bottom. Secure the cardboard in place with duct tape. Do not wrap over the top or cover the bottom of the metal container. Wrap a sheet of bubble wrap around the container sides, over the cardboard, and secure it with duct tape. The cardboard and bubble wrap serve as insulation.
Place two blocks of wood in the bottom of the container, spaced evenly apart. The blocks of wood will serve as a perch for the bearing, to keep it elevated from the container bottom. The blocks should be about 6 inches high, measured from the bottom. Place the bearing on edge directly in the middle on top of the wood blocks, to test its stability, then remove it.
Don safety goggles and canvas working gloves. Make sure you wear hard-soled shoes -- no bare feet. Pour enough liquid nitrogen into the metal container to cover the bottom to a height of 2 inches. Pour the liquid nitrogen down the side of the container, and not on the wood blocks. Carefully set the bearing on top of the wood blocks then cover the container with the lid. Set the lid slightly off angle, to provide a small amount of ventilation.
Wait one-and-a-half to two hours for the bearing to completely chill and contract. While you wait, take a measurement of the inside bearing housing, using a combination digital micrometer. Record the dimensions with a pencil and paper. After the chilling period, use a pair of channel locks (or your gloves) to remove the bearing. Quickly measure the outside dimensions of the bearing with the combination micrometer and record the dimensions with paper and pencil.
Determine if the bearing has shrunk enough to fit into the bearing housing by comparing both measurements. The bearing diameter should be less than the bearing housing diameter. If adequate shrinkage has occurred, place the bearing inside the bearing housing or race, pushing it in until it fully seats.