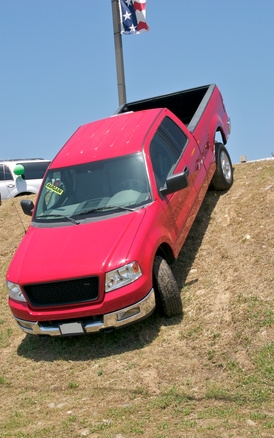
Ford Motor Company introduced the Ford F-series pickups in 1948. The first F-150 debuted in 1975. The 2004 Ford F-150 was equipped with the option of three sizes of engines: a 4.2-liter V-6, a 4.6-liter V-8 and 5.4-liter V-8. The 2004 F-150 was offered in both two-wheel drive and four-wheel drive packages. The U-joints on the 2004 F-150 are the joint between the drive shaft and the axle housing. If the vehicle is two-wheel drive, there is a single U-joint on the rear drive shaft. The four-wheel drive has two U-joints.
Raise the front or rear of the F-150, depending upon which U-joint you are replacing. Use a 2-ton jack to lift the F-150, then place a jack stand beneath either end of the axle housing. Do not attempt this project on only a floor jack because the jack is on wheels and will not create a sturdy enough base.
Lie just behind the driver's front wheel if you are working on the front U-joint. Lie in front of the driver's rear tire if you are working on the rear U-joint. Slide your body into position to physically access the U-joint, in relation to the end you are working on.
Remove all four of the U-joint retainer clips from the U-joint, using a pair of needle-nose pliers. Squeeze the middle or S-shaped part of the clips inward, then pull out all four clips by hand. Remove the four U-joint clip mounting bolts from the axle housing, using a 3/8-inch drive ratchet and socket. The bolts hold the outer U-joint clip onto the axle yolk. Use a 4-inch extension on the ratchet for added maneuverability if necessary. Push the drive shaft toward the center of the truck, and pull the shaft free from the axle housing.
Remove the U-joint bearing caps from all four ends of the U-joint. The U-joint bearing cap is the cap that contains rod bearings, and slides over each end of the joint. Insert a flat-head screwdriver where the joint and cap meet, toward the center of the joint. Tap the screwdriver handle with a hammer to push the caps outward and through their respective mounting holes. When the caps protrude far enough outward through the U-joint clip or drive shaft end, simply pull off the caps with your hand.
Remove the old U-joint from the U-joint clip and the drive shaft end, using your hand to twist the U-joint free then pull it out. Remove the old U-joint completely from the truck.
Remove the rod bearing caps from the new U-joint, being very careful to leave the bearing cap mounting holes upward. The mounting holes are the holes that the U-joint ends are inserted into. Turn the U-joint so that one cap is facing downward at the bottom of the assembly. Place your other hand onto the cap and pull the U-joint free. Do this for all four caps. Do not let the caps turn sideways or upside down, as the rod bearings will fall out or askew. If the bearings are moved at all, the bearing cap is then useless.
Insert the new U-joint into the U-joint clip, which attaches to the axle housing. Insert U-joint bearing caps on both ends of the U-joint that are positioned inside the clip. Push the caps in from the outside of the clip, while simultaneously pushing the U-joint into the cap from the inner side of the clip. When you are finished you should have two caps mounted opposite one another, through the U-joint clip and onto the U-joint. Use a 6-inch or larger vice to squeeze the caps into their final positions. Install the U-joint retainer clips with needle-nose pliers.
Install the remaining exposed ends of the U-joint into the drive shaft mounting area. Insert the bearing caps through the U-joint mounting holes in the drive shaft. Push the caps inward as far as possible by hand. Place a 6-inch C-clamp around the shaft, and squeeze the bearing caps inward until they stop. Install the U-joint retainer clips into the U-joint mounting holes, using a pair of needle-nose pliers to squeeze the clips in place. When you are finished, you should have the U-joint mounted in both the drive shaft and U-joint clip.
Align the U-joint mounting clip onto the axle housing of the truck. Tighten all four U-joint clip mounting bolts onto the axle housing with a 3/8-inch drive ratchet and socket. Turn the bolts until they are snug, and then turn the ratchet a half turn farther. This "snug-and-a-half" tightening method will tighten the bolts sufficiently, without applying enough torque to snap the mounting bolts.
Raise the end of the F-150 up and off the jack stands. Remove the jack stands from beneath the F-150, and lower the truck to the ground.