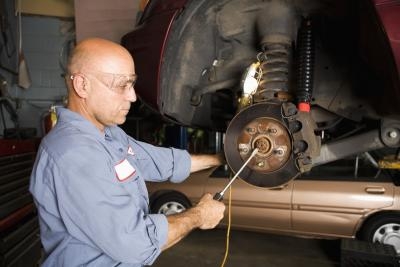
The 2004 Ford Expedition was produced with two different engines: the 4.6-liter V-8, and the 5.4-liter Triton V-8. The 2004 Expedition came standard with four-wheel anti-lock disc brakes. The 2004 Expedition was made in five trim packages: the Eddie Bauer Sport Utility, the NBX Sport Utility, the XLS Sport Utility, the XLT Sport Utility, and the XLT Sport Sport Utility. The trim package on the Expedition determined whether the SUV was two- or four-wheel drive. The rotors on the 2004 Expedition are known as rotor drums, as the emergency-brake components are inside the rotor, much like a standard brake drum.
Loosen the torque on the two rear wheels, using a tire iron to loosen the lug nuts. Do not remove the nuts completely, as you are just trying to break the initial torque off of them. Open the rear hatch and remove the panel door on the rear inside right of the Expedition. Behind the panel there is a switch to turn off the air suspension. Turn the switch off, to eliminate the chance of the suspension moving when the truck is in the air.
Lift the rear of the Expedition by using a 2-ton jack or one with greater capacity, beneath the rear axle housing. Place jack stands beneath both ends of the axle housing, just inside of the rear wheel and tire assembly. Place wheel chocks in front of both front wheels. Remove the lug nuts from both rear wheels with a tire iron, then remove both rear wheels completely from the Expedition.
Remove the caliper mounting bracket bolts using a 3/8-inch drive ratchet and socket. Turn the caliper bracket bolts counterclockwise to remove them. The caliper bracket holds the caliper in place on the brake assembly, and also the rotor in place when the caliper has been removed. Set the caliper and bracket assembly directly behind the brake dust shield, on the rear suspension arm. Do not let the caliper hang freely -- it can damage the rubber brake line.
Remove the brake disc rotor by hand. If the rotor will not come off of the hub, remove the small rubber grommet on the back of the brake dust shield. Place the tip of a flat head screwdriver into the rear dust shield hole and adjust the star-wheel adjuster to loosen the emergency brake from inside the rear rotor. The star-wheel is designed to loosen or tighten the emergency brake shoes. Repeat this procedure until the brake rotor is removable by hand.
Repeat Steps 3 and 4 to complete the removal of the rotor on the second side of the Expedition.