The Ford Freestyle is considered a crossover vehicle. The 2005 Freestyle comes standard with four-wheel anti-lock brakes and four-wheel disc brakes. The rear disc brake assembly is made up of the rear caliper, rear caliper bracket, the rotor, the brake pads and the brake lines. The caliper on disc brakes is responsible for essentially squeezing the brake pads onto the rotor, creating enough friction to stop the vehicle.
Break the lug nuts free on the rear wheels with a tire iron but do not remove the lug nuts completely. Lift the rear of the Freestyle with a 2-ton jack. Place jack stands beneath the rear suspension arms, just inside the rear tires. Remove the lug nuts completely from the rear wheels then remove the wheels completely from the vehicle.
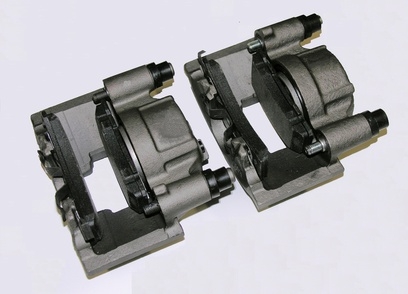
Remove the caliper mounting bolts from the inside of the brake caliper. The inside of a brake assembly is the side that faces into the wheel well while the outside faces you. The front and back of the brake assembly is proportional to the front and back of the vehicle. The brake caliper is the metal mechanism that is essentially wrapped around the brake rotor. Use a 3/8-inch drive ratchet and socket to remove the caliper mounting bolts, turning them counterclockwise.
Place a pry bar between the edge of the caliper and the caliper bracket and pry the caliper completely off of the brake assembly. Set the removed caliper on the suspension arm, just inside the back of the brake rotor dust shield. Do not let the caliper hang freely as the weight of the caliper can damage the fragile rubber brake lines between the caliper and the body of the Freestyle.
Remove the bracket mounting bolts from the inside of the brake assembly with the 3/8-inch drive ratchet and socket turned counterclockwise then remove the caliper mounting bracket.
Pull off the rotor from the Freestyle. If the rotor is stuck onto the wheel hub assembly, use a hammer on the protruding front face of the rotor. Tap the front face of the rotor, hitting it between the wheel lug studs. Do not hit the wheel studs directly or you could damage them.
Hold the caliper in one hand, with the piston facing you. Insert a 3/8-inch drive ratchet with a caliper rotating tool onto the caliper piston. Install a 6-inch extension between the ratchet and caliper tool to add maneuverability and leverage to the ratchet. Turn the caliper piston clockwise while simultaneously pushing the caliper piston inward. This procedure is called compressing the caliper and is necessary if you are reusing the caliper. If you are going to remove and replace the caliper, proceed to Step 7 and disregard this step.
Place a caliper hose clamp or needle-nose vise grips on the rubber brake hose on the inside of the caliper. Remove the mounting bolt for the brake hose from the inside of the caliper with an open-end wrench. Pull the brake line free of the caliper once the mounting bolt has been removed. Remove the caliper completely from the vehicle.
Repeat Steps 2 through 7 to complete the disc brake removal on the other side of the Freestyle.