Your car engine powers several accessories under the hood, such as the alternator, power steering pump and air-conditioning compressor. In older cars, each accessory drew power from its own V-belt. Serpentine belts began replacing V-belts throughout the 1980s. According to Popular Mechanics, serpentine belts take up less space in front of the engine, last much longer, constantly maintain tension without adjustment and are easier to change. Still, serpentine belts do require occasional replacement.
Visually inspect the old serpentine belt. Look for cracks, damage to the ribs on the grooved side of the belt and exposed and fraying cords. Use the mirror and flashlight if necessary to see the grooved side of the belt.
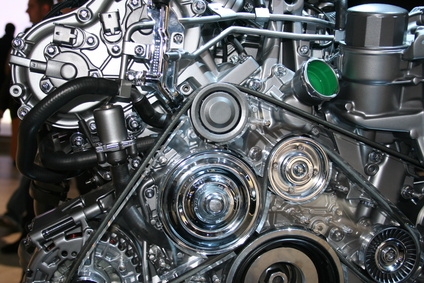
Find the belt-routing diagram. A diagram showing how the belt winds around the pulleys should be located in your owner's manual and/or on a decal placed somewhere under the hood.
If you cannot locate a belt-routing diagram, sketch out a diagram before removing the old belt.
Insert the drive end of the 3/8-inch ratchet in the square hole on the pulley side of the tensioner arm.
Use the ratchet to apply leverage against the load of the tensioner arm. Doing so takes tension off the serpentine belt.
Maintain leverage on the tensioner arm while slipping the belt off of the idler pulley, if equipped, or the tensioner-arm pulley.
Slip the serpentine belt off of the remaining pulleys.
Clear the belt around the fan blades and remove the belt from the engine.
Visually inspect for signs of pulley damage. A bent or damaged pulley, including one on the idler arm or tensioner, causes specific wear patterns on the old belt. Look for heavy wear along the belt edge, wearing of the belt ribs to small strips of rubber and frayed cord that looks like it has been snagged.
If you find wear patterns on the old belt, thoroughly inspect all belt pulleys for damage. Repair or replace any damaged pulleys.
Using a straightedge, check the alignment of each pulley. Lay the straightedge flat against the hub of the pulley and make sure the straightedge lies flush with the hubs of all adjacent pulleys.
If you find a misaligned pulley, check the accessory's mounting bracket to see if it is bent or damaged. Adjust or replace the mounting bracket where possible. Any further misalignment may require servicing by a licensed auto mechanic.
Check the used belt and all pulleys for oil. If you find any oil residue, address any oil leaks around the engine that may be the cause.
Clean the grooves in the grooved pulleys. Use a wire brush and some brake cleaner.
Check for excess play in the tensioner and idler pulleys. Excess play in the pulleys can be a sign of a worn bearing. Replace the pulleys if necessary.
Check the tensioner for spring strength. The tensioner should be very difficult to move without the ratchet. Replace the tensioner if necessary.
Install the new serpentine belt on the crankshaft pulley and all of the accessory pulleys. Follow the belt-routing diagram or a sketch you may have drawn.
Insert the drive end of the 3/8-inch ratchet in the square hole on the pulley side of the tensioner arm.
Use the ratchet to apply leverage against the load of the tensioner arm. Maintain leverage on the tensioner arm while slipping the belt onto the tensioner arm pulley, followed by the idler pulley, if equipped.
Visually inspect the belt system to ensure the serpentine belt winds properly around all of the pulleys. Pay particular attention to the grooved pulleys, making sure the belt seats properly in the pulley grooves.
Start the engine and allow it to idle for a couple minutes.
Visually inspect the tensioner arm. Most tensioners have a hash mark cast into the spring housing that will line up with a gap on the tensioner arm when the belt is installed. This lets you visually gauge the tension on the belt. If the hash mark falls outside of the gap, you may have the wrong size belt. Shut down the engine and replace the belt with the correct size.
Check the tensioner arm and belt for excess vibration or belt "bouncing," which can be a sign of a damaged or misaligned pulley or debris in the grooves of a grooved pulley.