Chrysler Corporation recommends inspecting the brake pads on your Dodge Avenger every six months and replacing them at the 15,000 miles mark or every 15 months as part of your regular vehicle maintenance schedule. However, the friction material on the pads may wear down sooner and compromise your safety on the road. Do not wait 15 months. Change the break pads as necessary in your own driveway, using some simple tools.
Open the hood of your Avenger and check the brake fluid level in the reservoir of the brake master cylinder. If the reservoir is more than half full, remove some of the fluid into a suitable container using a clean turkey baster to bring the level below the half-way mark.
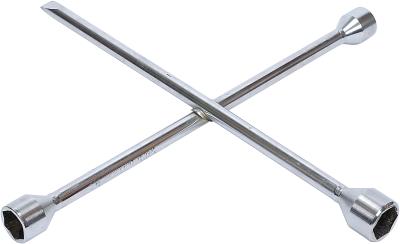
Loosen the front tires’ wheel lugs using a lug wrench. Do not remove them, just break them loose (about 1/2 turn).
Block the rear wheels with a couple of wood blocks and apply the parking brake.
Lift the front of your vehicle using a floor jack and support it on 2 jack stands.
Remove both front tires and wheel assemblies using the lug wrench, and work on the brake assemblies one at a time. This way, you will always have a completed assembly to use as a reference.
Seat the caliper piston into its cylinder. Position a large C-clamp over the brake caliper and slowly turn the clamp screw against the outboard brake pad to push the inboard brake pad flat against the caliper. This will force the piston to fully seat into the bore.
Unscrew and remove the two brake caliper lock pins located at the bottom and to each side of the caliper. Use a ratchet and socket.
Lift the brake caliper from the caliper bracket and brake disc and secure it to the strut coil spring with a wire. This way you will prevent damaging the brake hose connected to the caliper. On some Avenger models, you can remove the bottom lock pin and use the upper pin as a pivot bolt to swing the caliper off the brake disc without the need to remove the caliper completely.
Remove the outboard brake pad, inboard brake pad, shims and spring clips, if equipped. Your Avenger model may use two sets of shims located behind each pad and two spring clips. Make a note of the order and position of each item so that you can replace them in the same order and position.
Clean the brake assembly and mounting hardware of brake dust and dirt using brake parts cleaner and lint-free towels.
Mount the new brake pads along with the shims and spring clips on the caliper mounting bracket.
Install the brake caliper over the mounting bracket and pads, being careful not to scratch or damage the rubber boot over the brake caliper piston.
Align the caliper mounting holes with the caliper bracket mounting holes and start the two lock pins by hand. Then tighten the lock pins using the ratchet and socket.
Go back to step 6 of the previous section and replace the brake pads on the opposite brake assembly.
Mount both front tires and wheel assemblies on the hubs and install the wheel lugs using the lug wrench.
Lower your Avenger and finish tightening the wheel lugs.
Pump the brake pedal several times until the pedal feels firm.
Check the brake fluid level on the brake master cylinder reservoir and refill, if necessary, using new brake fluid.
Test the brakes on a low-traffic road to make sure they are working properly.